
Odoo 14 Project Management Timesheet
A timesheet, often known as a time-keeping system, is an essential component of project management. We may use the Odoo platform to accurately record the time spent by users on various projects or tasks.
Timesheet is integrated with the Project Module, and when we start a project, we can make a timetable or manage a timesheet for the project to ensure the efficient completion of the project's invoiced activities. Odoo Timesheet can also be used to track tasks and projects, as well as to analyze completion rates.
Many businesses work on various projects dependent on the project's budget. Timesheets will help us manage and track the budget more effectively by tracking employee working hours and costs. Odoo eliminates the need for you to validate the timesheet and makes it easier to update the timesheet properly.
We must enable the Timesheet option if we want to use Odoo Timesheet in the Project module. This is done through the Configuration menu. We need to access the Settings menu, which is located beneath the Configuration, and enable the timesheet there. We can begin using the timesheet after enabling Time management in the settings.

Create a full project with Timesheet
We can look at how to build a new project and use the timesheet support to manage the operations. When we select Create Project, we are presented with a pop-up box in which we may enter a name for the project. We can also enable planning, worksheets, timesheets, billable and recurring tasks. Here, we must only allow the choices that are absolutely necessary. While we are testing Timesheet integration with Project, we can enable the Timesheet option and click the Create button.
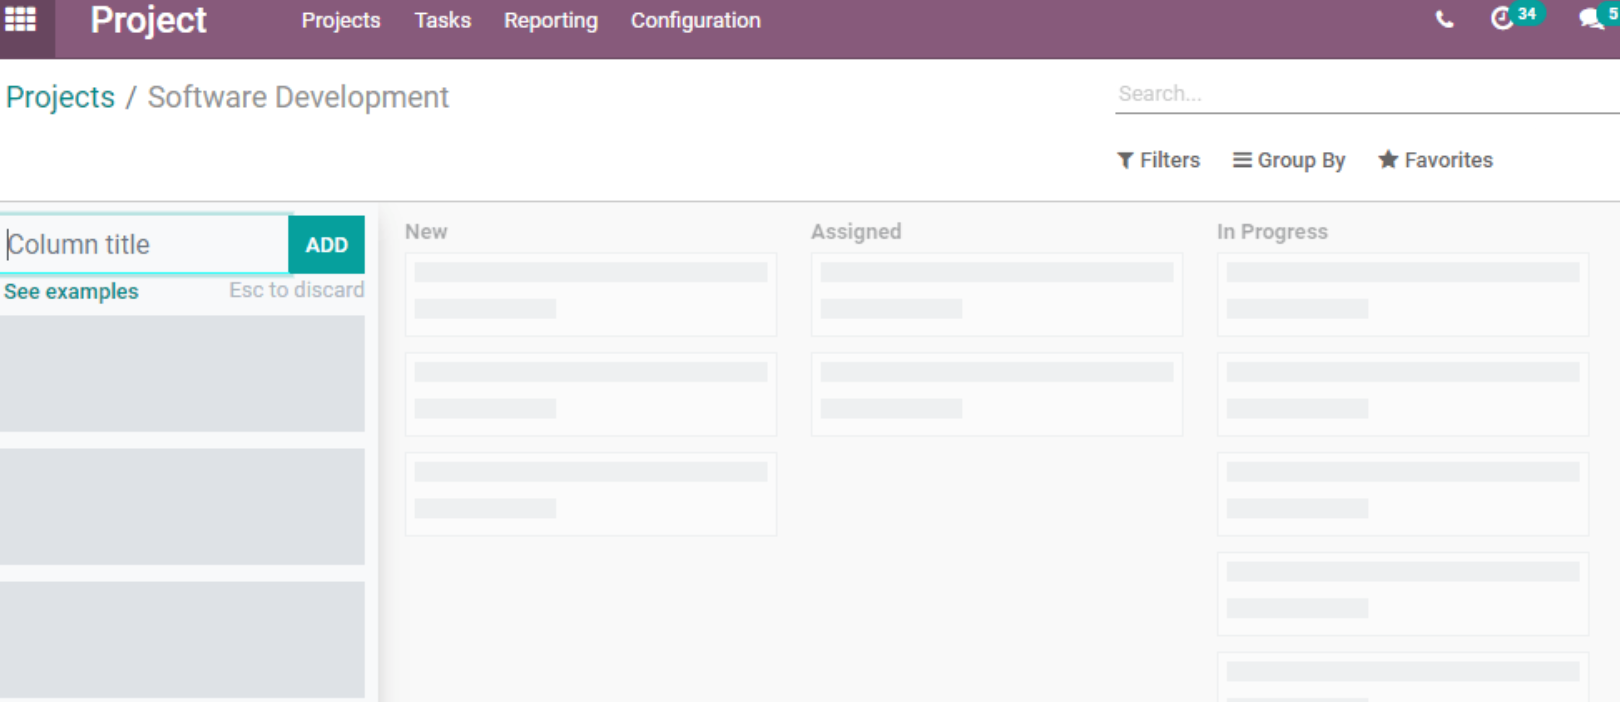
After hitting the create button, we are taken to a page where we must enter the various stages of project management.
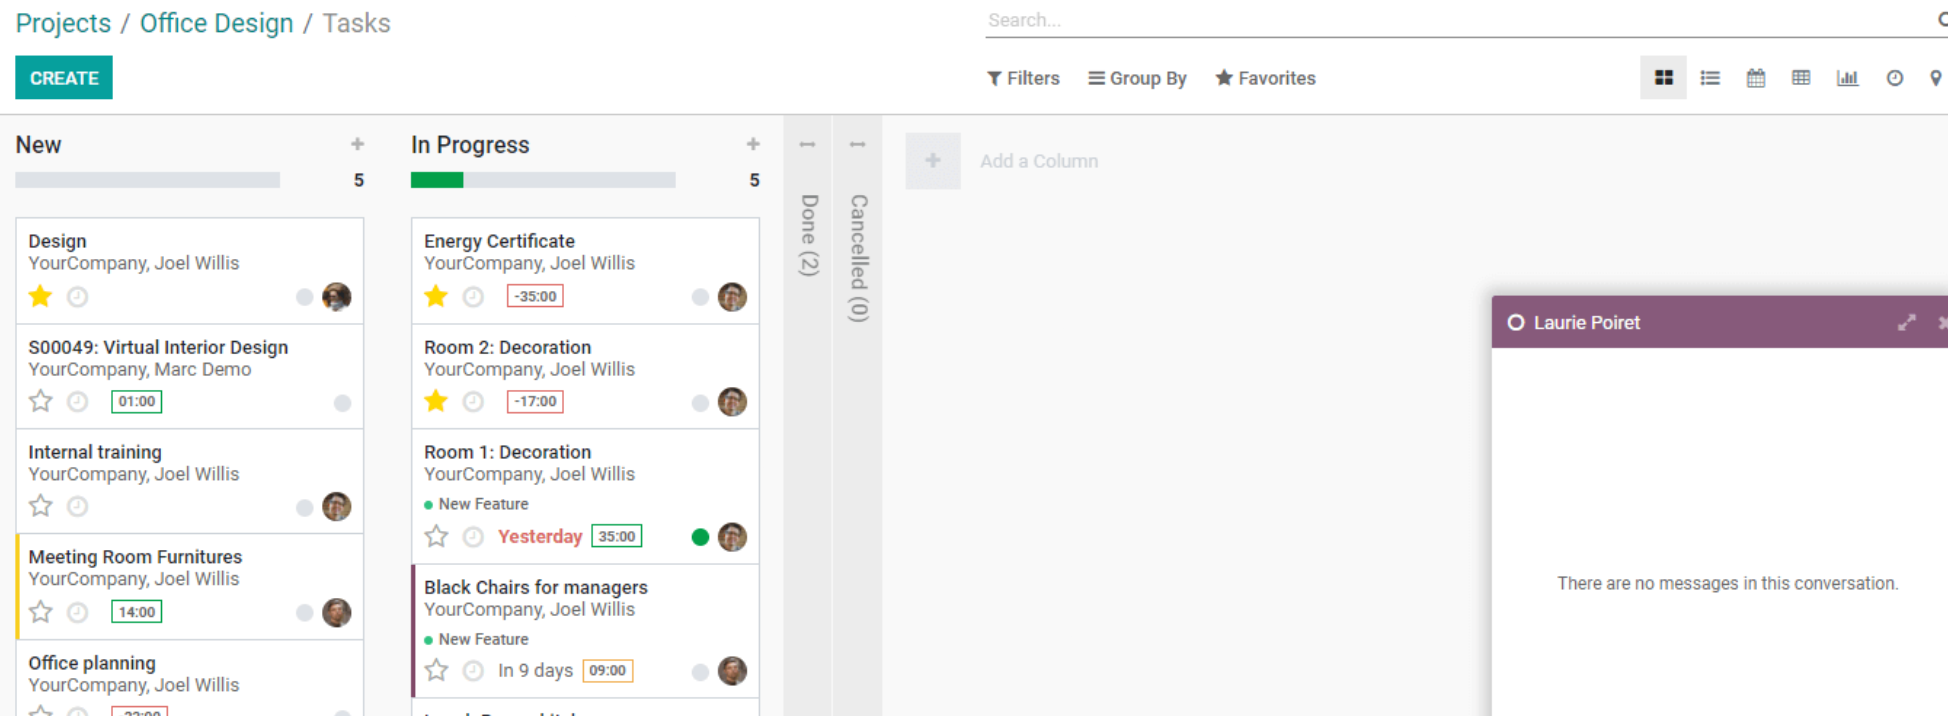
We can add multiple stages to the work and organize the tasks in a logical manner here. We can now revisit our projects and double-check a project.
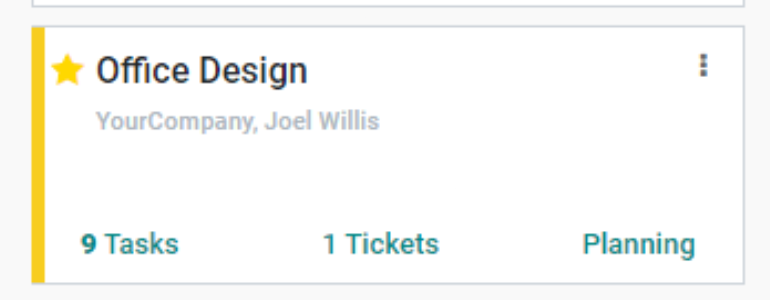
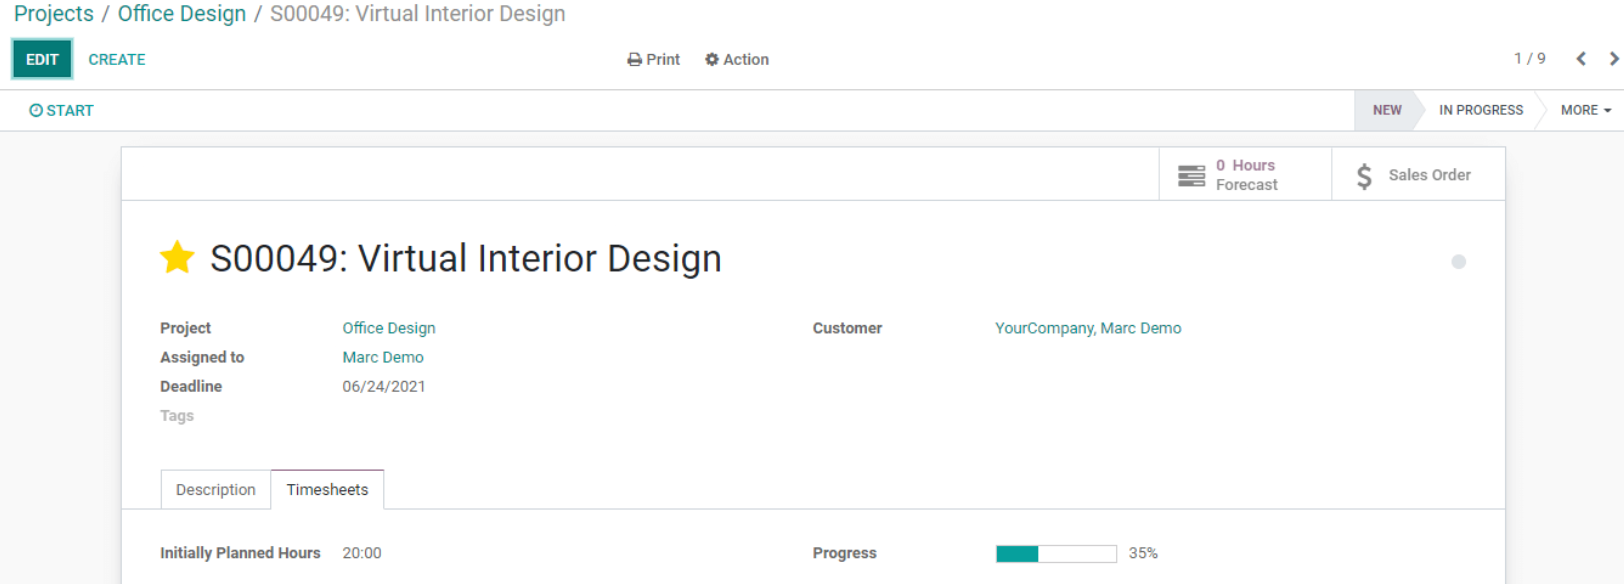
We can look over Office design projects. This project includes nine tasks and one ticket. Using the three dots, we can make adjustments to this project. Then we receive the edit option, and we can see if we have enabled the Billable option.
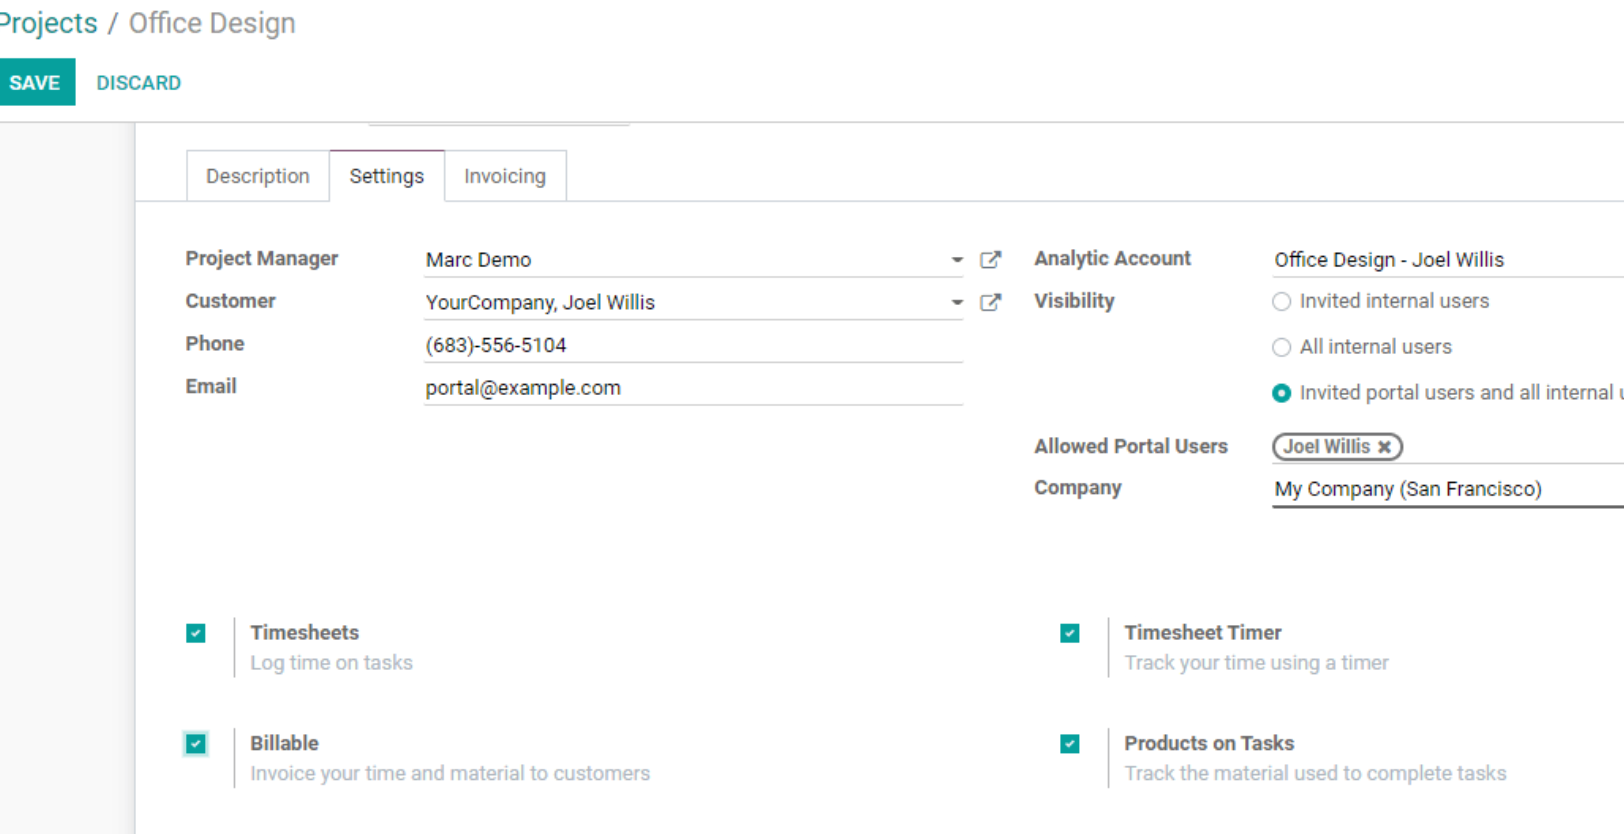
We selected the billable option, which will allows to generate invoices based on the timesheet.

By using Create button, we can add new tasks to the project.
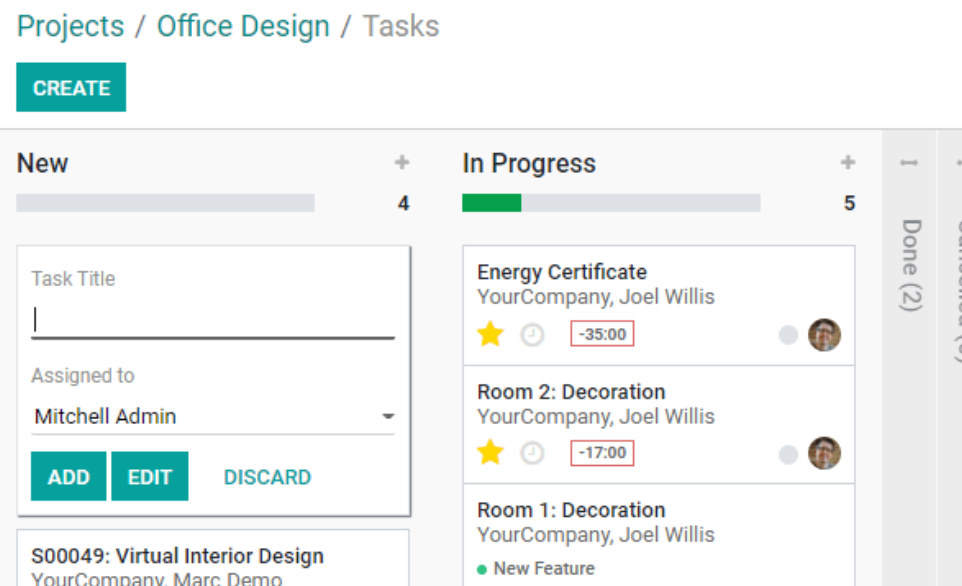
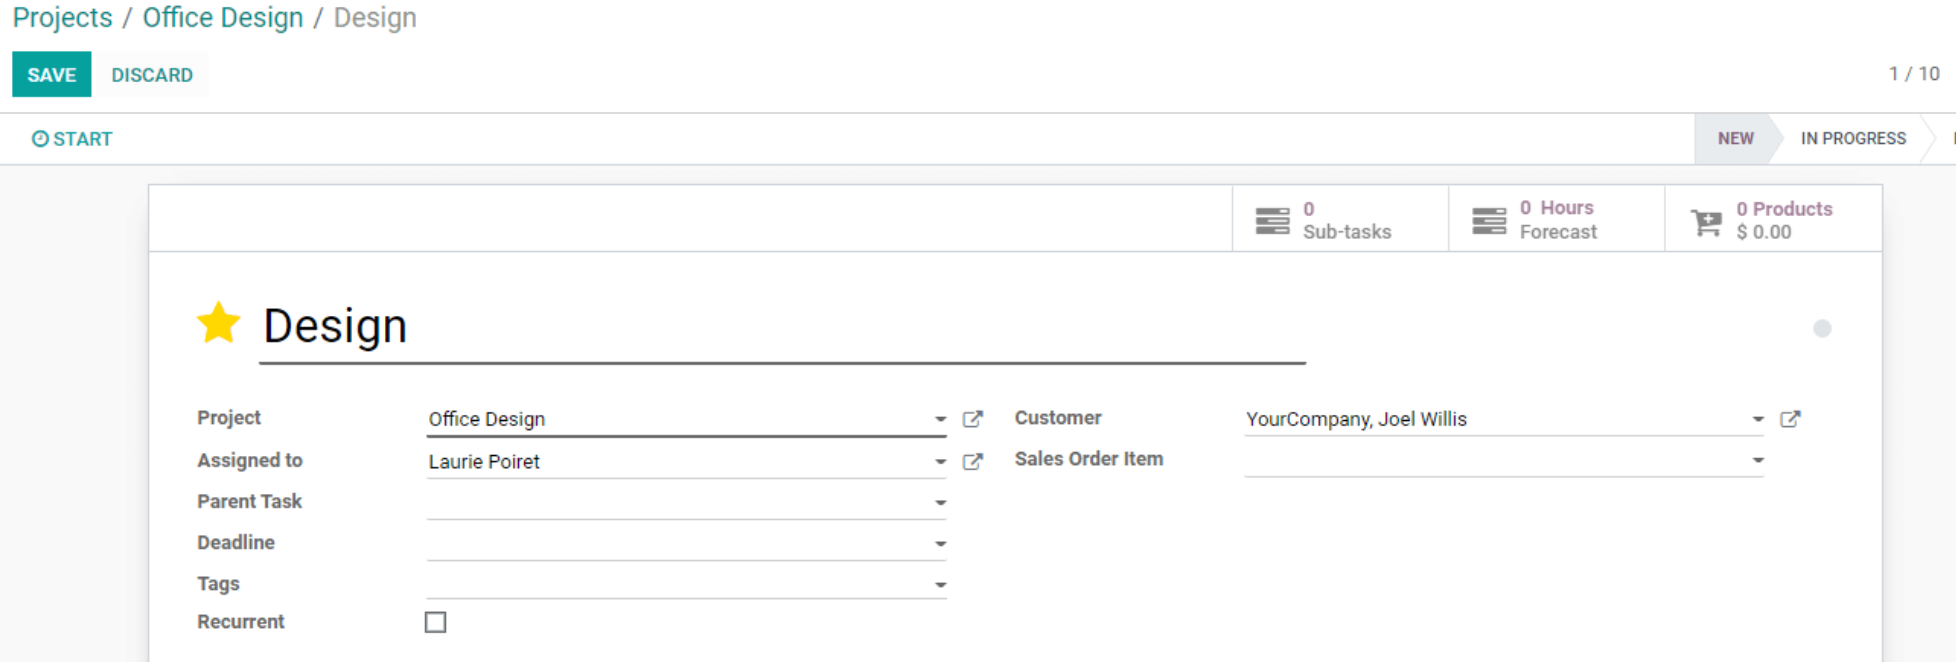
Once the job has been created, we may assign it a priority and schedule its completion. If you want to start a dialogue with the person who has been assigned the work, click on their image. Then we'll have a conversation box.
By opening the task, we can inspect it. We can update the task here and add the customer information. We can also add parent tasks, deadlines, tags, and other information here. We can also choose the items for the selling order.
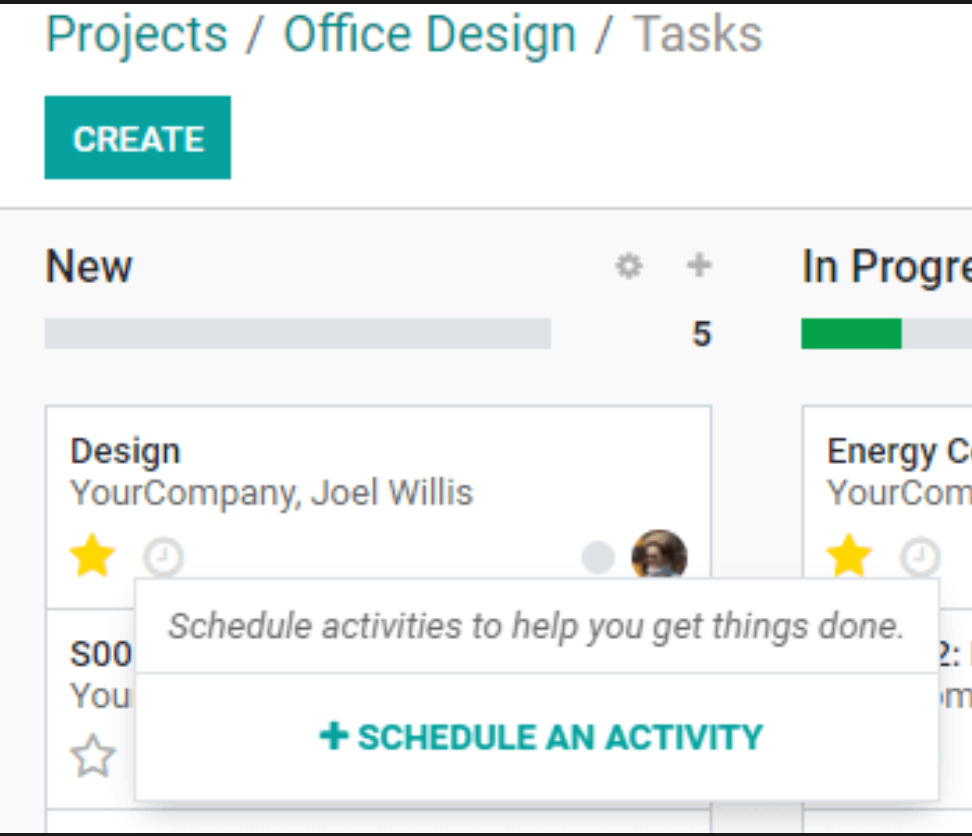
The Timesheets tab can also be found here. The Timesheet Tab will assist us in adding a timesheet beneath this tab.
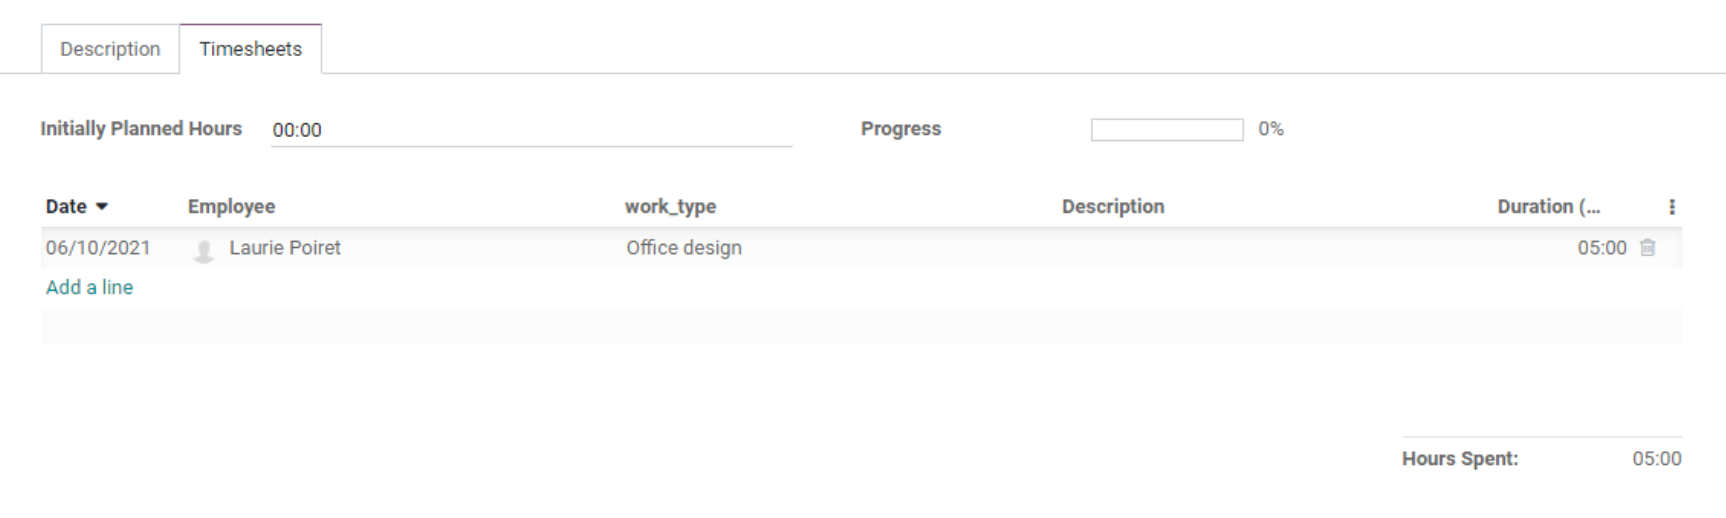
We can add the date, employee name, work type, description, and duration of labor to the image above. By adding extra lines, we can include the work done by different employees.
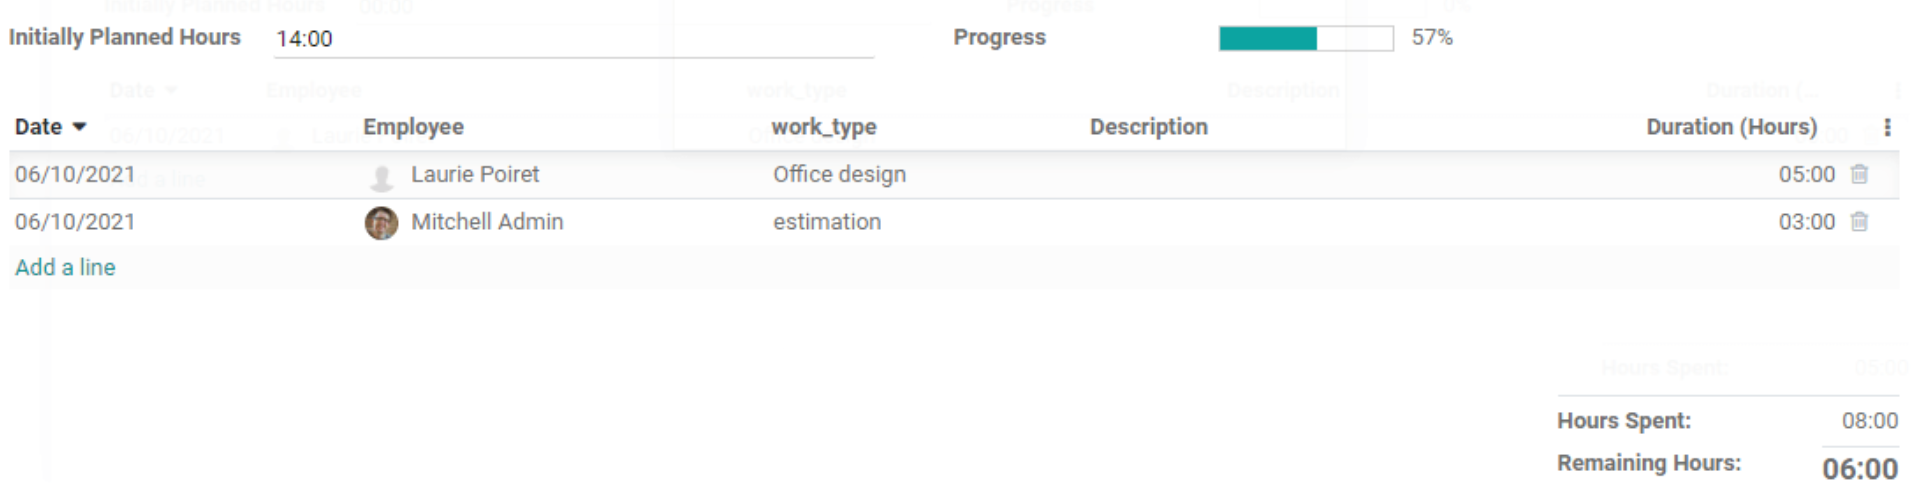
On the top, there are two more possibilities. Hours and Progress are initially intended. We estimate the total number of hours of work whenever we start a new project. When we add the employees' labor hours, the progress is immediately displayed in percentage. This will aid us in the creation of project reports. After that, we can save this work and proceed to build a sales order.
We can create an invoice and continue the invoice generating procedure by clicking on the Sale order.

Overview of the Project. A project overview option can be found near projects.

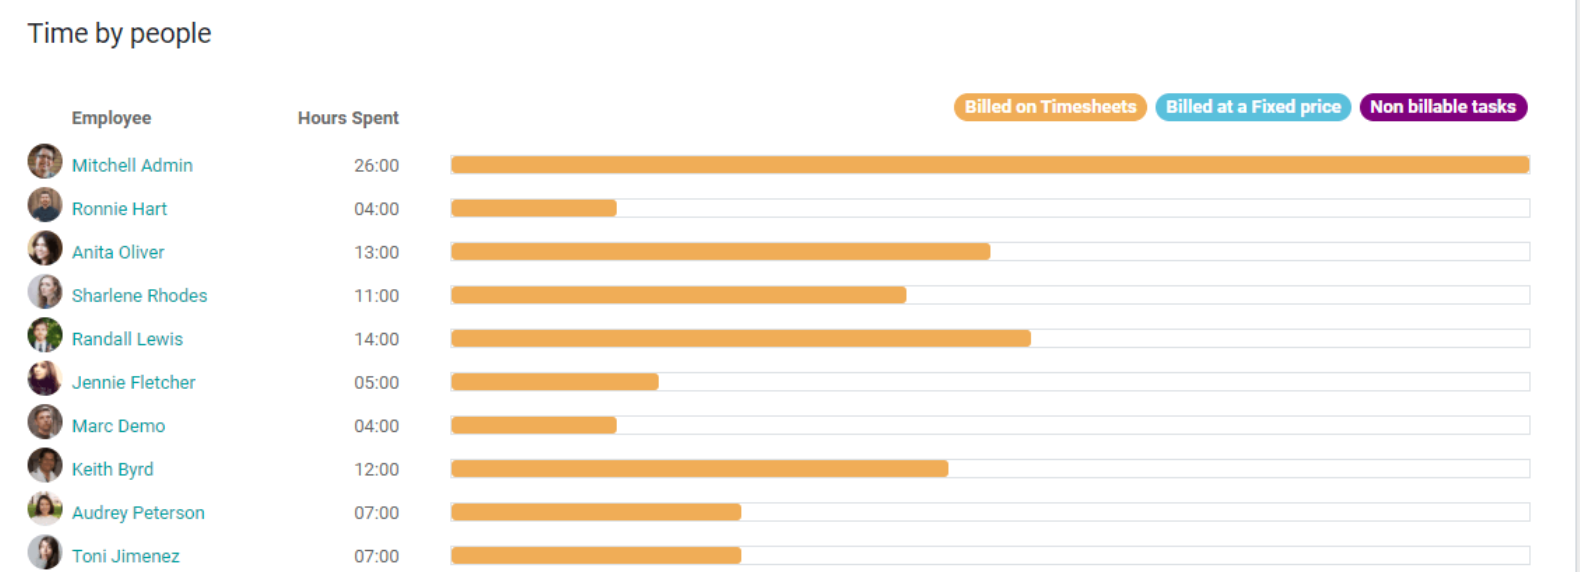
We can see from this overview that there are two tasks under one project. The website also contains late jobs, overtime details, and hours of work. The recorder hours are 212 hours in this case. Then we can determine the billed and unbilled hours. Below profitability, we can see the invoiced amount, the amount to be invoiced, the cost of the timesheet, and other costs. We may also get information such as the time from different people here. Then, from this overview, we can access the timesheets and planning details. Recorded hours and profitability can be seen here.
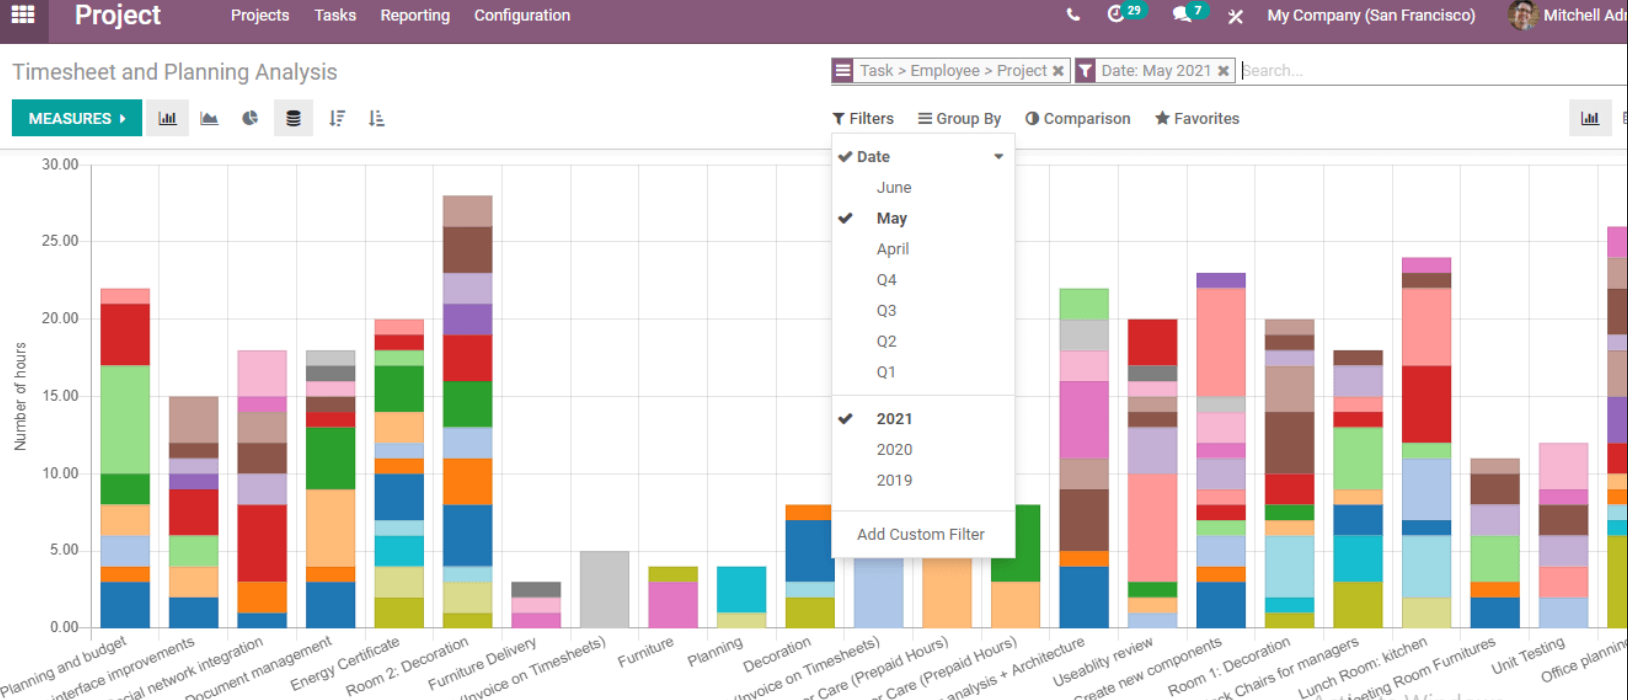
Below are the documented hours, which include both billable and non-billable tasks. We can also obtain the profitability details against the hours. Reporting is a vital element that will allow us to evaluate the efficacy and productivity of our personnel.
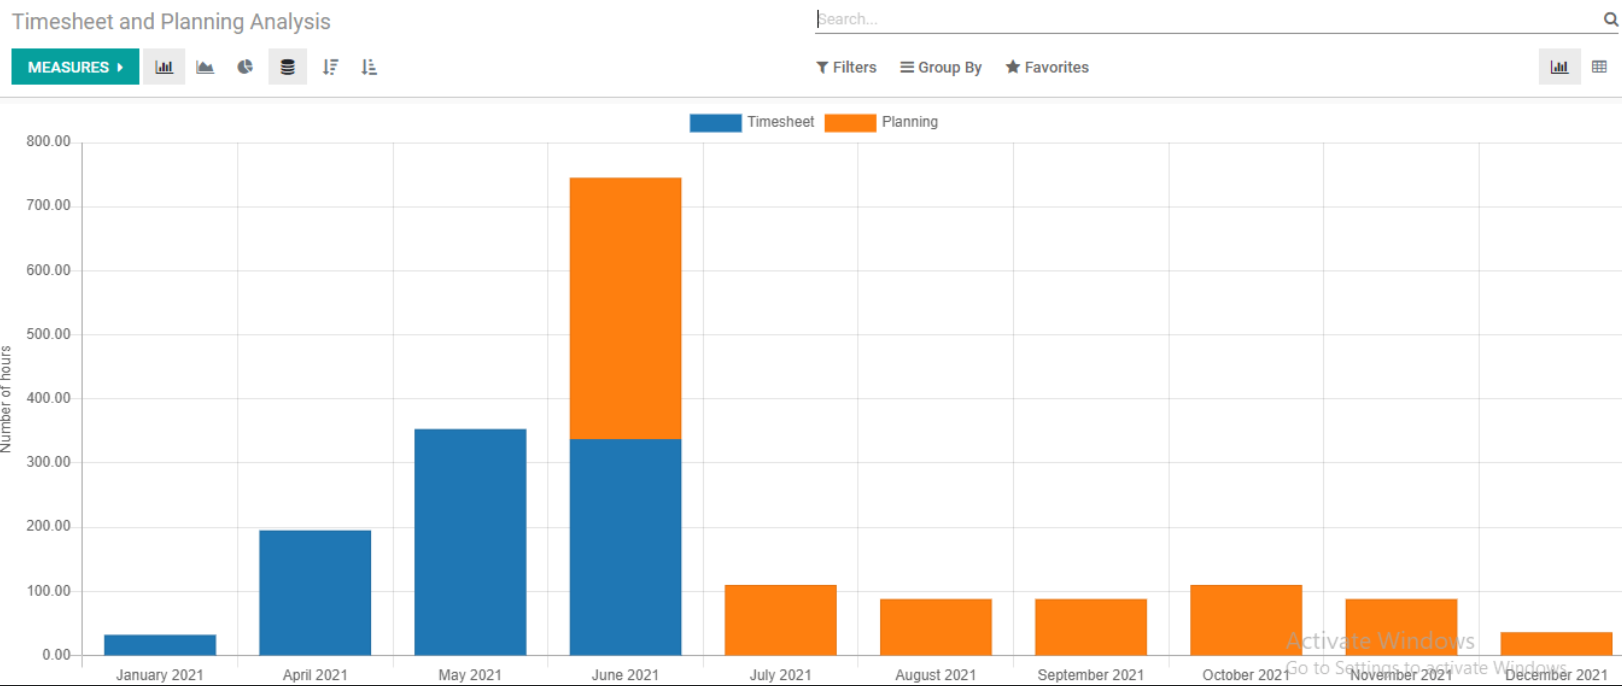
The performance of employees in various months is depicted in the above figure. This is accomplished through the use of timesheet representations.
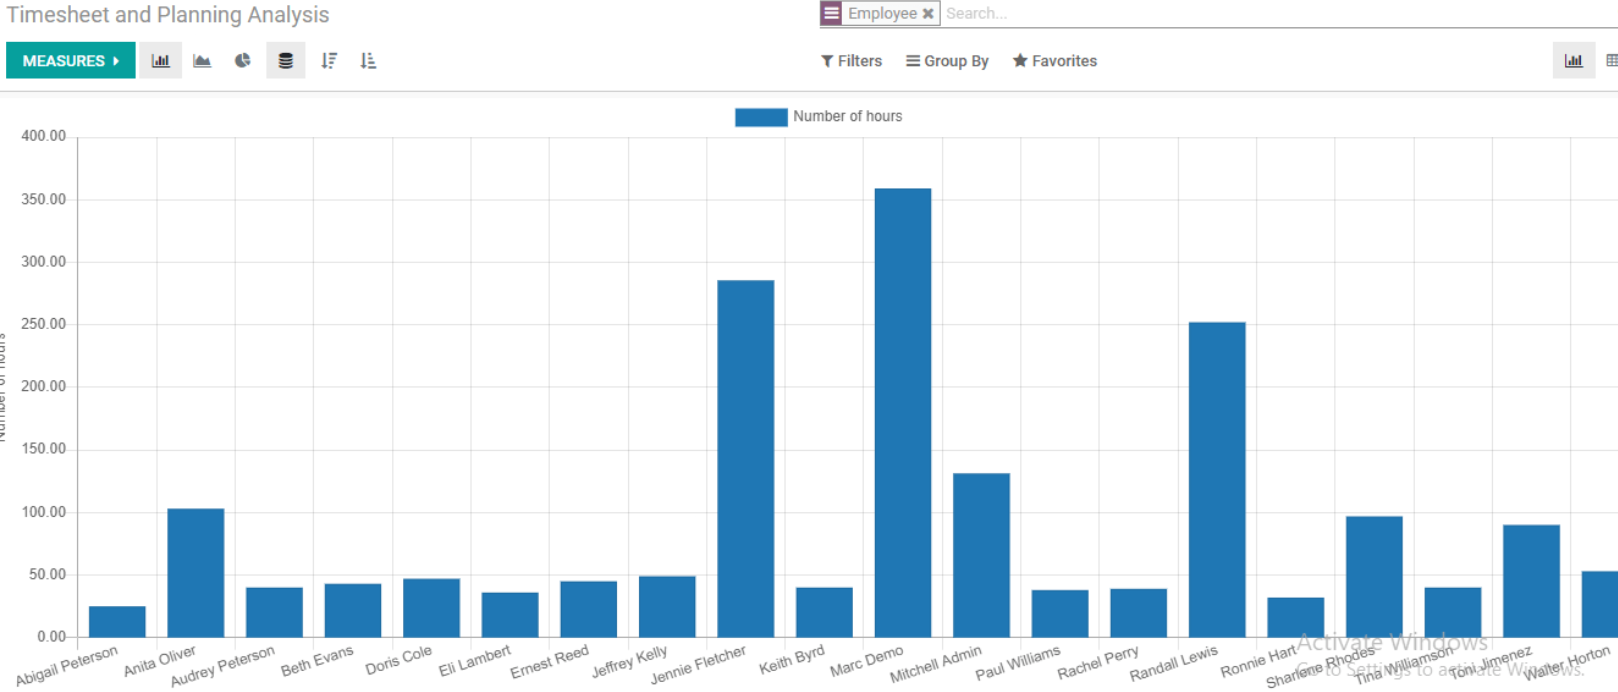
We can categorize the reports based on many parameters. The report on the performance of several individuals is shown above. Their task management and support systems are used to evaluate their performance.
Based on this image, we may conclude that Marc Demo was the most productive employee.
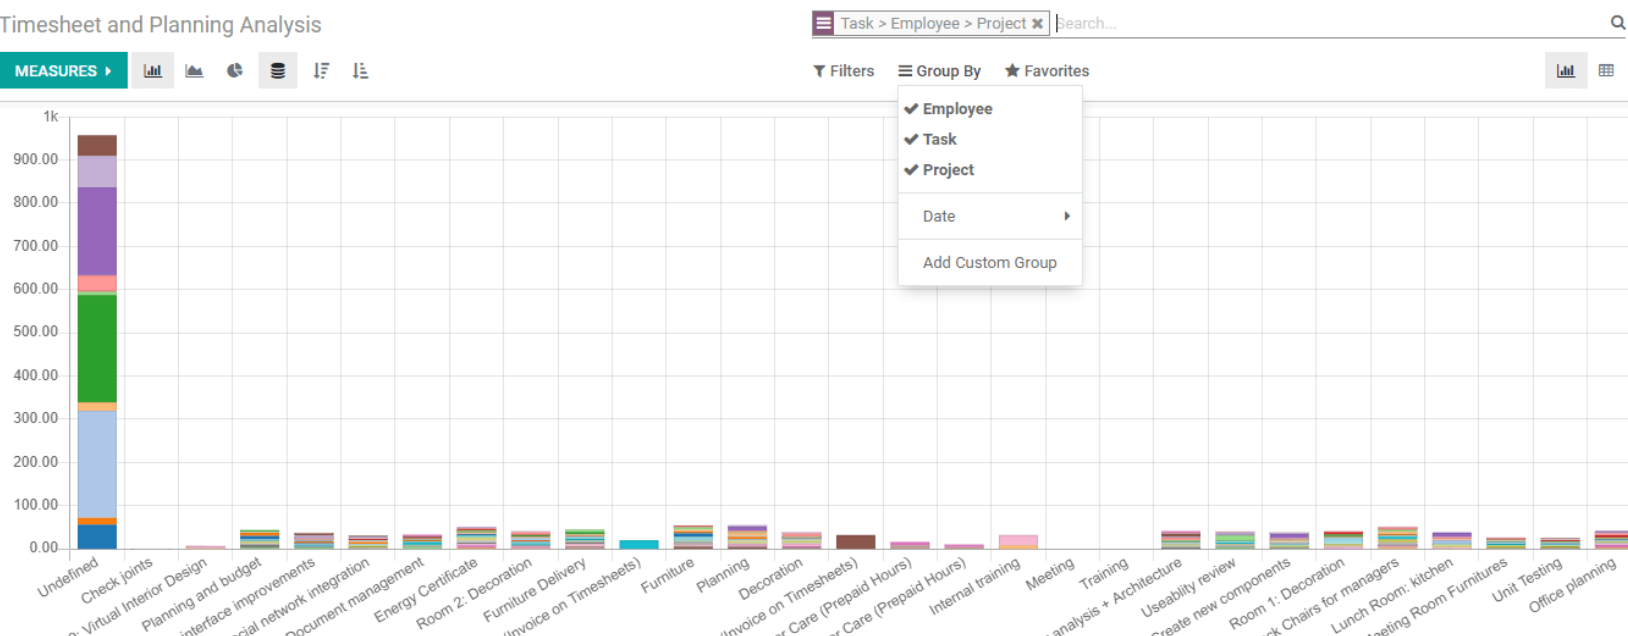
We can organize it by employee, task, or project. We can additionally manage the reporting measures.
Different measurements, such as effective hours, number of hours, scheduled hours, and so on, might be used.
Odoo 14 Project Management Timesheet