
Odoo 15 Accounting Module
Odoo 15 Accounting Module (Debit Notes)

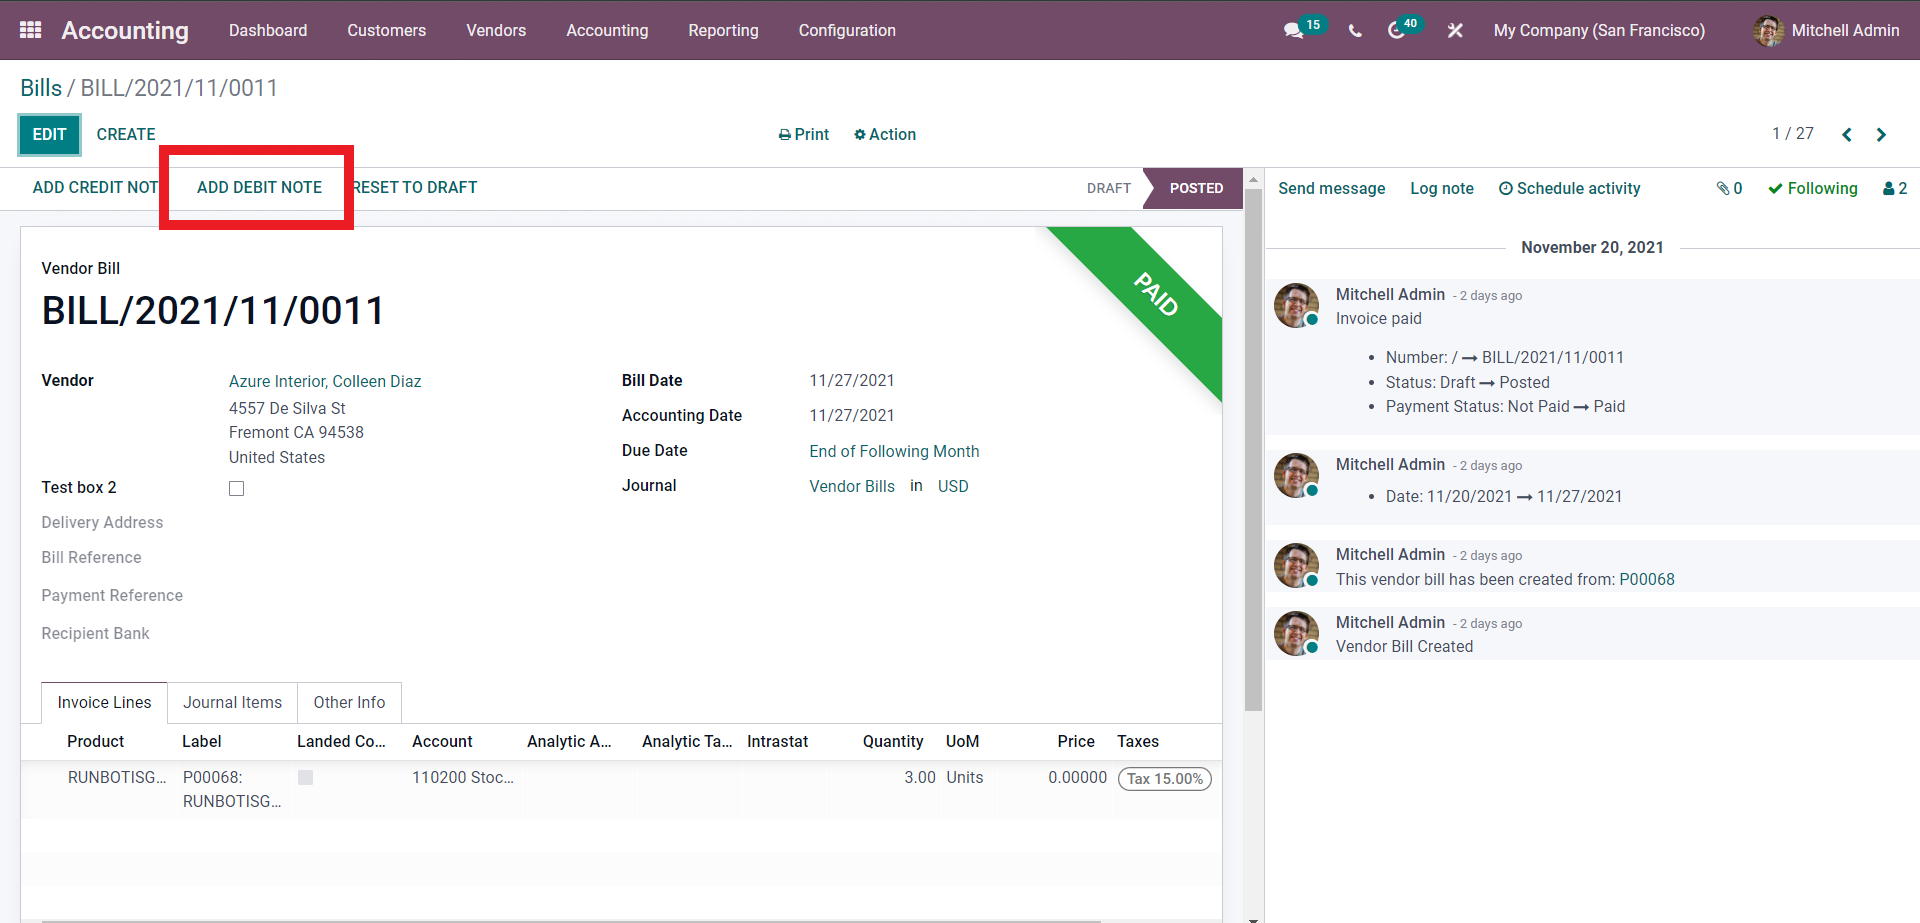
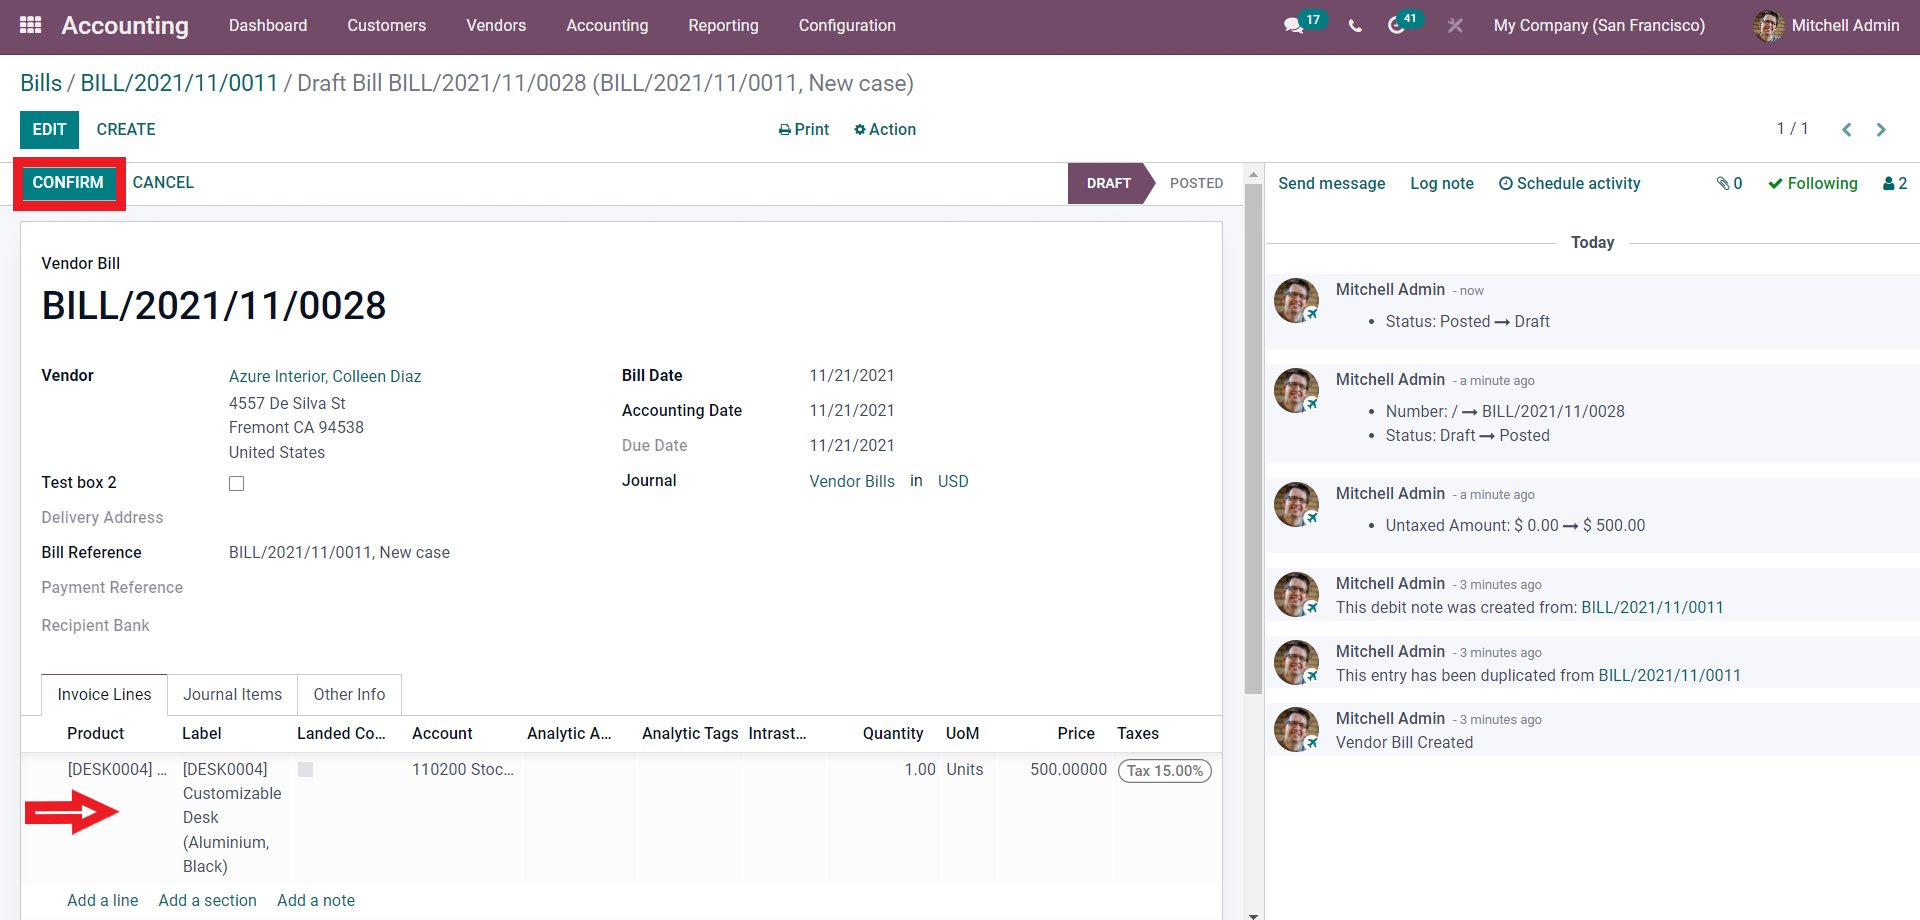
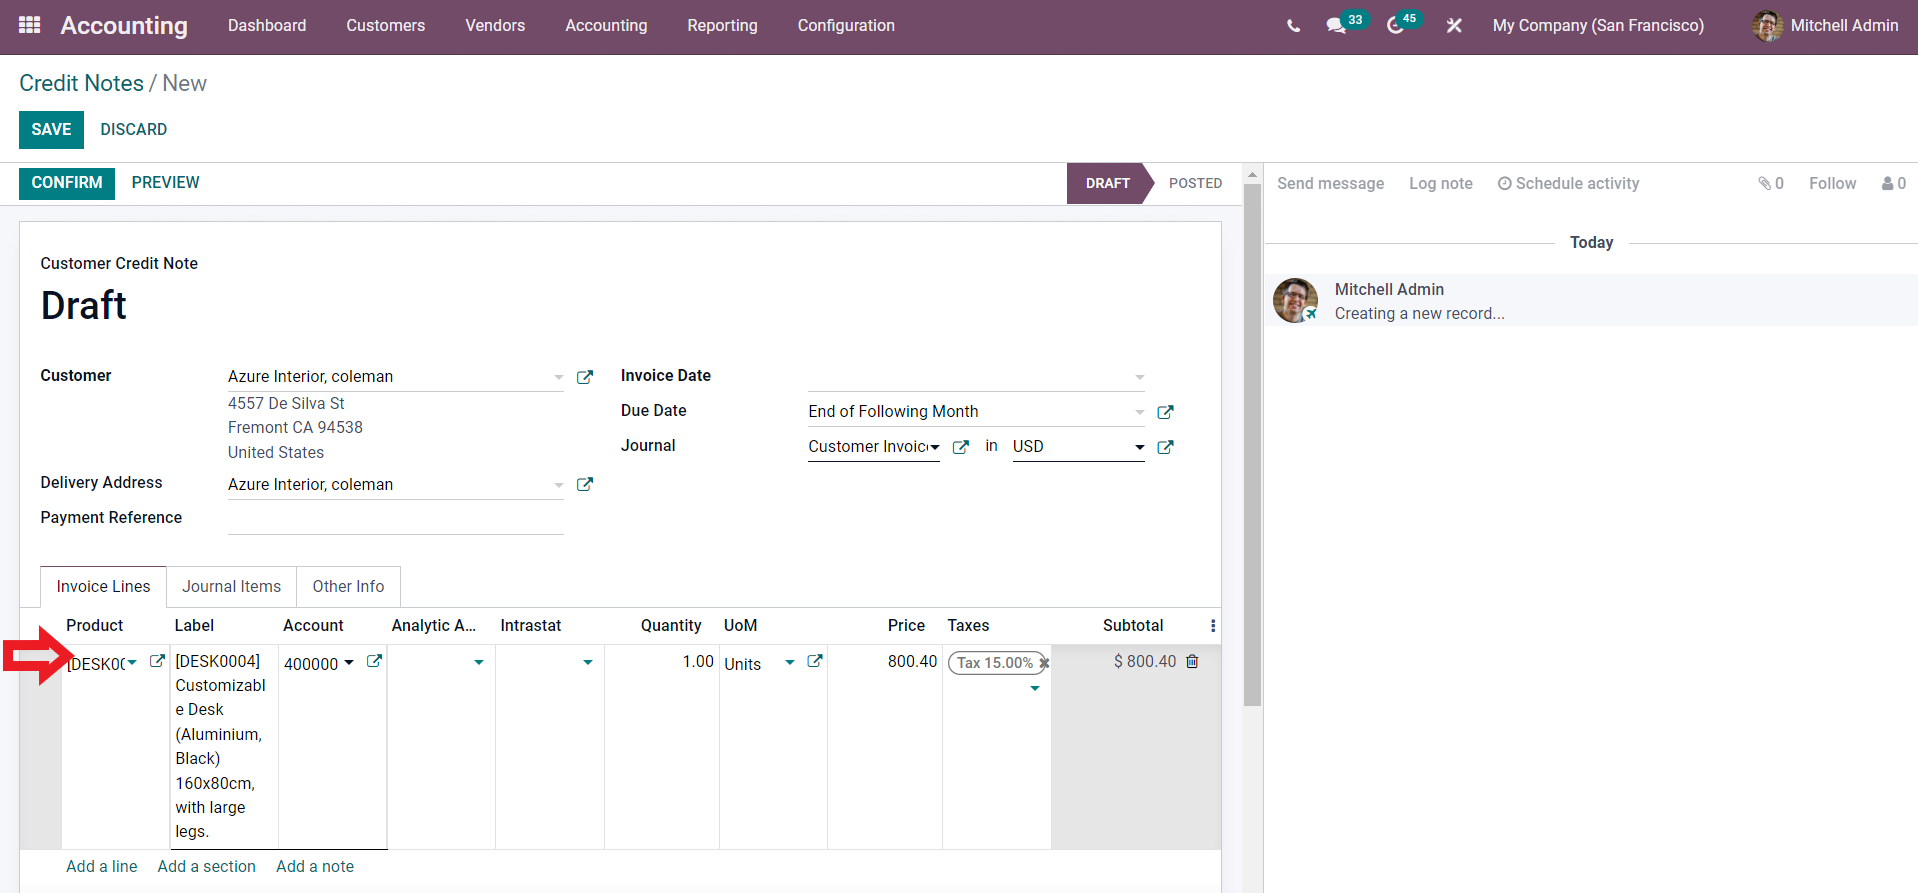
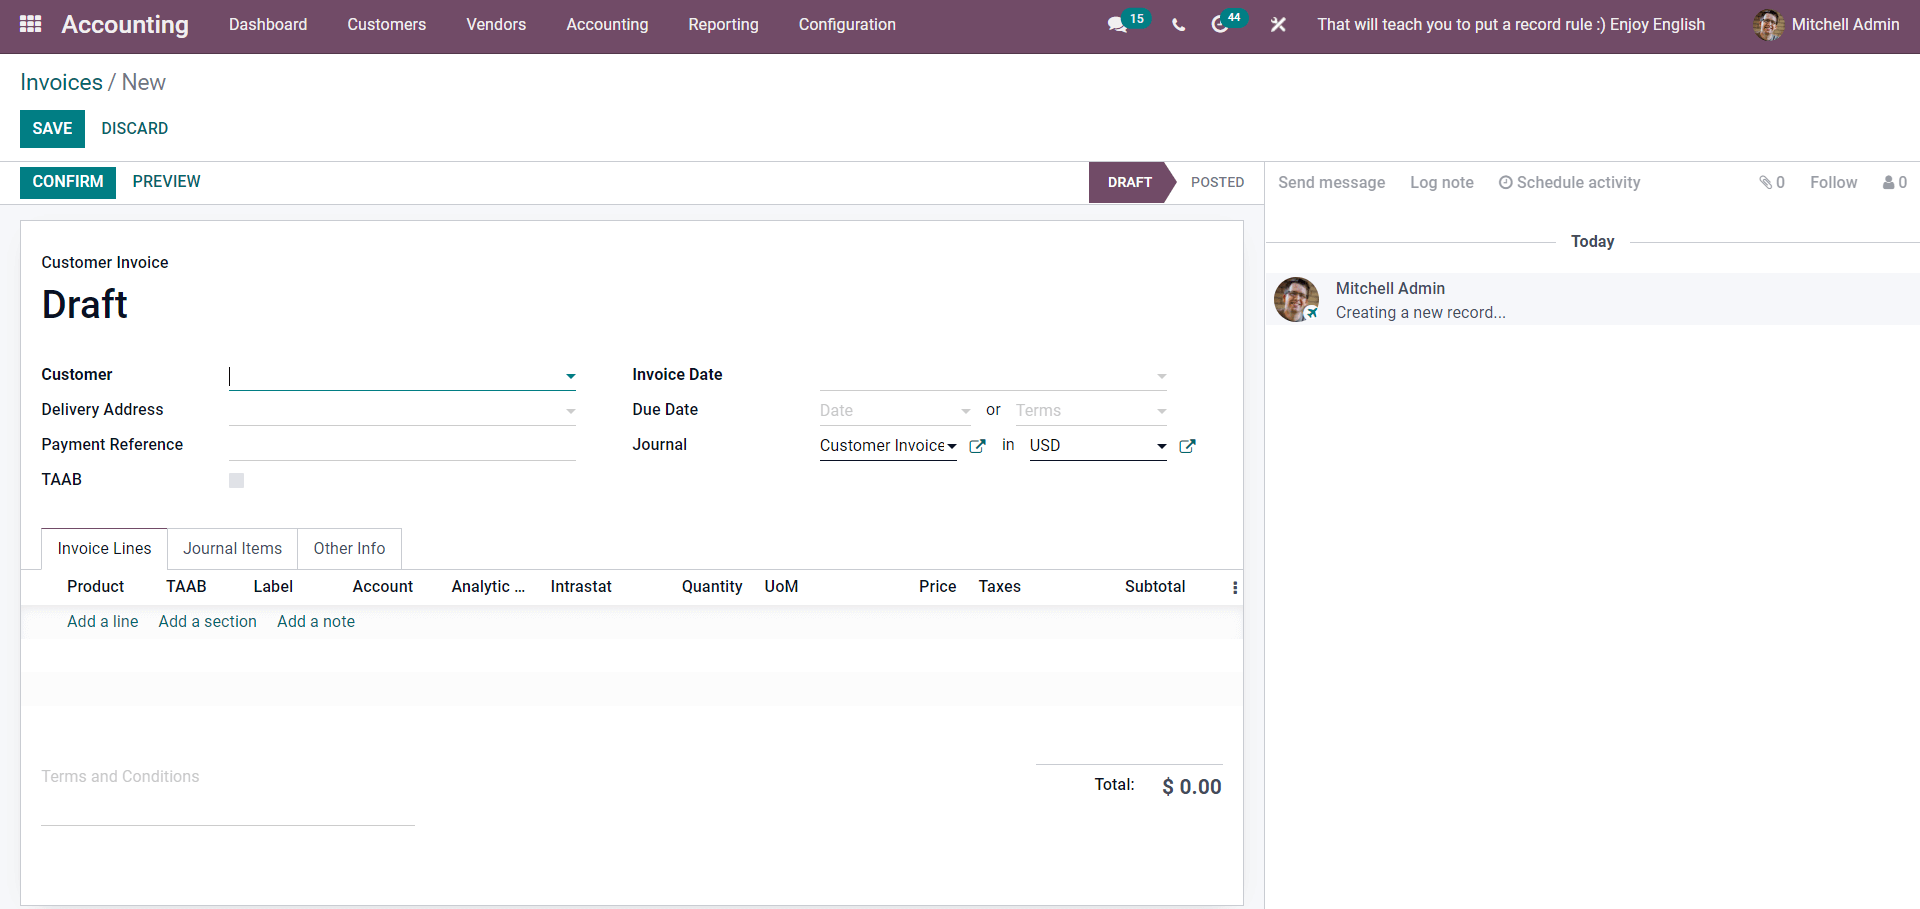
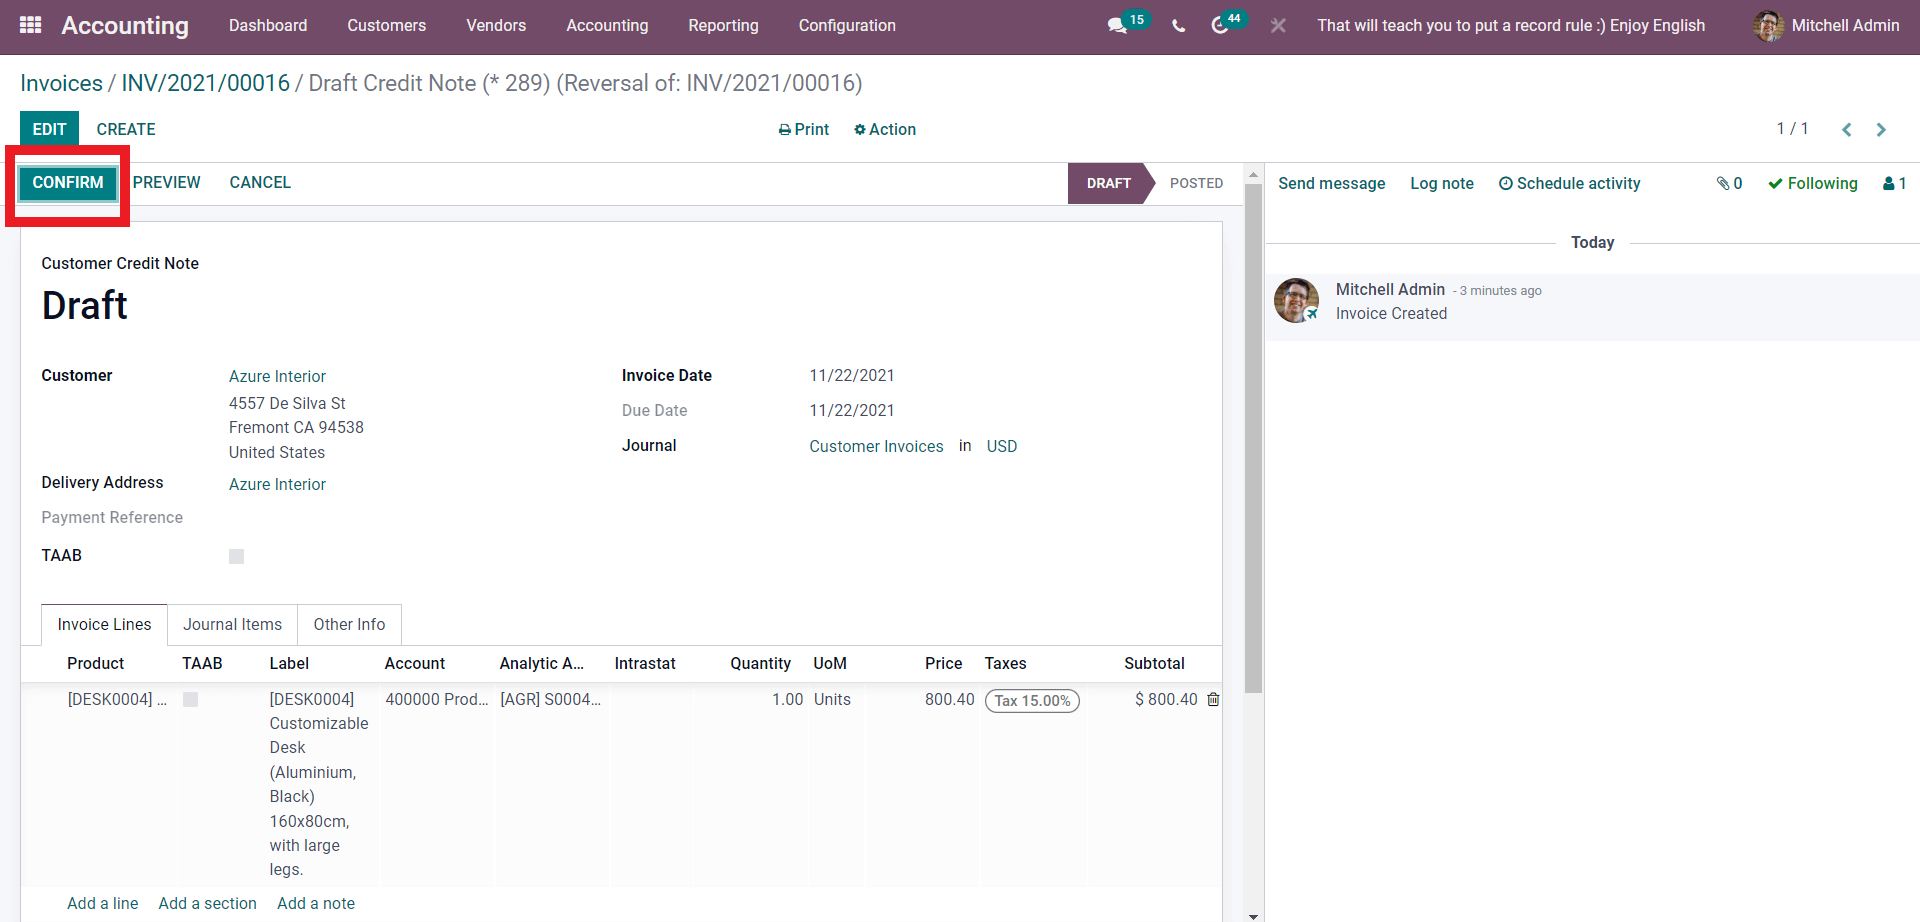
Click the Confirm button after adding the product to the 'Invoice Lines' tab below.
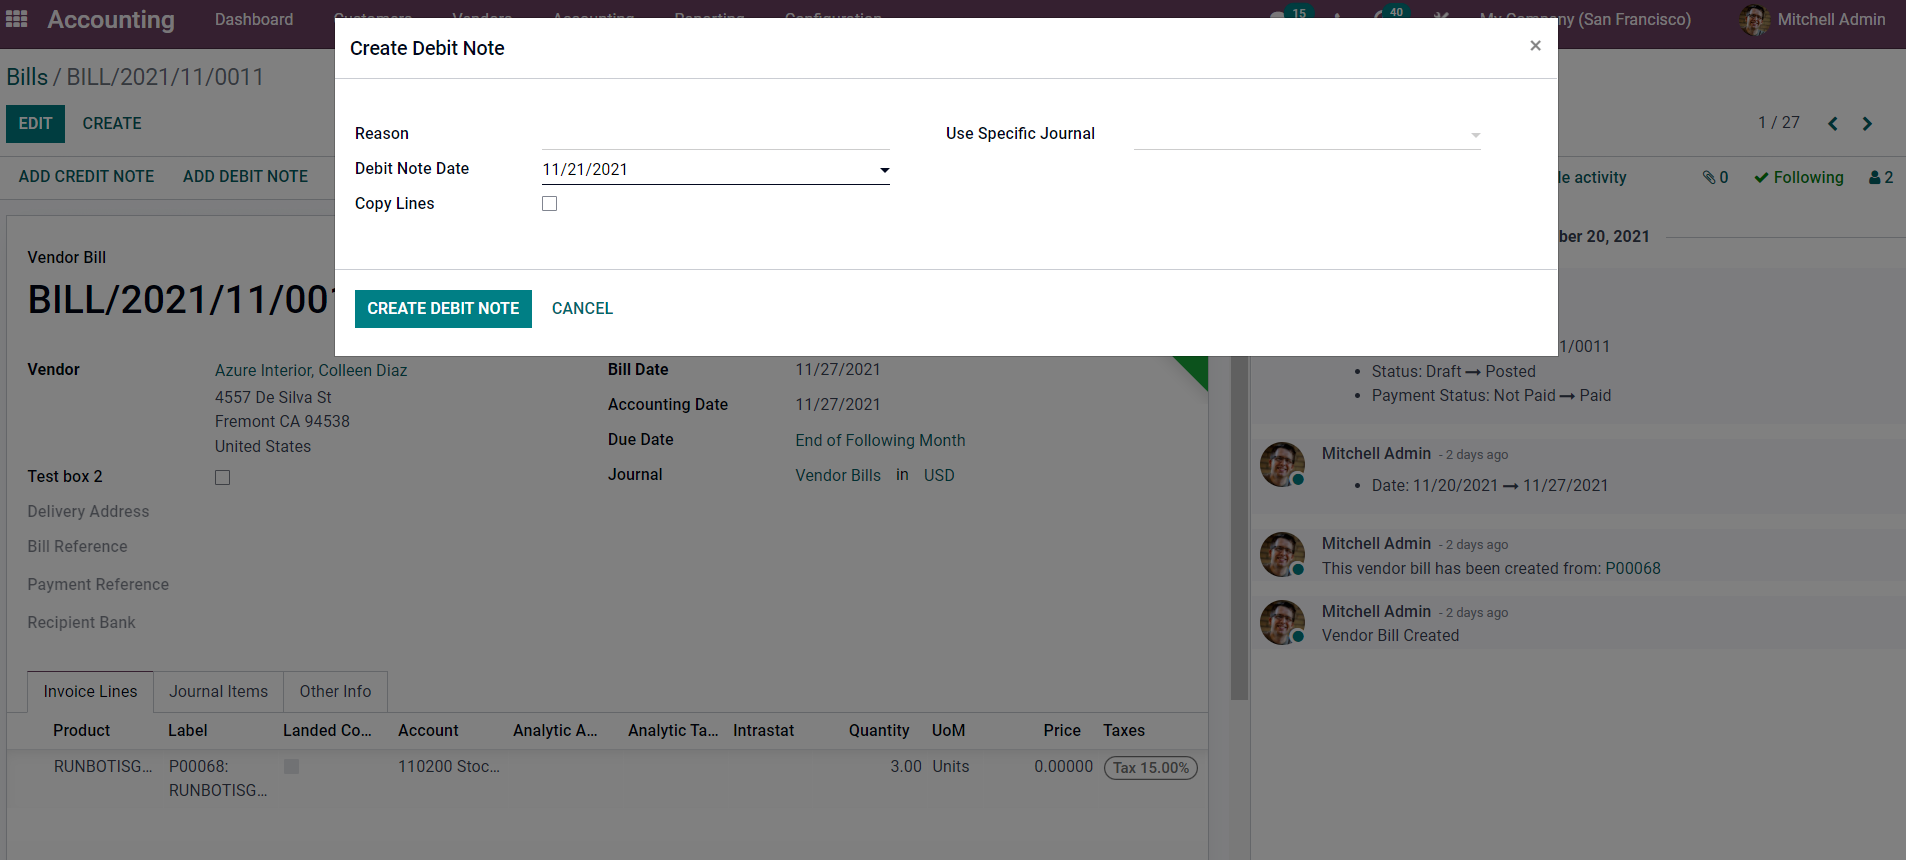
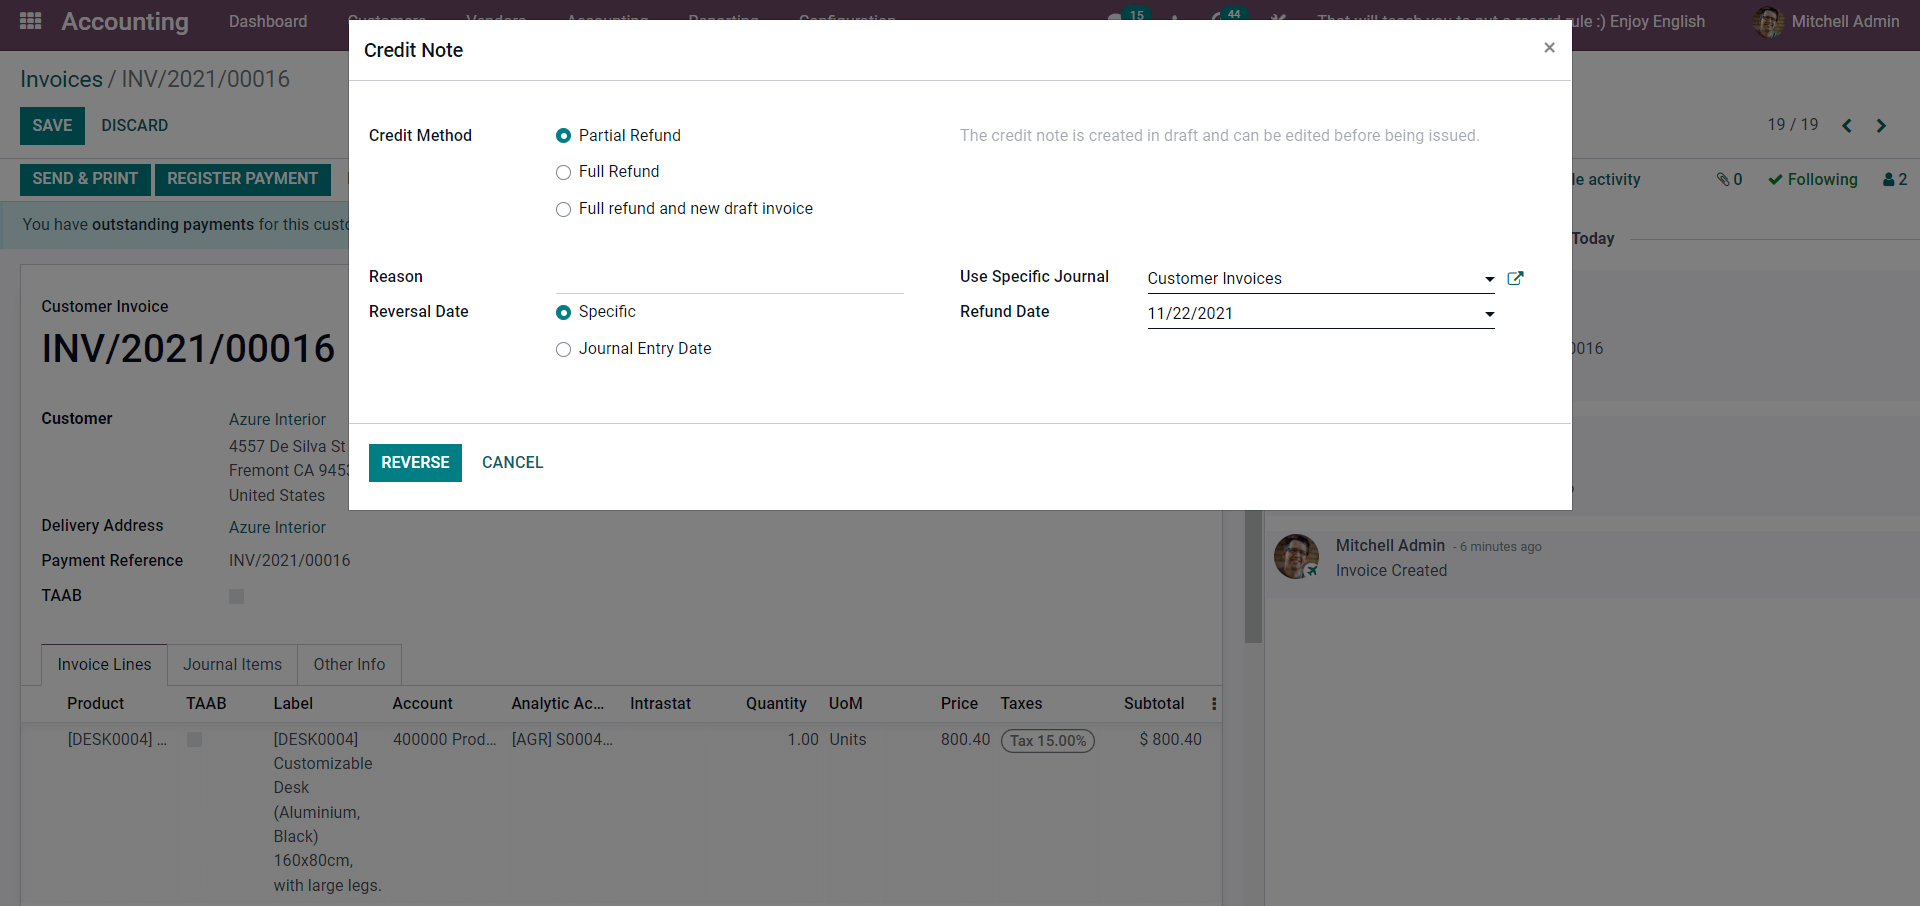
In the Debit Note Configuration section, select the Debit Note Date. After you've finished configuring the debit note, click the 'CREATE DEBIT NOTE BUTTON' to start creating it. Following the Debit Note setup, the Vendor Bill page will appear. Click the Confirm button after adding the product to the 'Invoice Lines' tab below.
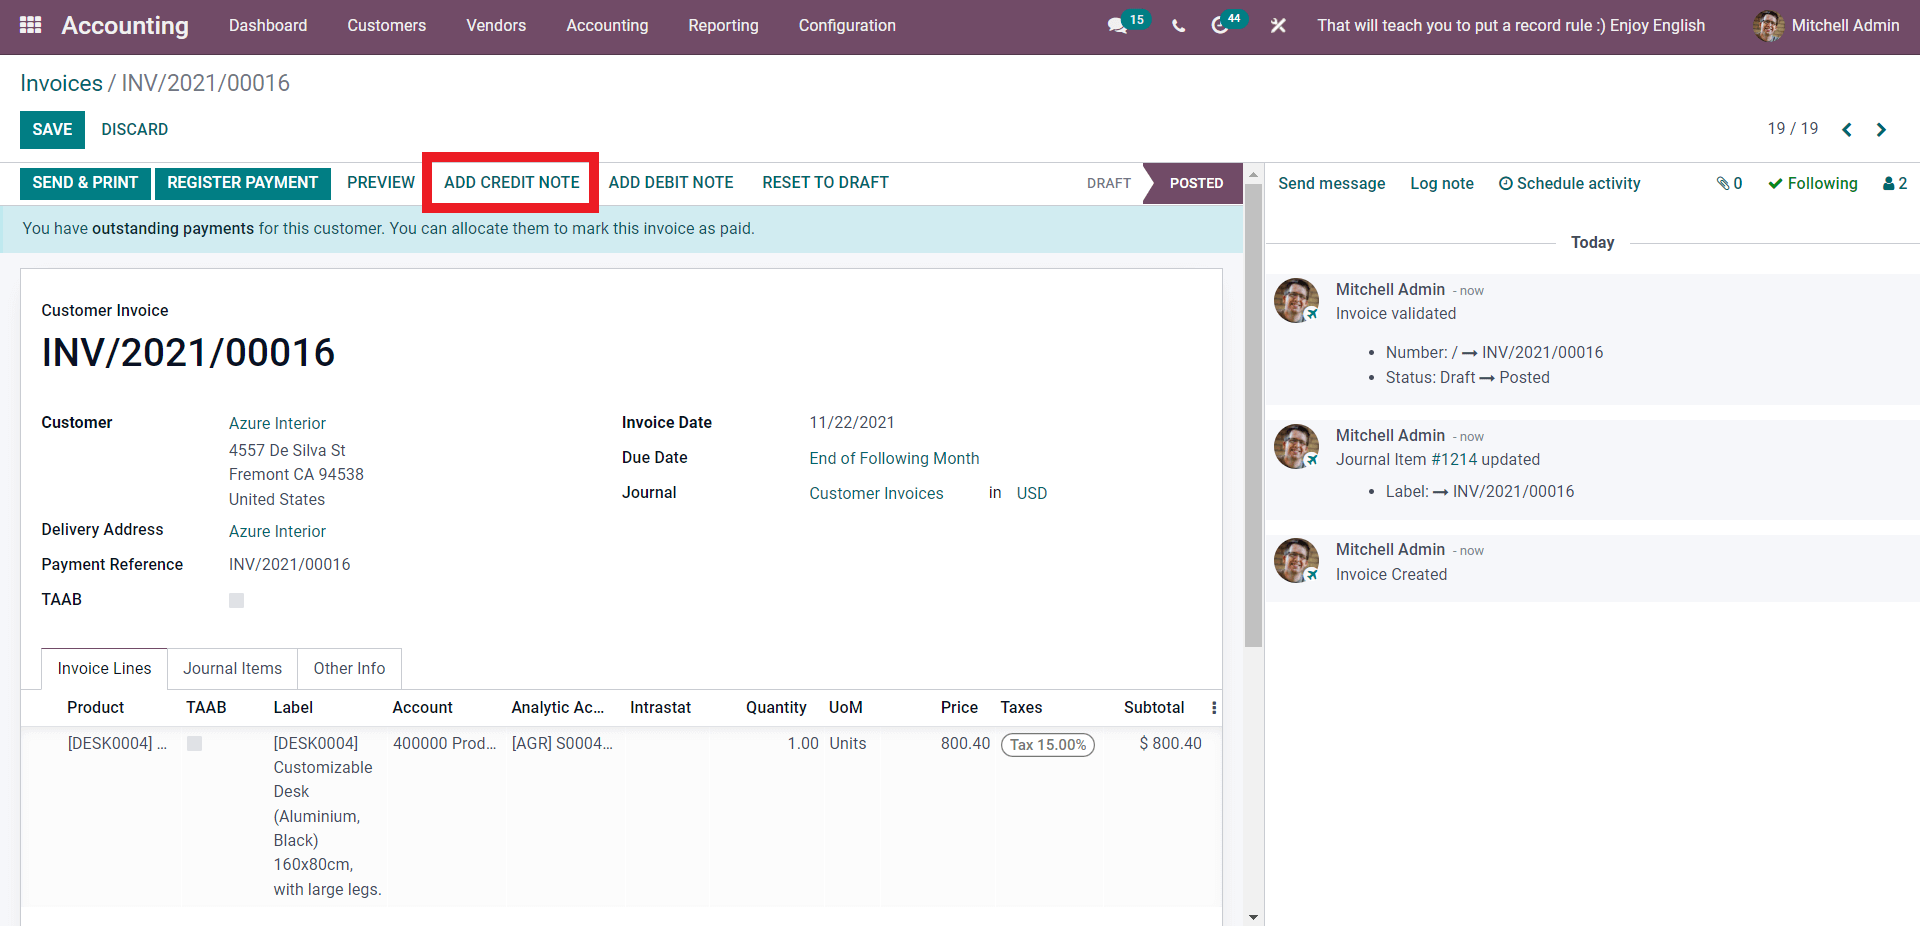
Odoo 15 Accounting Module (Credit Notes)
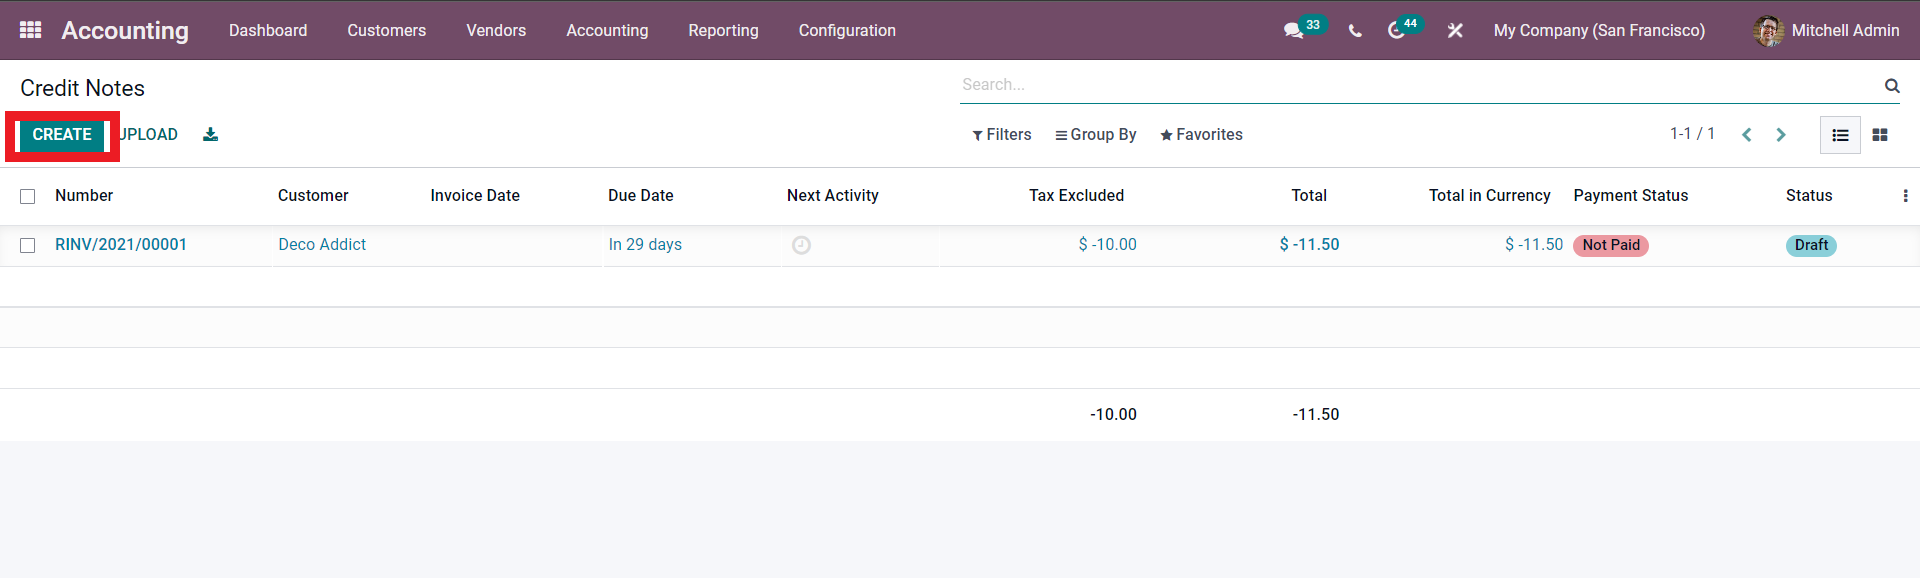
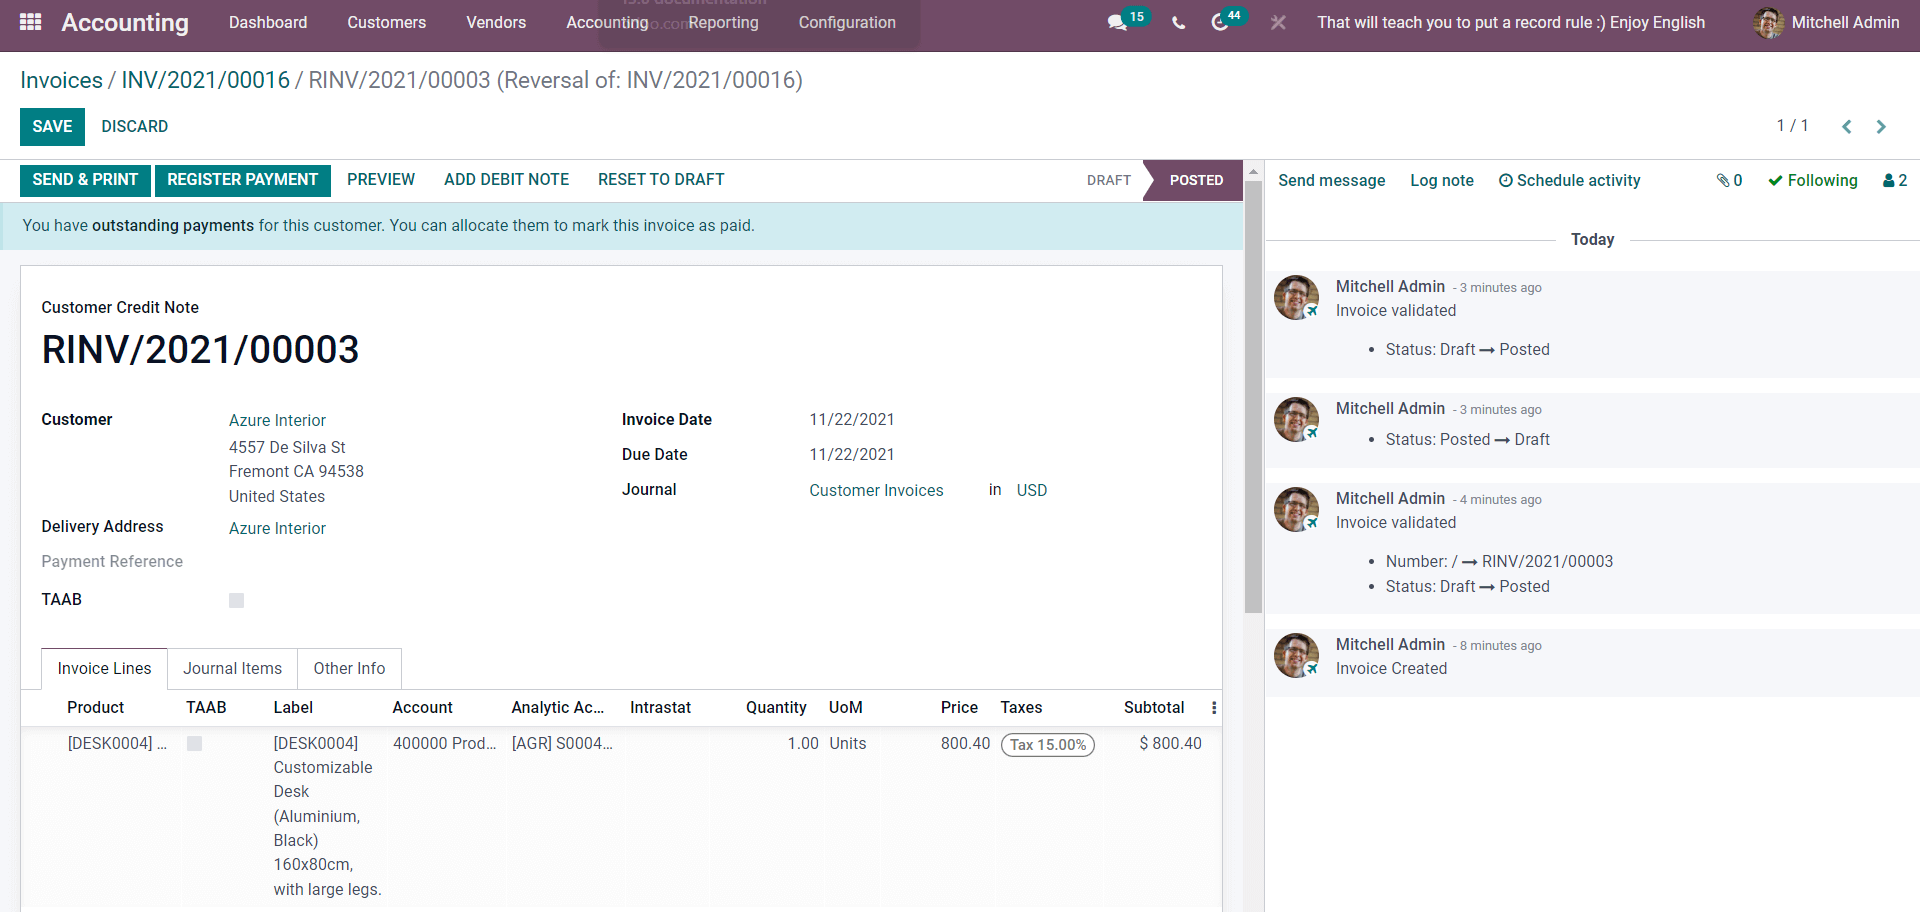
In all of these scenarios, using and managing credit notes is simply using the Odoo 15 Accounting module. Go to your Accounting module to create a Credit Note or Credit Memo. Credit Notes can be found under the Customer tab on the Accounting module's dashboard; click on it to go to the Credit Notes section below.
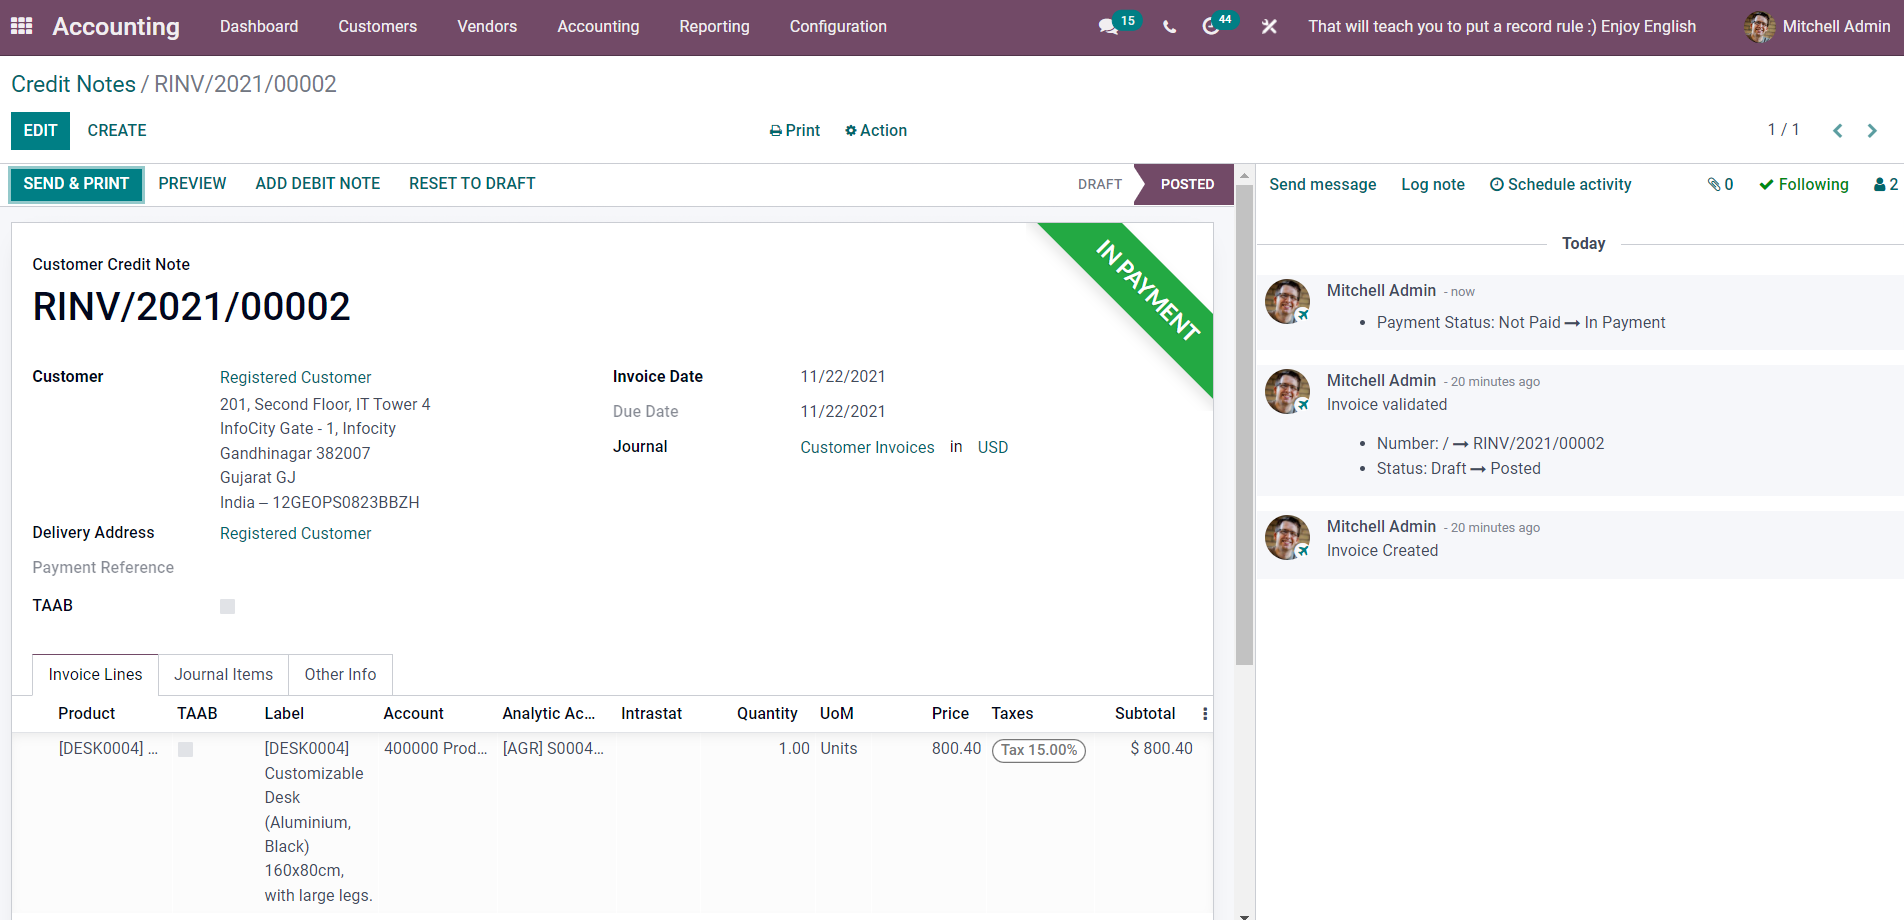
Odoo 15 Accounting Module (Customer Invoice)
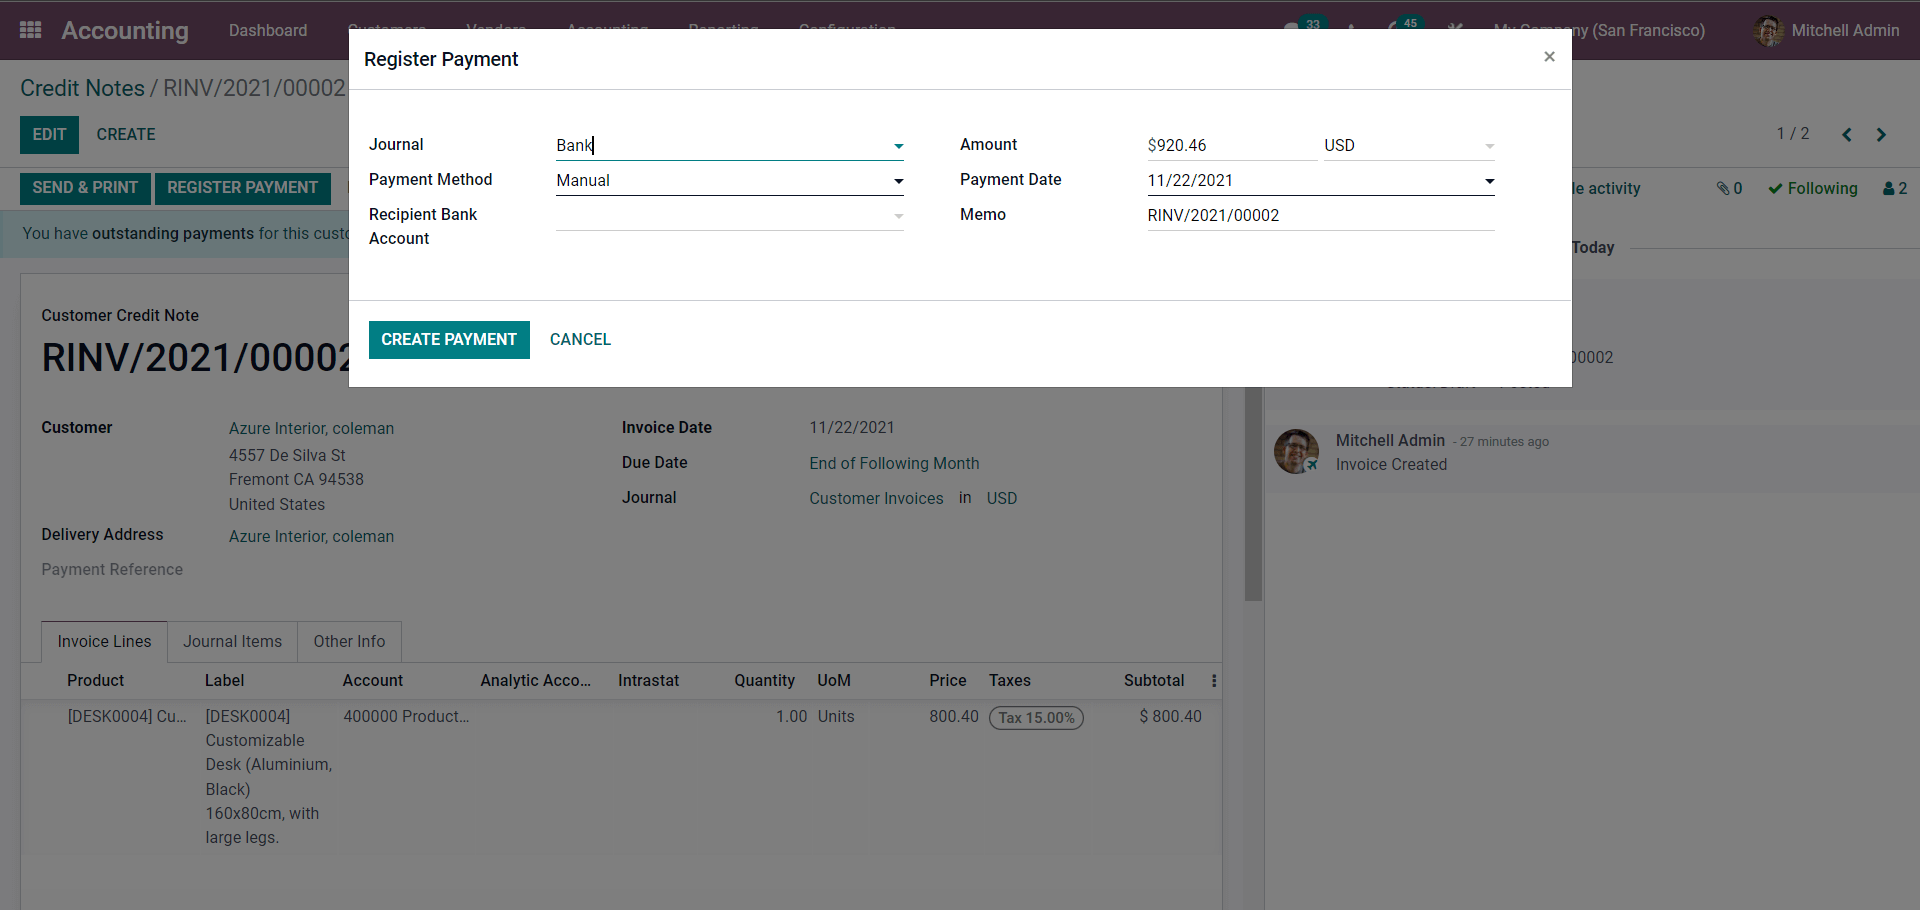
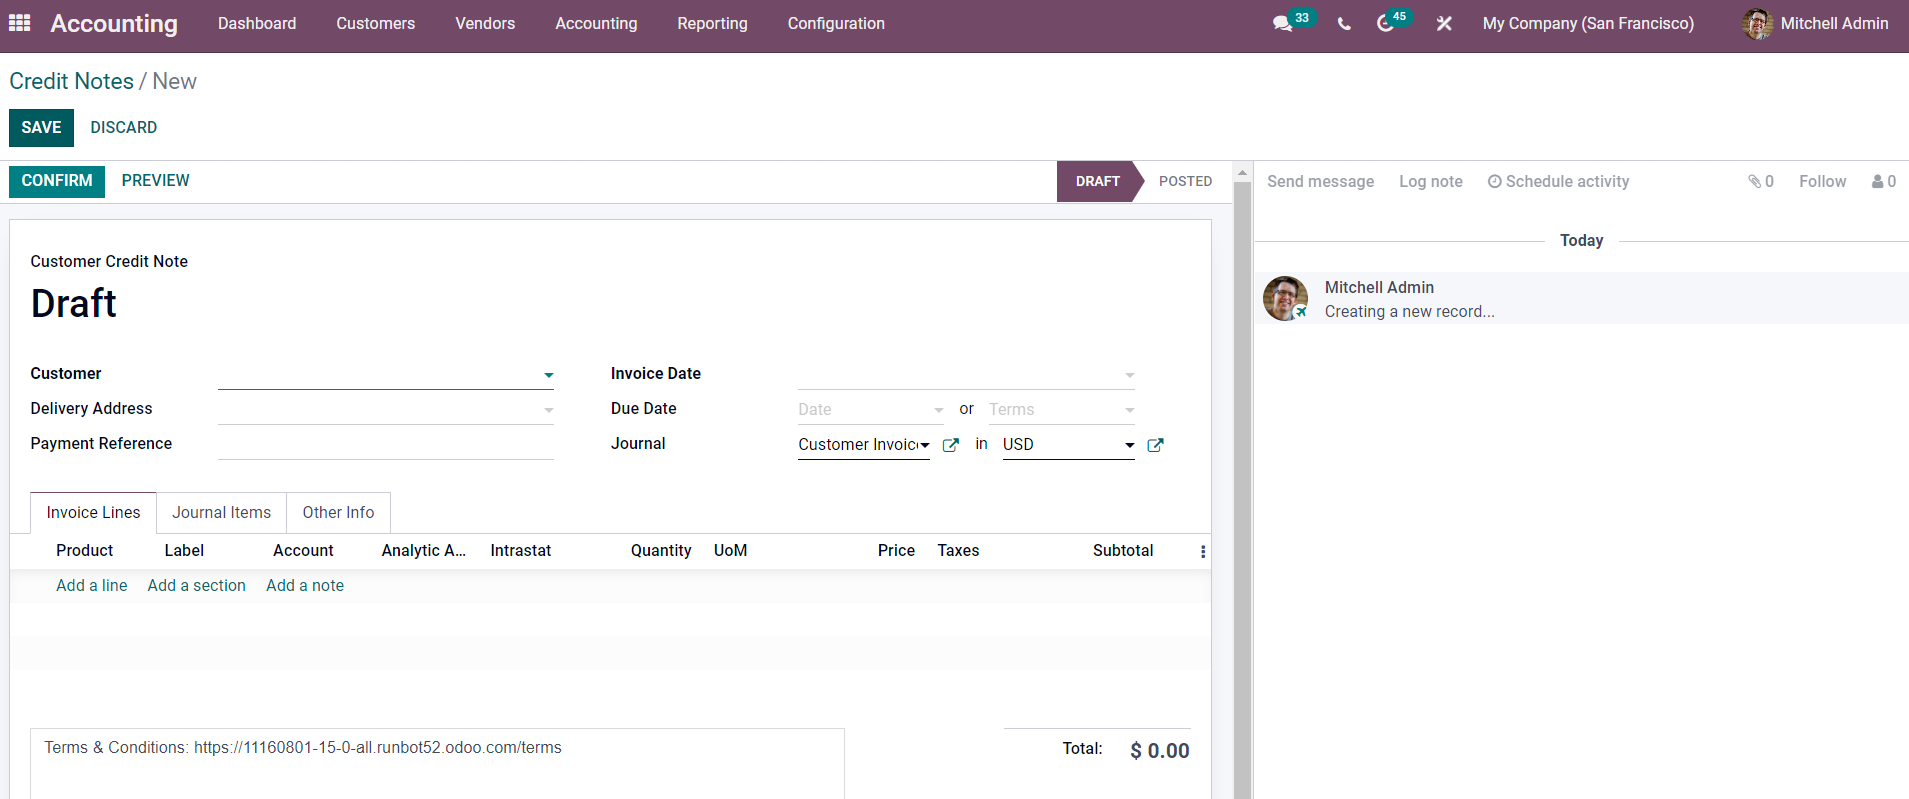
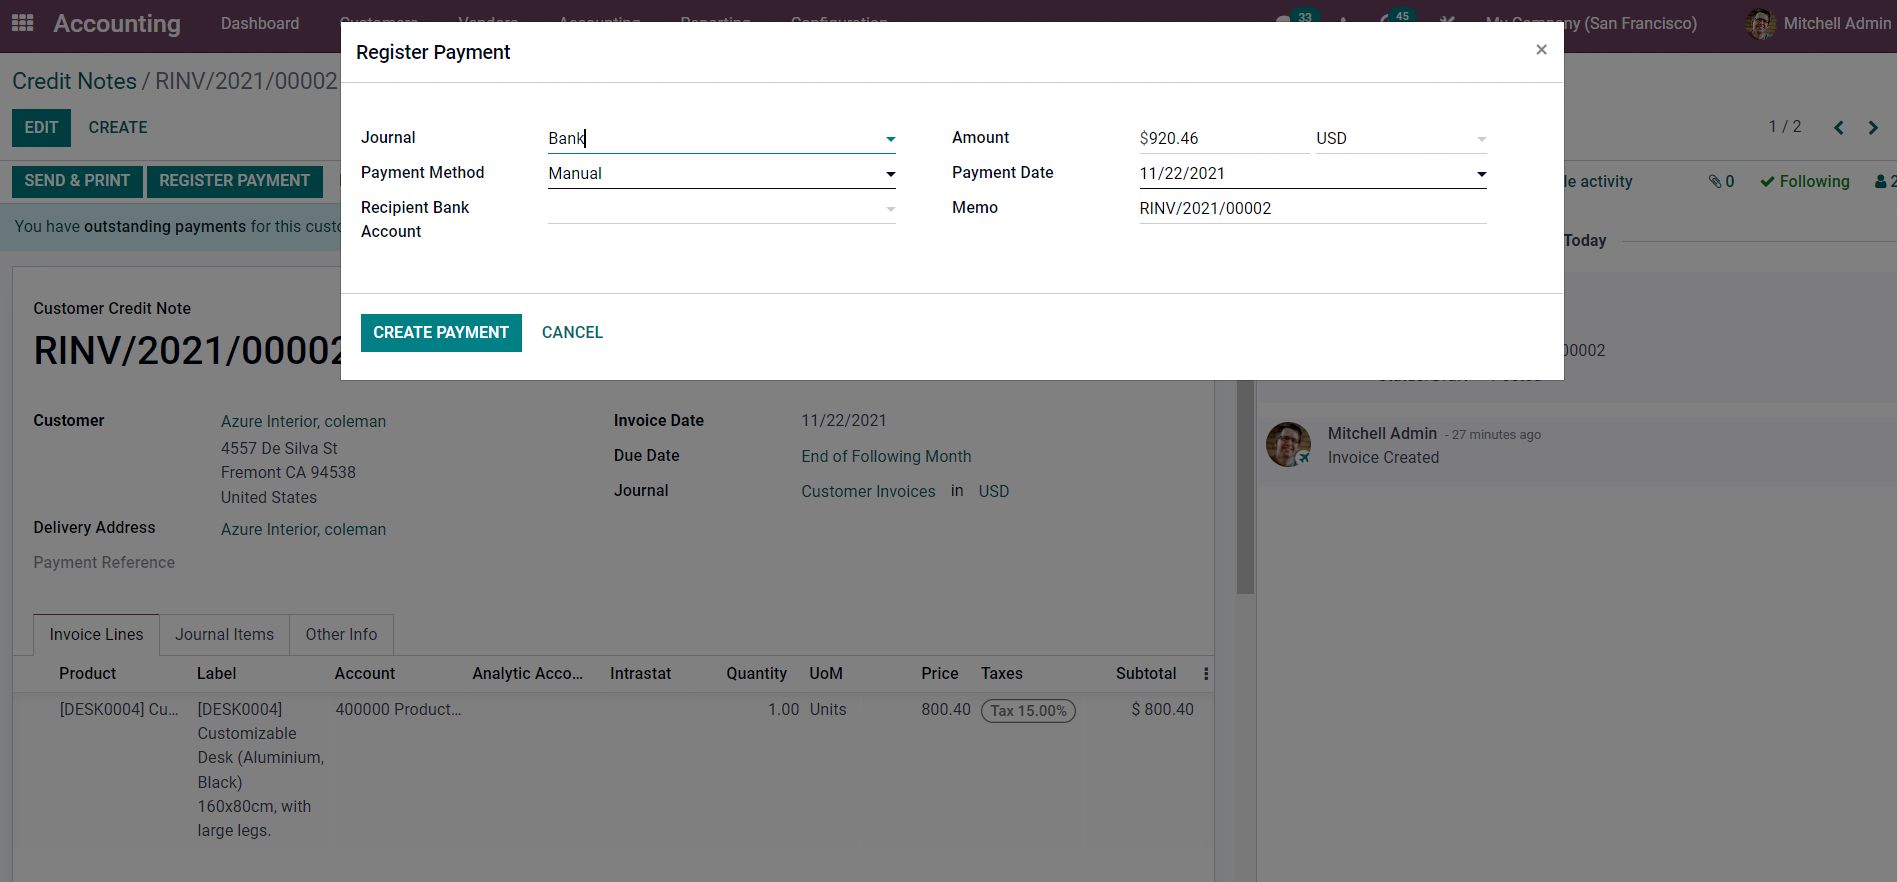
All of the details will be filled in for you, and you may adjust the setup from here. After you've completed the configuration, click CREATE PAYMENT to save the forms.
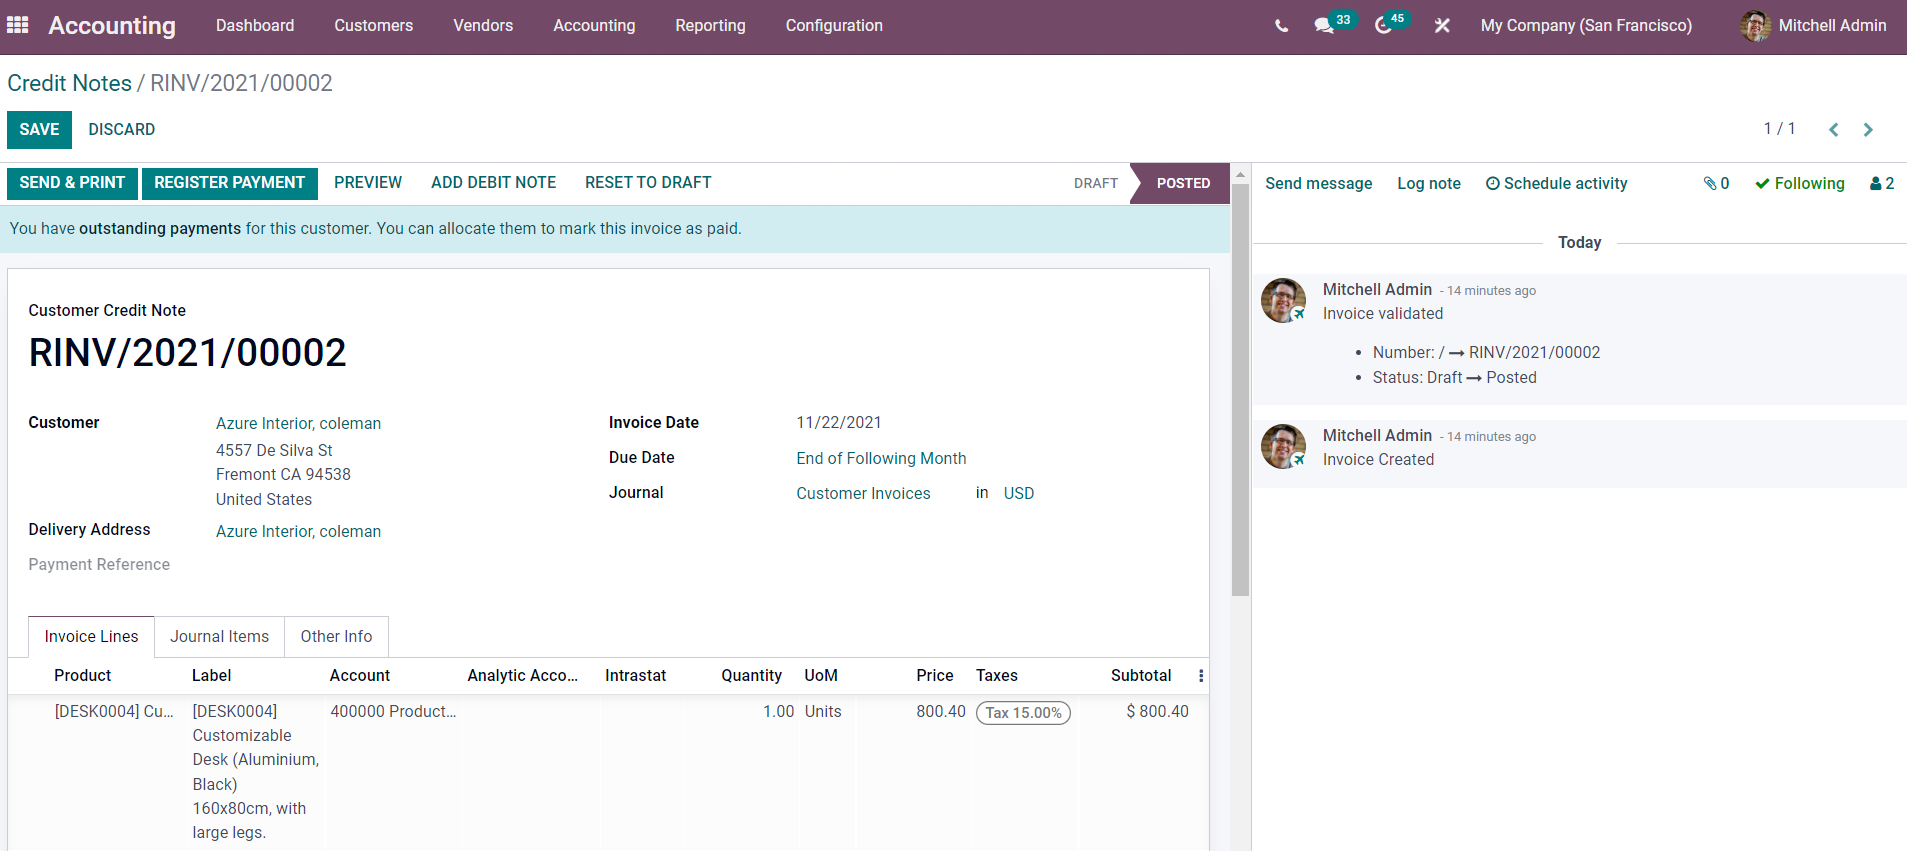
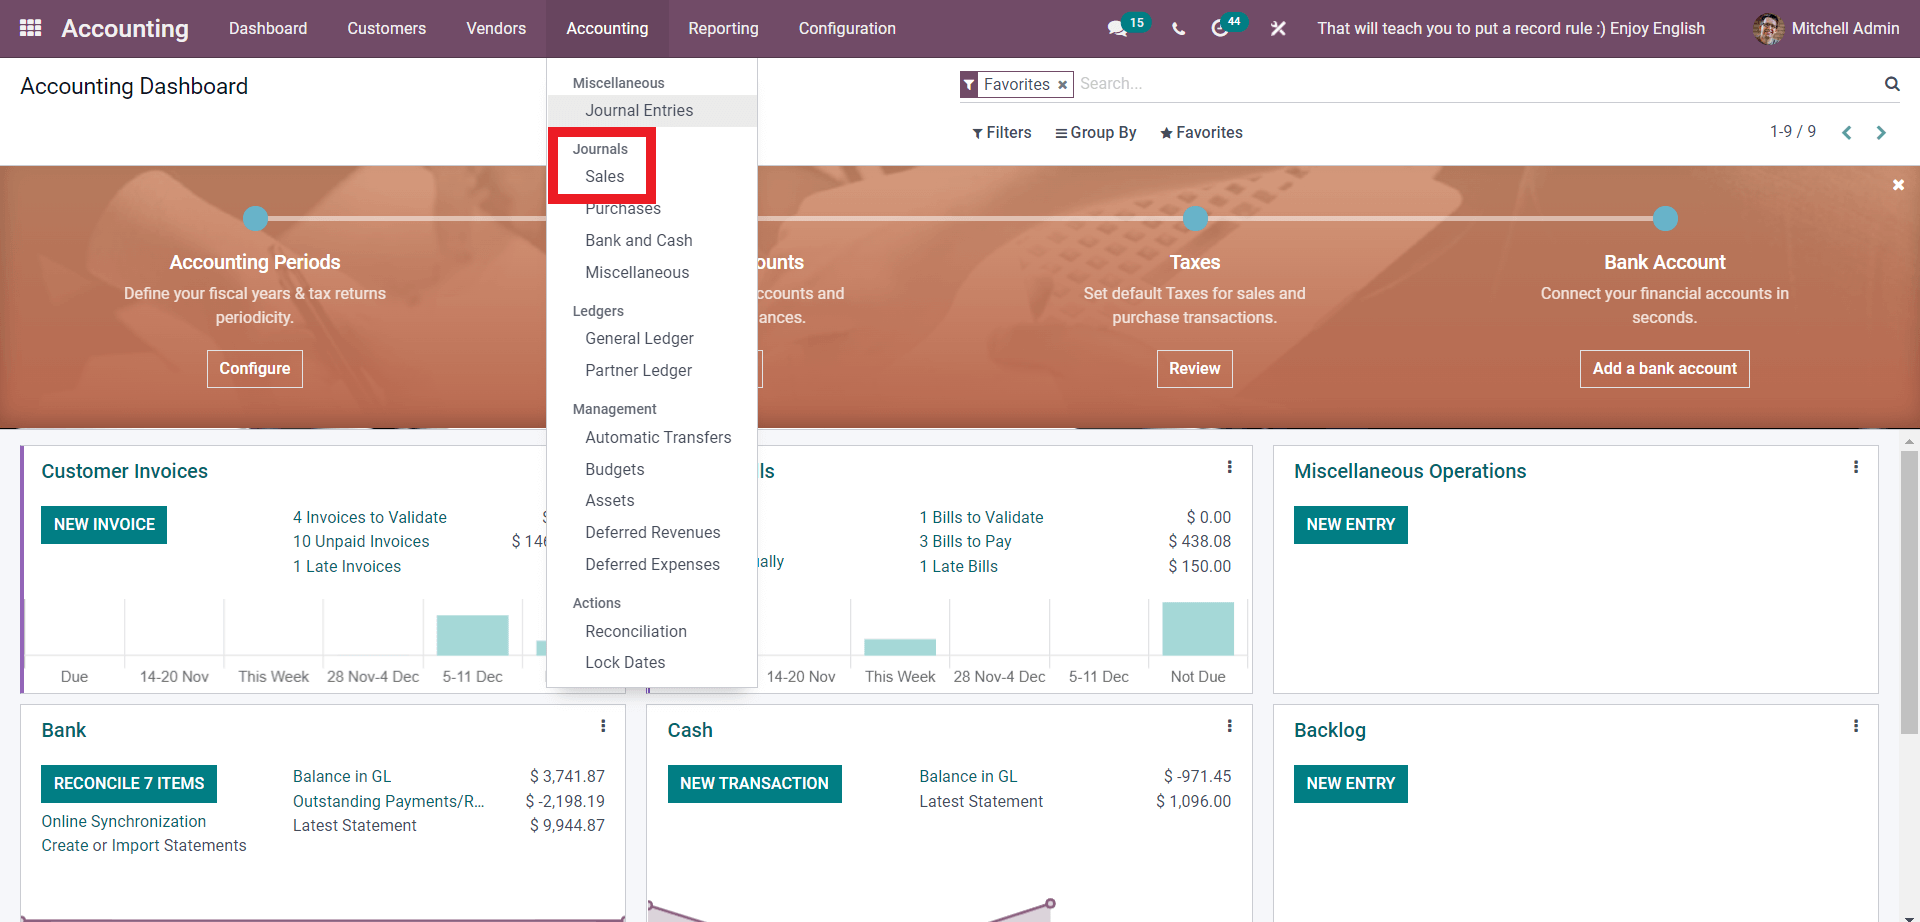
Following that, the Credit note will be seen in the Sales Journal. Select Sales under the Journal portion of the Accounting module's Accounting tab from the Dashboard, as shown below.
Following that, the Credit note will be seen in the Sales Journal. Select Sales under the Journal portion of the Accounting module's Accounting tab from the Dashboard, as shown below.

Odoo 15 Accounting Module