
Odoo 15 Accounting Module Invoice Management
Odoo 15 includes a number of advanced capabilities for invoicing administration, making it easier and more accessible for users. The Odoo 15. Accounting module makes it simple to create, design, customize, and manage invoices.
Create invoices on your own
To begin, you must build an invoice design that is unique to your company's theme and nature. Odoo makes it simple to access invoices. They are available in a variety of formats and designs, and you can quickly personalize your invoices using Odoo's extensive invoice design and customization options.
To design and create a completely customised invoice that is unique to your firm, go to the Accounting module's Invoicing tab under the Accounting module's Dashboard and configure the Company data to include in the invoice. Following the setups, you may proceed to the Designing a New Invoice phase, as illustrated below.
Odoo 15 Accounting Module Invoice Management
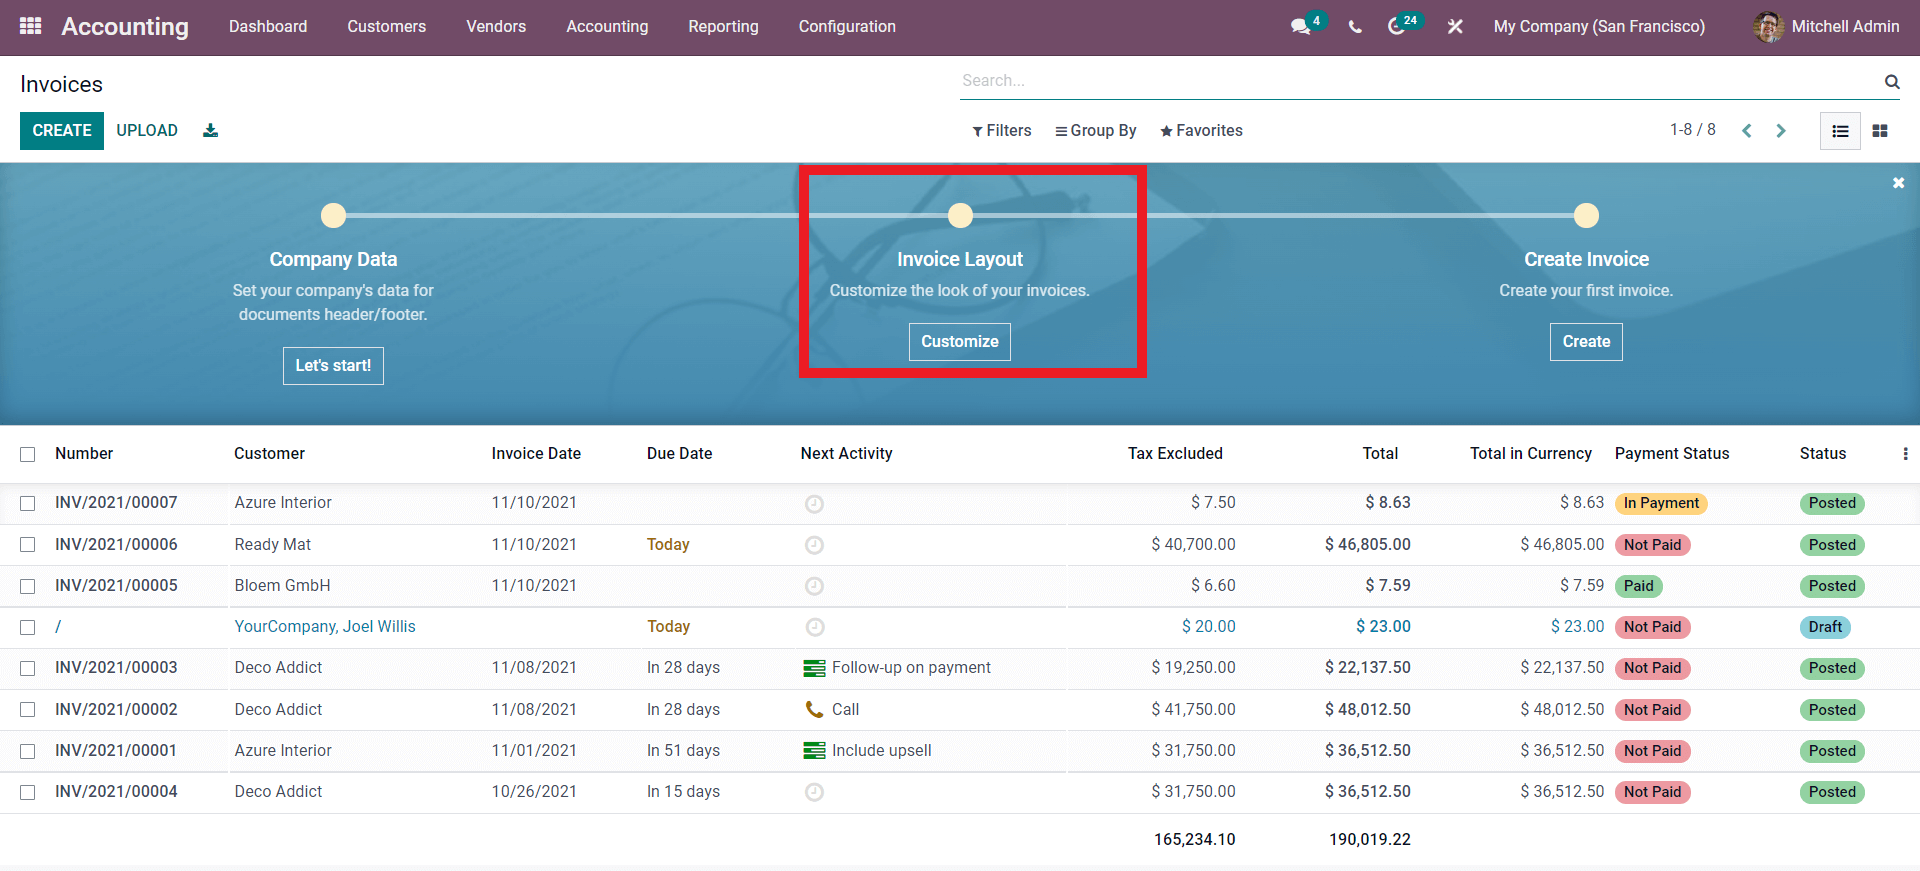
Odoo makes creating invoice layouts simple. It is an important aspect of invoice management since the layout frequently indicates a corporation or a business and its professionalism in invoice management.
With the invoice layout choices provided below, Odoo will allow you to create professional-level invoices with ease.
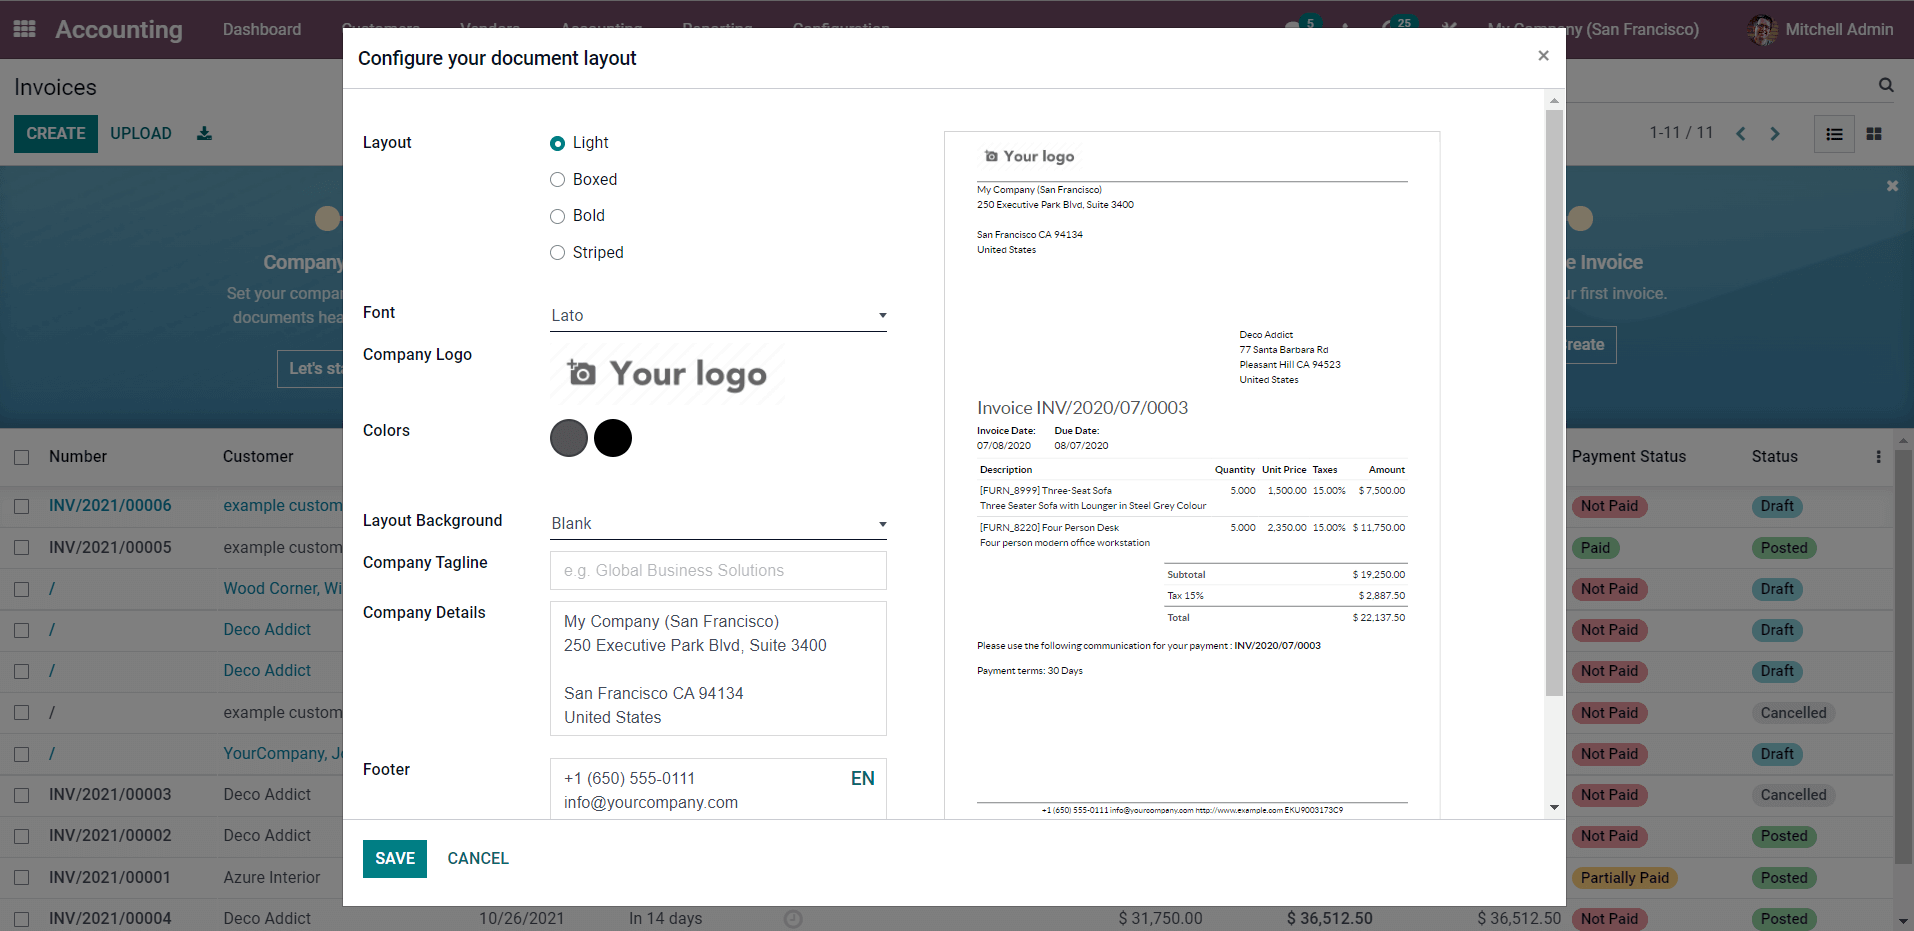
This is the area where you can customize the invoice's layout. On the setup page, there are a number of advanced preinstalled features. To begin with, you have a variety of alternatives for laying out the plan. Light, Boxed, Bold, and Striped are some of the alternatives.
From the right side of the screen, as seen below, you can observe the Invoice alter in real time.
To construct the right invoice layout, choose between the layouts and keep an eye on the real-time changes. After you've decided on a layout style, you'll need to decide on a font for the invoice to be printed in. To create your invoice layout, you will have a variety of fonts to pick from.
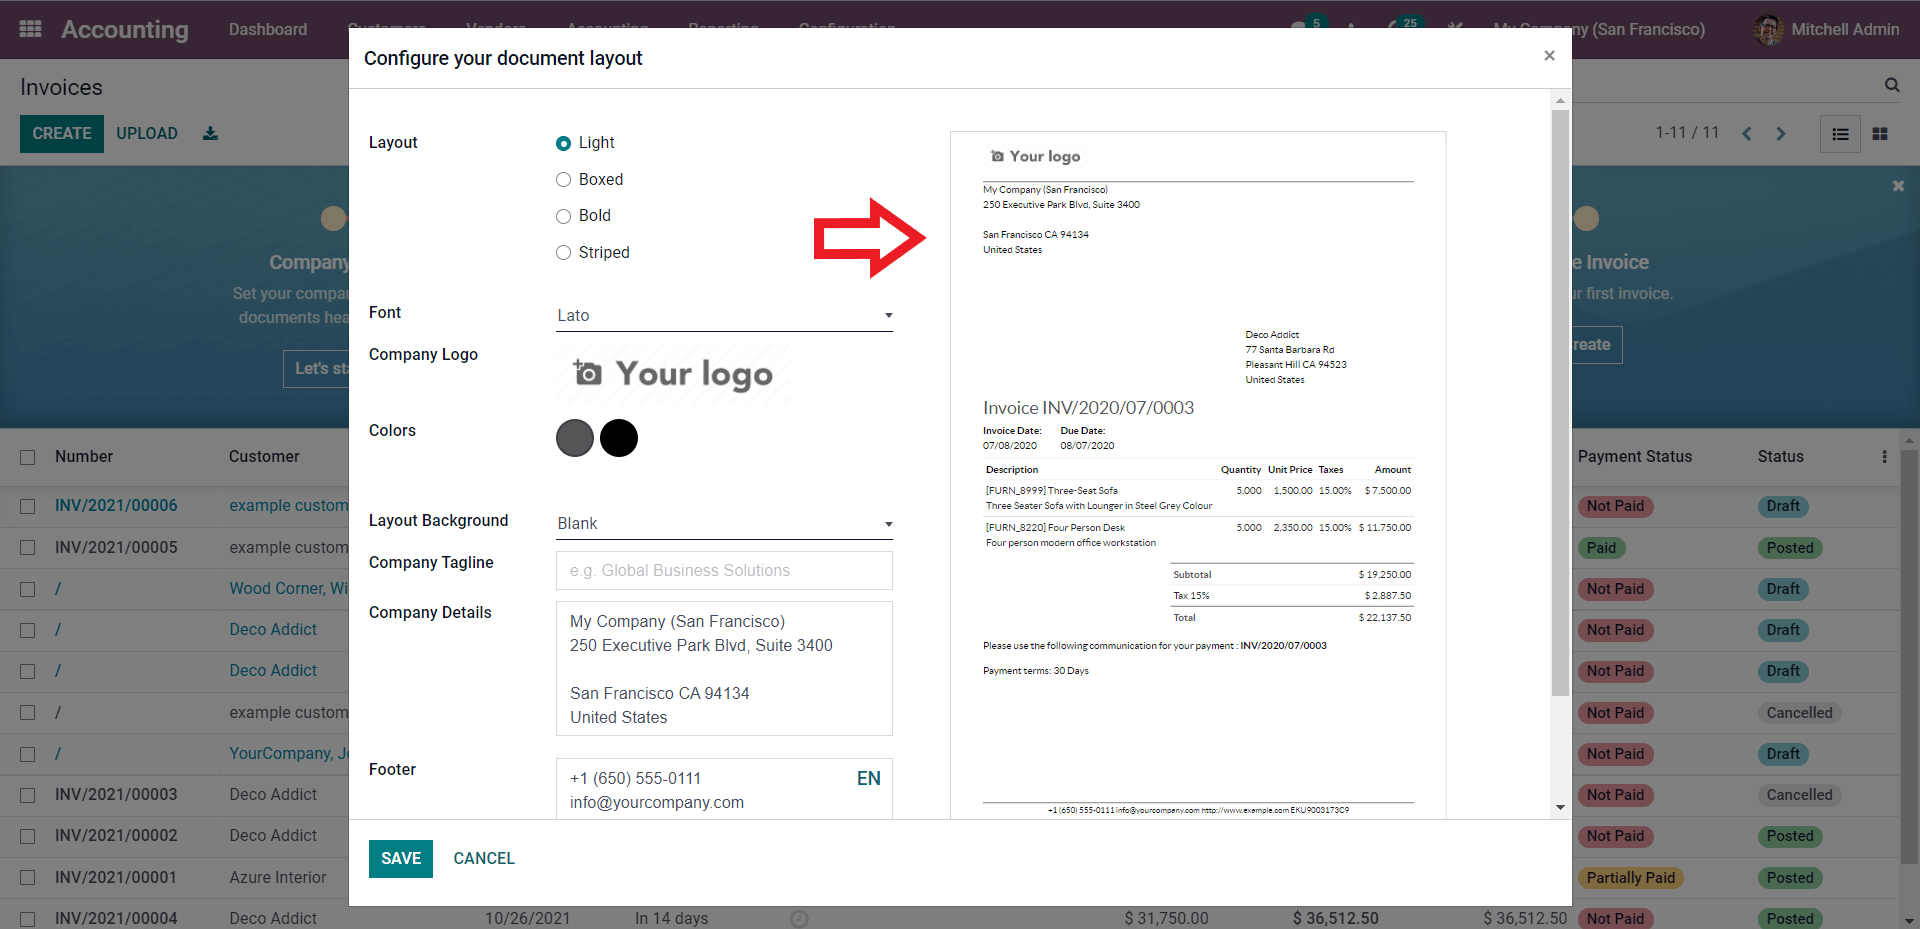
After you've chosen a font, head to the company area and pick and upload your firm's logo, which will appear on the invoice. Choose a color from the color area, and that color will be the color that the content is shown in. The invoice number, as well as other information, will be displayed in the color of your choice. You have hundreds of color selections to choose from, as shown.
You can choose from the colors from this section. Choose the layout background from the drop-down options as shown below.
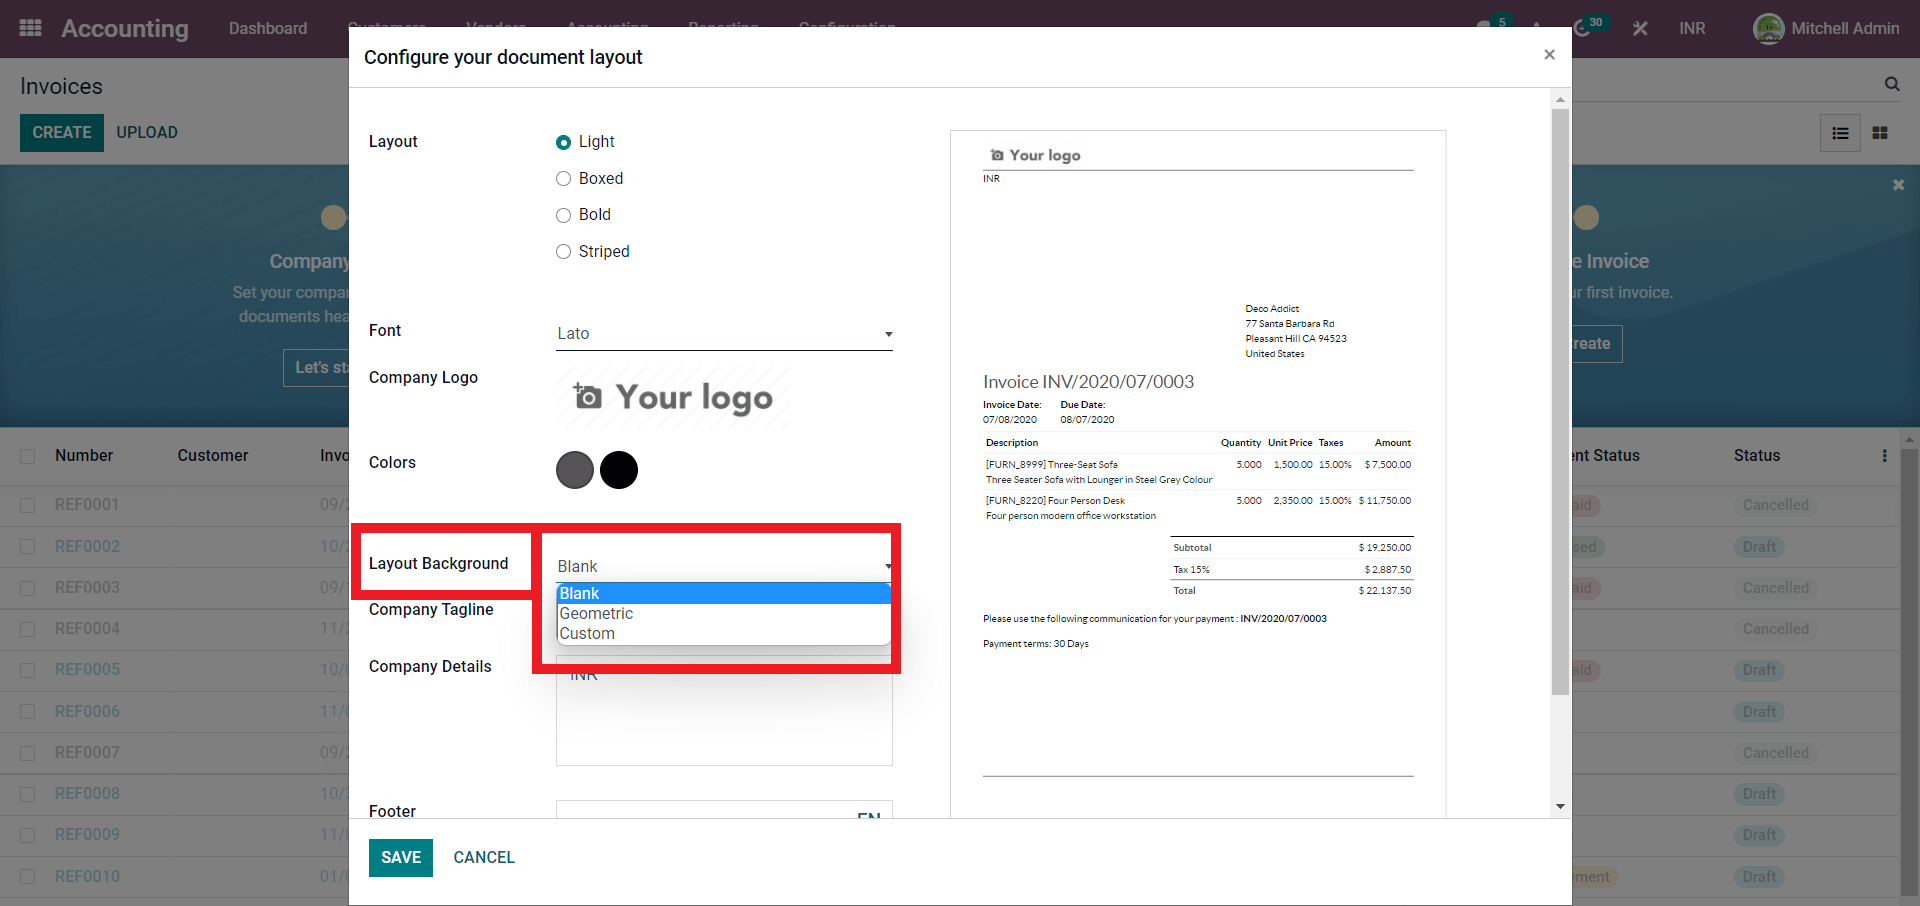
To change the background of your invoice's layout, click the layout background button. Enter the Company tag line after selecting the layout background. Your company's slogan will appear on the invoice as a result of this. The next step is to fill out the company information. From the section about the company's information. After that, you can add a footer to the invoice, which will be presented as a footer.
After you've finished configuring the invoice, click the Download PDF preview button to get a preview of it. Because the invoice is generated automatically by Odoo, you should double-check the information you submitted in the settings section.
Invoices are sent to the customer. The Invoices can be found on the Customer tab of the Accounting module. Under the Customer tab, select Invoices from the drop-down menu. As seen below, a page with a list of previously created invoices will appear.
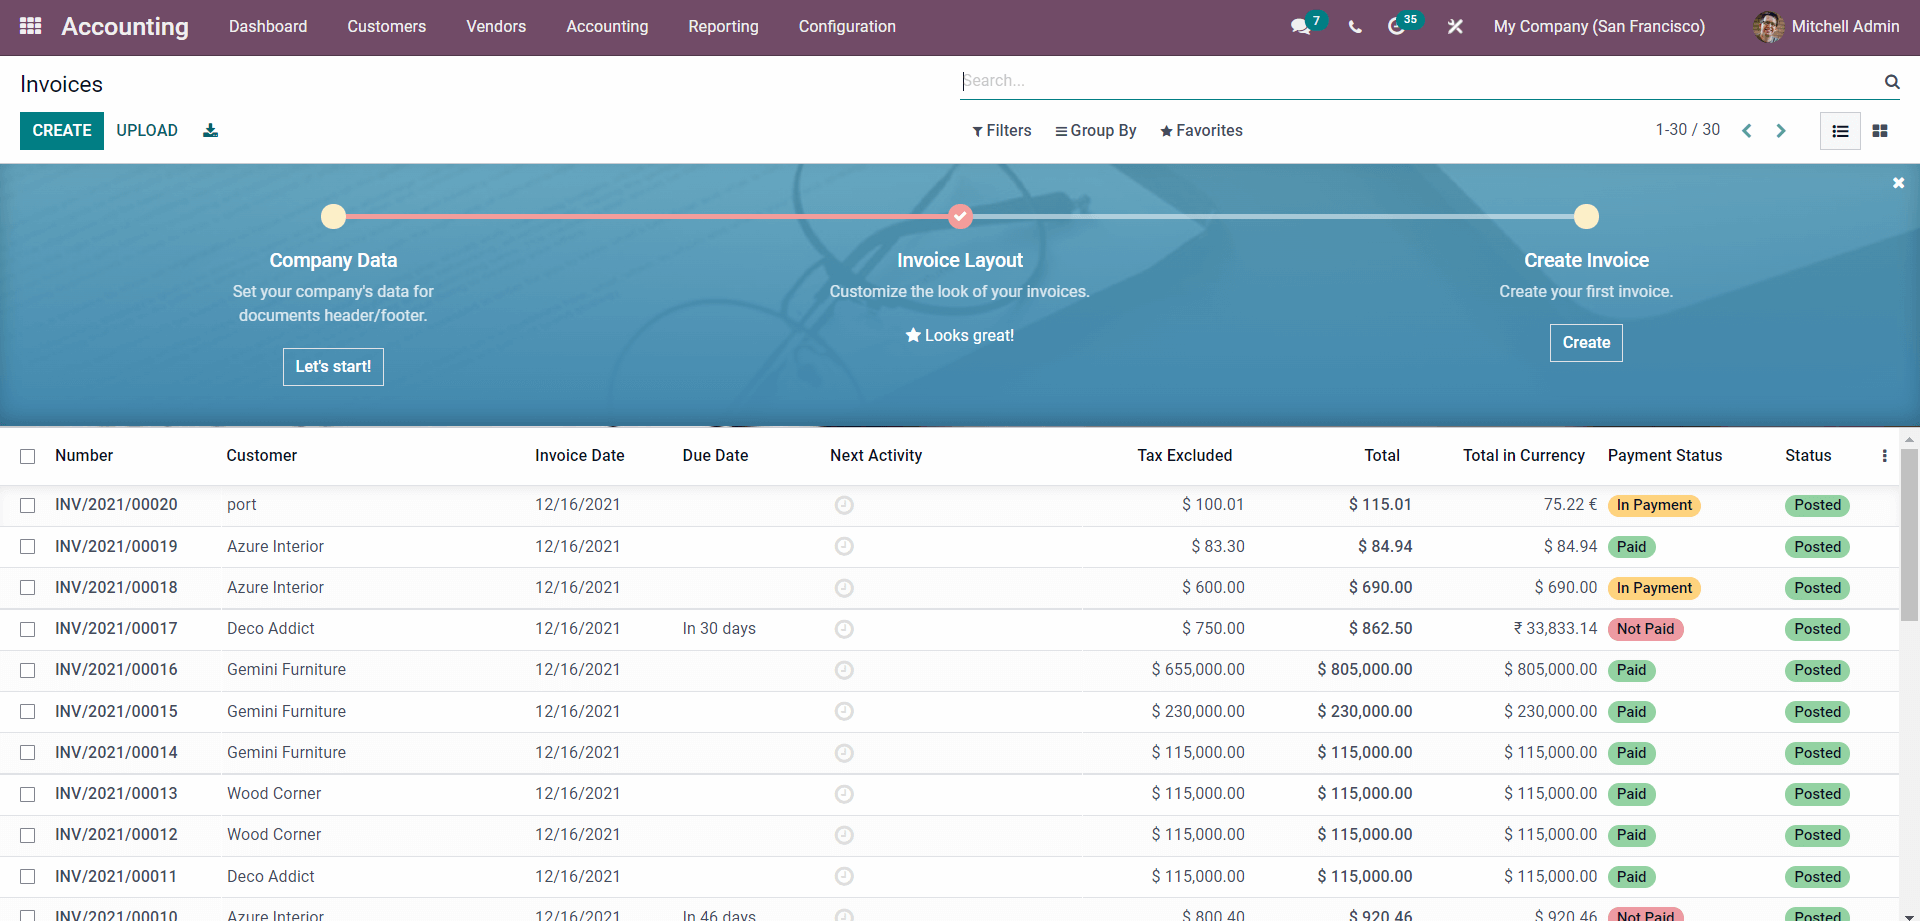
This is where all of the client invoices from the Accounting module will be presented. You may utilize the Filters and Grouping options to give yourself the most flexibility in reading invoices while also reducing clutter.
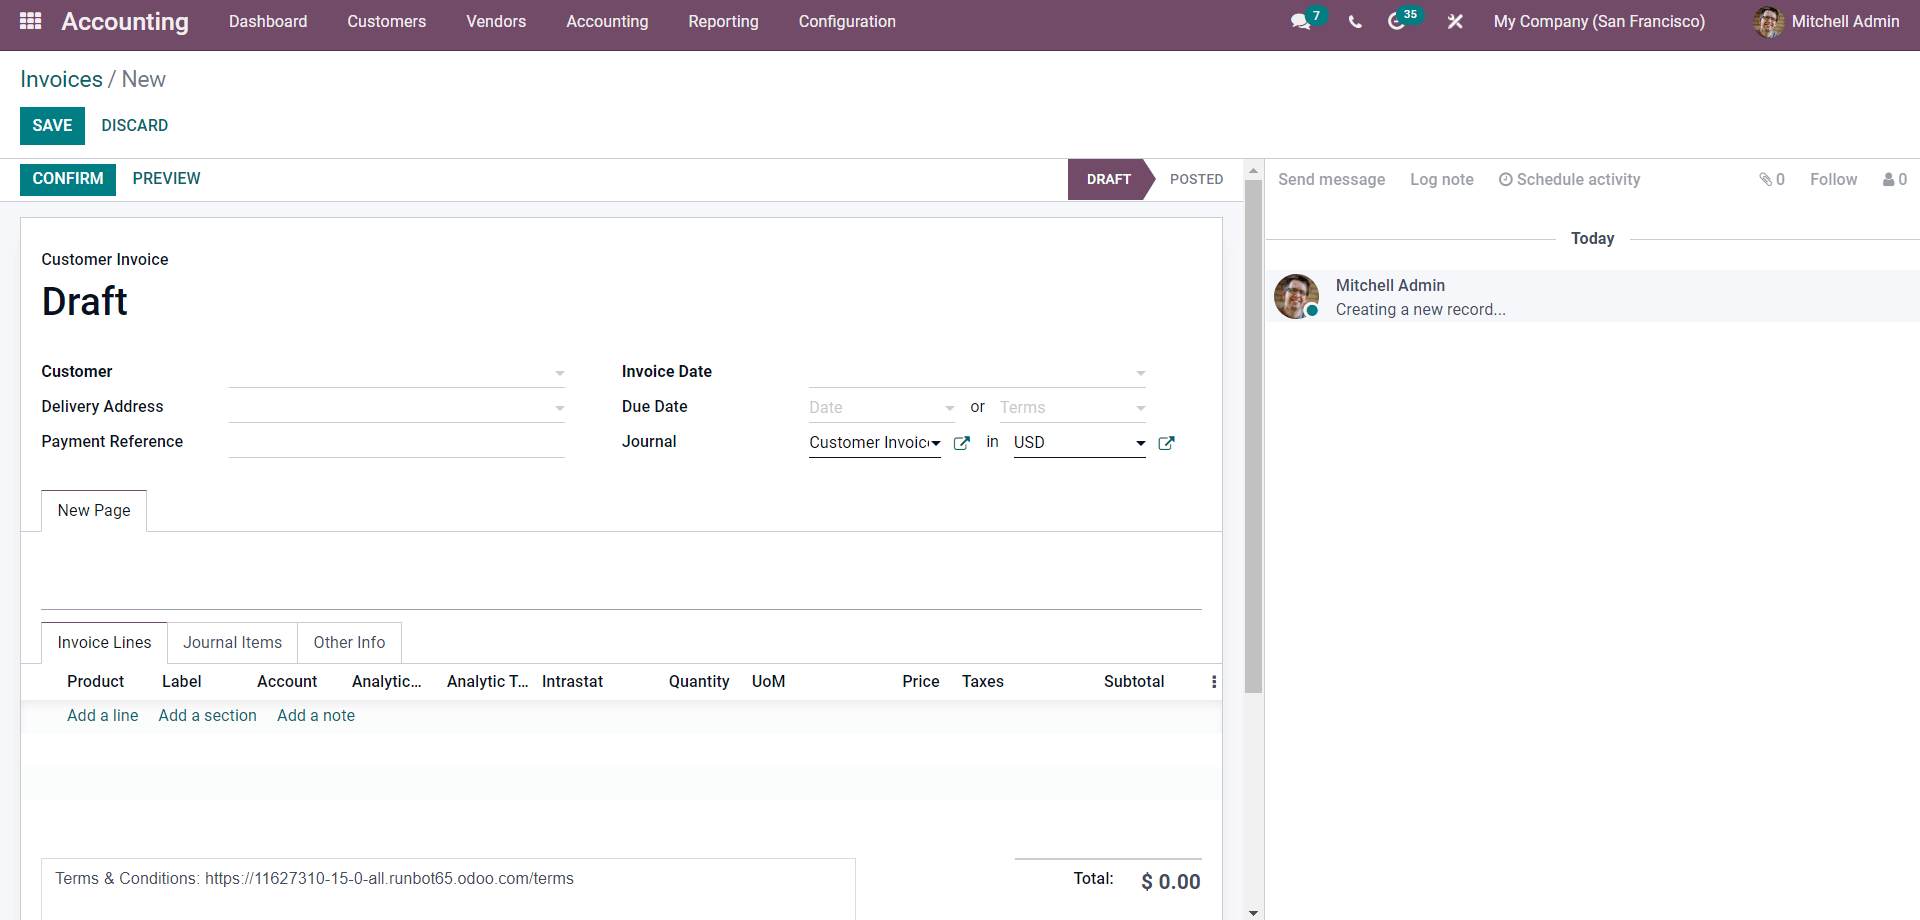
In order to produce a new invoice, follow the steps below. When you click the CREATE button, a configuration screen appears, as seen below.
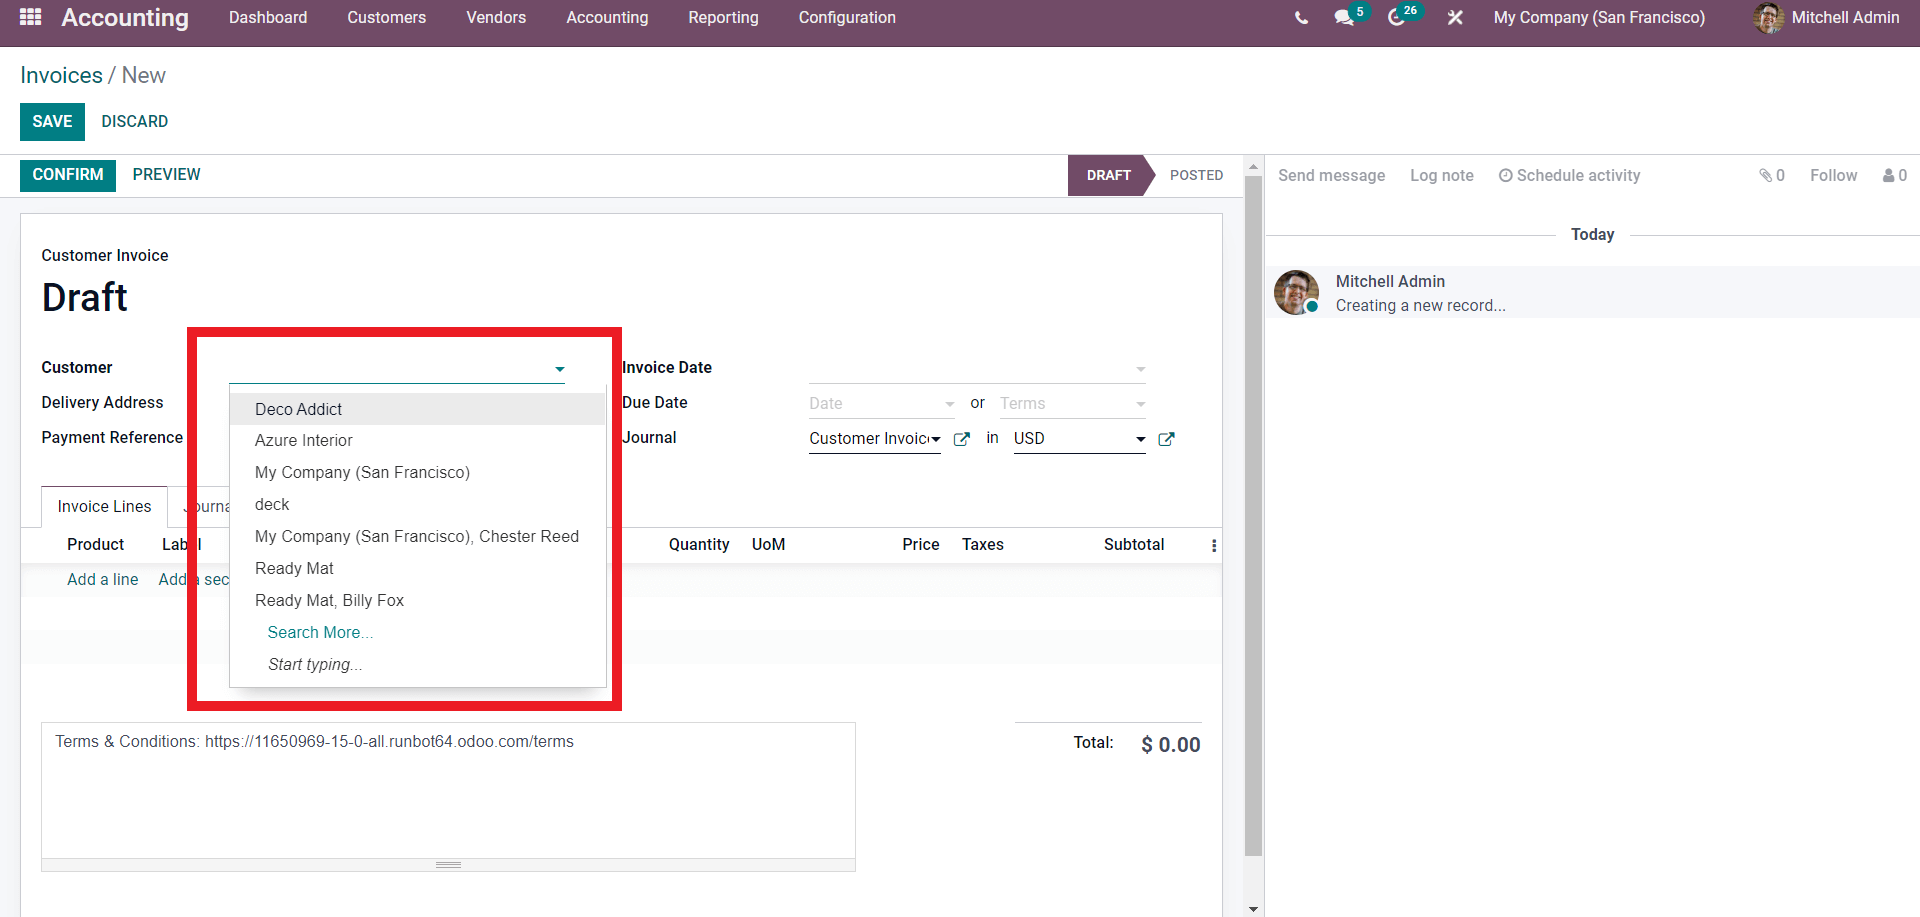
In the customer field, type the name of the customer. A drop-down list of customers will appear when you click the Field next to 'Customer,' as seen below.
To see more clients, select Search more from the drop-down menu, as shown below.
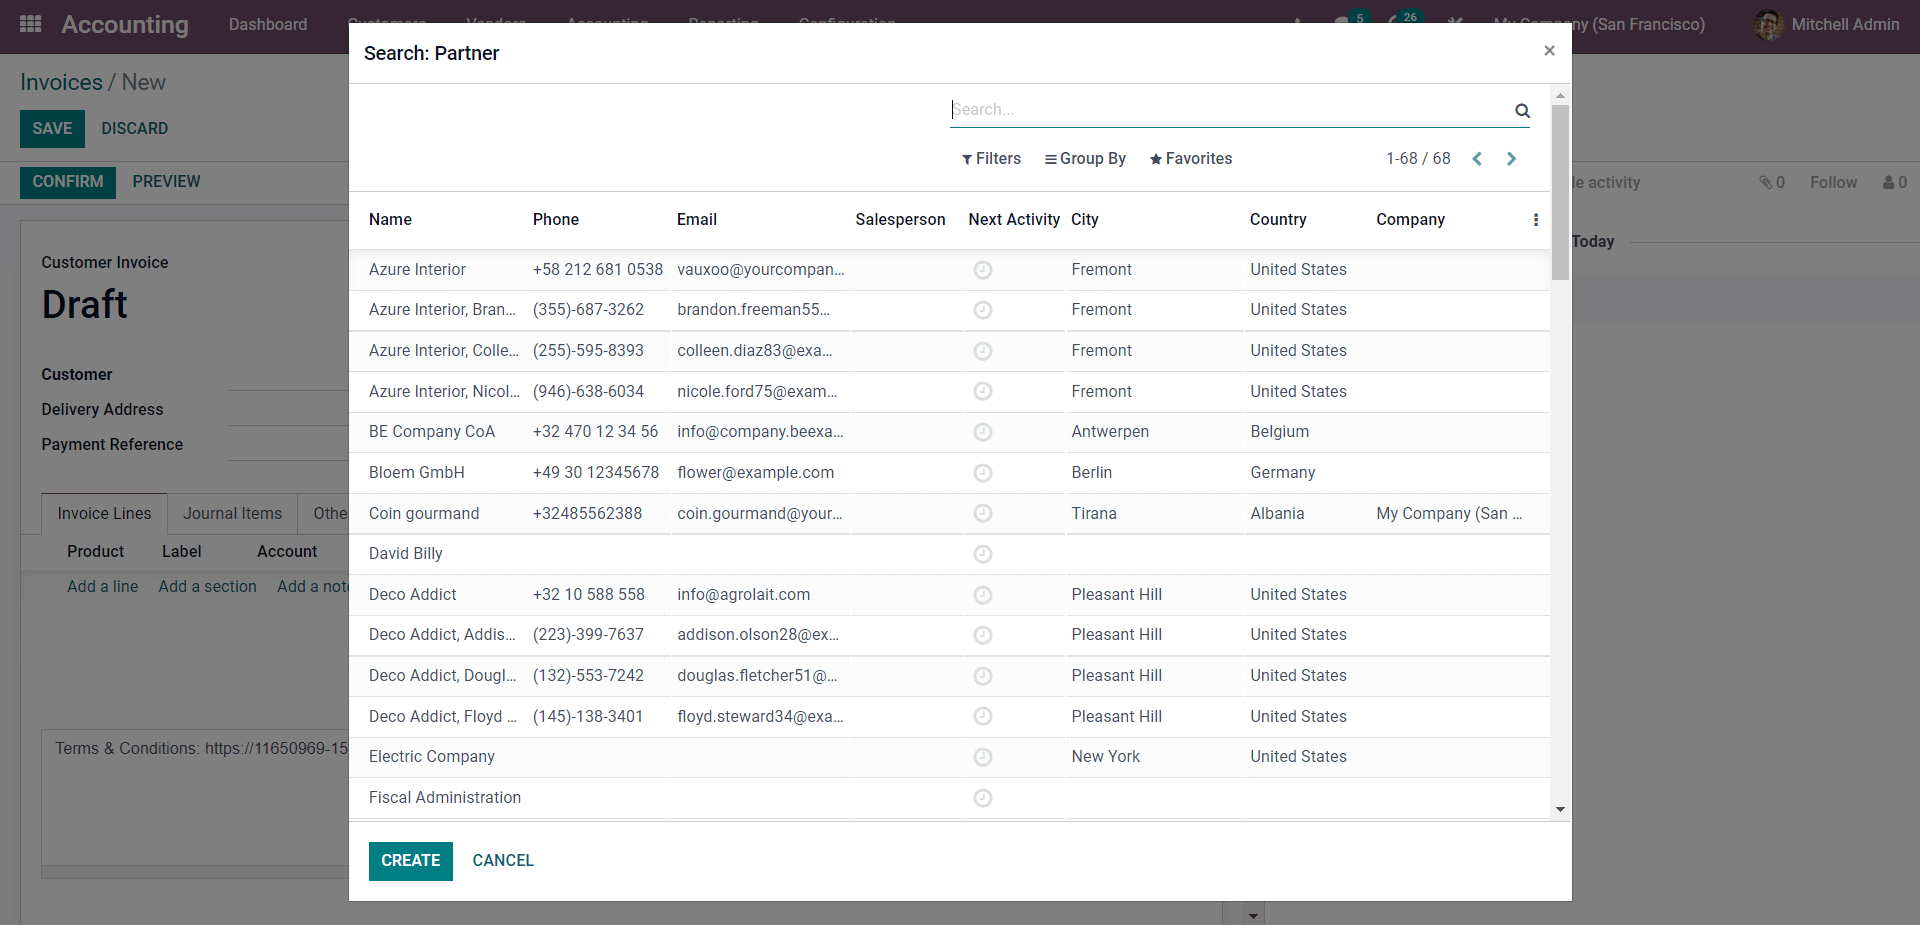
You can select from the list, and if the client is new, click the CREATE button to begin the process of creating the customer. You can add the Invoicing Date after you've added the customer, as seen below.
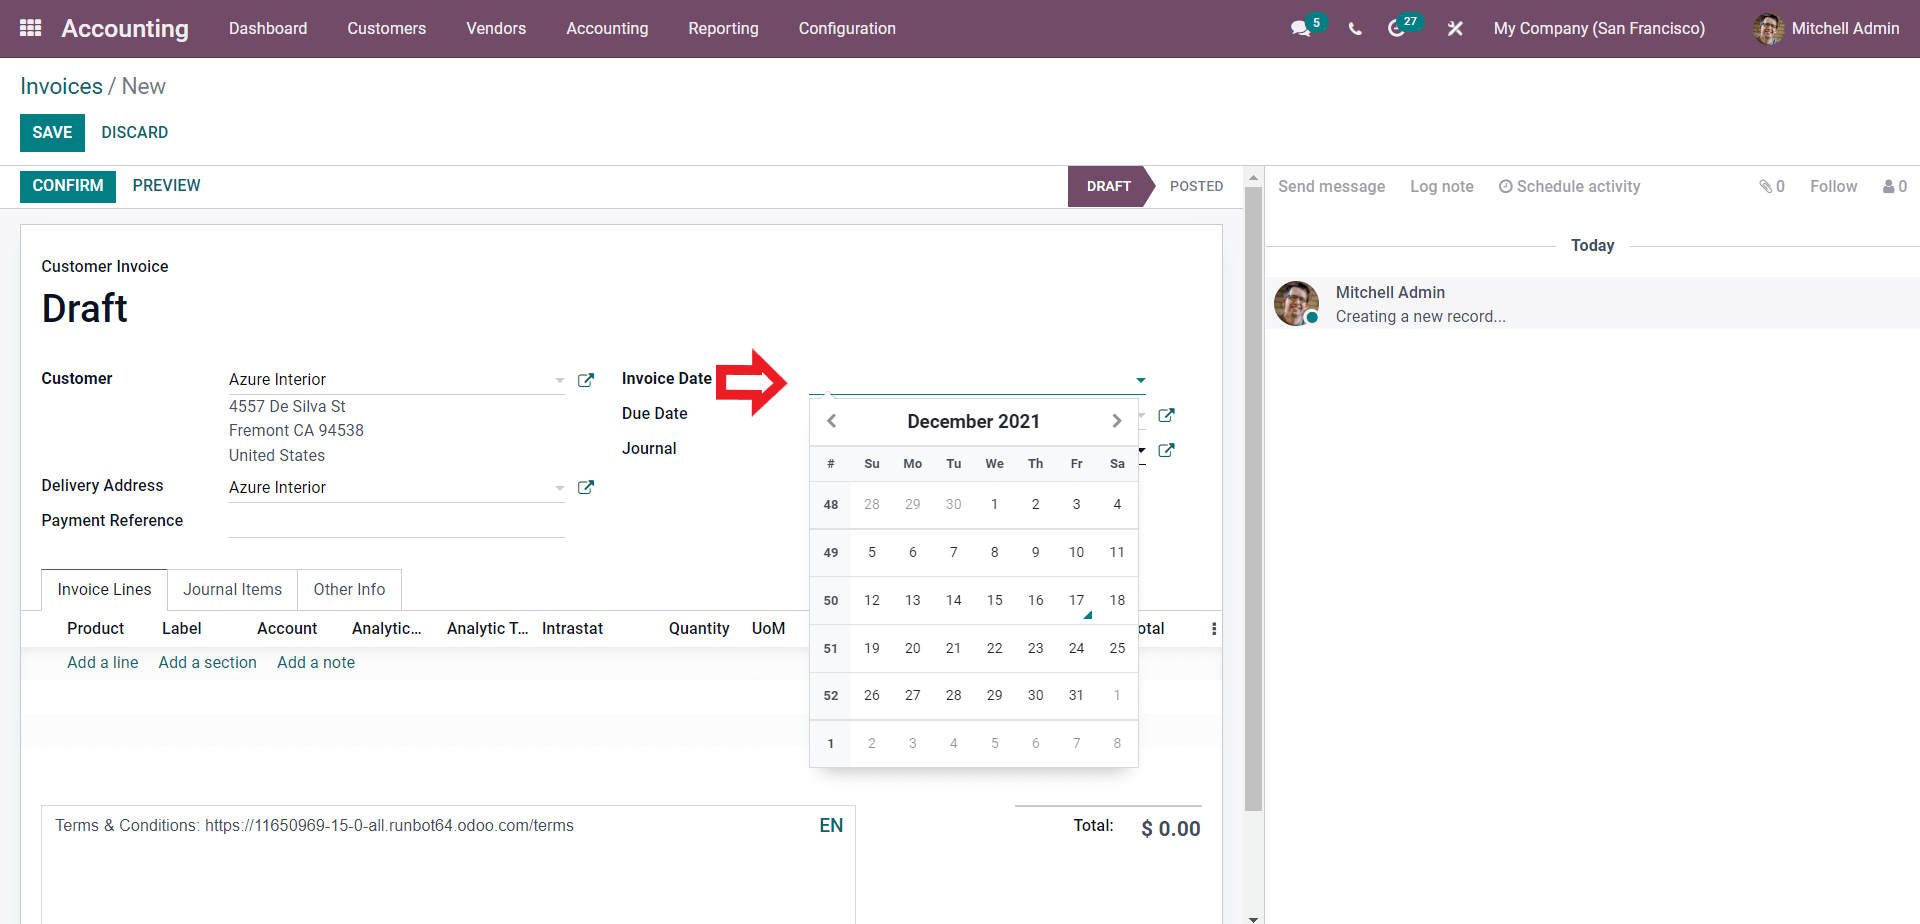
Here you can choose the billing date. Invoice management is heavily influenced by the invoicing date. Based on the invoice dates, Odoo estimates invoice-to-customer interactions. You can also set the invoice's due date. Setting Due Dates allows you to efficiently collect revenues on time, and you can use Odoo's powerful follow-up features to automatically follow up on your customers on invoice dues.
You can assign or add a journal to handle the invoice entry. You can simply manage and edit invoices by creating specific journals based on the type of the invoice. If the 'Payment Reference' field is required, you have the opportunity to add the Payment reference. Finally, go to the Invoice tab and click on 'Add a line' to add the products to the invoice. A new field or line will be formed, and clicking on the Product line will bring up a drop-down list of products, as illustrated below.
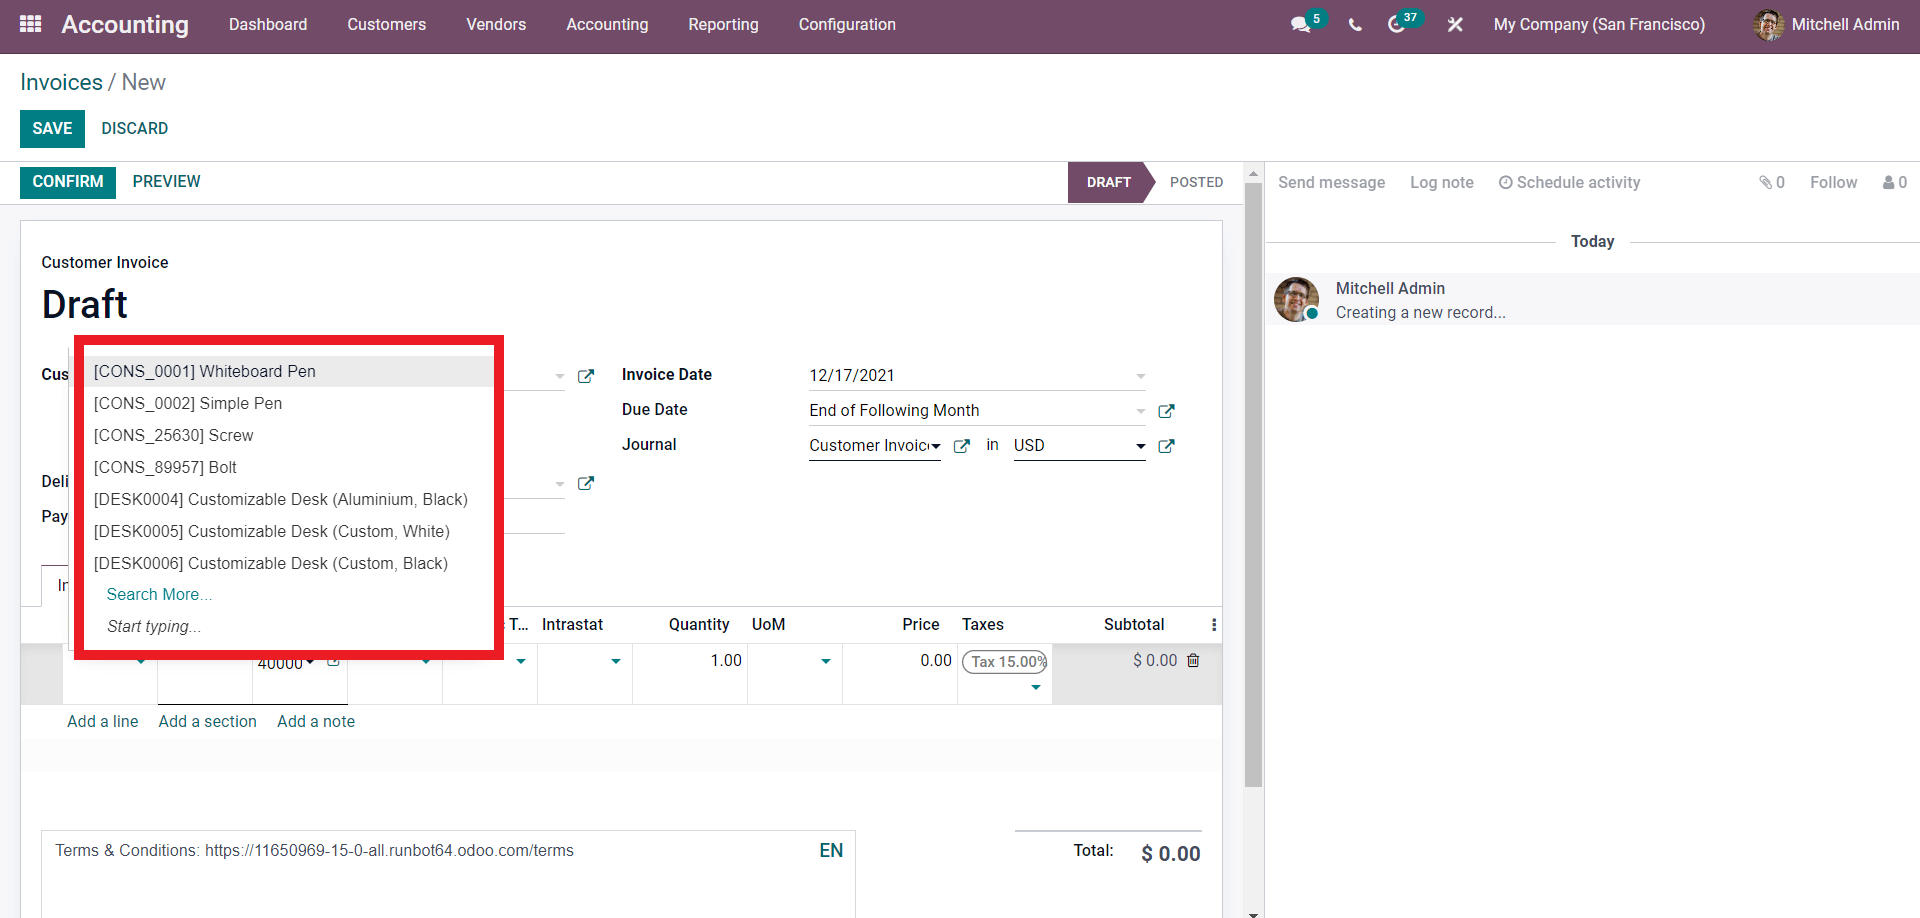
Click on "Search more" to expand your search. Simply click on the product you wish to add to the invoice, and it will be added immediately. With accordance to the arrangement that you have created with the customer, you can adjust the quantity that must be supplied to the customer, as well as the pricing and tax details on the product.
After you've finished configuring everything, click the CONFIRM button to move on to the next stage of the invoicing process, as seen below.
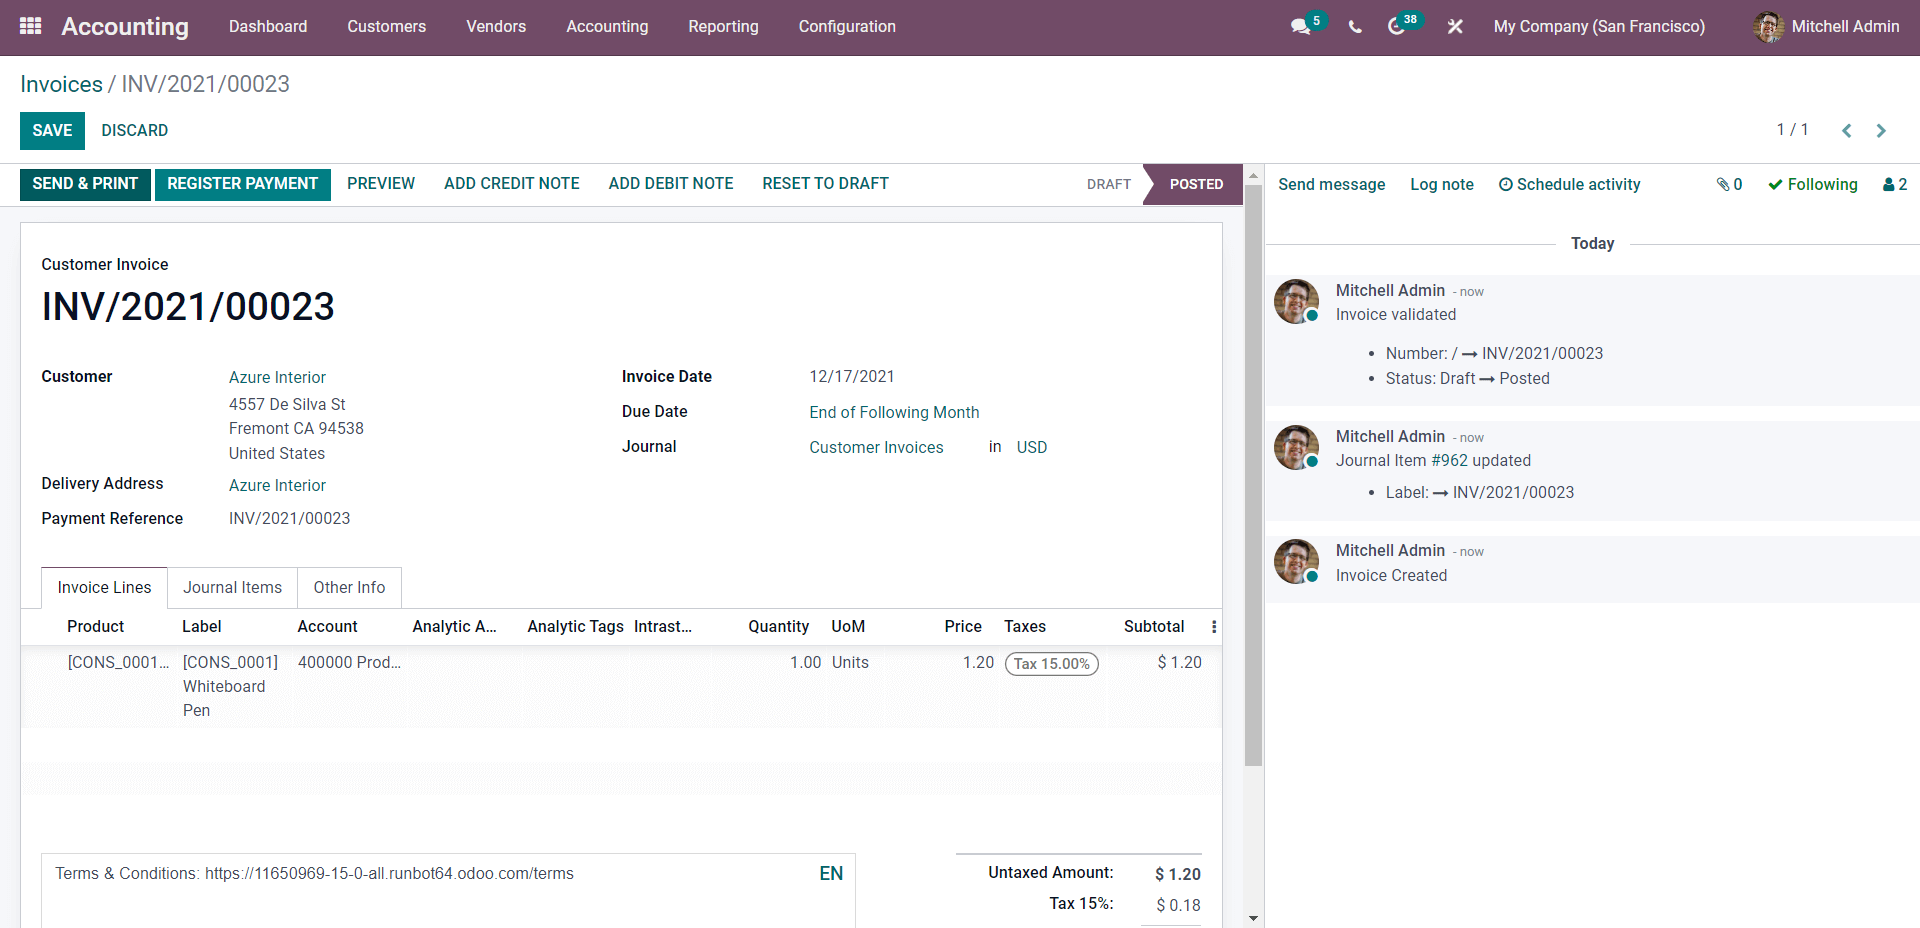
This is the registration page for payments. The customer form allows you to confirm the payment. After you've confirmed the customer's payment, click the REGISTER PAYMENT button.
To ensure that you receive payments on time, Odoo allows you to add payment terms with your invoices. Odoo makes it simple to set up payment arrangements.
Payment Conditions
Payment Terms are guidelines that you can include on an invoice that specify how much time the customer has to pay for the product or services you've offered them, or that you can give them through professional invoices. This allows you to get paid faster and will assist your consumers in making all of their transactions as promptly as possible. This functionality is simple to set up in the Accounting module. From the module's dashboard, select the Configuration tab, then Payment Terms from the drop-down under the Invoice section, as shown below.
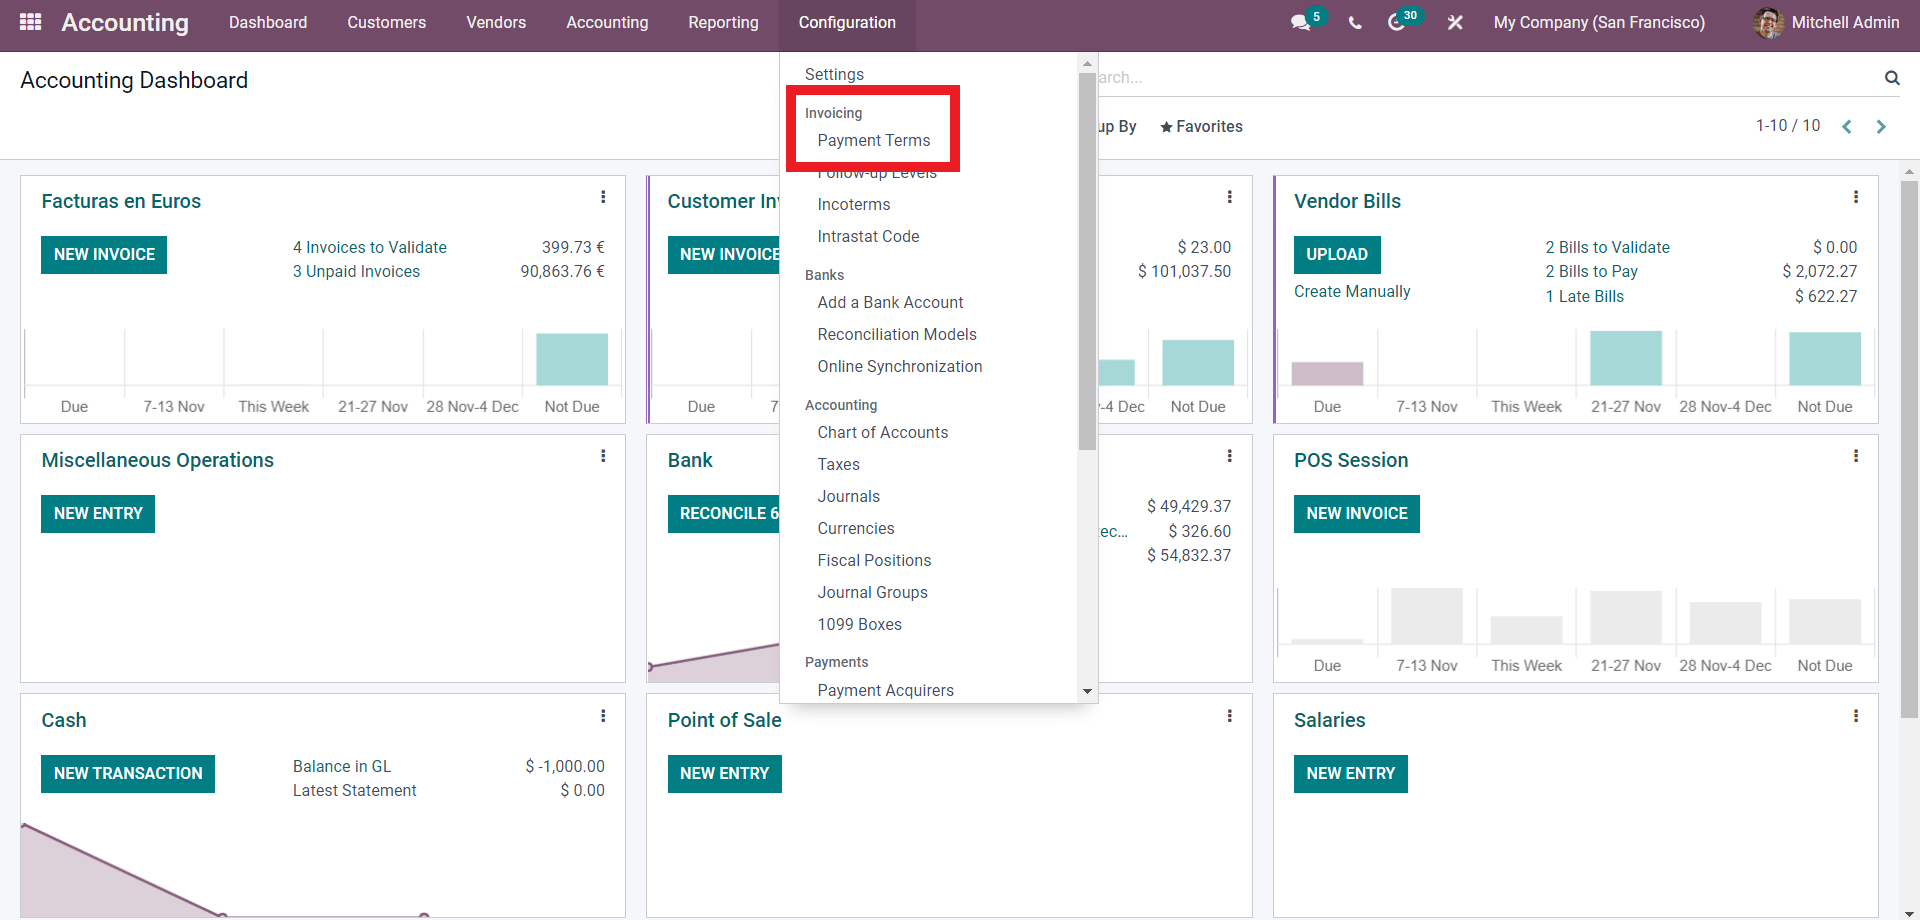
This will lead you to the Payment Conditions page, where you may view and use all of your previously generated payment terms, as shown below.
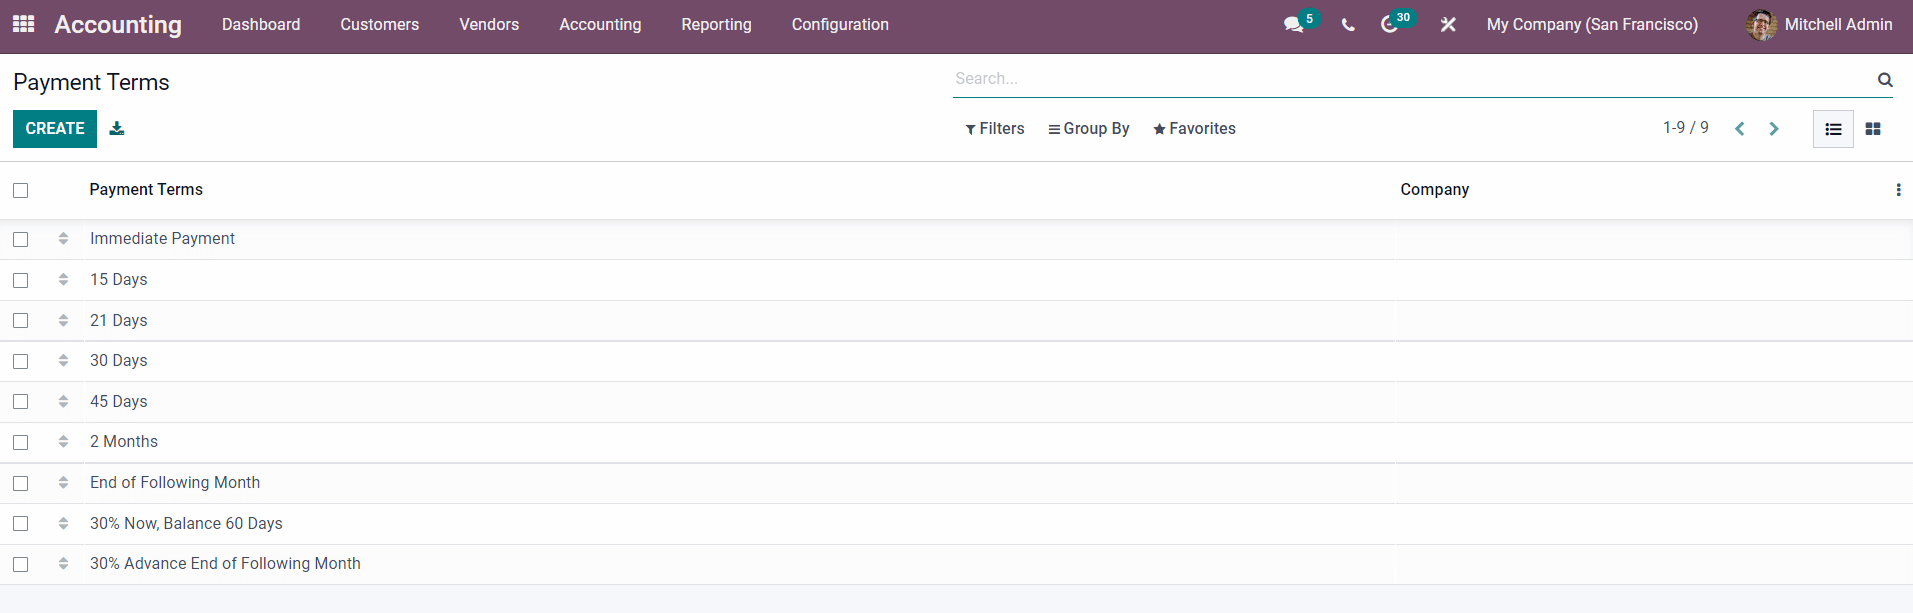
To configure and set up a new Payment Term, click the Create button, as shown below.
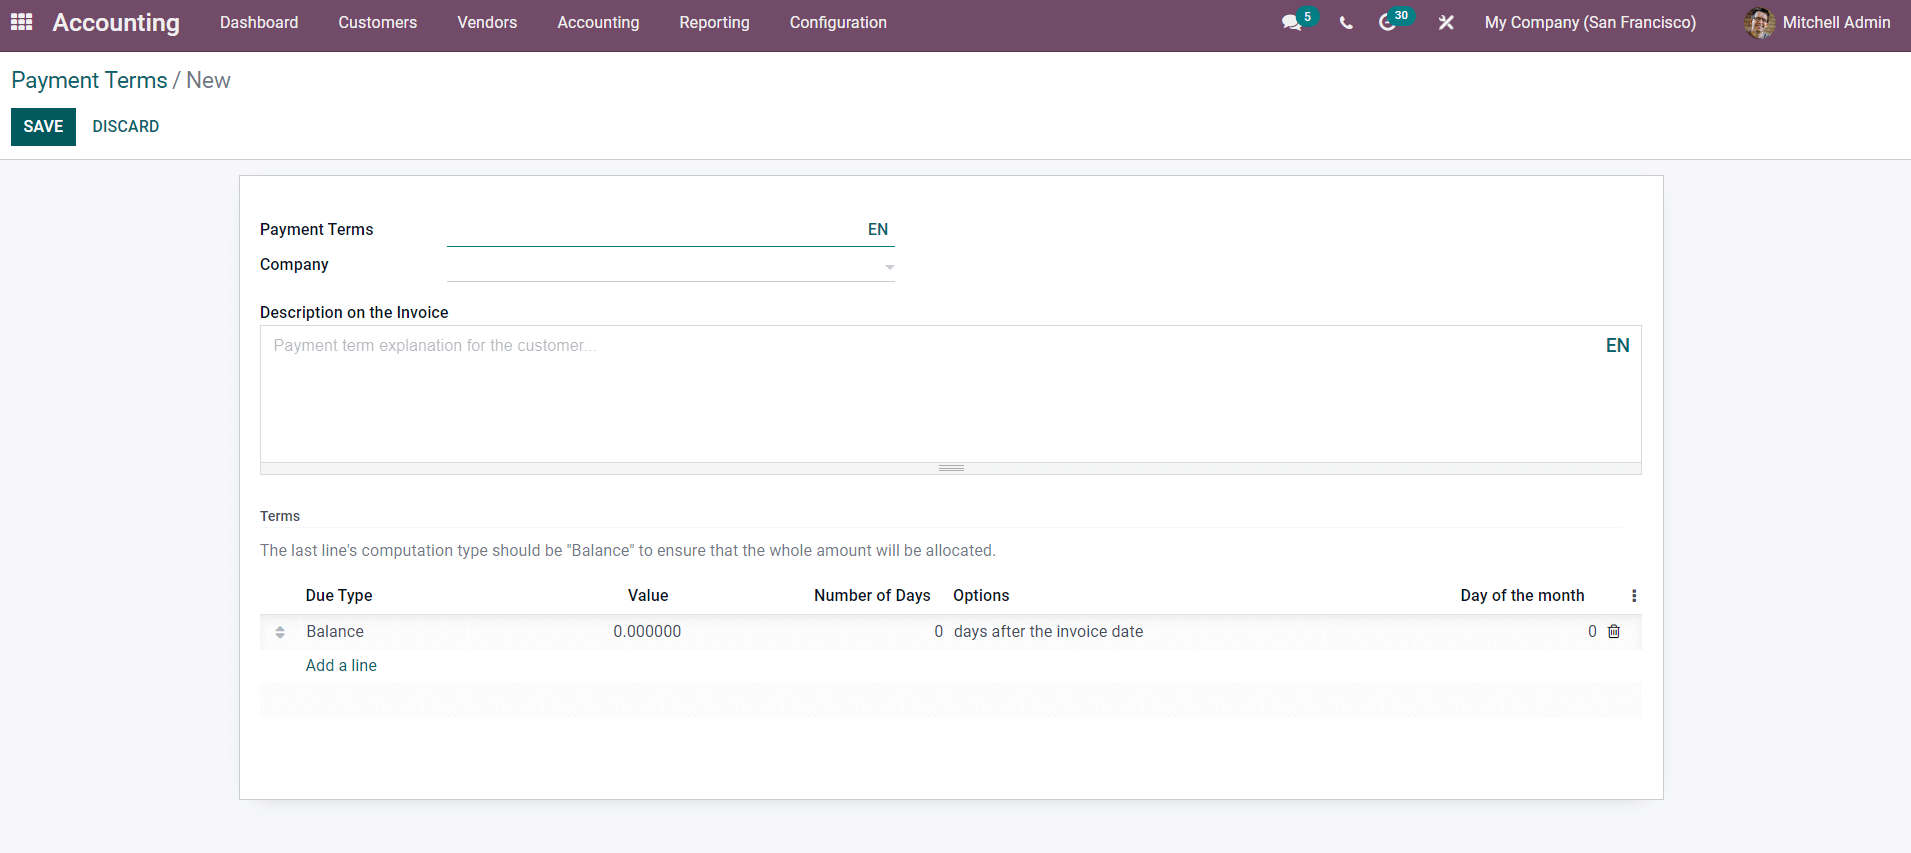
From here, you can easily create a new Payment Term. Choosing a name for a new Payment term is the first step in the process. Enter the Term and choose the Company from the Payment, Terms column. The Payment Term should be justified by the Term. This makes it simple to manage the Payment Terms. From the Company section, select the company you want to work for.
You can rapidly write a description to be printed with the invoice using the Description on the Invoice option. The Payment Term can be explained in the description space. The report should be brief and accurate so that customers can comprehend it at a glance, or you can go into more detail about the Payment Term. Once you've given the description, proceed to the Payment Term Tab below for more sophisticated options. As shown in the figure below, the configuration section is allocated for configuring the Due date specification on the Payment term.

As shown in the highlighted portion of the image above, click the Add a line button. This will enable you to create a Term. As seen below, a settings tab for configuring the term will appear.
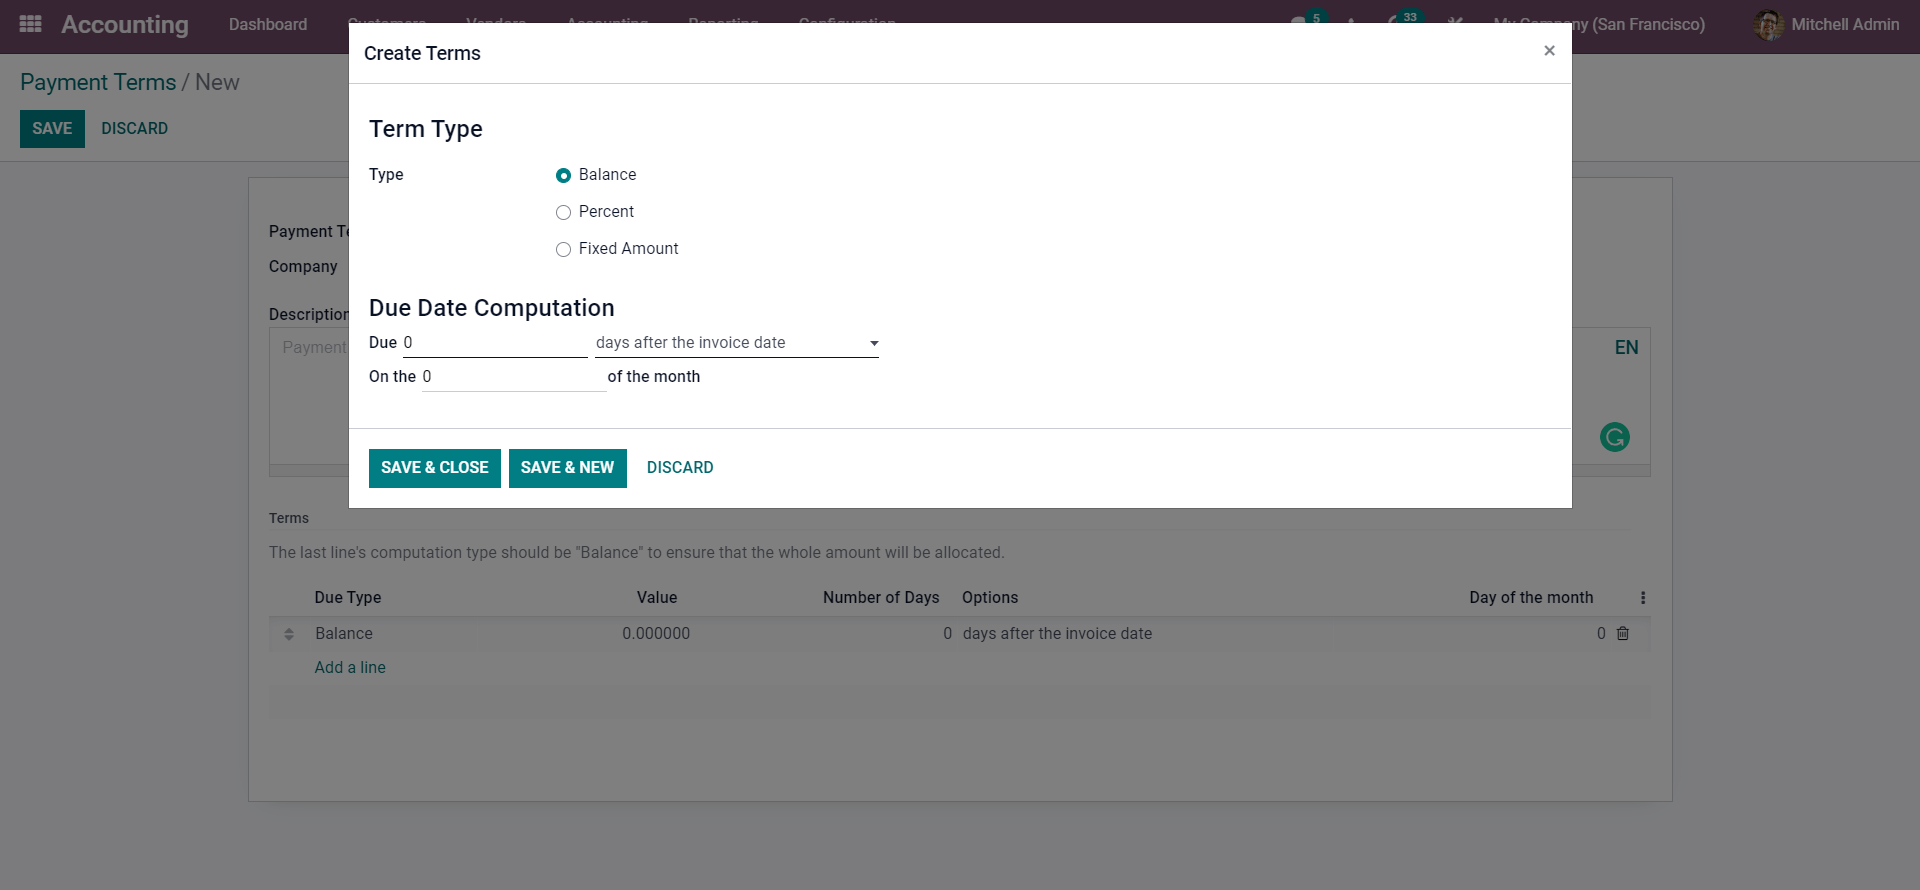
Here's where you can make a Term form. Setting the term Type is the first step. There are three types to choose from when setting the Type. Fixed Amount, Percentage, and Balance It's worth noting that the configuration varies depending on the type. Choose a Term type that corresponds to the kind of the invoice you're sending. A new Value line will emerge if you select Percent from the options, as seen below.
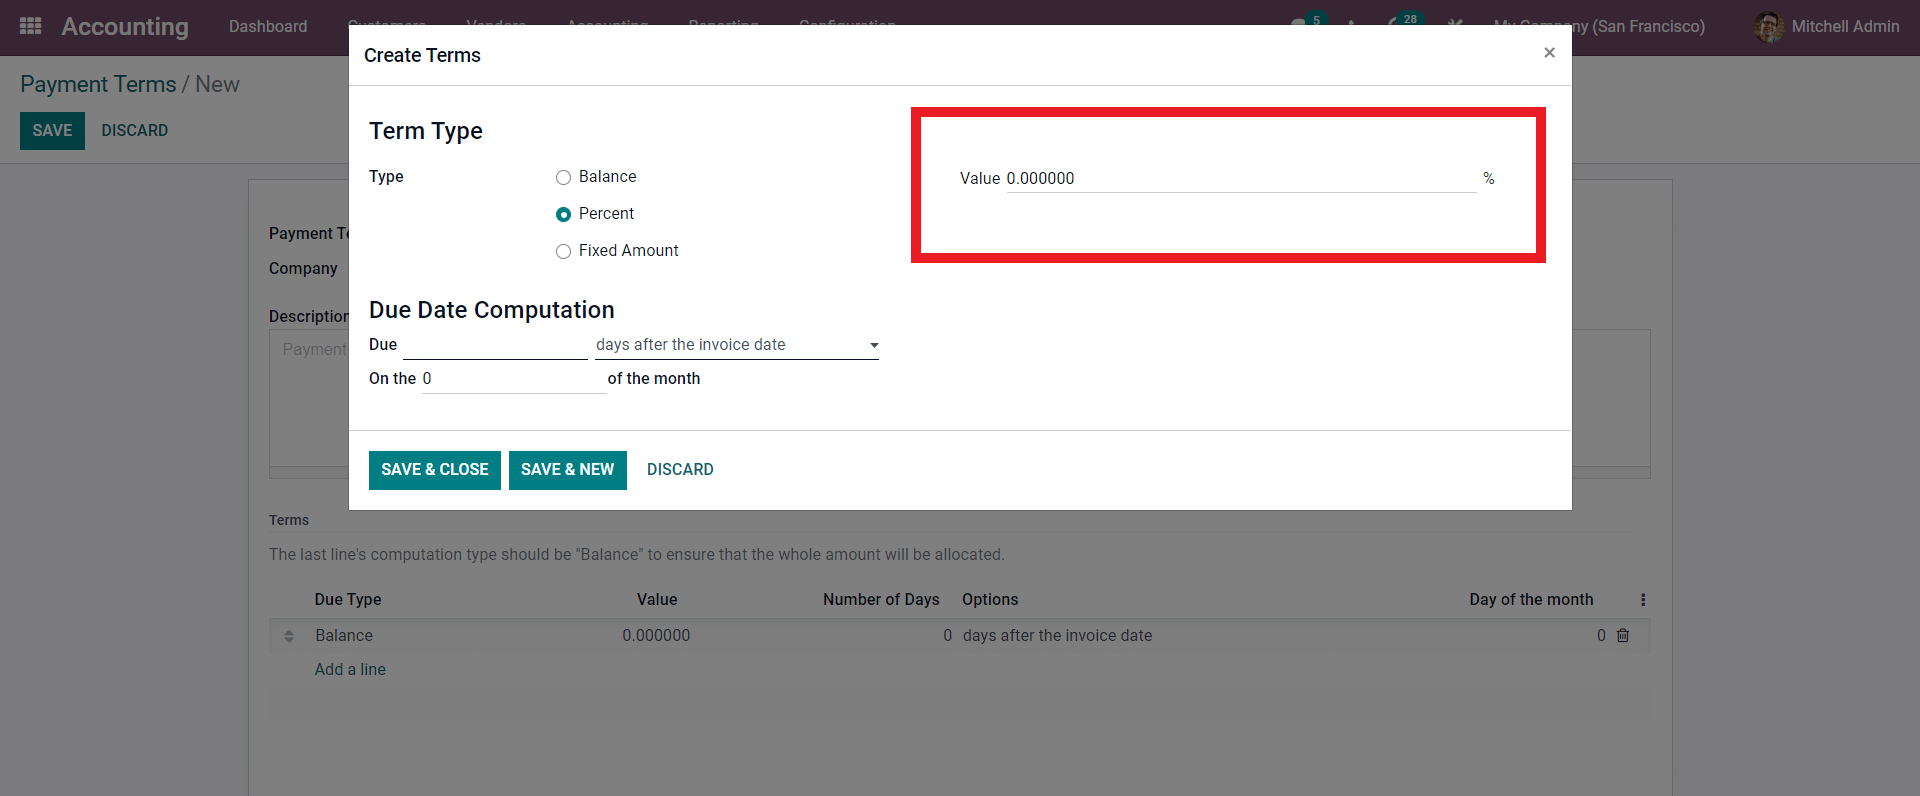
You can enter the percentage value here. You can input the Value in Fixed amount beneath the Value area if you select Fixed amount from the alternatives. As a result, you can enter in the total amount or a percentage of it here.
The Due date computation must then be configured. The Due part is the first section under the Due date computation section. Here, you must enter the number of days and the Due Date, and then select the most relevant choice from the Days After the Invoice Date Drop-down menu. Days after the end of the invoice month, the following month, or the current month are all options. After you've finished configuring the Payment Terms, click SAVE & CLOSE to continue.
After the configurations on them, you may discover the new line under the Terms section, as shown below.
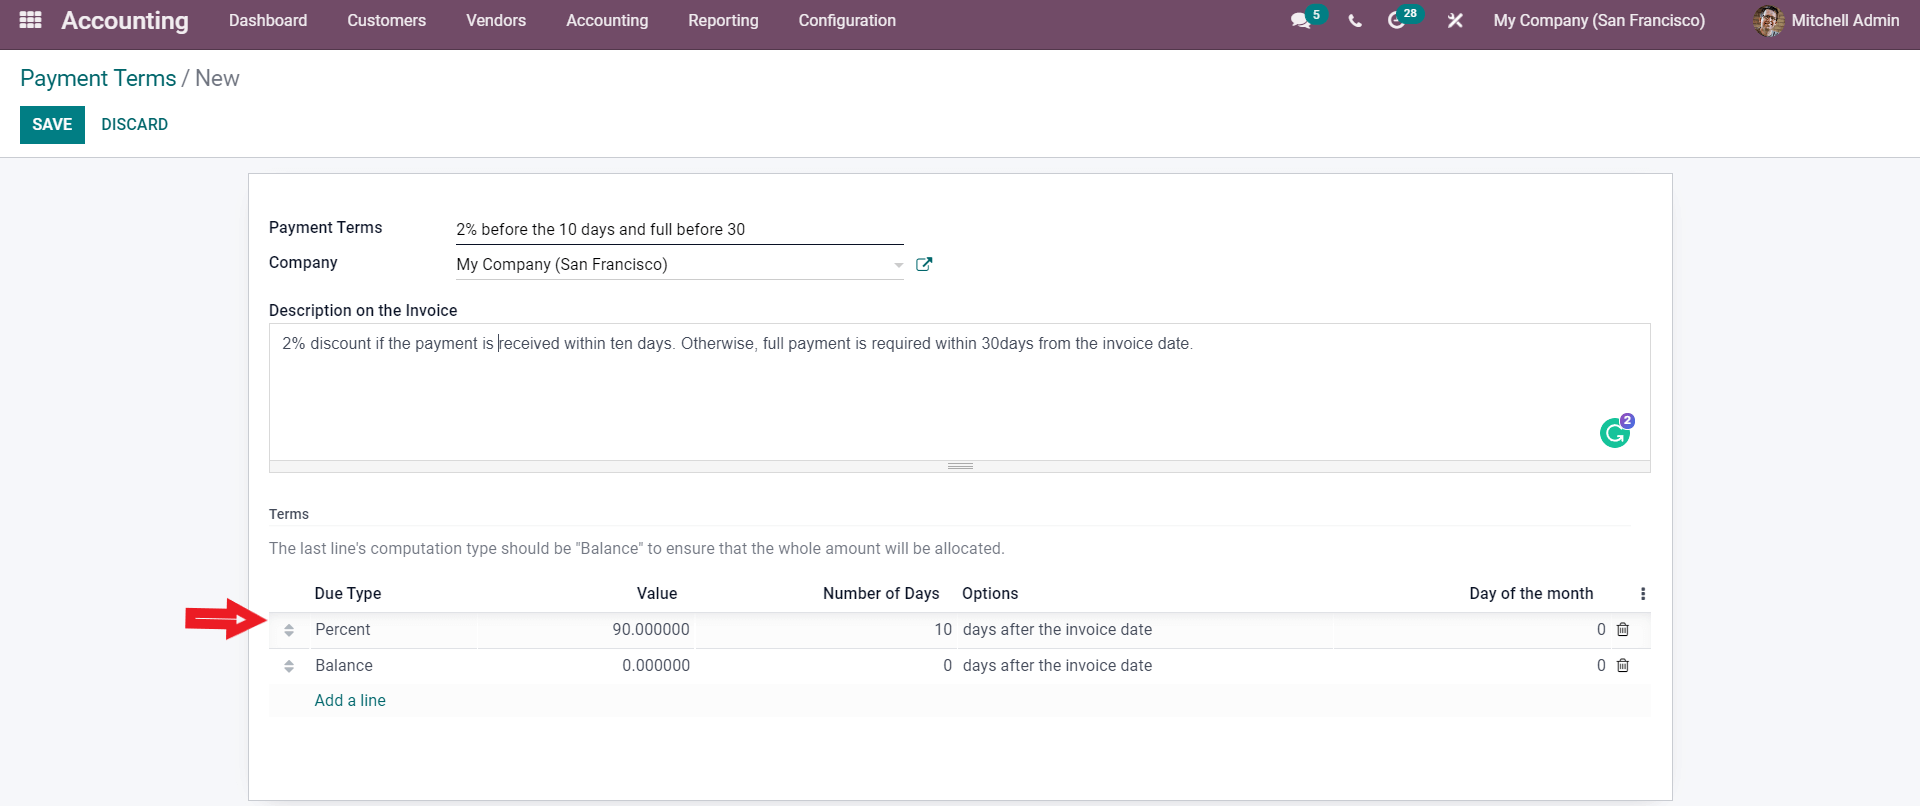
It's important to keep the Balance at the bottom of the line or list at all times. The newly formed condition will be instantly placed beneath the balance line, allowing you to move it to the top and guarantee that the entire invoice amount is awarded. You can also alter the Balance by clicking on it, which will take you to the configuration tab, as previously described. After you've completed the configuration, you may begin the invoicing process.
In the accounting Dashboard's Customer tab, select Invoices from the drop-down menu. The CREATE button will take you to a new page where you may create your invoice, as seen below.
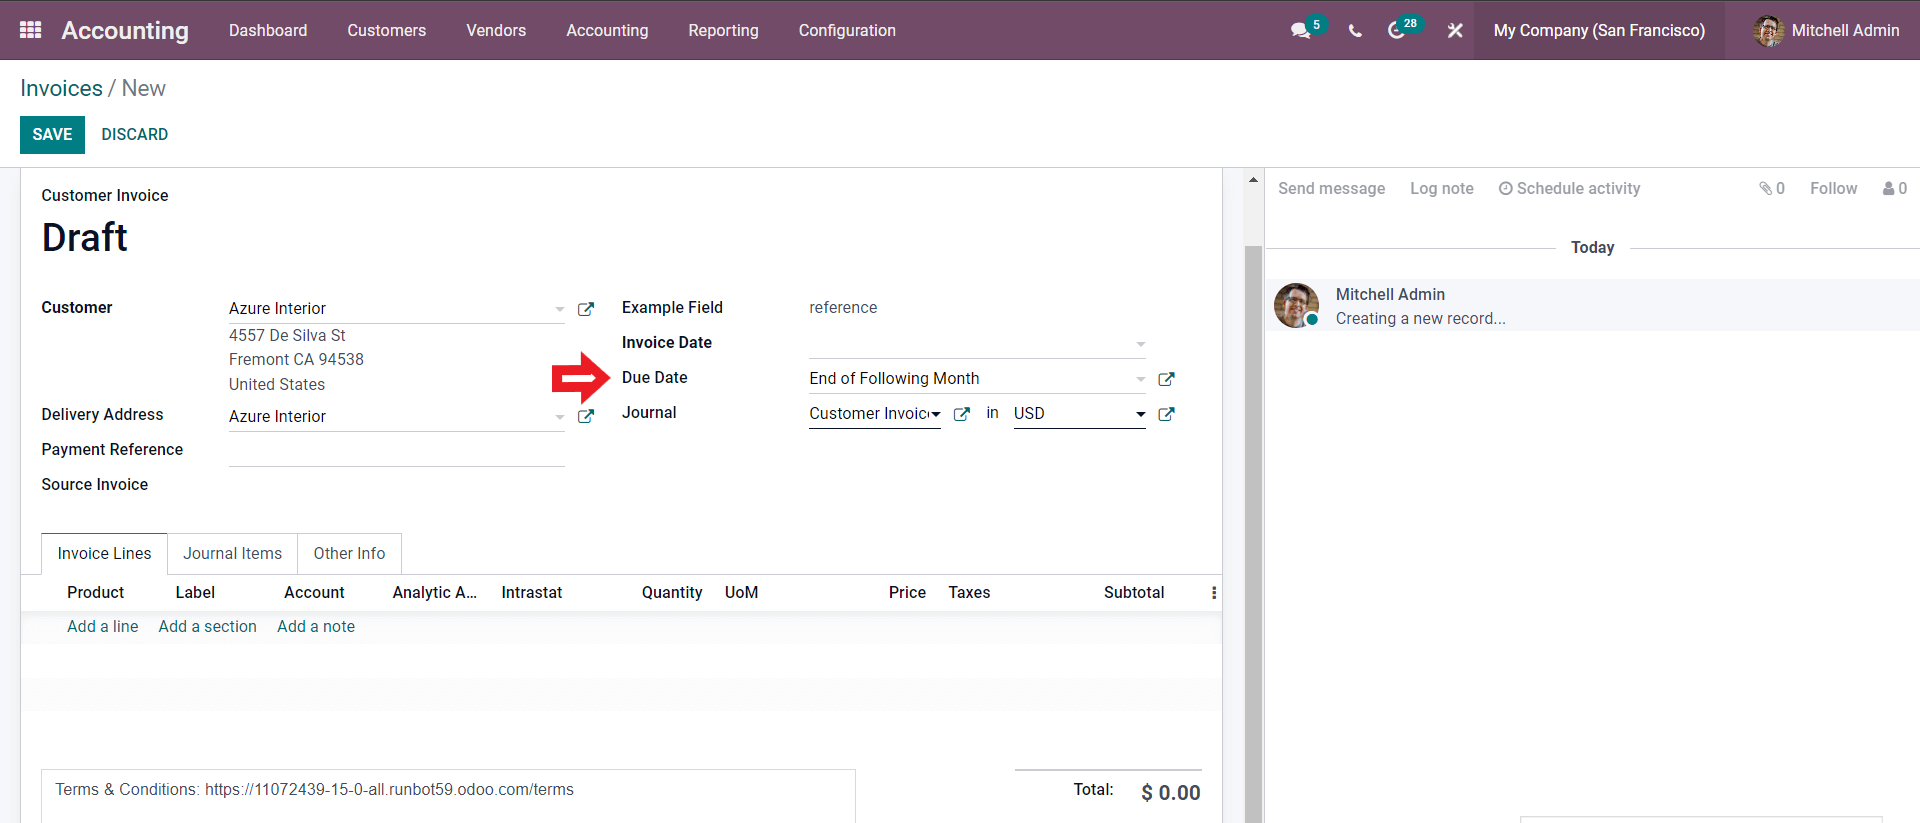
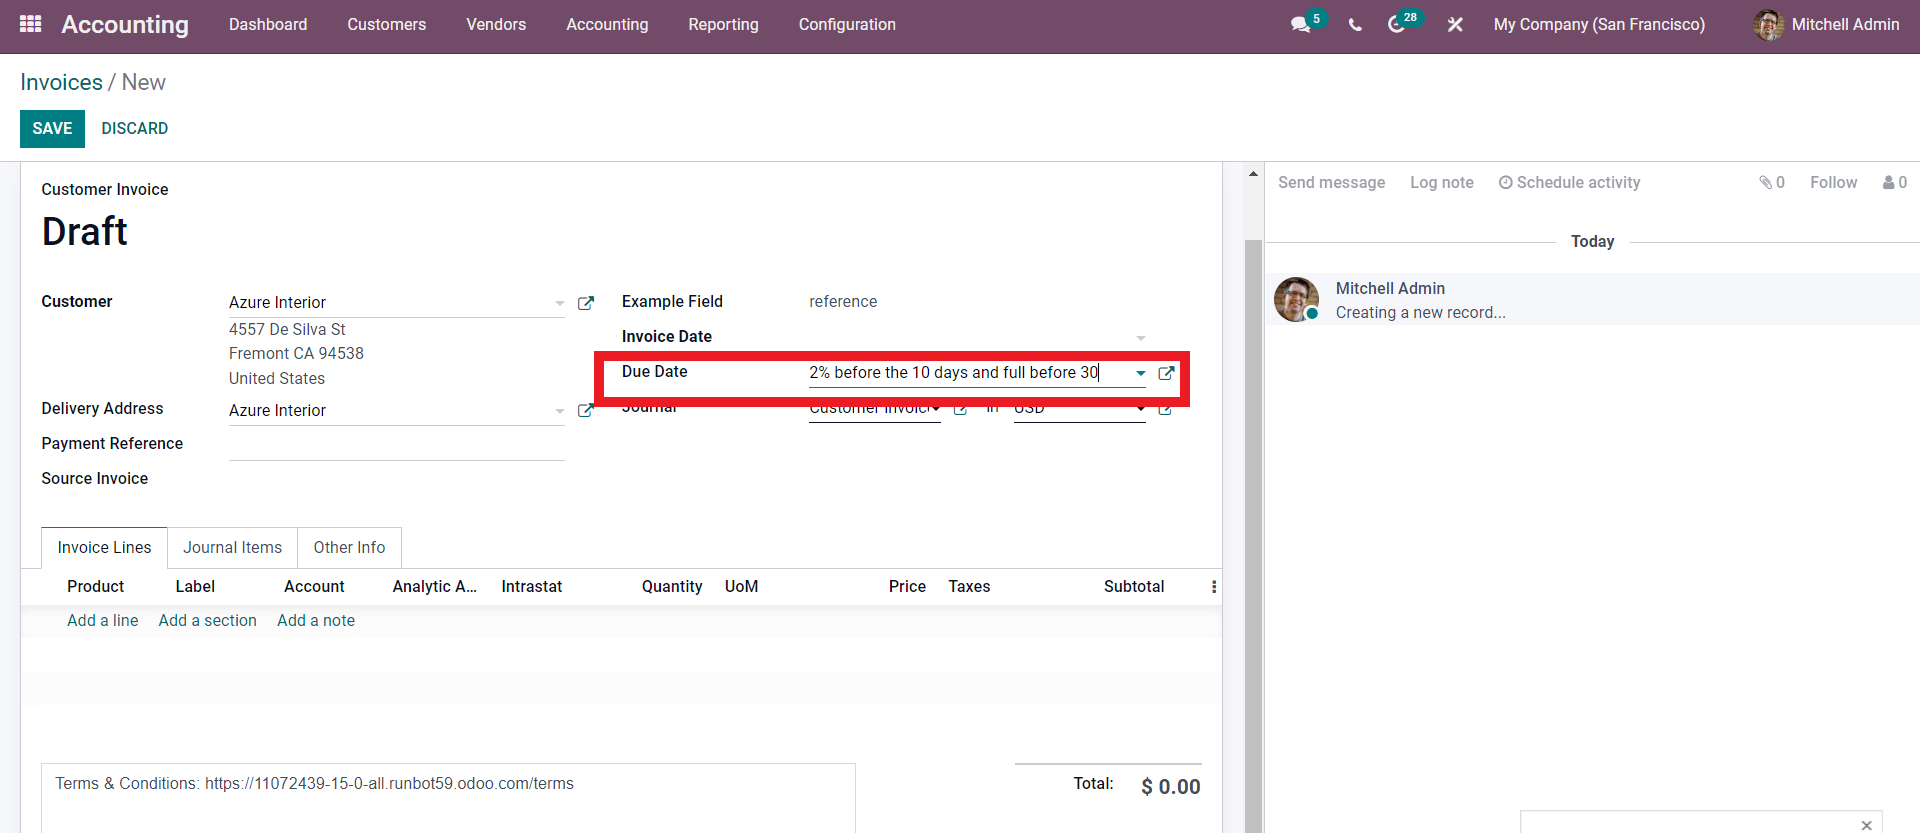
Fill out the details on the invoice, and then select your payment term from the Due date area, as shown below.
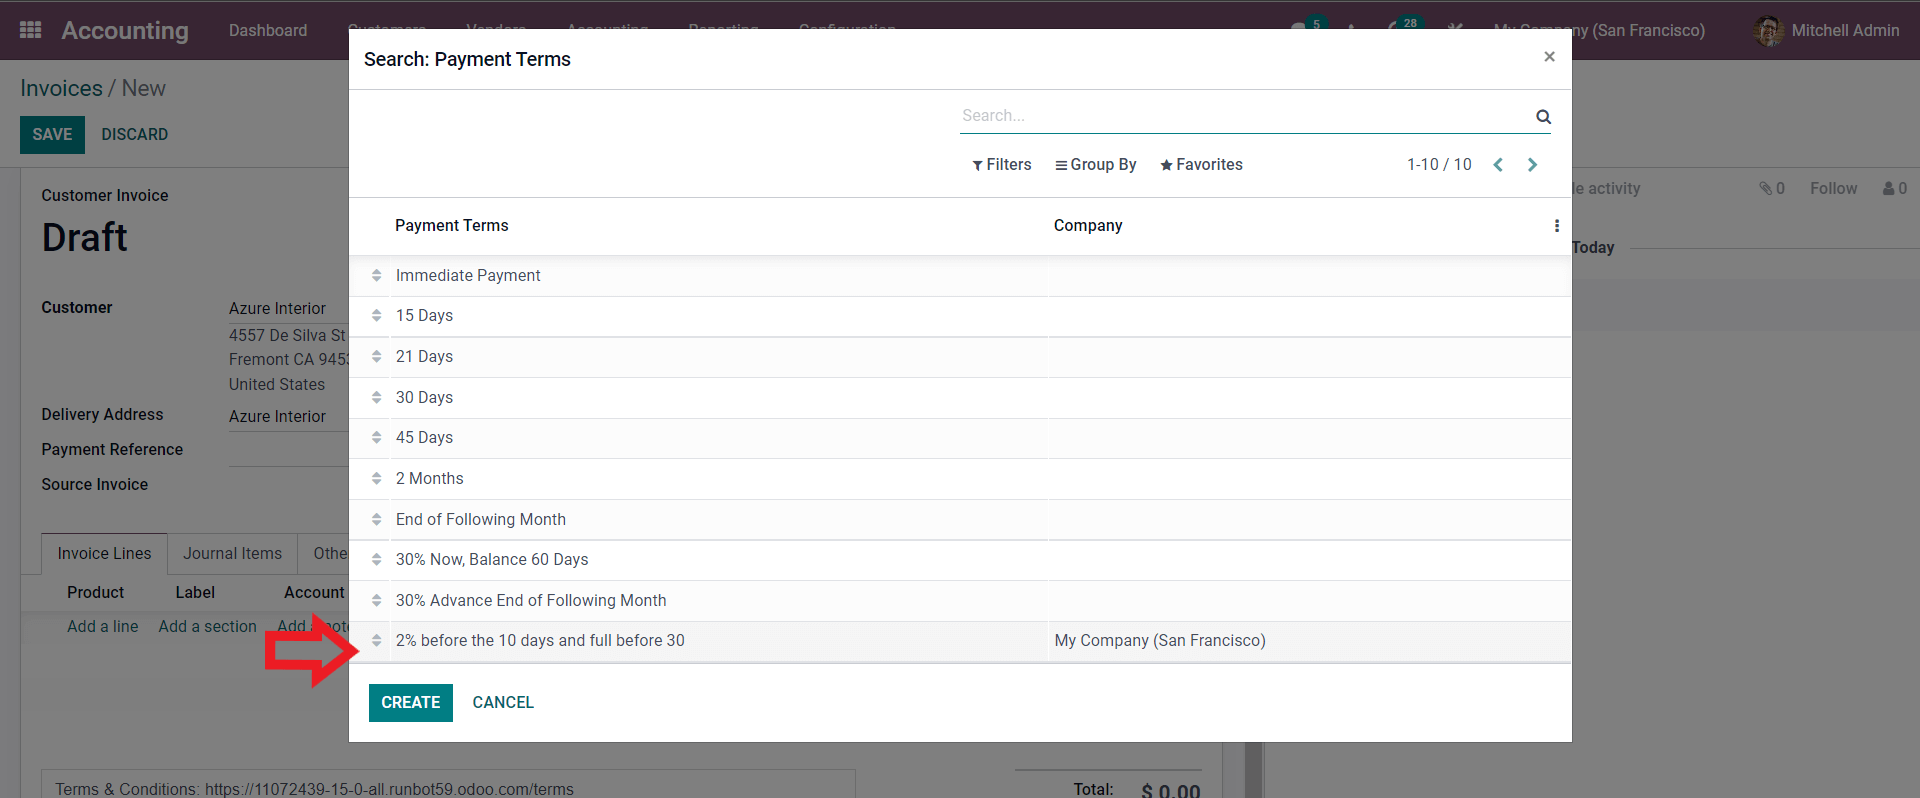
It's worth noting that Odoo allows you to construct Payment Terms directly from Invoices. When you click the CREATE button, Odoo will take you to the settings tab where you may create a new Payment Term.
Choose the Payment Term as shown in the image above, and it will be automatically appended to the invoice as seen below.
As demonstrated in the invoice preview below, this will be displayed on the invoice so that the customer can act on the payment properly.
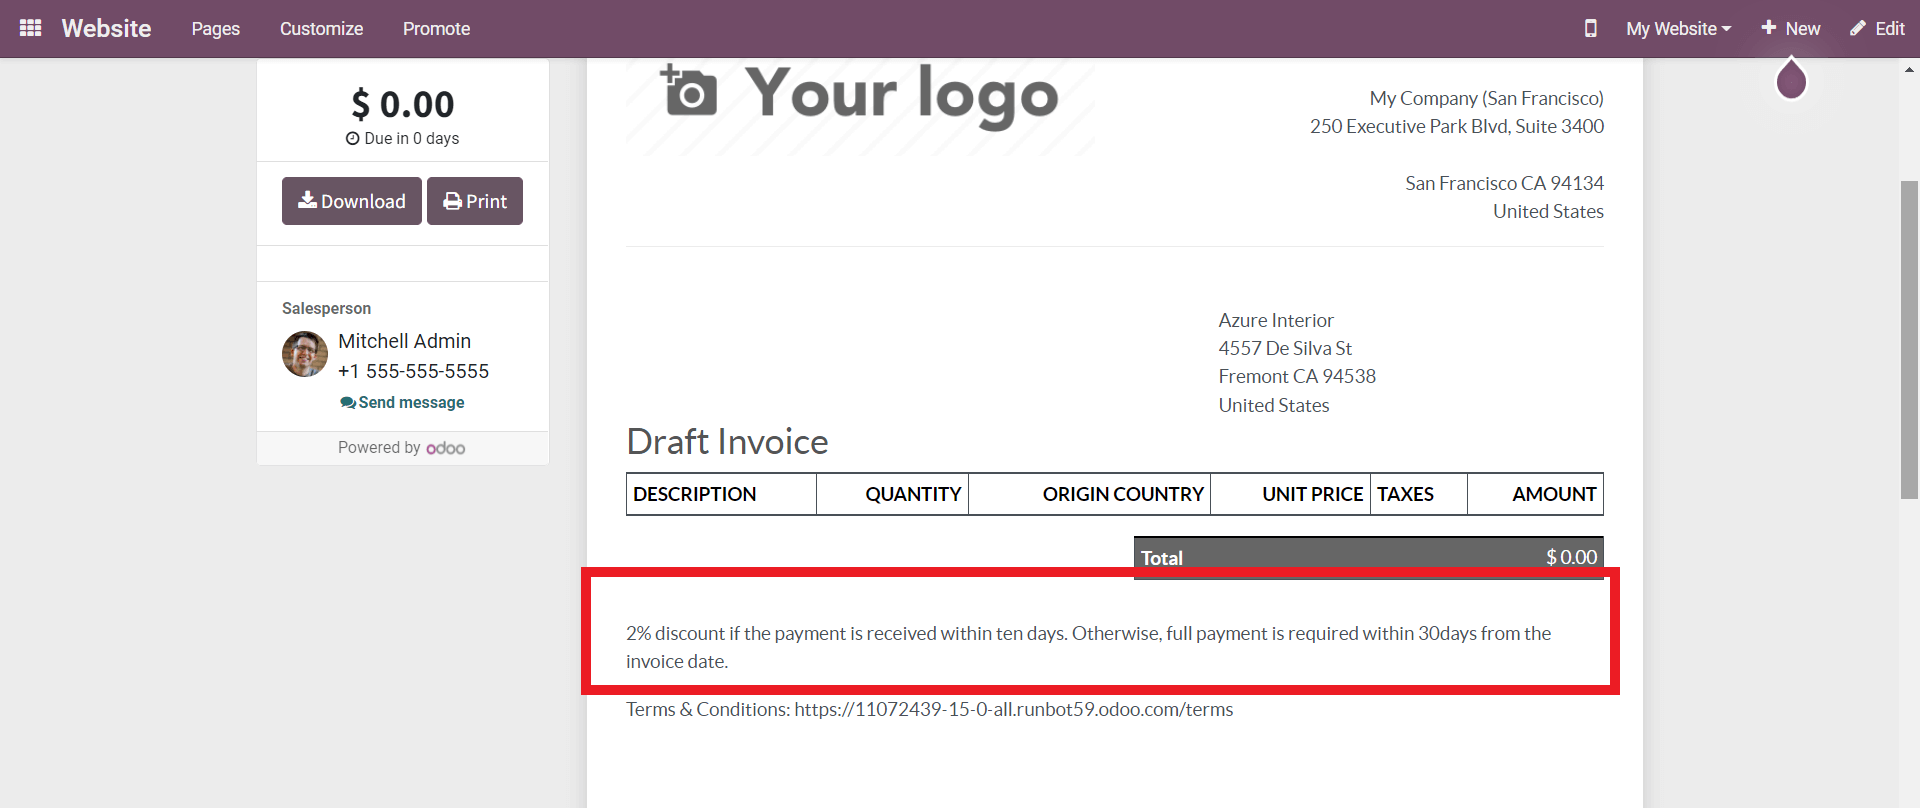
The Payment Term that has been applied is highlighted above. This helps your consumers to quickly review the Terms and serves as a reminder of the critical Payments.
Individual clients can have their own payment terms set up in Odoo. Go to the Customers choices on the Accounting dashboard's Customers tab to do this. As seen below, this will show your customers.
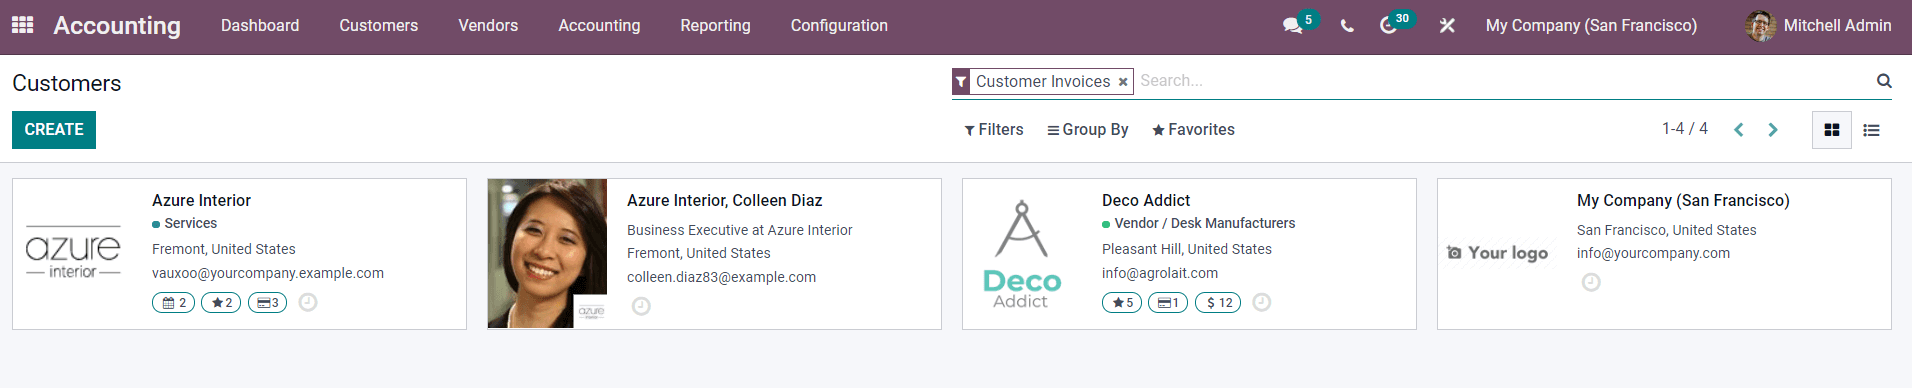
From the Options menu, pick the client to whom you want to apply the Payment Terms, and the settings page for that customer will appear, as shown below.
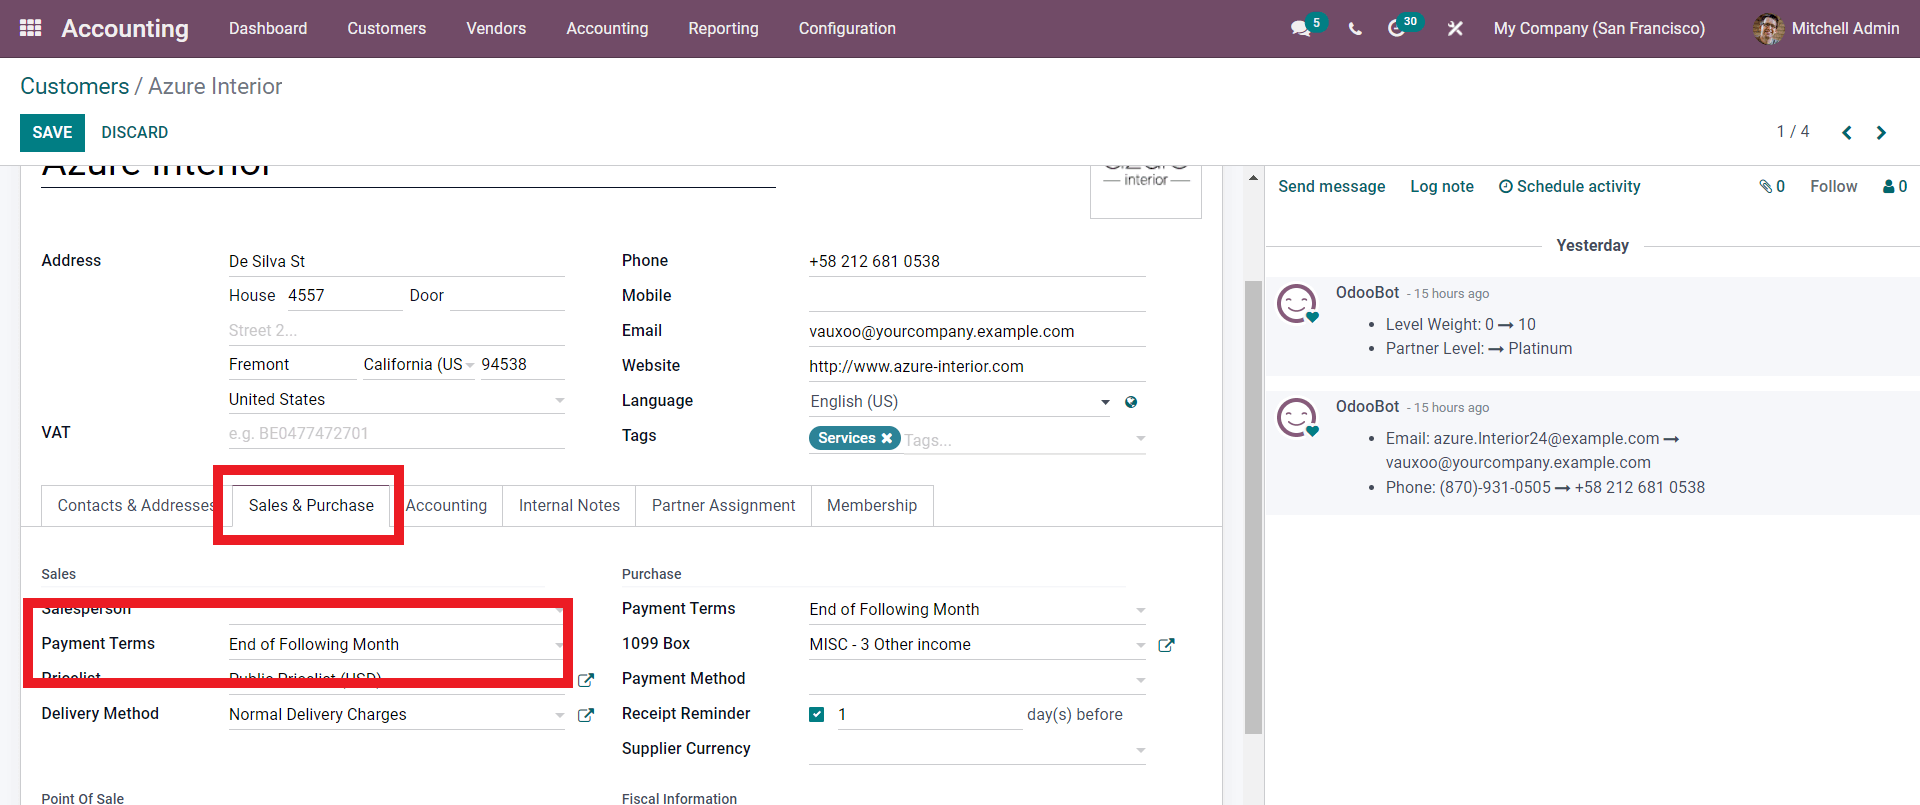
Click the Edit button, and the Payment conditions will appear under the Sales & Purchase area, as seen above. Select the payment period from the drop-down options by clicking on the field. Odoo will take note of this and incorporate the Payment period in future invoices to the customer. In order to manage invoices efficiently, payment conditions are crucial.
"There are several tools built into Odoo to assist with the invoicing process, similar to the payment conditions. The feature of the invoice differs depending on the sort of invoice you're creating. However, the invoice's core structure is consistent across all Odoo modules."
Odoo 15 Accounting Module Invoice Management