
Odoo 15 Accounting Module Reconciliation Models
If you review your bank records and account statements manually, it can be a time-consuming and error-prone operation. It's difficult to compare and contrast bank data and company data with such a large volume of data, and as a result, it's a time-consuming operation.
Odoo provides a sophisticated approach for dealing with this problem. No matter how much data you're processing, Odoo can effortlessly compare and contrast your payment document and bank data.
Odoo 15 Accounting Module
Odoo 15 Reconciliation Models
Configuration and Usage
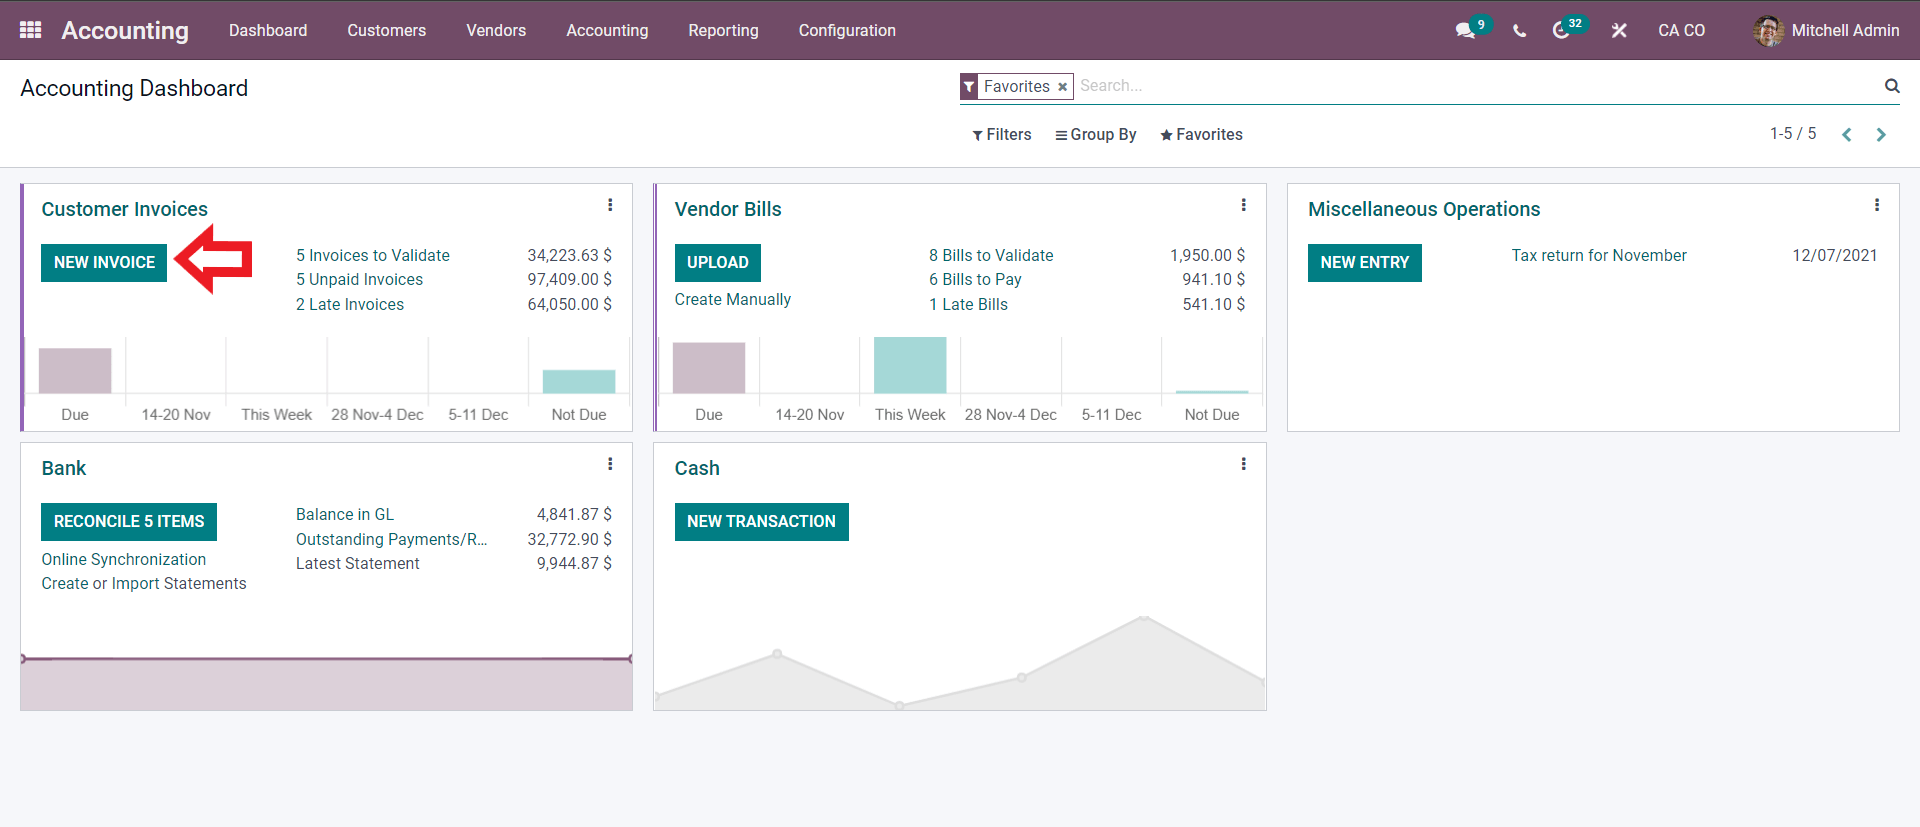
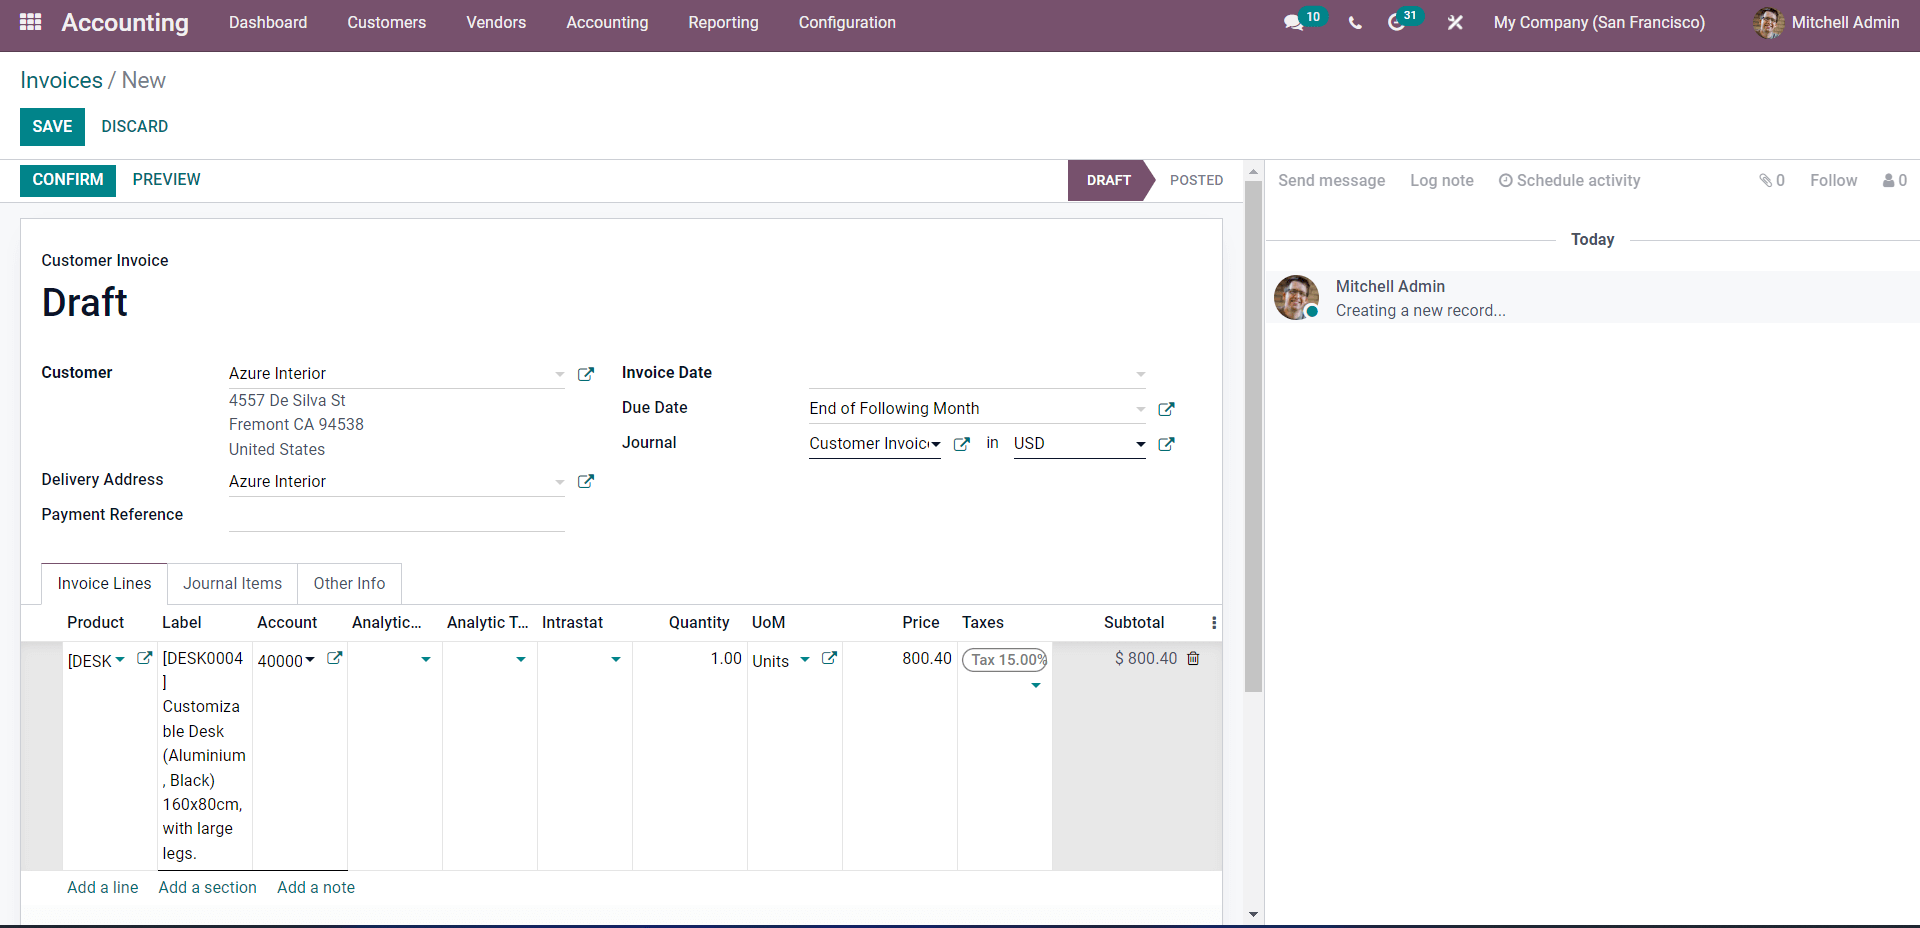
With the Odoo 15 Accounting module, the reconciliation procedure is simple. In Odoo 15, there are two methods or alternatives for performing the reconciliation. You can specify the payment method immediately on the invoice and reconcile open invoices with bank statements. By pressing the NEW INVOICE button on the dashboard, you can create an invoice in the Accounting module right from the dashboard, as illustrated below.

Add the customer's information and the product. After you've completed the configurations, click CONFIRM. This will prepare the customer for payment, allowing you to proceed to the next step in the payment registration process.
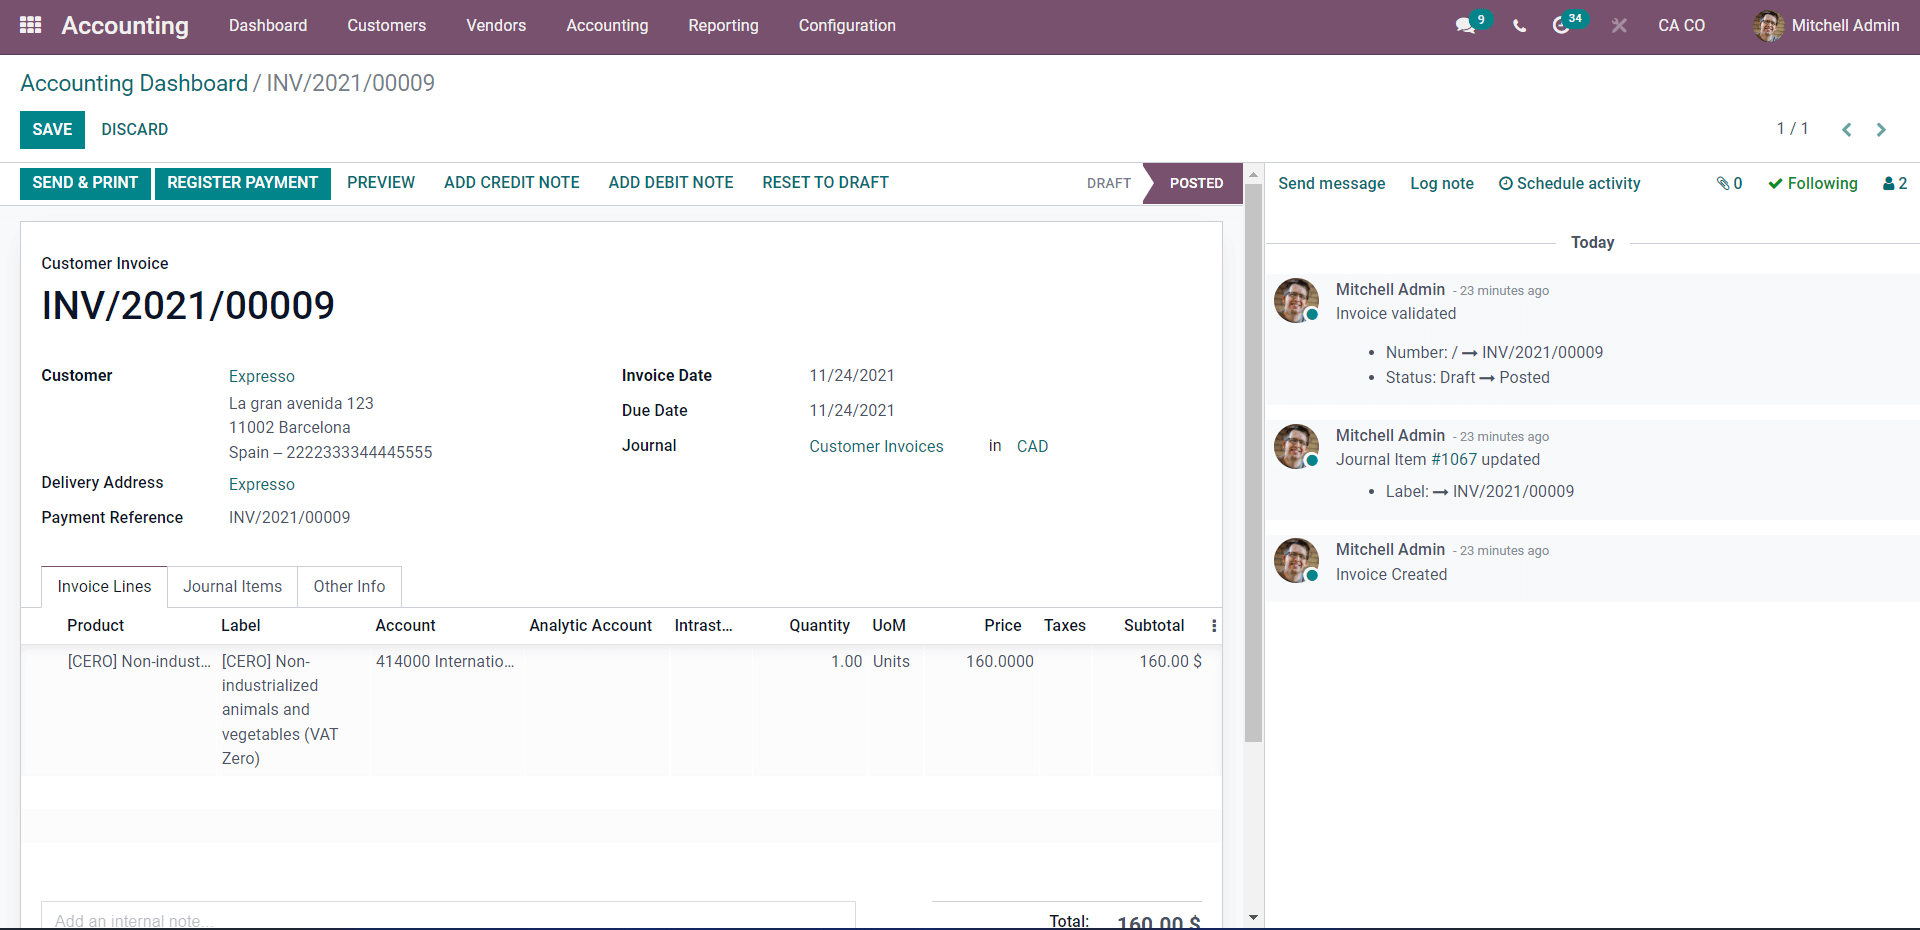
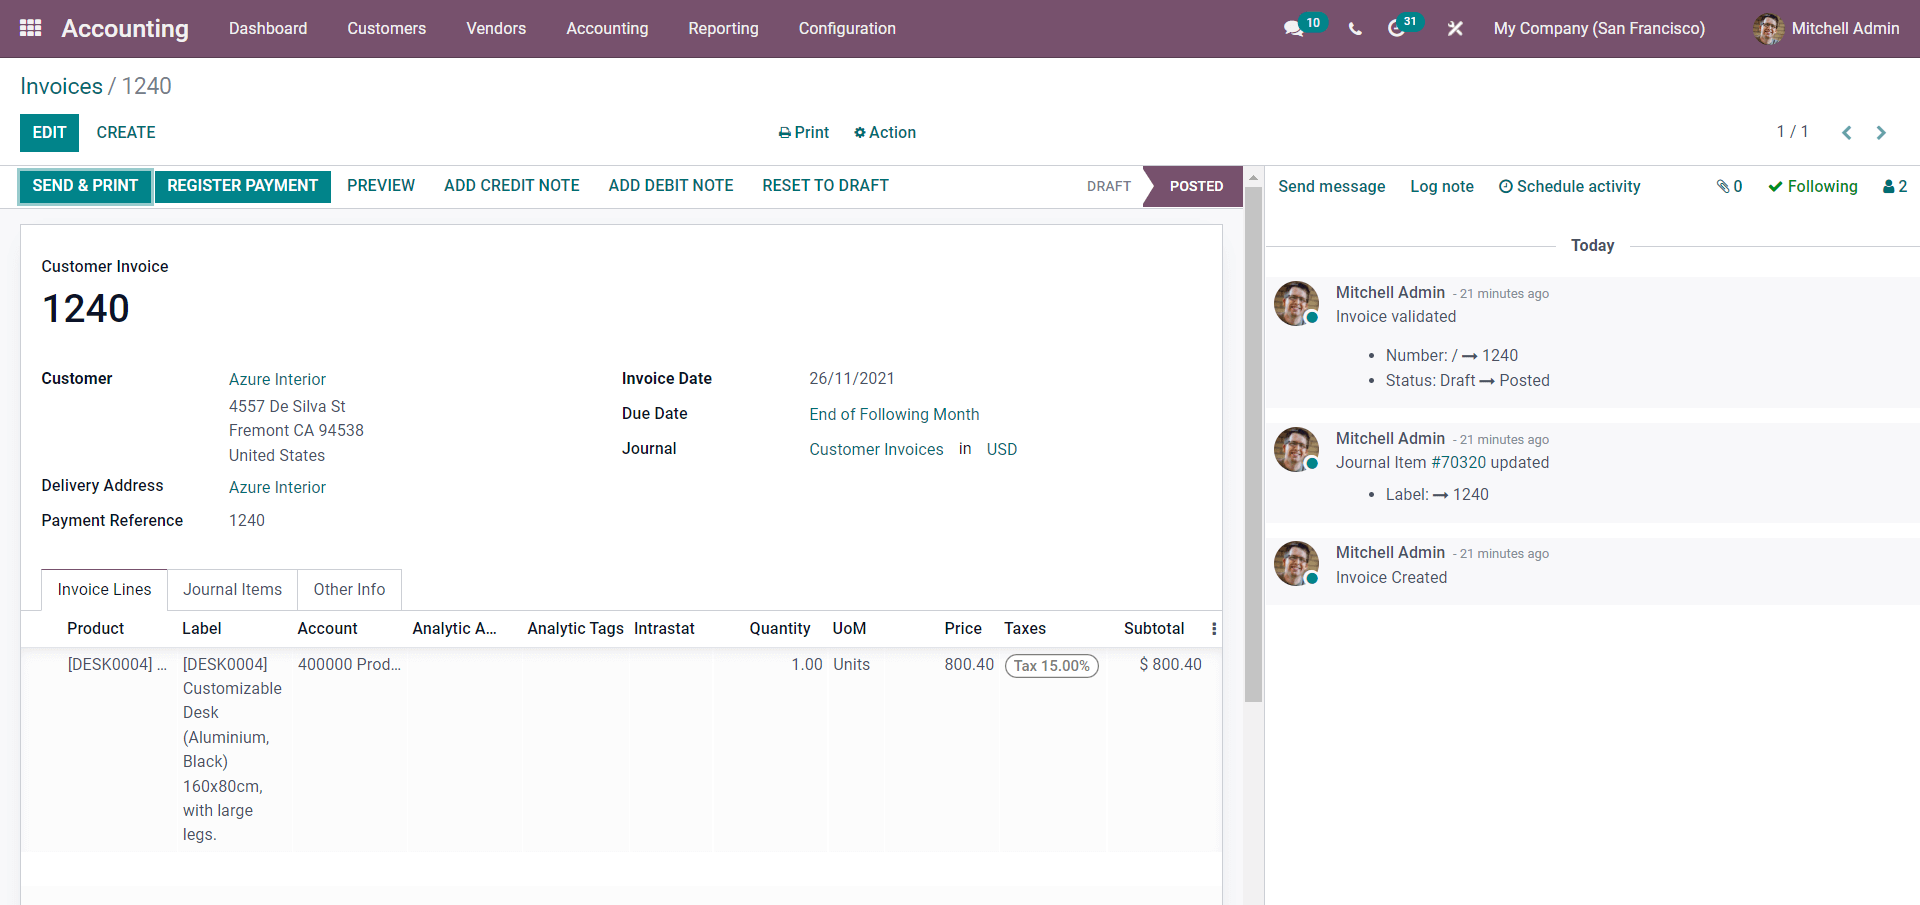
We confirm to Odoo that the customer has made the payment in response to the customer payment after the Payment Registration. The Reconciliation procedure is started by clicking the REGISTER PAYMENT button in the invoice section below. To configure the payment, a quick configuration tab will appear, as illustrated below.
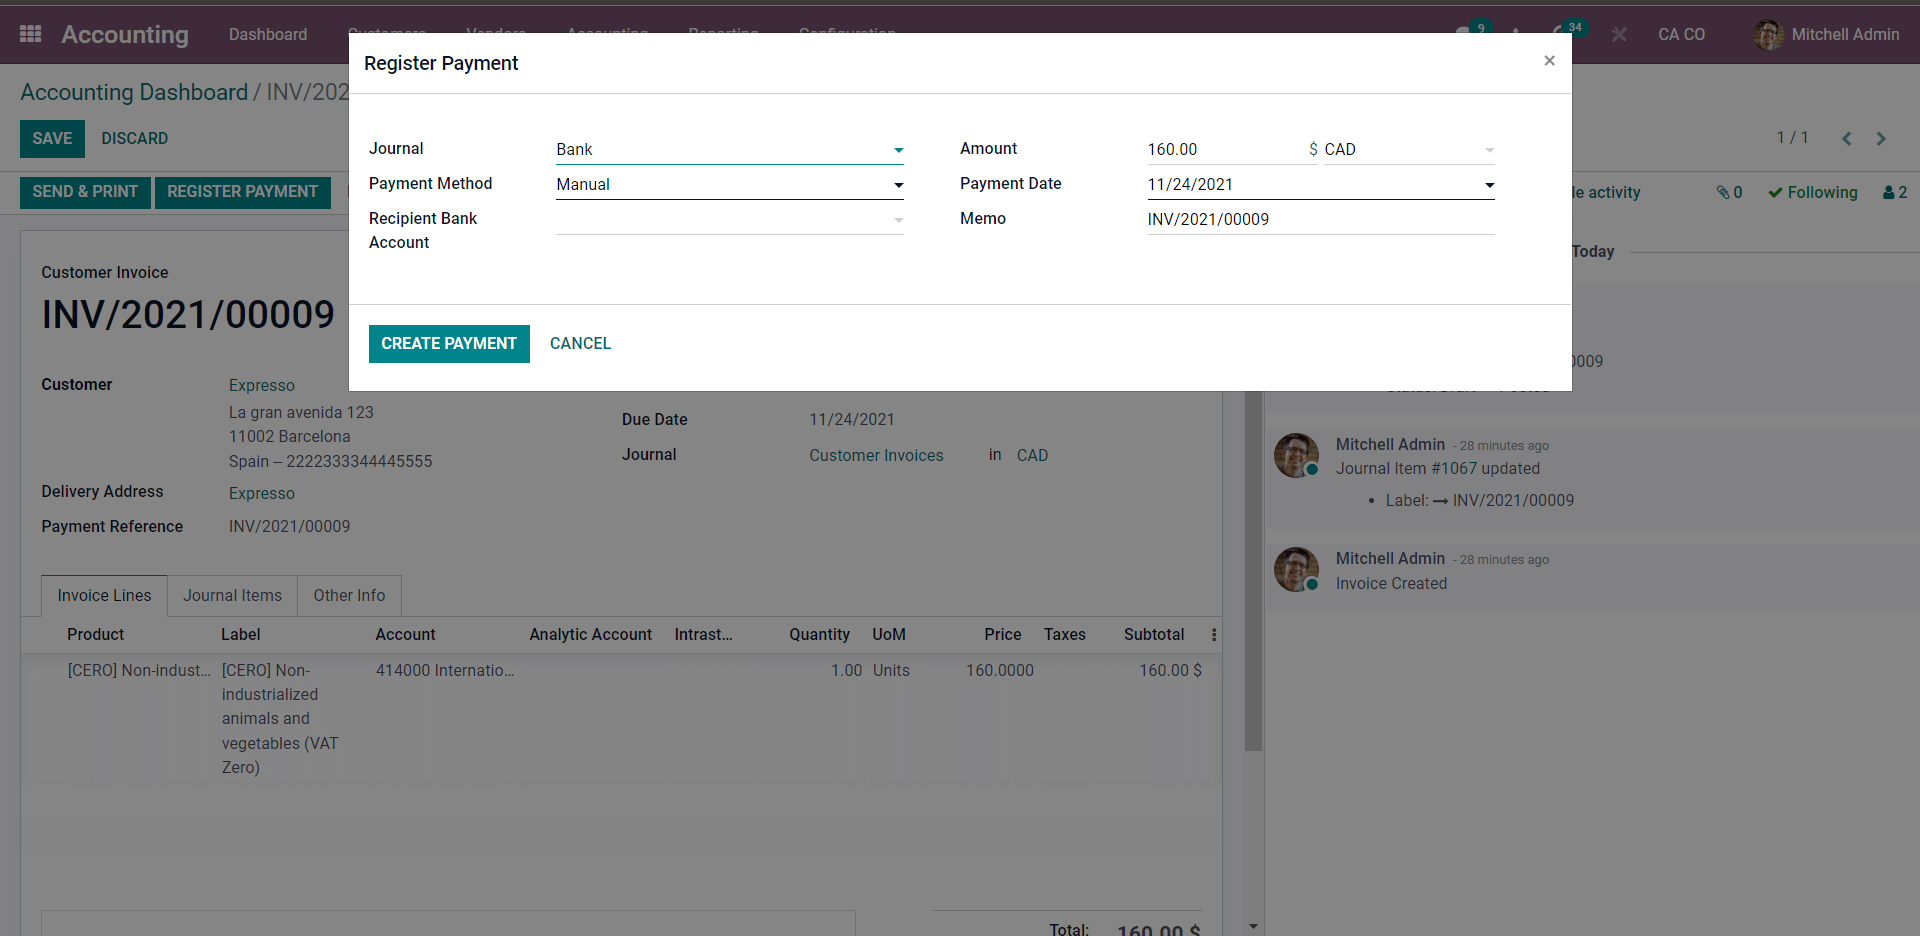
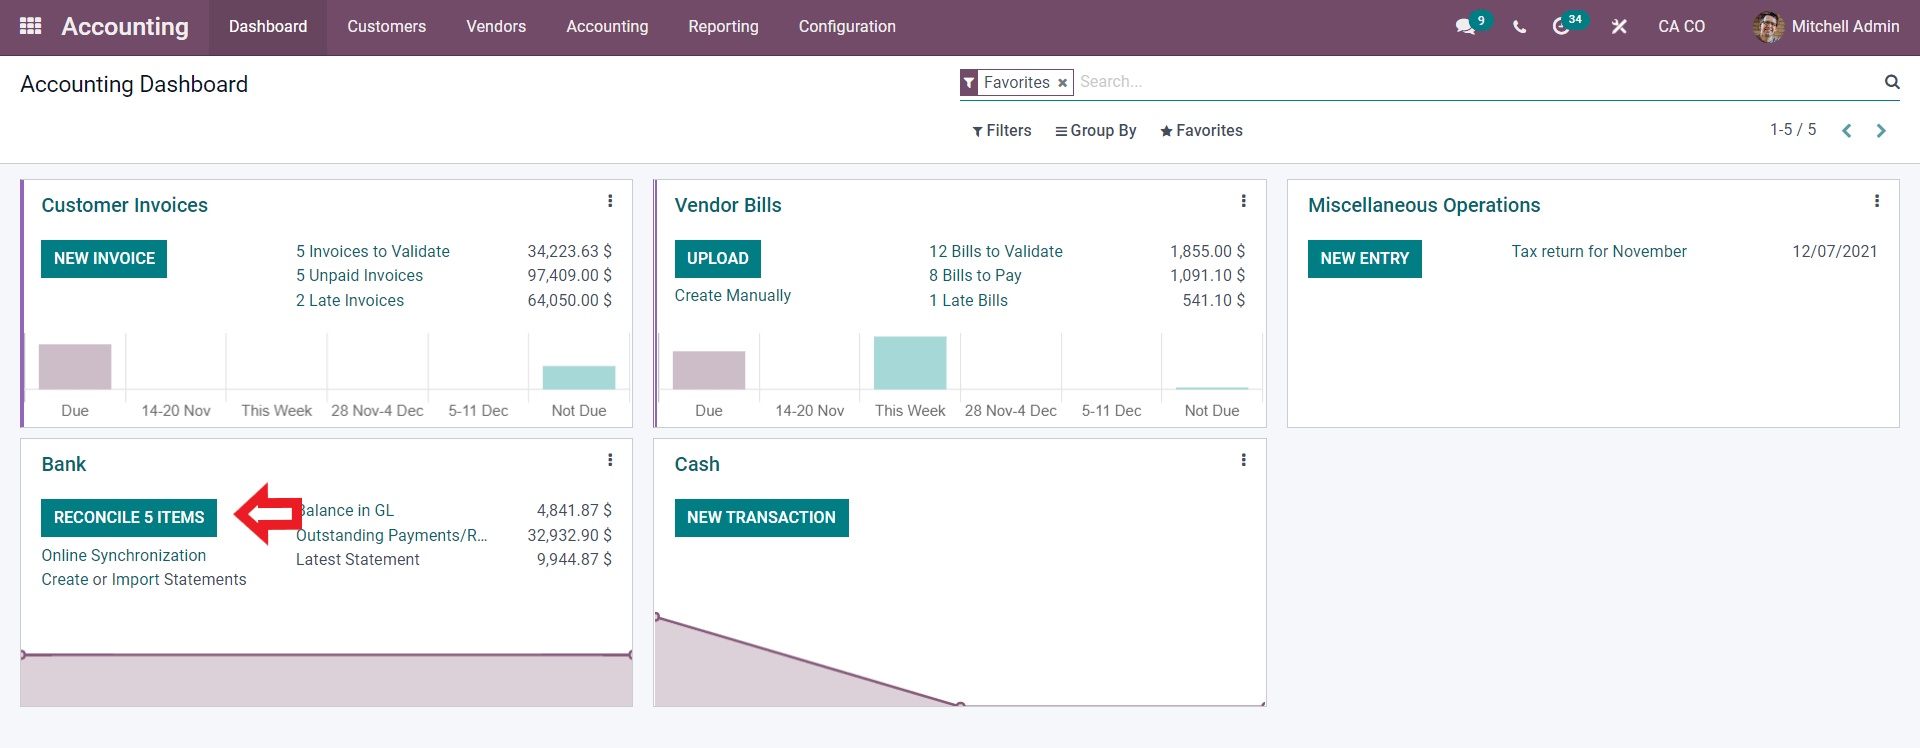
To configure the Payment, enter and choose the configurations from this section, then click the CREATE PAYMENT button. After that, your invoice will be marked with an IN PAYMENT banner. To do reconciliations, go to the module's Dashboard and block click on RECONCILE from the Bank, as shown below.
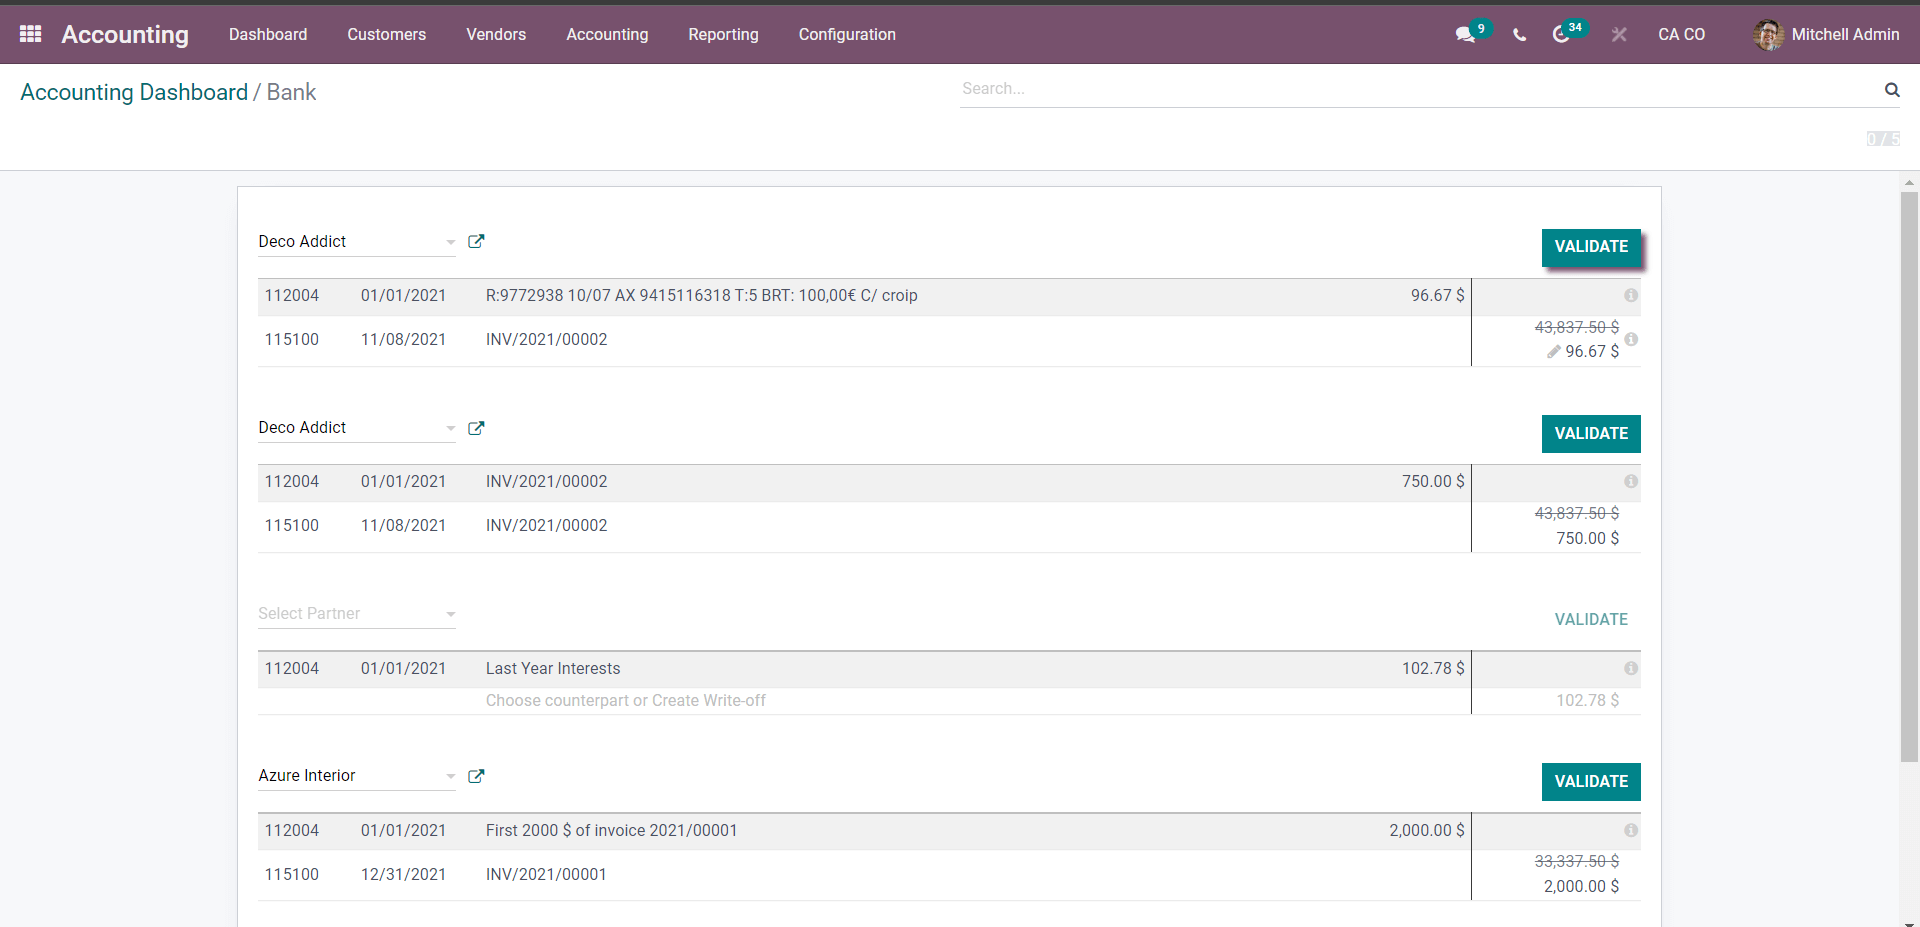
When you click it, Odoo will display you the Validate section, as shown below. By clicking the VALIDATE button next to the statement that has to be reconciled, you can validate it.
Odoo 15 Accounting Module (Reconciliation models)
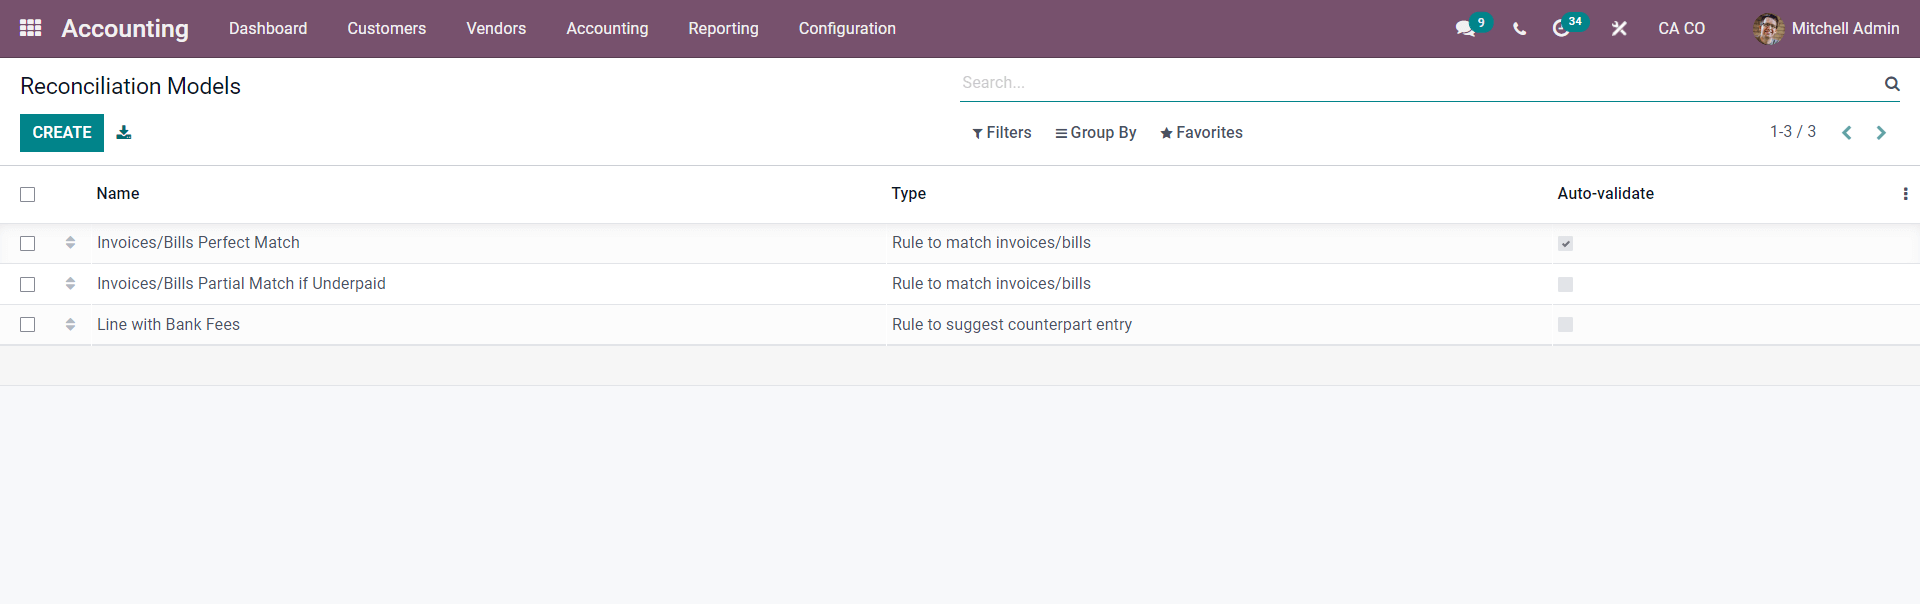
Reconciliation models can make the process of reconciliation a lot easier. The Accounting module makes it simple to create up Reconciliation models. Reconciliation models can be configured by going to the Configuration tab and selecting Reconciliation models. A page titled Reconciliation Models will appear, as shown above. From this page, you may build and maintain Reconciliation Models. By pressing the CREATE button, you can create new models.
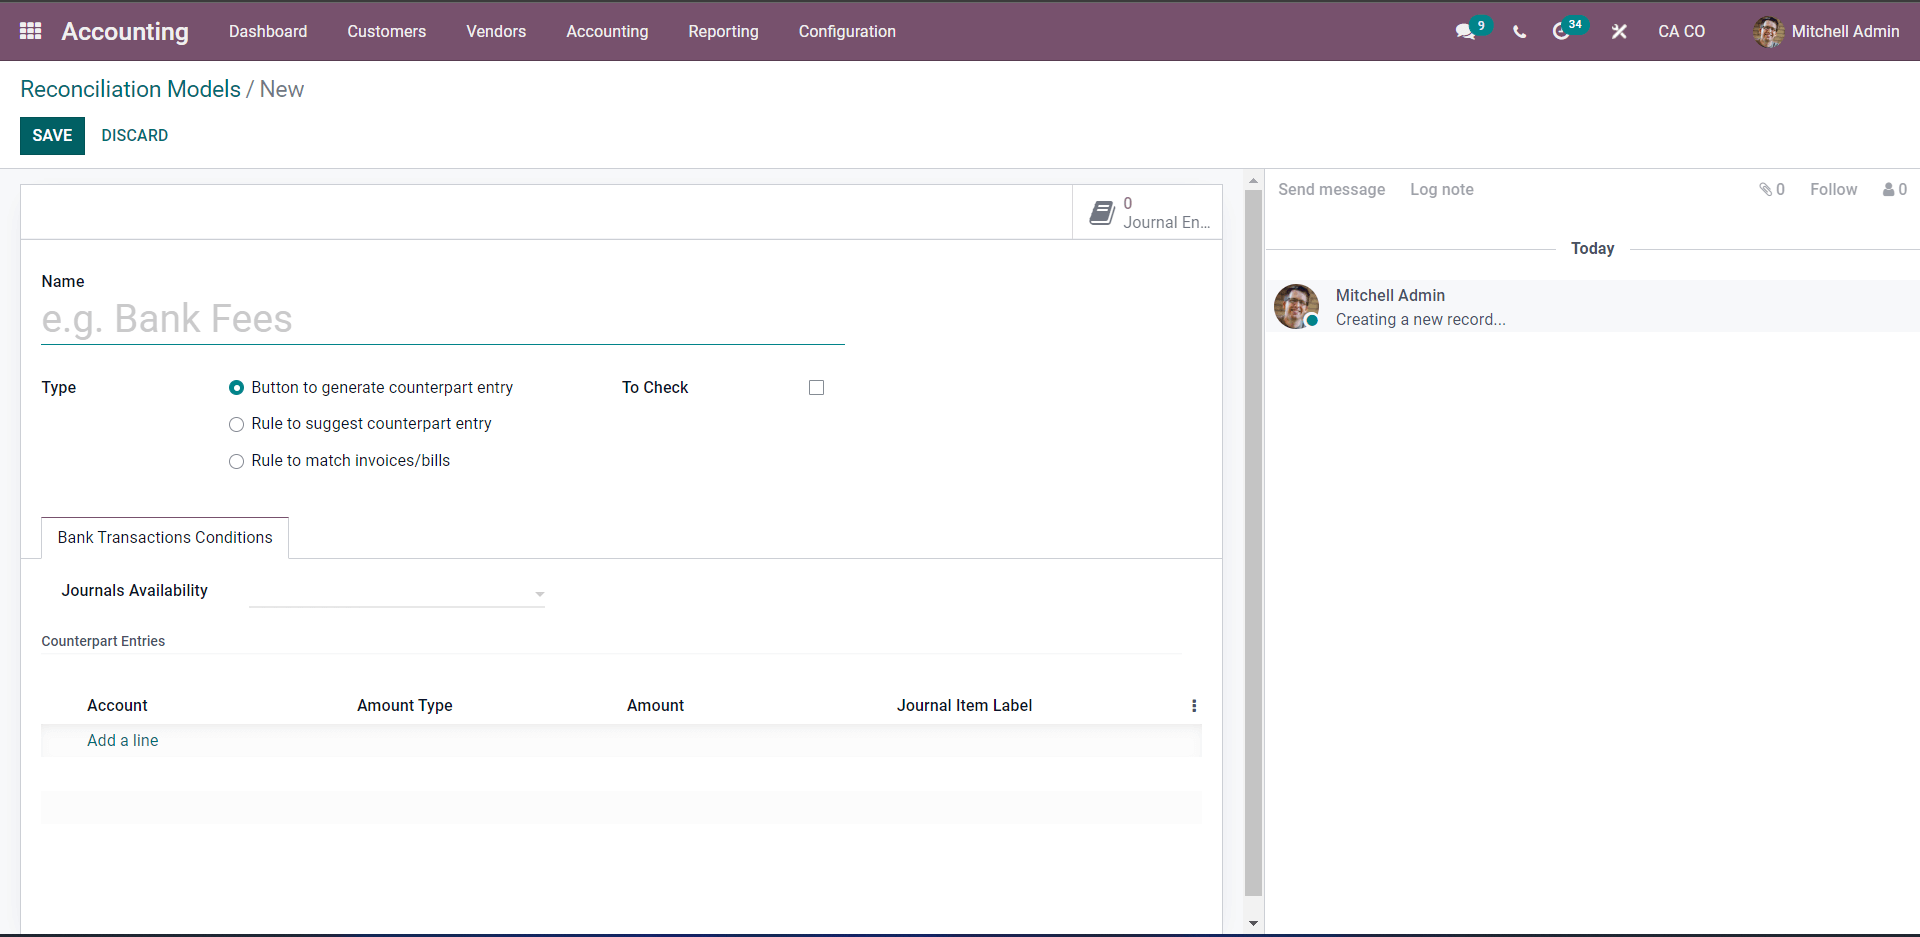
In the Name Field, give the Model a name. Select a type from the Type drop-down menu. Button to produce Counterpart Entry, Rule to Suggest Counterpart Entry, or Rule to Match Invoices/Bills are the three options. Note that depending on the Type you select in the Type section, the configurations will change. You can choose whether the reconciliation is automatic or not if you select the rule for match or bills. The sorts of bank transactions can have a significant impact on the transactions.
"Button to generate counterpart entry"
It is critical to understand all of the Types' configurations. The structure would be as follows if you chose the Button to produce counterpart entry.

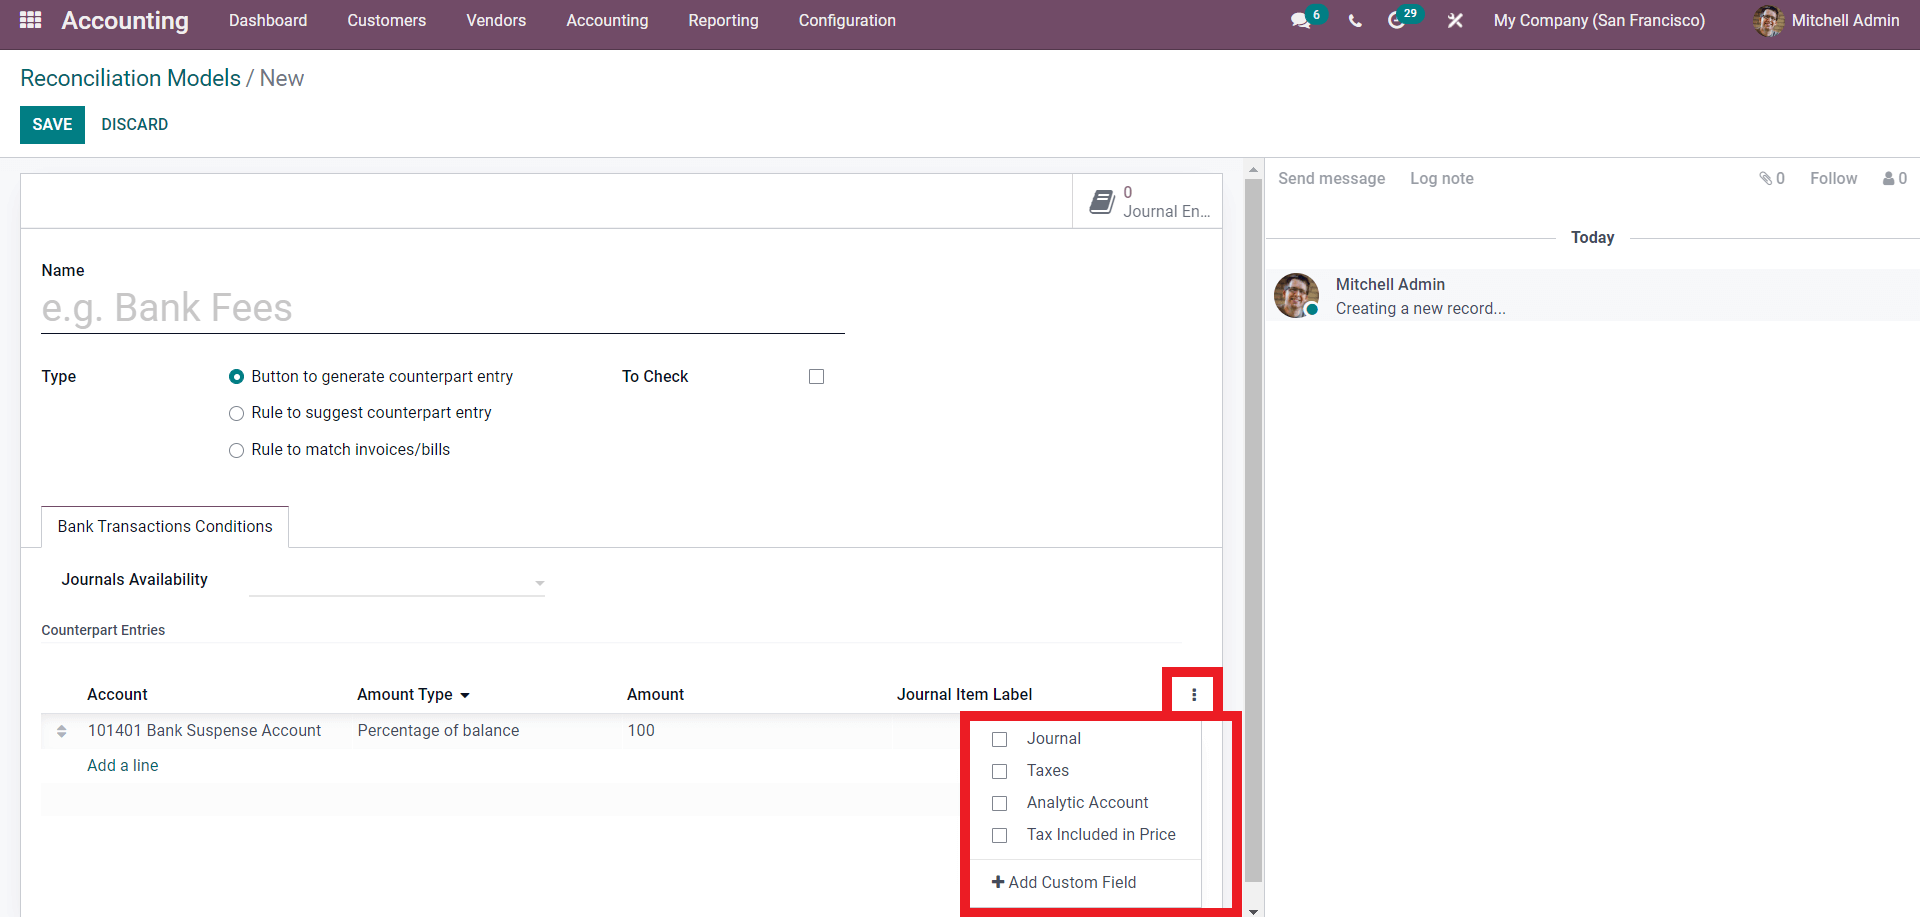
In this situation, you can select Journals Availability from the Bank or Cash Journals drop-down options in the Journal Availability box. Click Add a line under the counterpart, Entries, and enter the Account underneath.
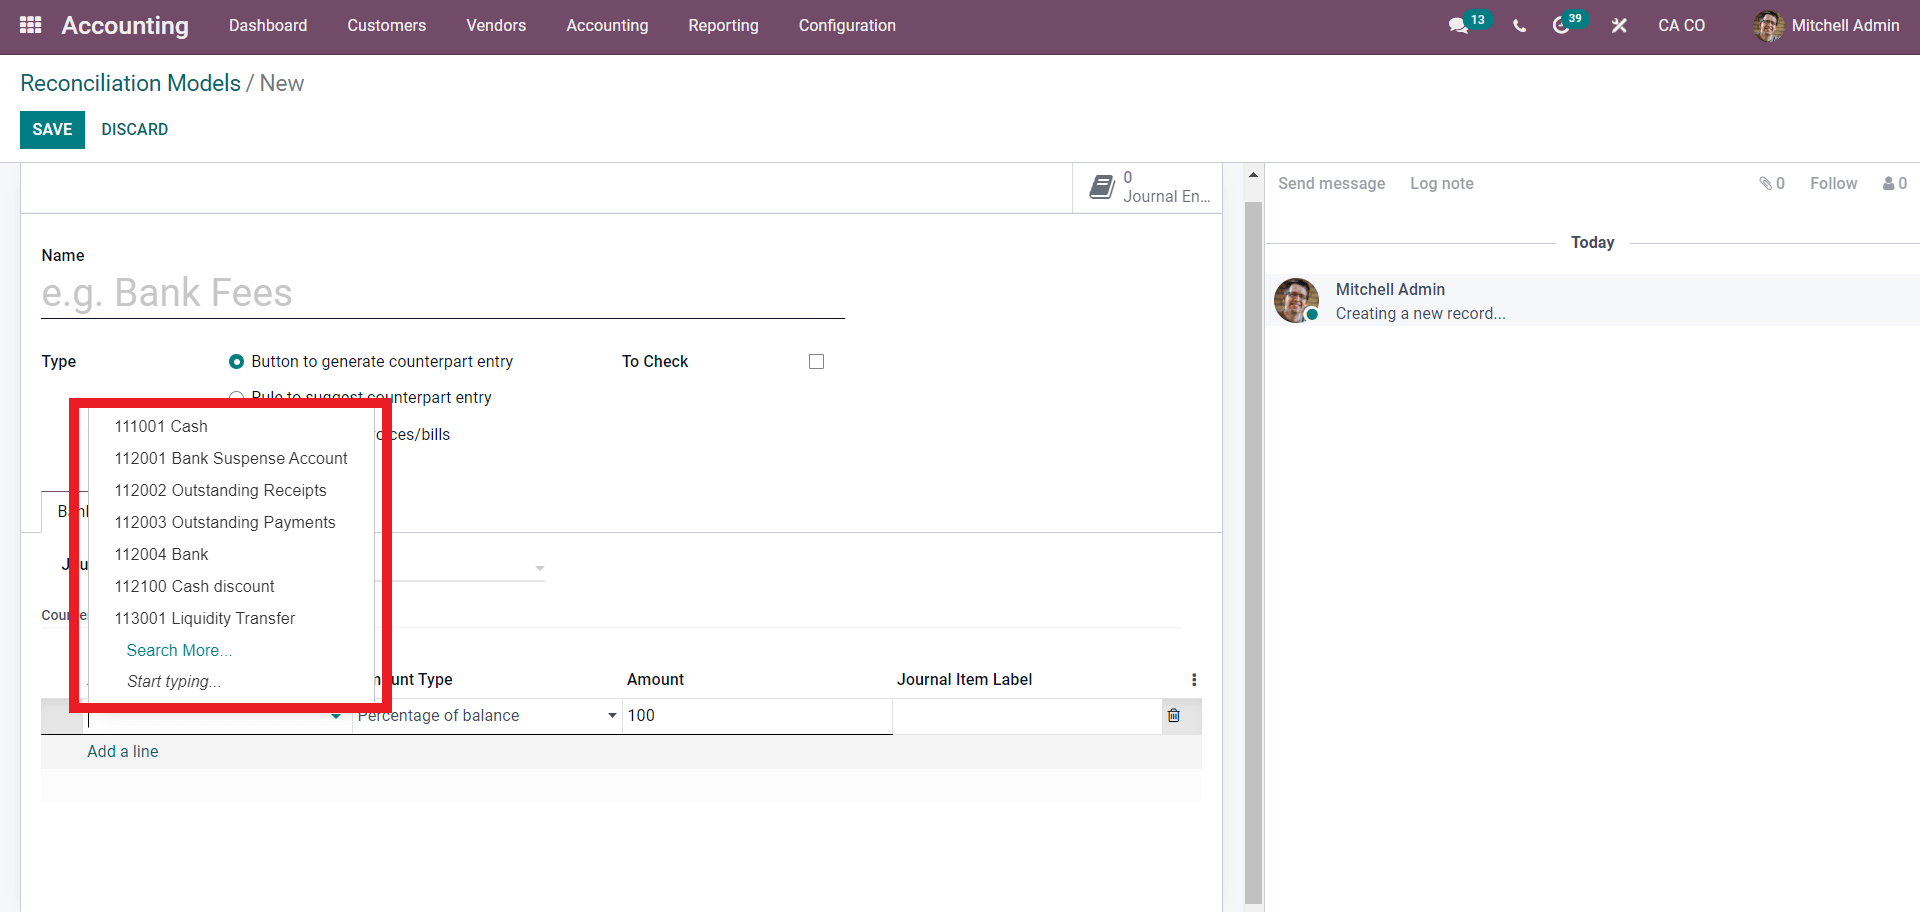
To apply for it, select from the list of possible alternatives. Choose an amount type from the drop-down menu, such as Fixed, Percentage of balance, Percentage of a statement, or From label. Under the Bank transactions conditions, you can add further fields. To add new fields, click the dots adjacent to the areas displayed below. By selecting Add Custom Field from the Dropdown menu, you can customize the fields or create a new section.
The Reconciliation model will be accessible to utilize after the configurations on the Button create counterpart entry. Let's make a Customer invoice to see how it works. Go to the Accounting module dashboard, click on the client tab, and then choose invoices from the drop-down menu. This will bring up the invoices configuration tab, as seen below.
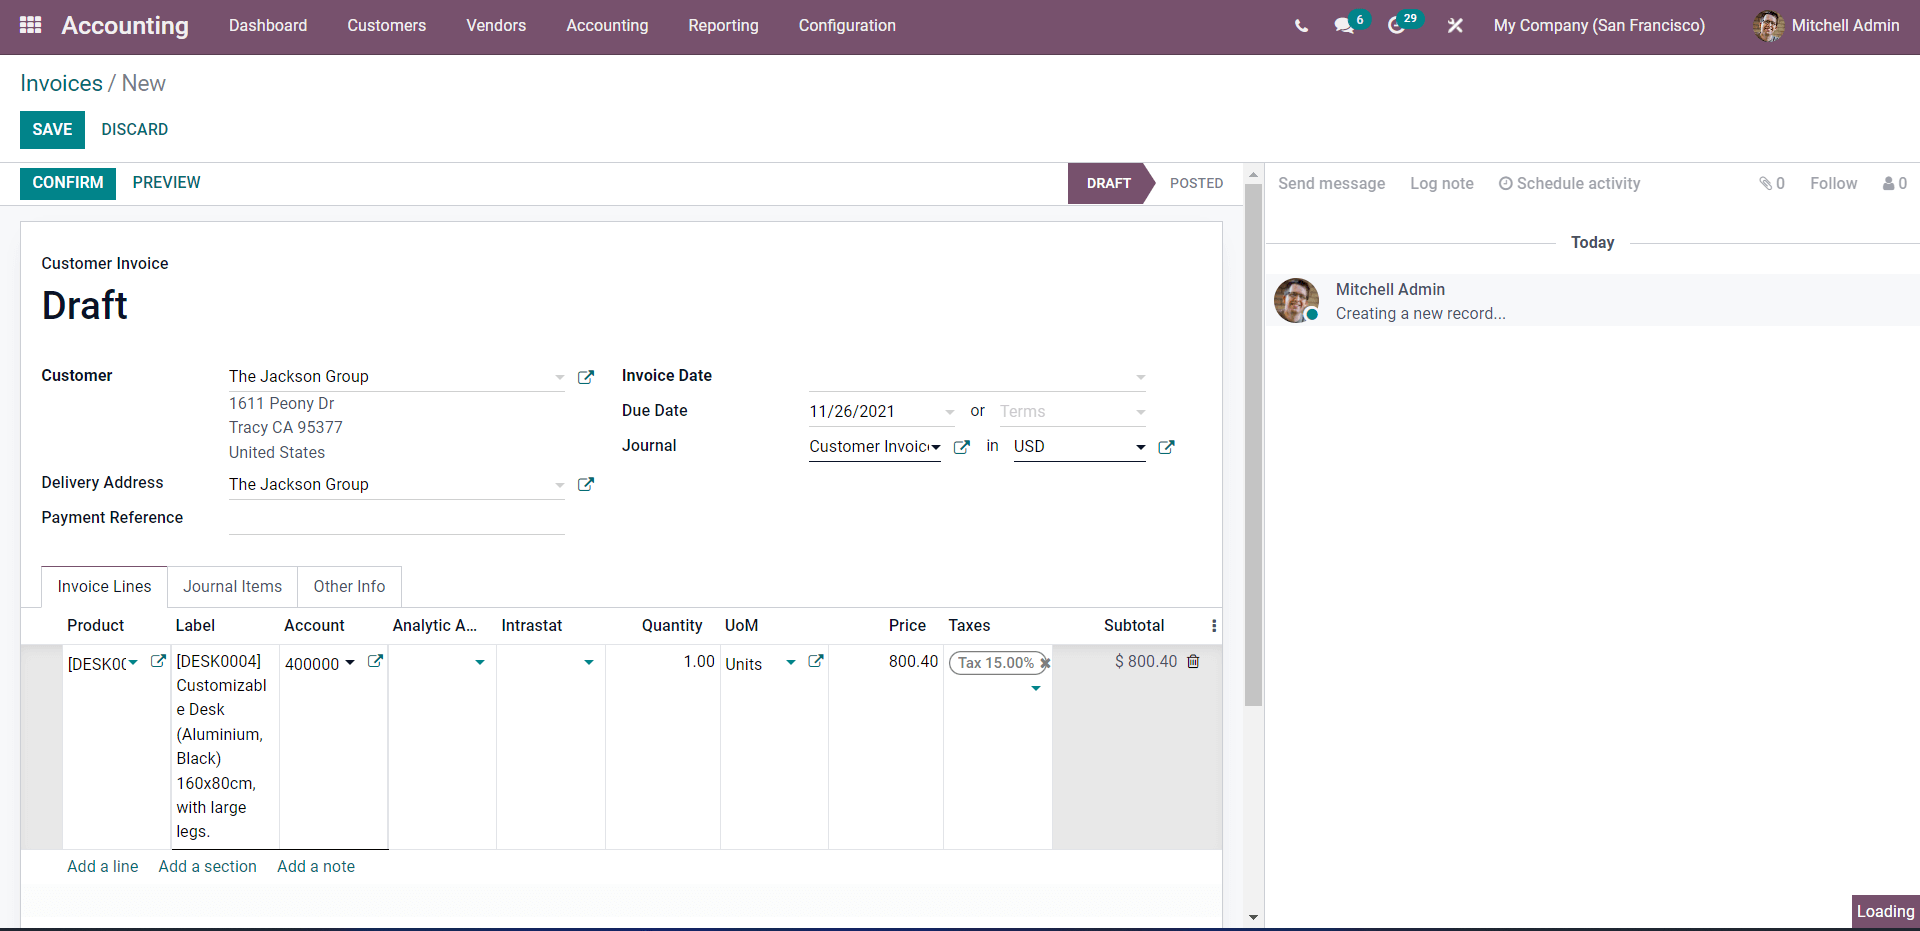
Choose the customer and the product from the invoice section, then confirm the invoices by clicking the CONFIRM button, which will send you to the next area, as seen below.
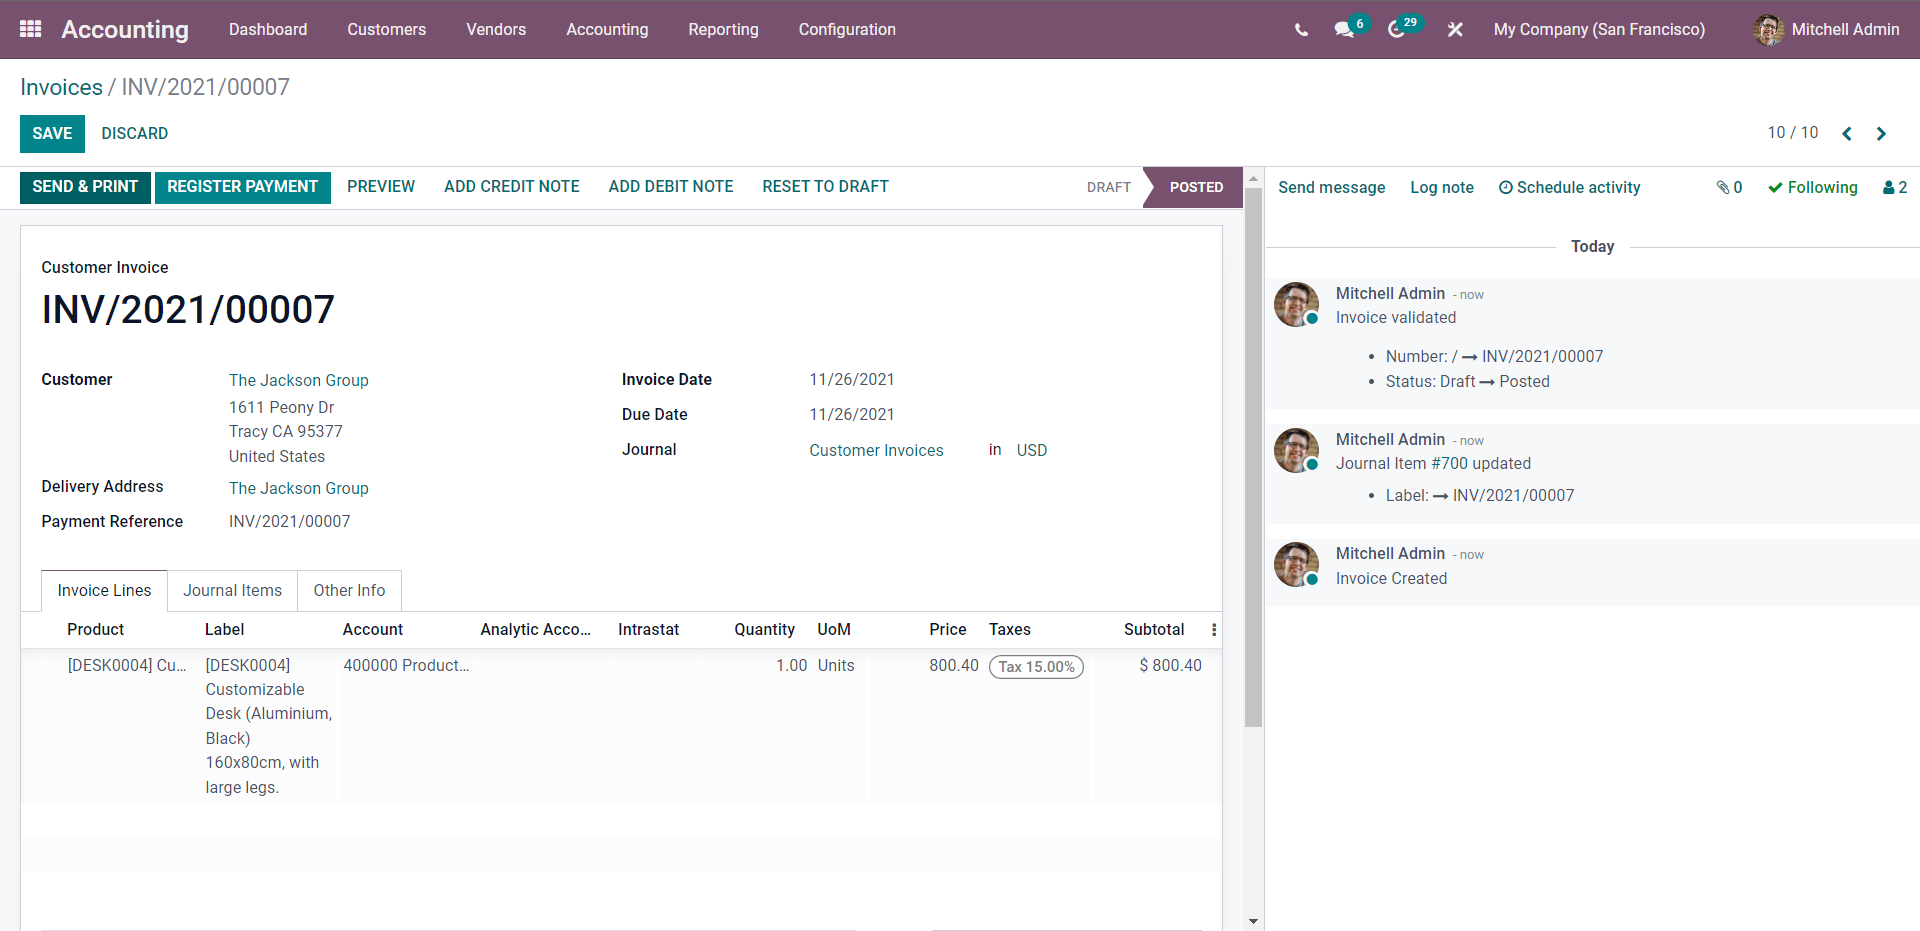
Return to the module's Dashboard after that.
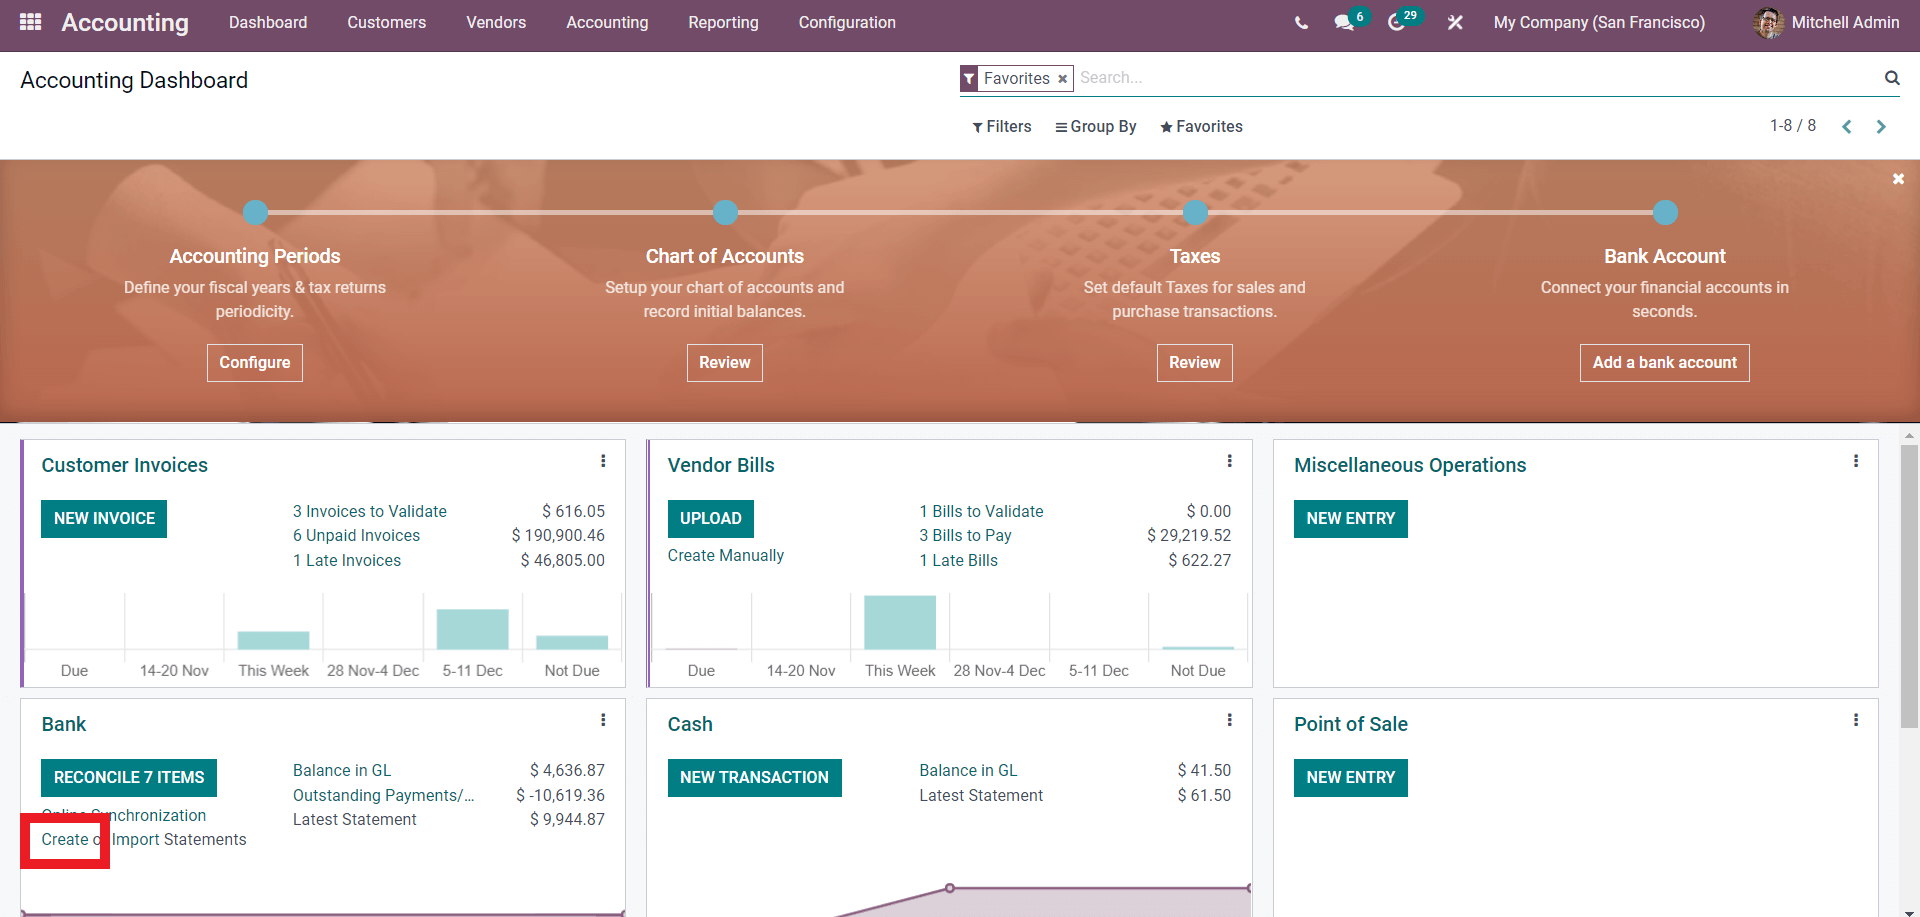
To construct or create a new bank statement, go to the Bank section and press the Create button as shown in the box above.
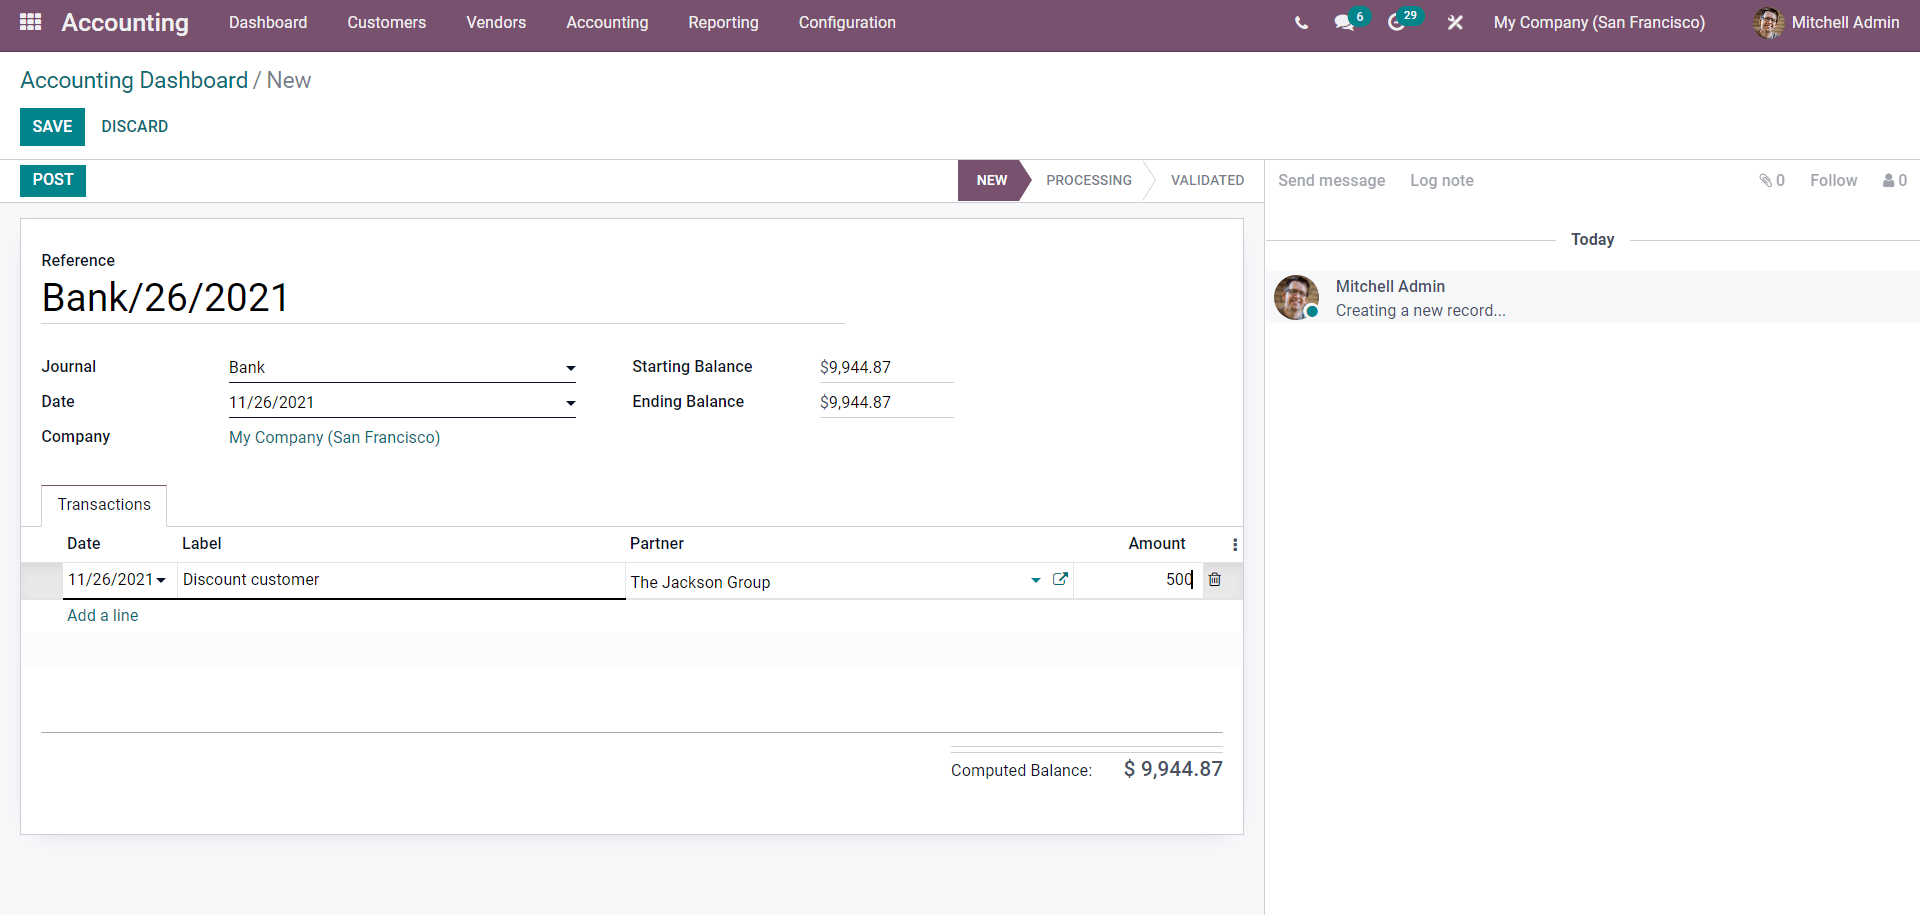
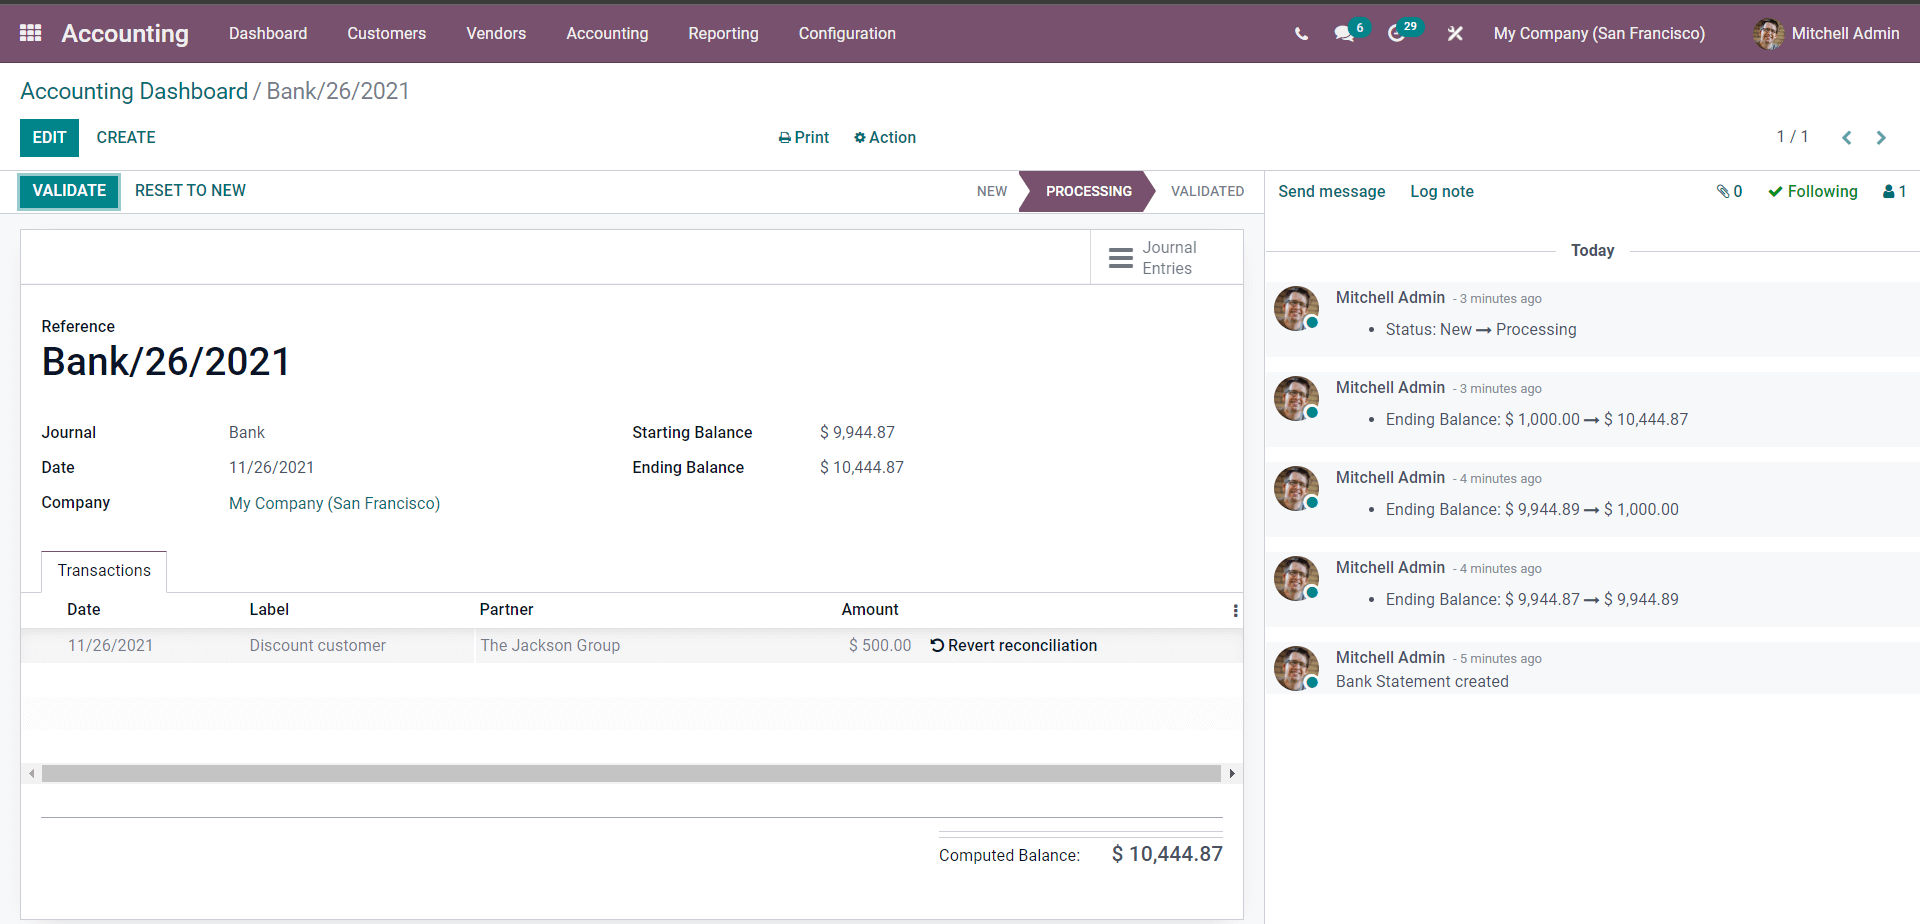
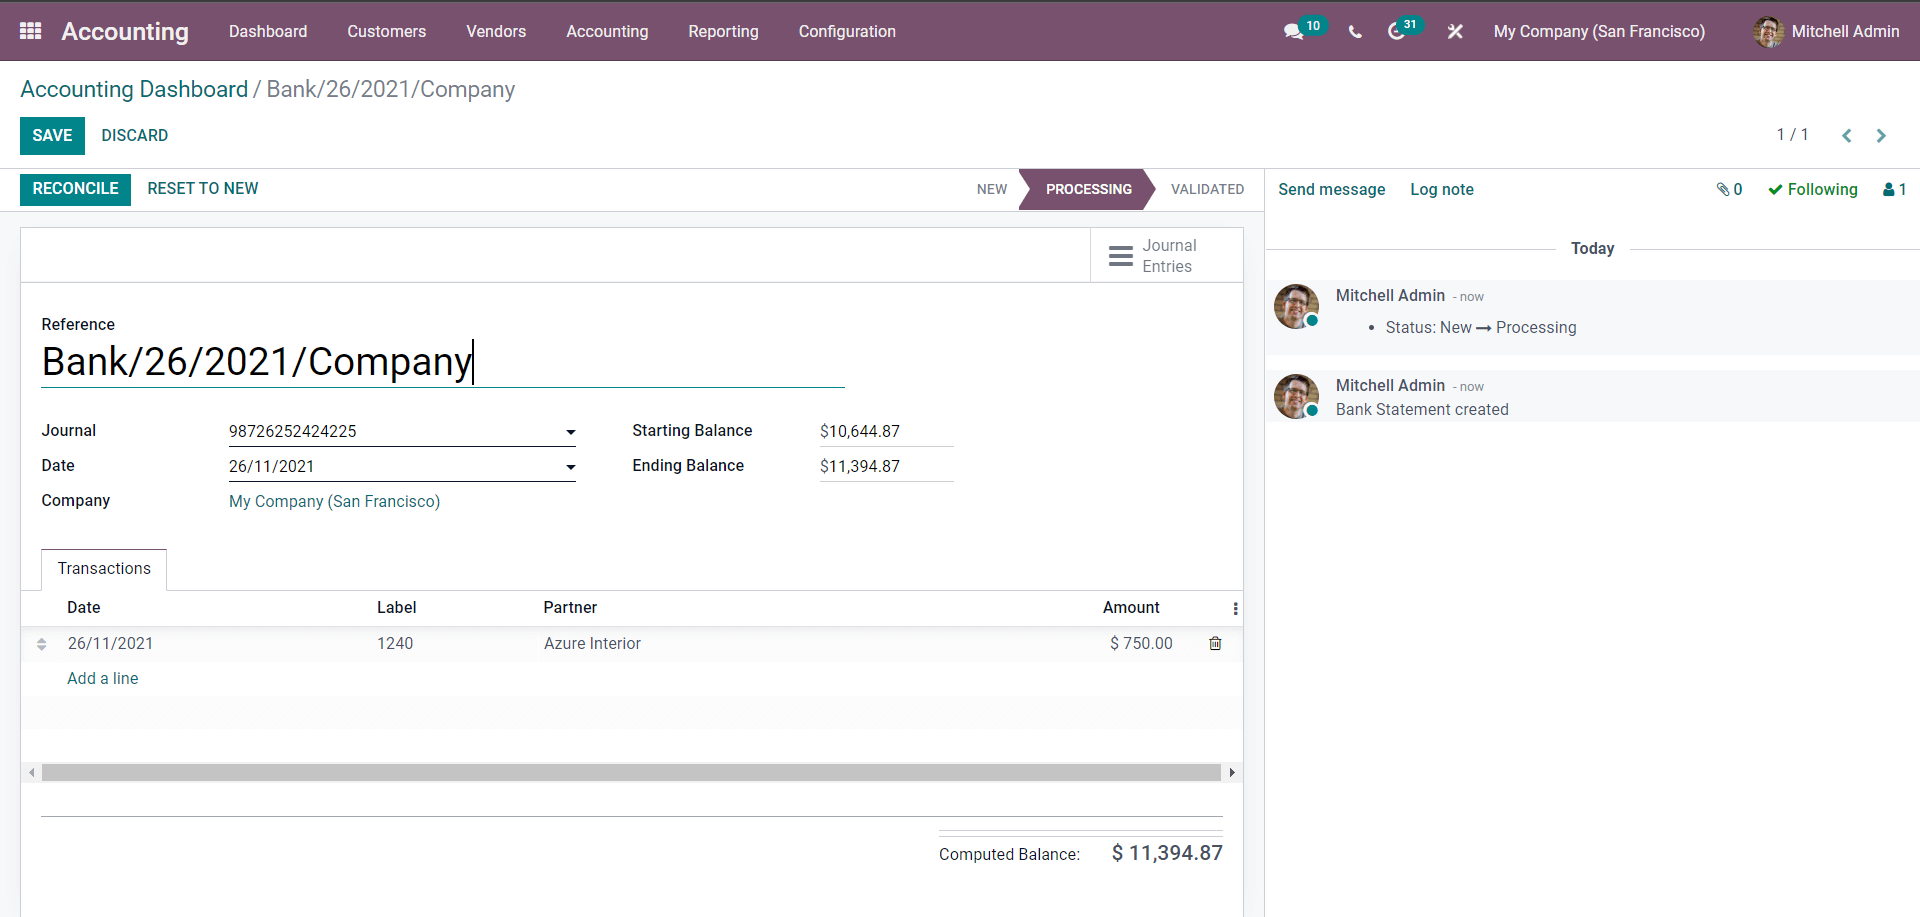
For rapid reference and identification of the statement, insert the date or the name in the Reference area. It's the statement's inception date in this circumstance. The date, initial balance, and ending balance can all be customized.
Click the Add a line button in the transactions section to add configurations to the transactions, as shown in the figure above. Include the date as well as the label. The Label is a Discount customer in the image above, and the Partner is added as a customer. Enter the amount in the Amount field and click the SAVE button.
Change the Ending Balance in the Ending Balance box before posting. After that, click the POST button to post and move on to the next stage of the procedure, as seen below.
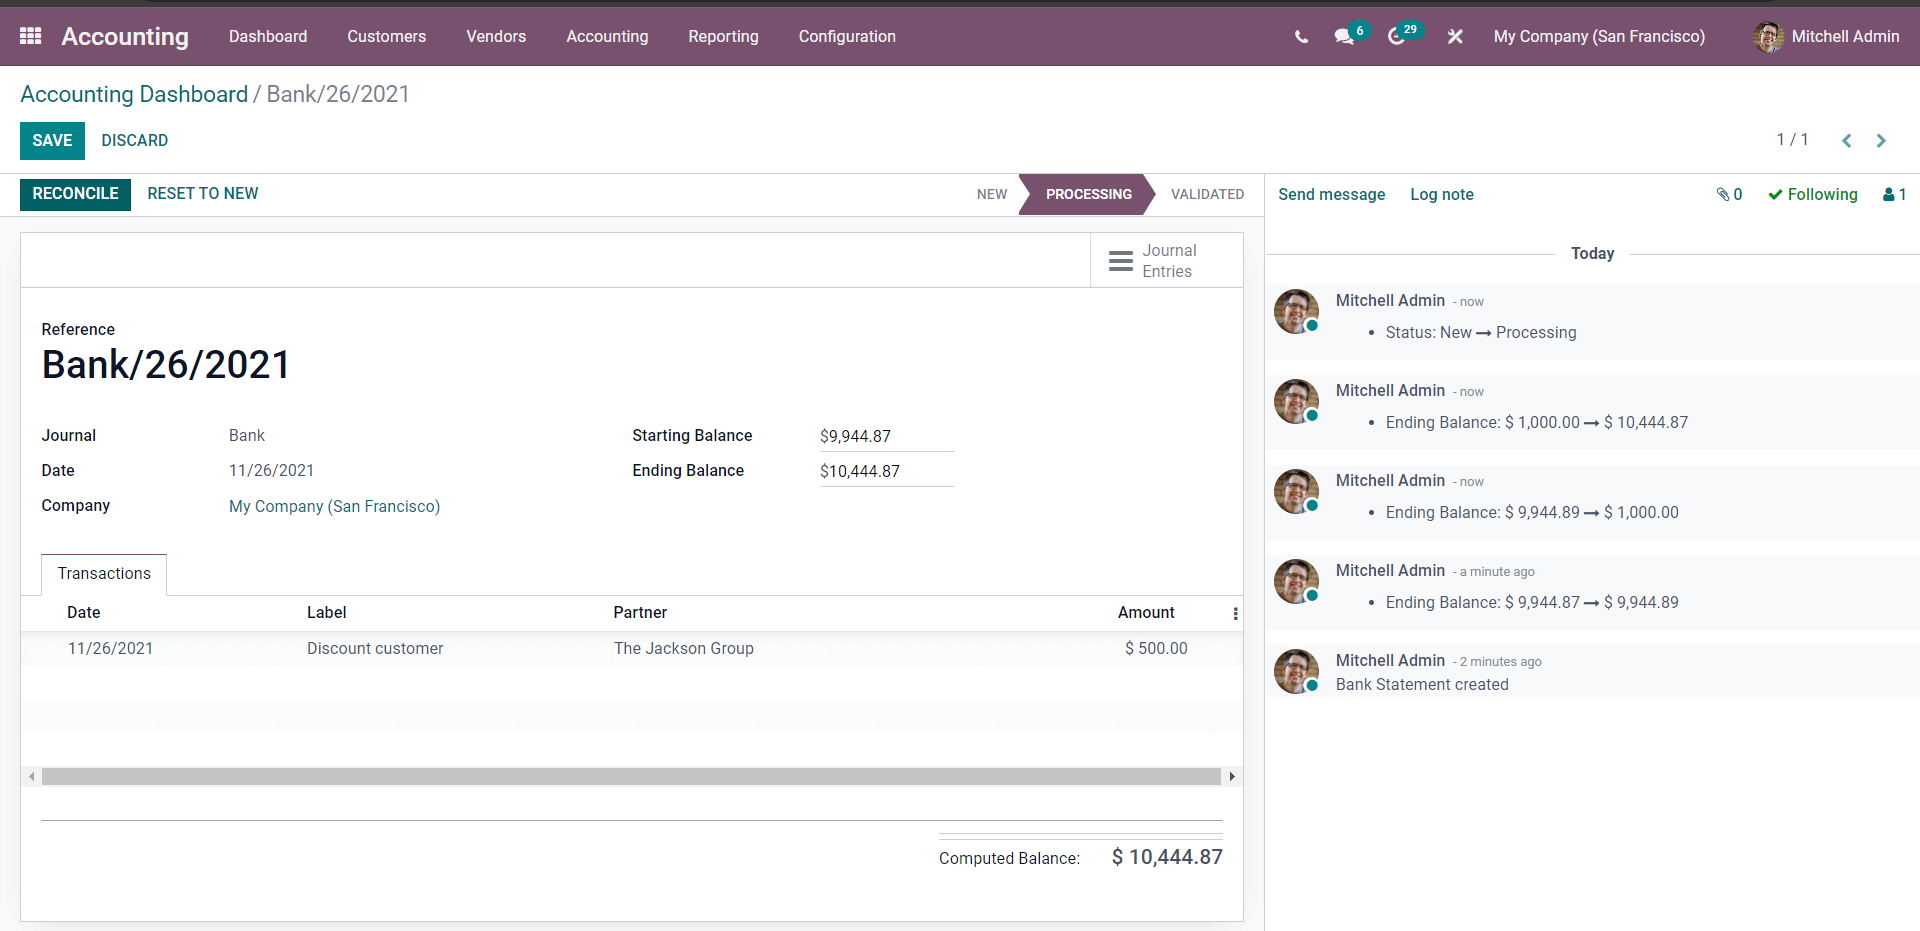
Examine the details to determine if any adjustments are necessary, then click the RECONCILE button to reconcile, then move on to the next phase to validate the statement, as shown below.
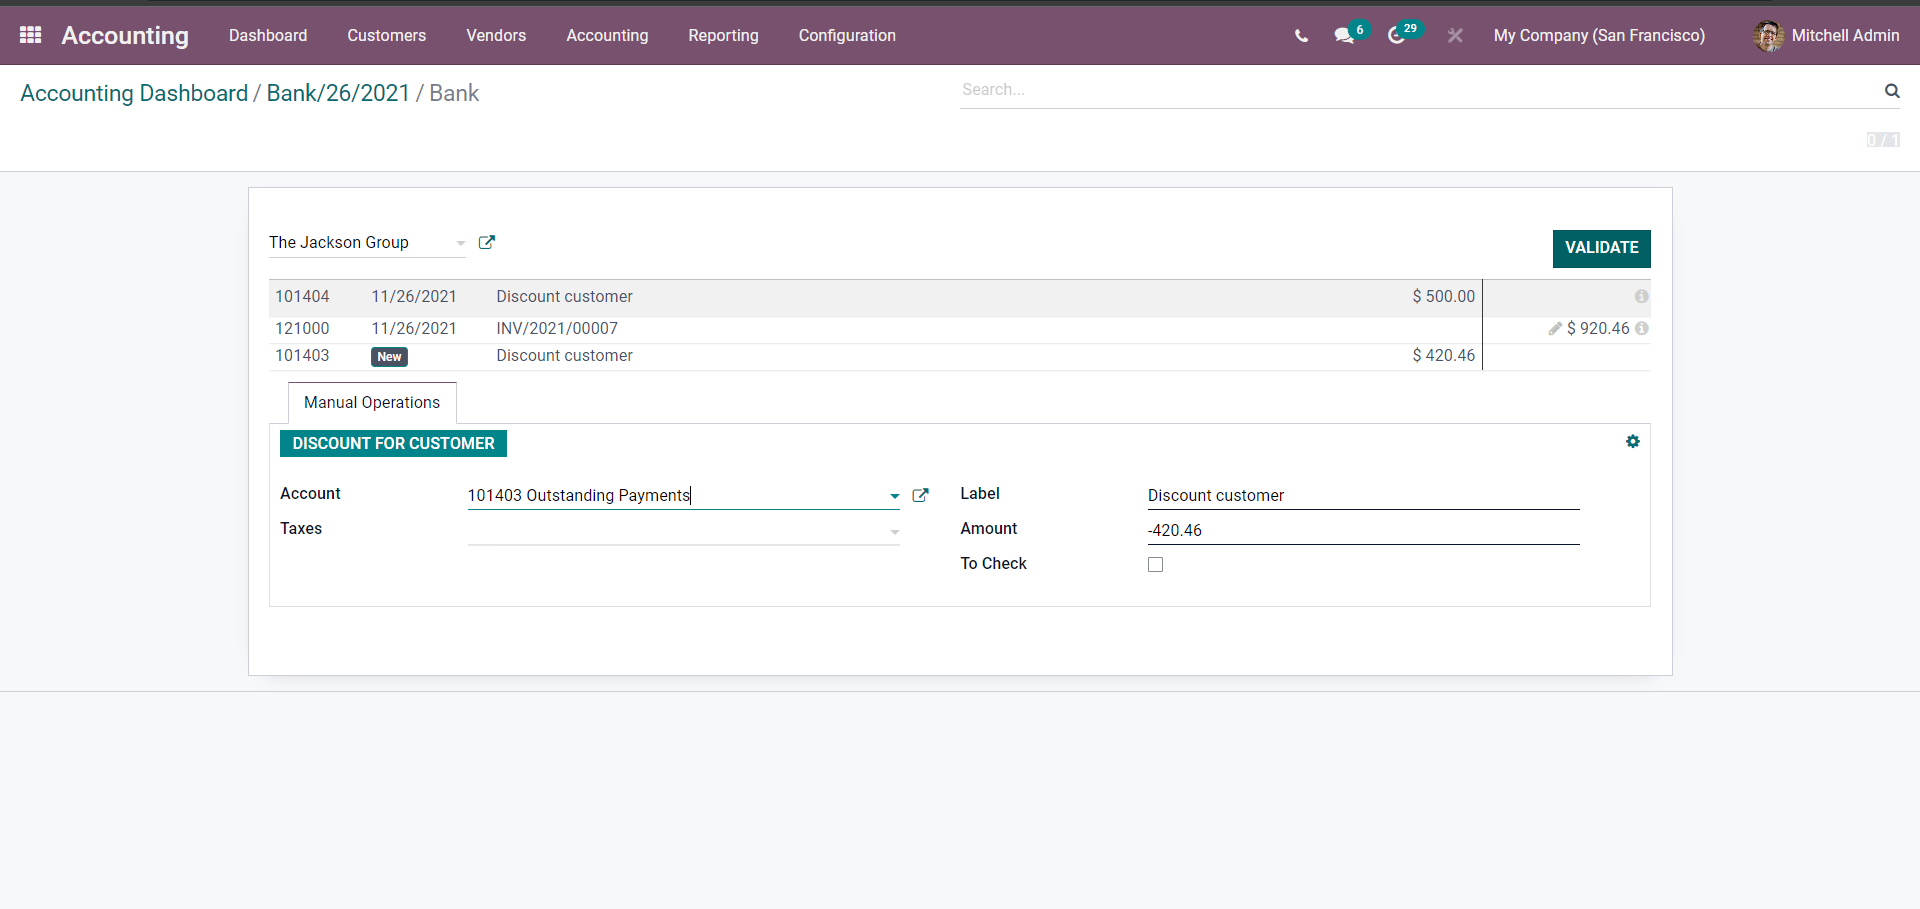
The sum listed near the Statement is $500. Click on it to modify it, and the amount entered is $920.46, with the difference of $420.46 showing in the INV area just below the labeled statement as shown above.
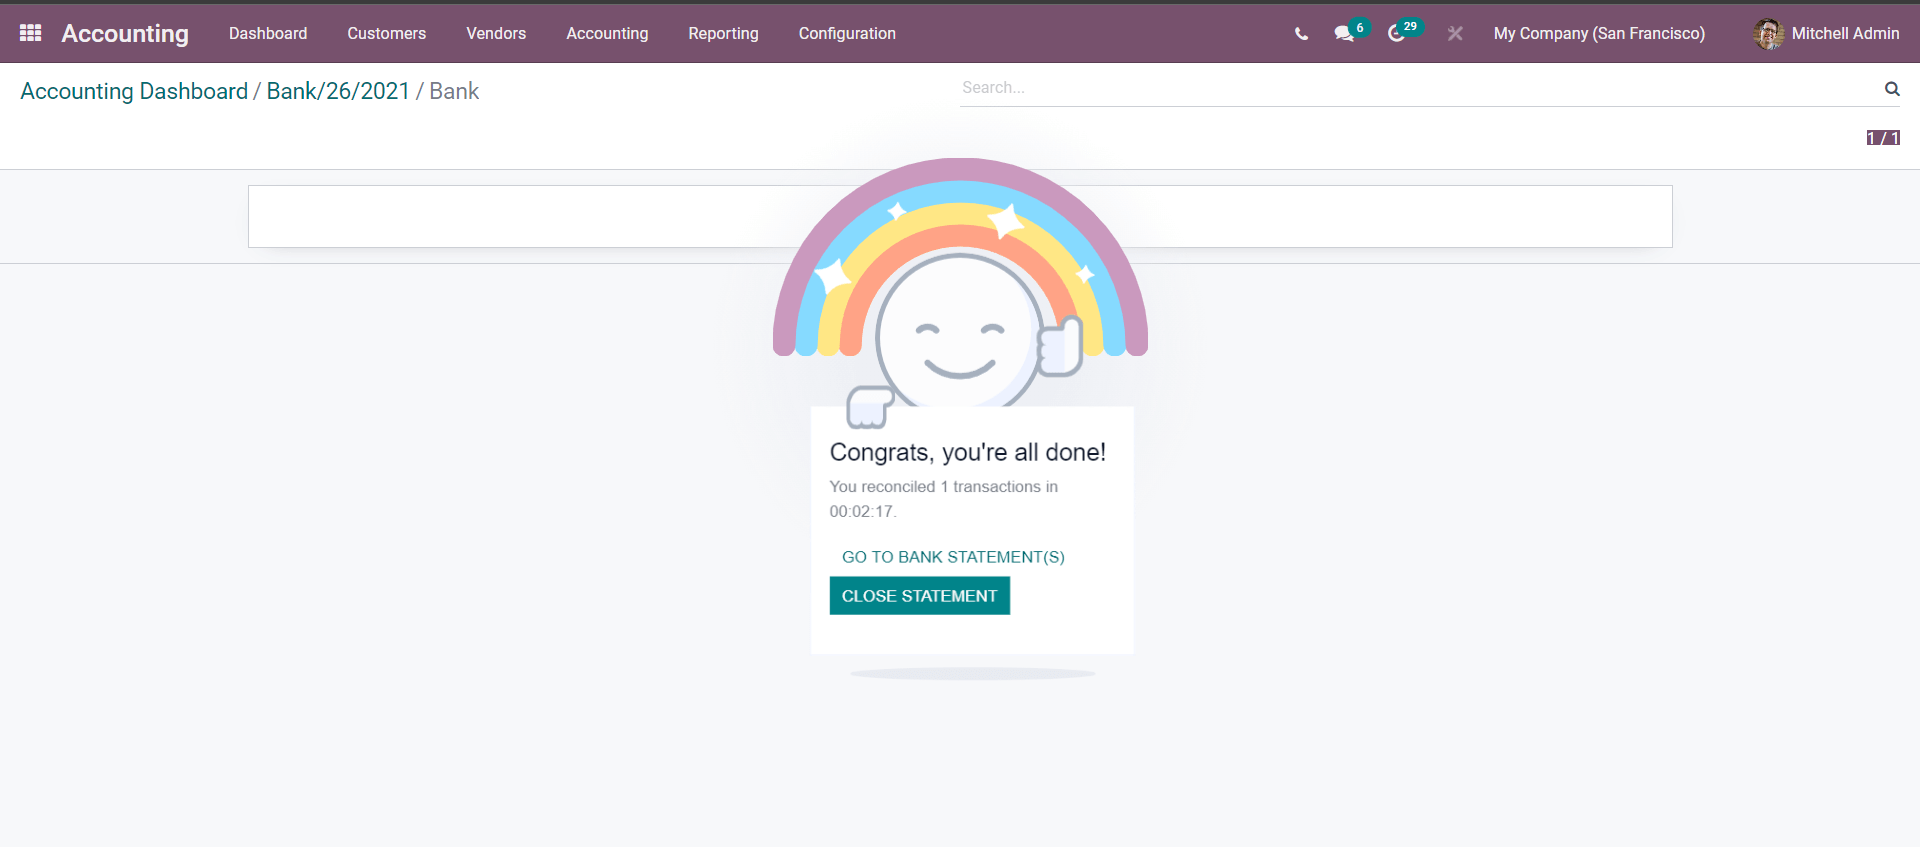
The Reconciliation Model name DISCOUNT FOR CUSTOMER can be found in the Manual Operations section. The fields will appear after you click on it. They'll be automatically filled with the data you entered in the reconciliation model section. After that, click the VALIDATE button to validate the process, bringing the Reconciliations process to a close. A final page will appear, as shown below, to indicate that the process is complete.
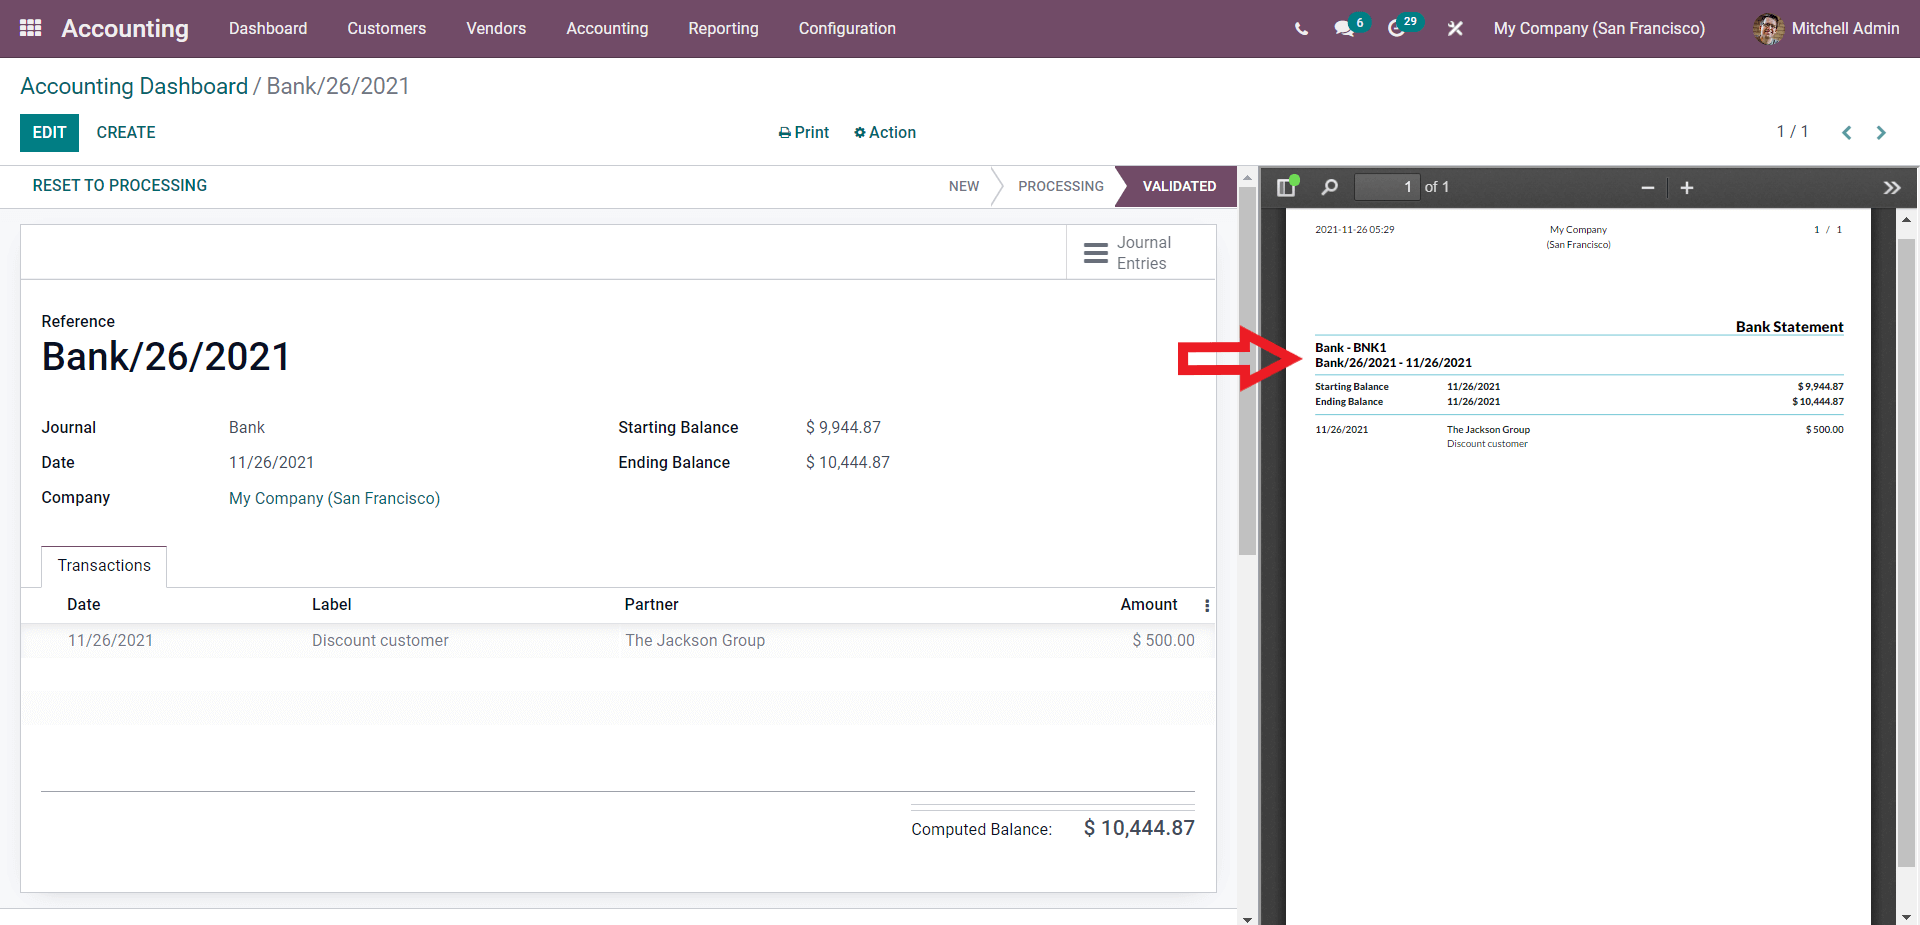
Return to the bank page
From here, you can either Validate or Revert the Reconciliation. To validate the procedure, click VALIDATE. You can notice that the Statement has been validated on the right side of the website. This section will detail the beginning and ending balances, as well as the overall amount.
"Rule to Suggest Counterpart Entry"
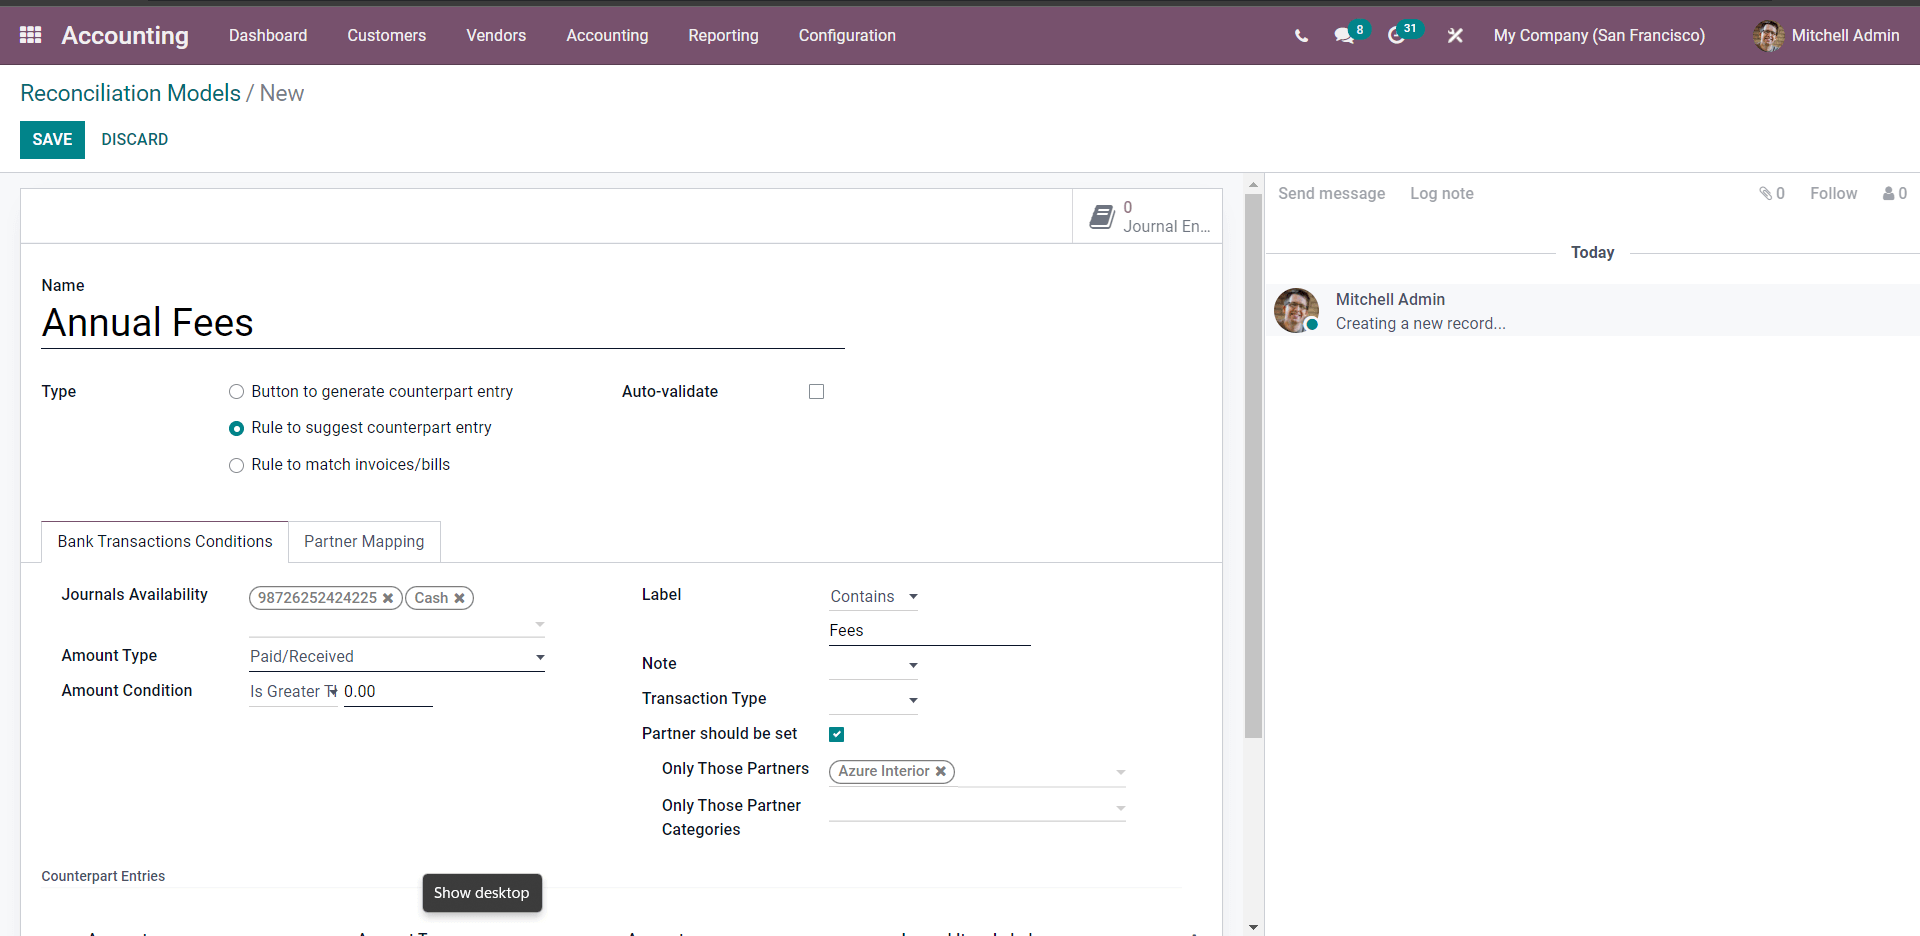
The setup page will appear below if you pick Rule to recommend a counterpart item.
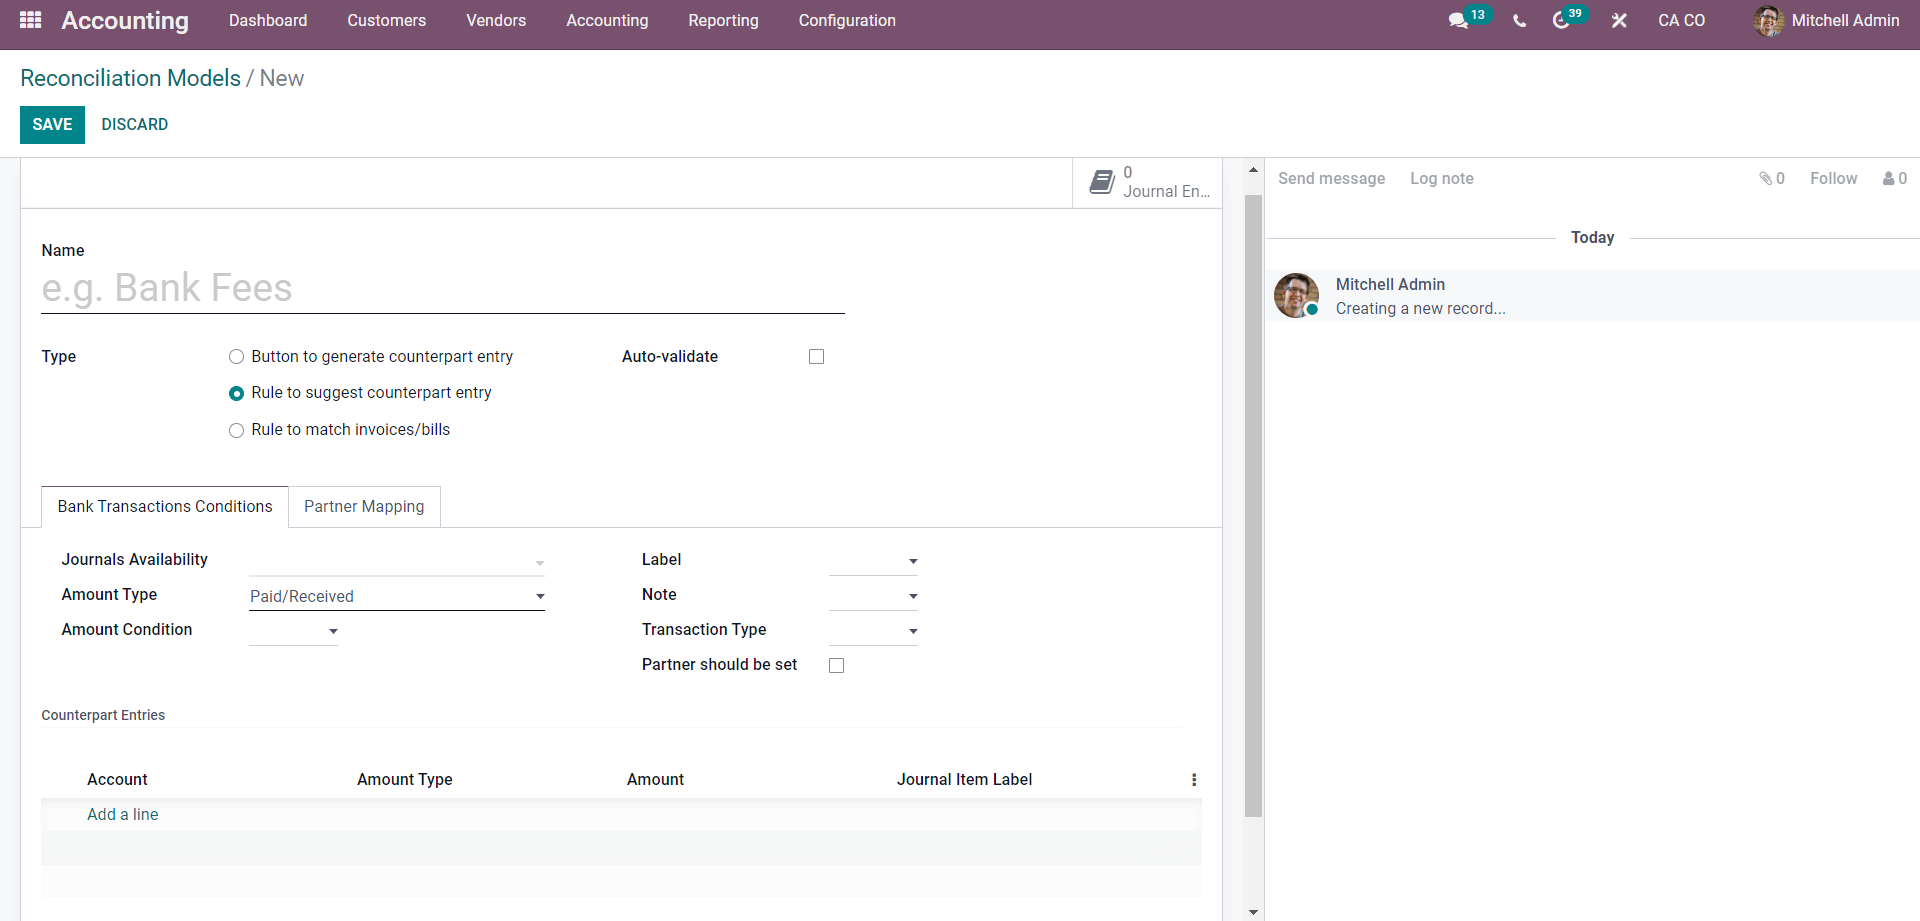
You'll note that there are more configurations available under this Type. You can choose whether or not to Auto validate the Statement line using the Rule to Suggest Counterpart entry type. The Bank Transaction conditions can be customized.
You can select Journals Availability in the 'Bank transaction conditions' section. From the Received, Paid, or Received/paid list, select the Amount type. You can choose the Amount condition from the three drop-down options, lower than, larger than, or in between, to start the reconciliation process.
The Label field, which contains three options: Contains, Not Contains, and Match Regex, is located on the right side of the section. You can also configure the Partners by selecting the Player Should be Set option, which will provide you with extra options to pick the partners, as seen below.

After configuring the partners, go to the next step, Partner Mapping, and utilize the Add a line button to add the Account under the Counterpart Entries section.
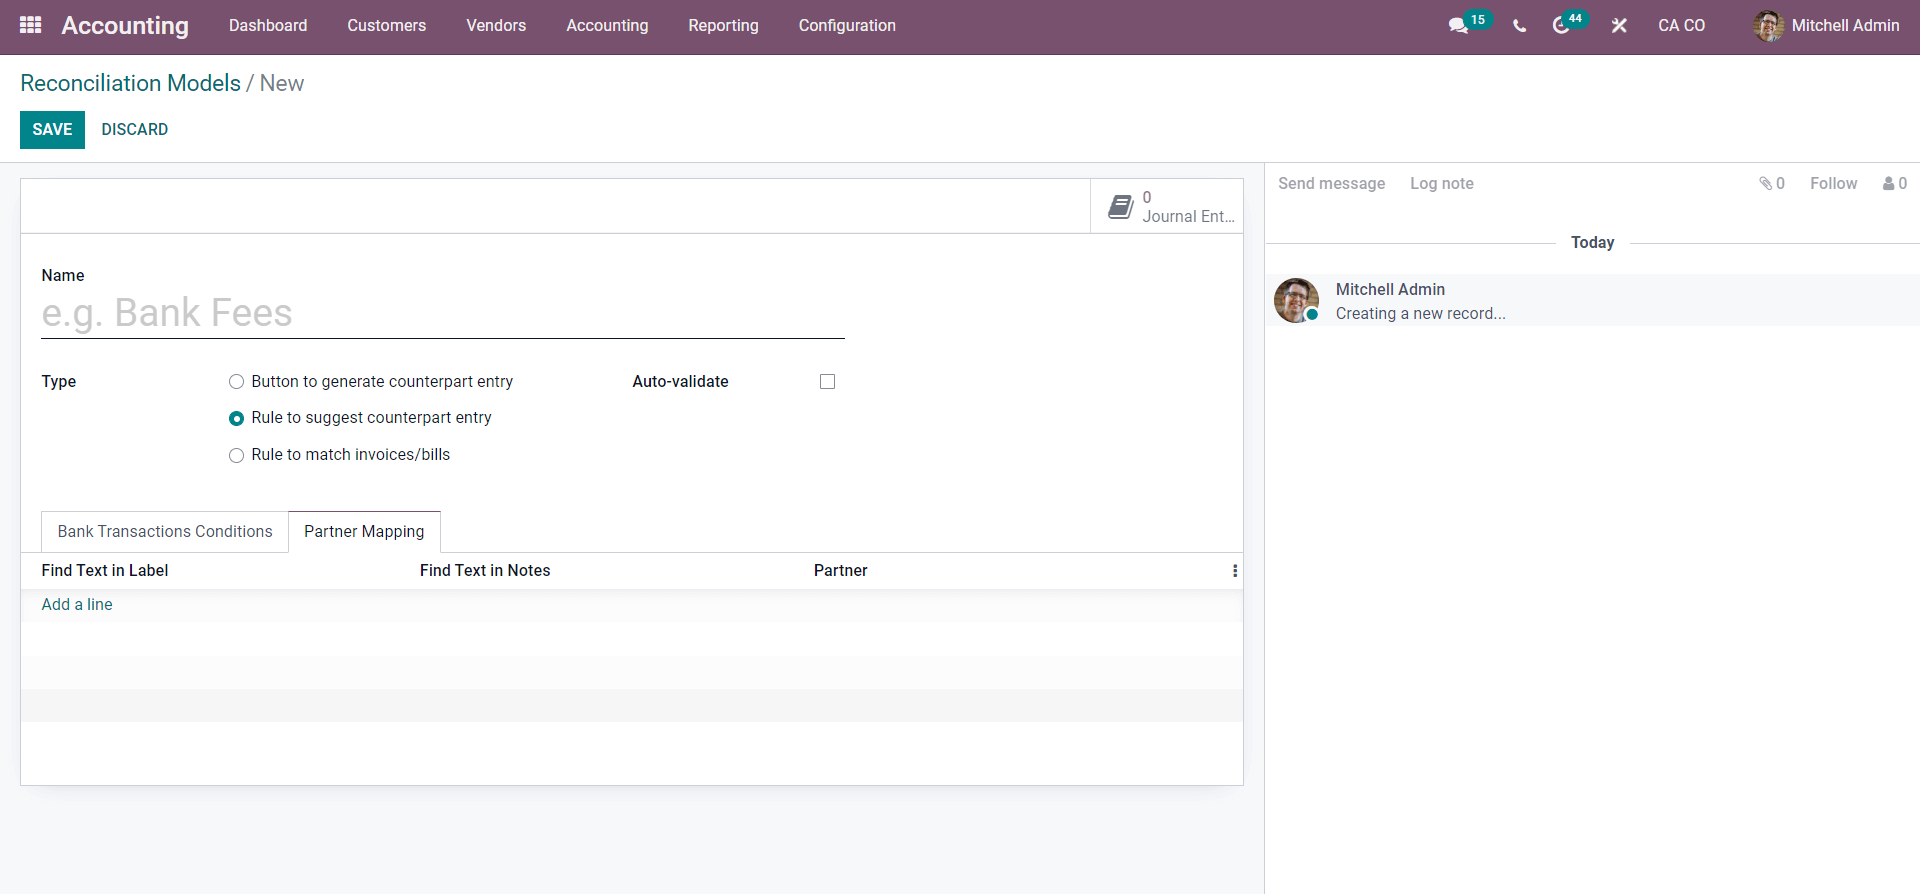
To add the configurations, click the Add a line button. Find text in notes and Partner are two of the configurations. Following the setups, you may add custom fields and existing lots; click the SAVE button to save the Reconciliation Model.
After you've finished configuring the Rule to recommend counterpart entry, save the updated Reconciliation model by clicking the SAVE button. After that, go to the module's Dashboard and create a statement under the bank area, which will offer you the same setup as the page below.
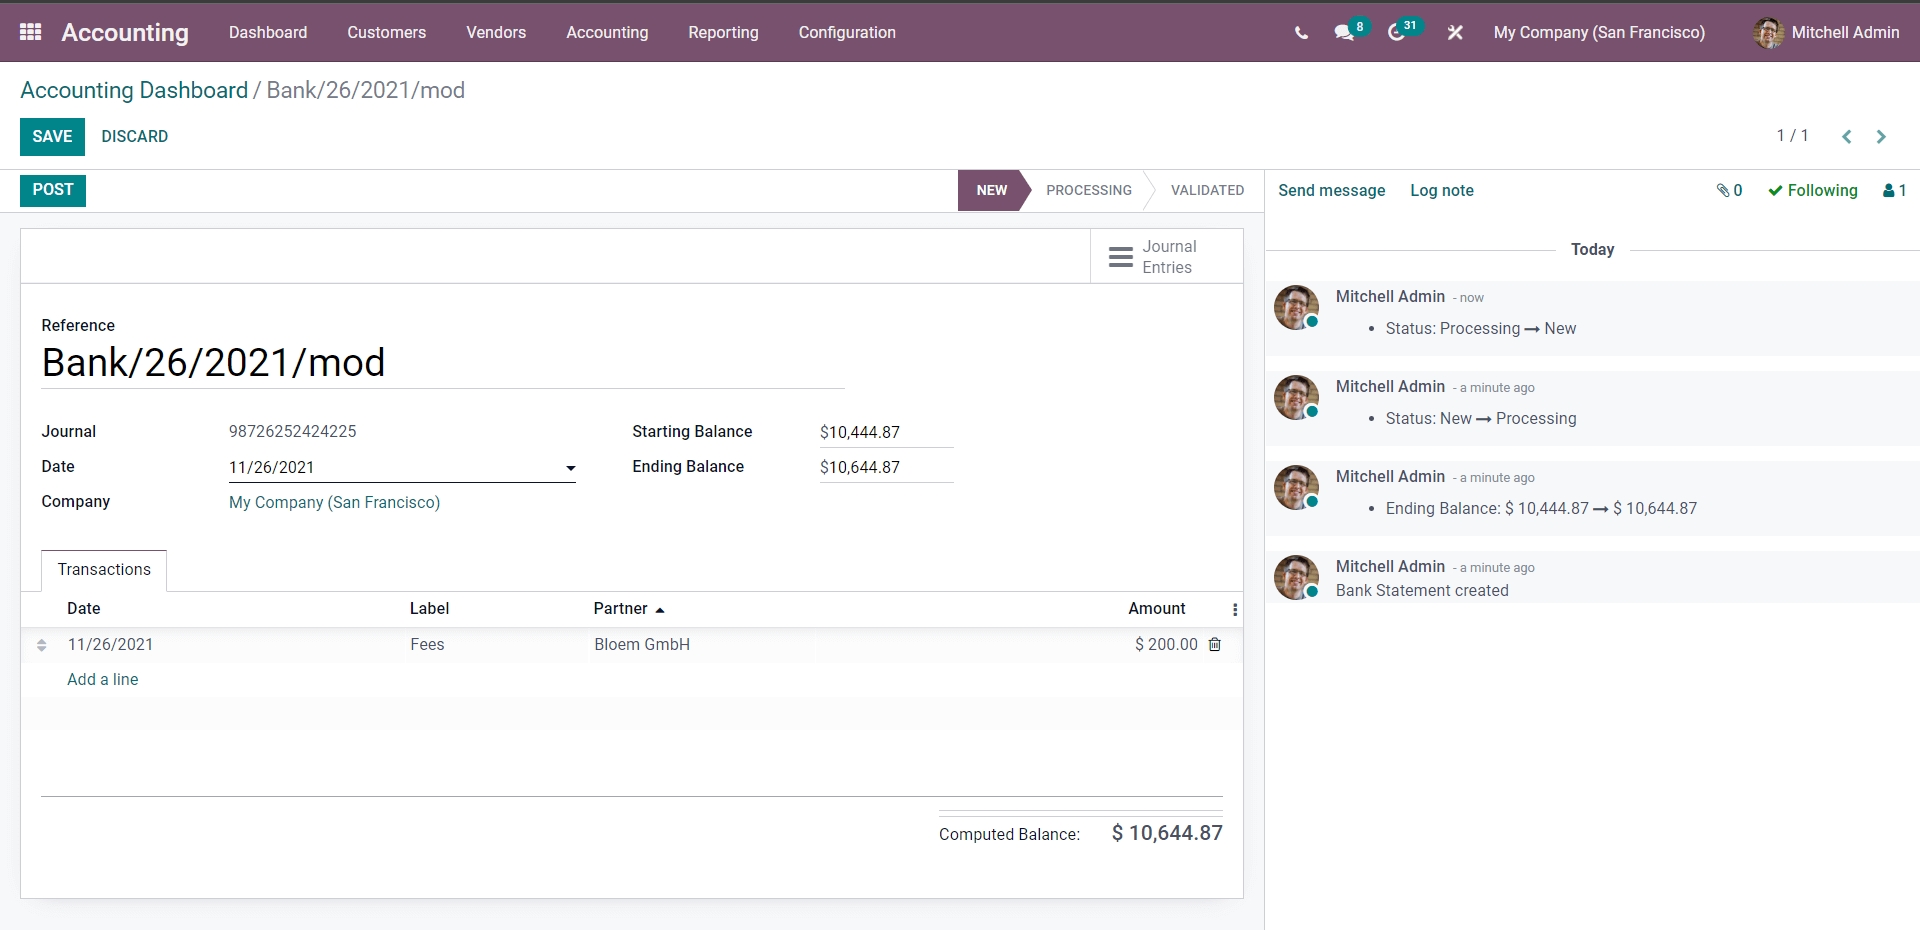
Include the name of the reference, the journal, the date, the starting balance, and the ending balance. Click the Add a line button in the Transactions section and fill in the details such as Date, Label, Partner, and Amount.
As previously said, you can change the fields in any way you like. If the Ending Balance and Starting Balance are the same, put the Complete balance in the Ending Balance column. After you've completed the setup, click POST to proceed to the next level.
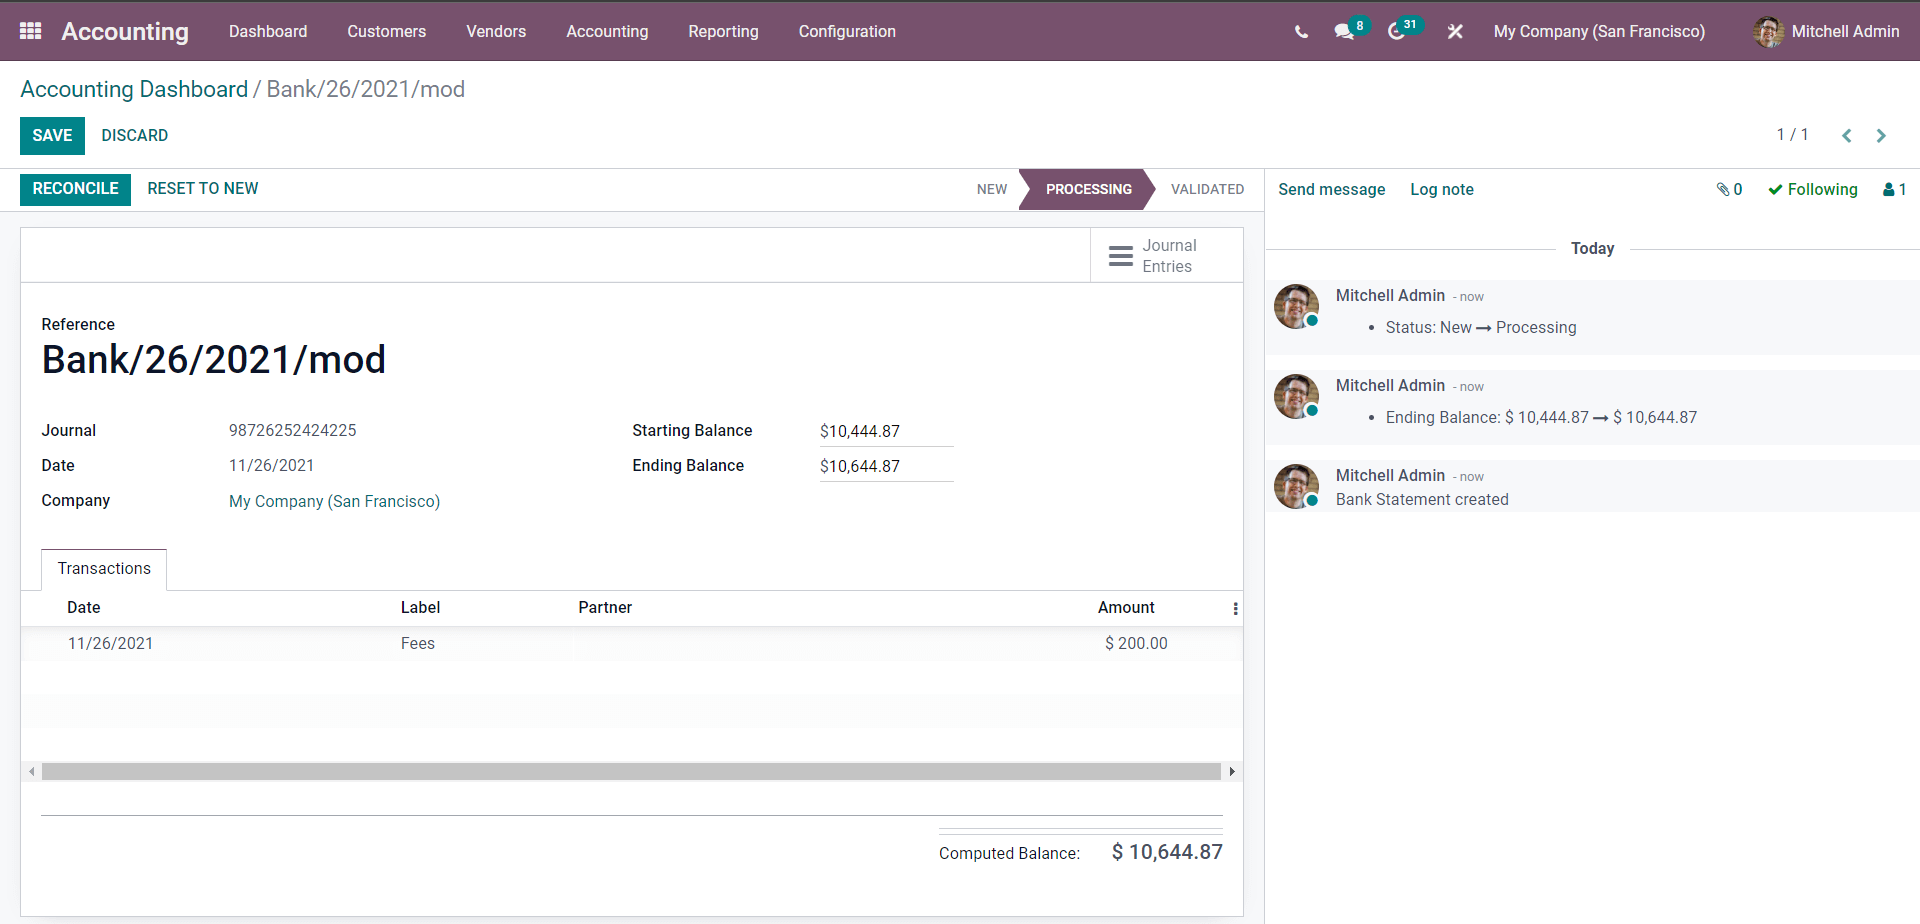
Reconcile the statement by checking the details and clicking the RECONCILE button, which will send you to a Validation section as shown below.
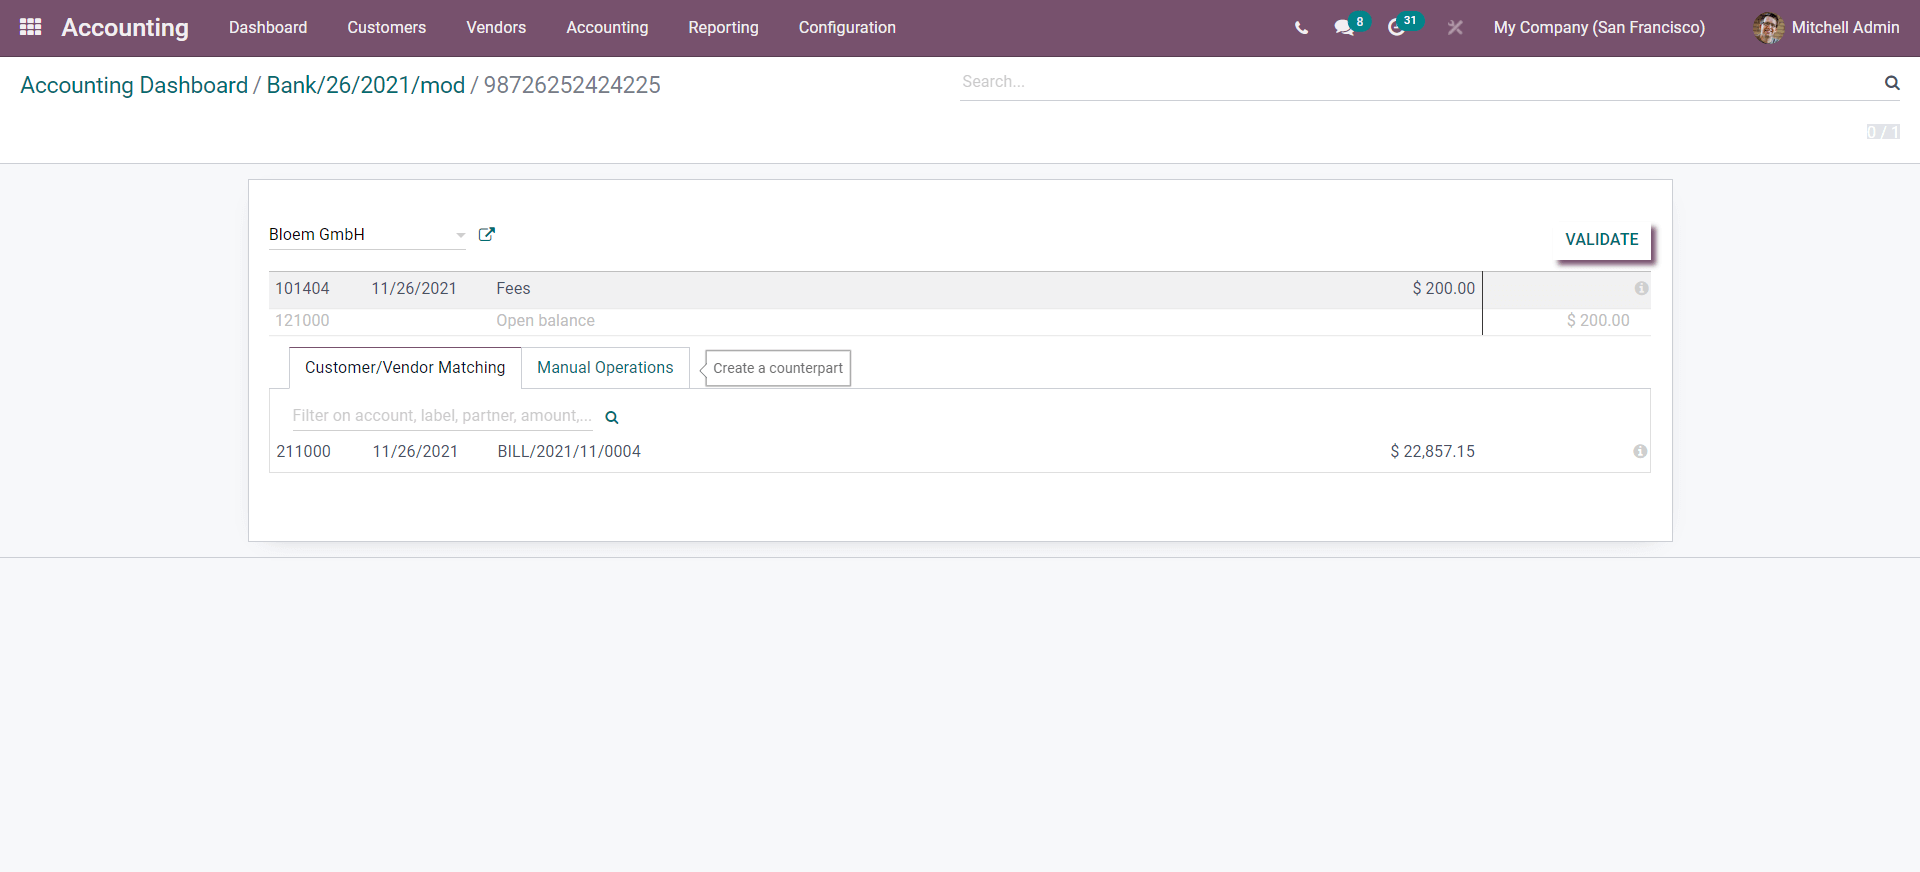
You can configure the amount on the Validation page in the same way as you do on the Button to produce Counterparts type. You can alternatively go through the Manual Operations and then validate the Statement by clicking the VALIDATE button, which will instantly validate the Statement. As illustrated below, a final page describing the process' conclusion will appear.

This is the last step in the entire procedure. The statement will appear in the Accounting dashboard's Journals section.
"Rule to Match Invoice/Bills"
The options will be presented below if you select "Rule to match invoices/bills."
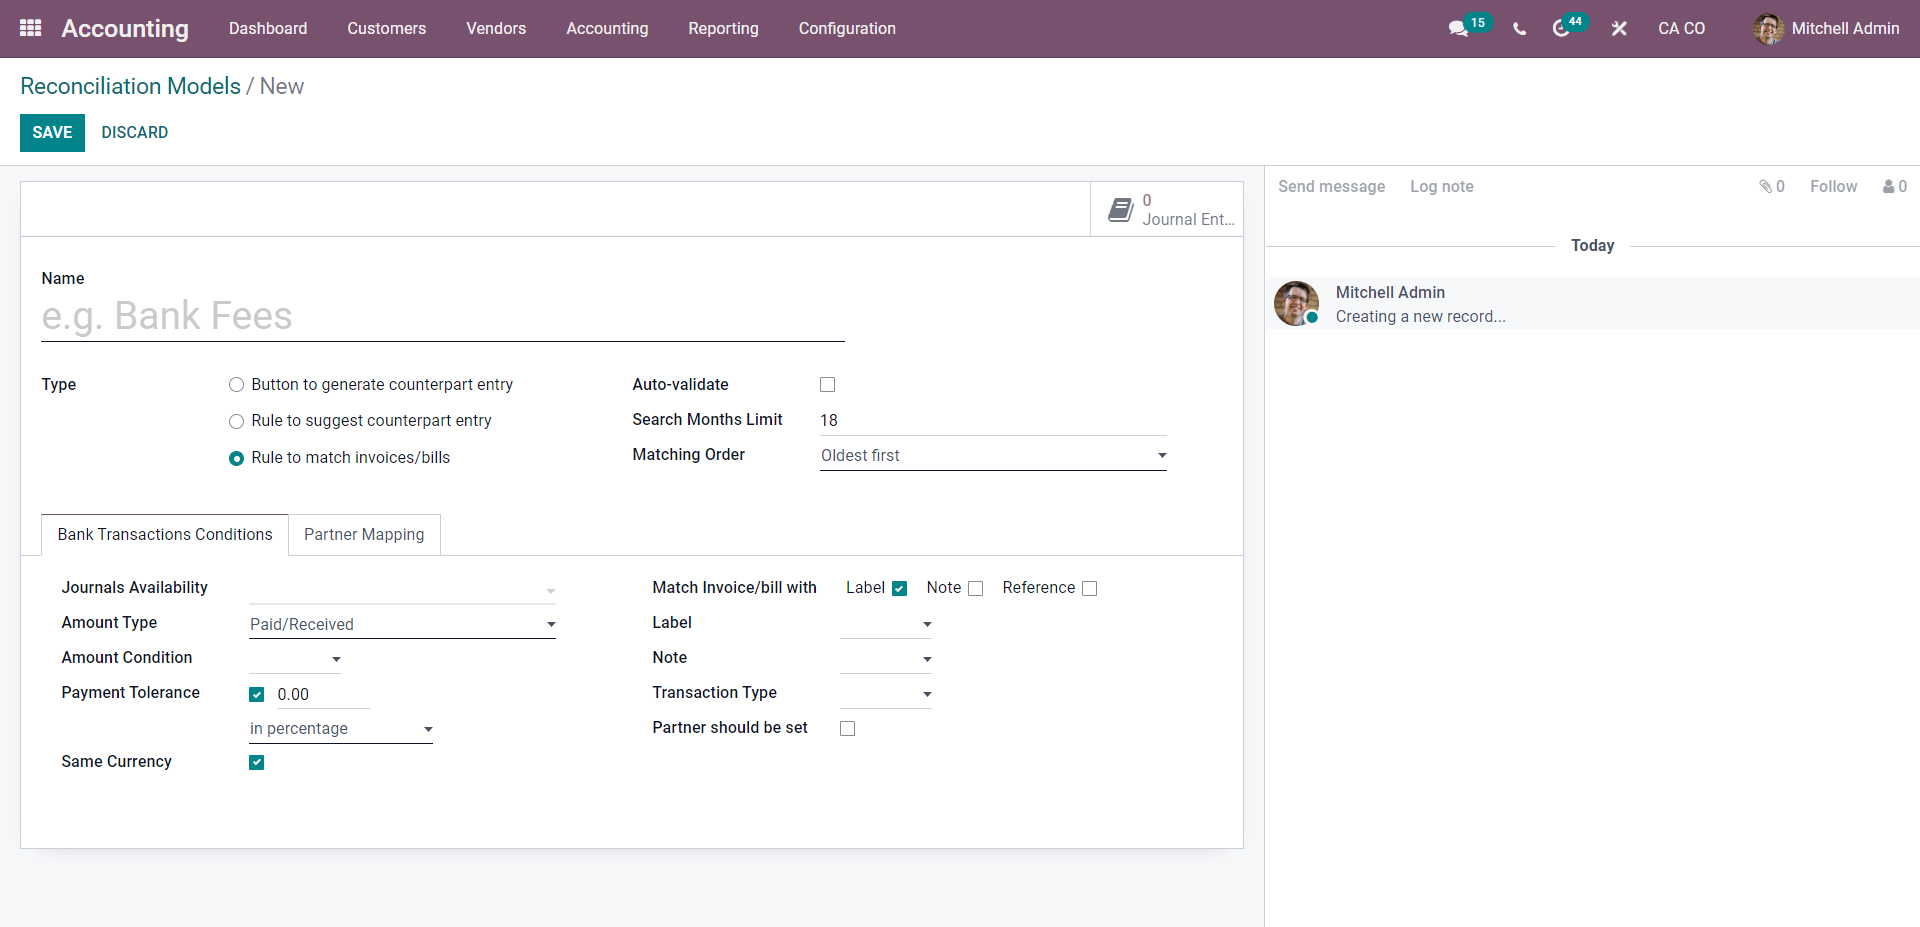
You can name the model and choose whether or not it should auto-validate. Set the matching order and select the Month limit from the drop-down menu.
You can configure the Journal activity under the Bank transaction condition. You can choose the unit to represent the payment tolerance and set the payment tolerance. Configure the remaining parts in the same way you did the different types previously; once you've finished, click the Save button to save your changes.
Create an invoice for the customer you specified in the Reconciliation Model settings section for the Partner category.
Configure the customer, add the product, then confirm the invoice by clicking the CONFIRM button.
Go to the module's dash and Create a bank statement, then copy the reference number from the Customer invoice area.

Under the Transactions section, configure the details as described above, then give the Label as the invoice's reference number, copy it, and paste it below to match it. After you've completed the settings, press the POST button.
Click the RECONCILE button after adjusting the Ending balance to the Completed balance. Because the Validation is automated in this situation, you will not receive it; instead, it will be completed for you. After the customer completes the co-payment, go to the customer invoice to see the Reconciliation findings.
Setting up Reconciliation models simplifies the entire reconciliation process and aids in improving statement and invoice management efficiency. You may easily complete the Reconciliation operations without double-checking each step because you are less likely to make a mistake with the details on the customers and items.
Odoo 15 Accounting Module Reconciliation Models