Odoo 15 Document Management System

Odoo 15 Document Management System

Every organization's most difficult task is efficiently handling all of its paperwork. For any organization or individual to keep their data, an outstanding and efficient digital management tool is required. The Odoo Document module is an excellent tool for quickly creating new documents, storing important files and existing files, recording files, retrieving documents, ensuring their security, and many other tasks. The document management system enables you to centralize all of your company's documents and data.

You may develop a paperless, fully digitized document management system in your company by using the Odoo Document module. Within seconds, you may send, share, identify, and archive scanned documents with this module. It's simple to create business papers for manufacturing, such as vendor bills, tasks, and product sheets.


Let's take a closer look at the Odoo Document module's Document window in this article.

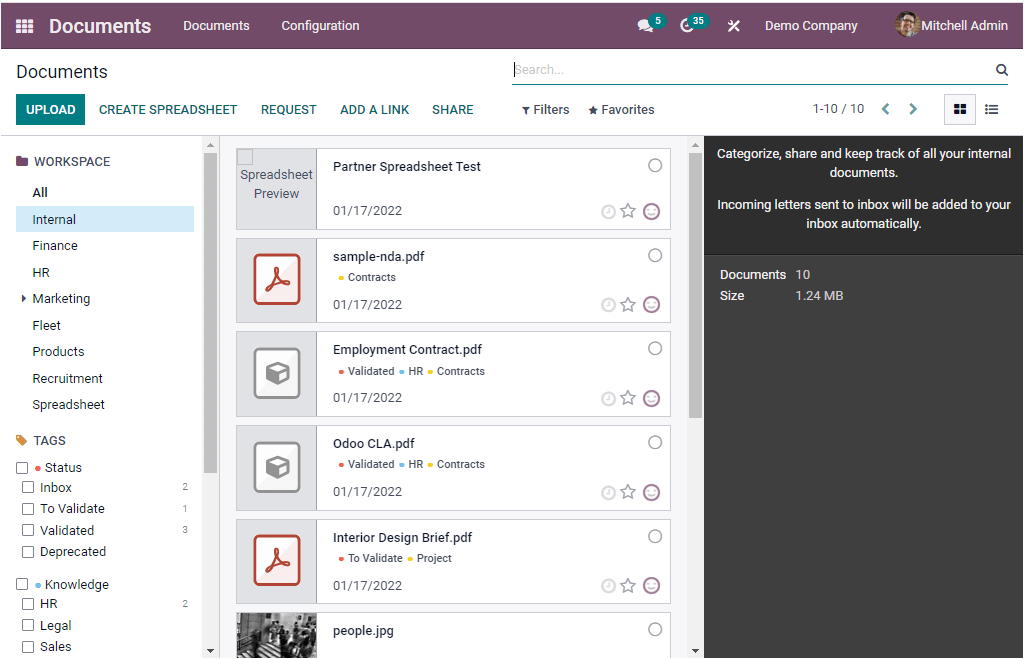
The Odoo Document module's Home dashboard pane is seen below.


In both Kanban and List view, the home dashboard pane will offer you an overview of all the papers uploaded in the system. The Kanban view is depicted in the image above, and the screen is separated into three pieces. Various filters can be found in the first section, which is located on the left side. These filters come in handy when it comes to organizing your data. That means you can simply categorize your documents using the platform's numerous workspaces, such as Tags, templates, or attached files, and many other features. Click the All menu if you wish to see all of the defined documents at once.

You may see a variety of preconfigured workplaces in the window above. Internal, Finance, Human Resources, Marketing, Fleet, Products, Recruitment, and Spreadsheet are the categories. Odoo allows you to create different workplaces. The option to configure a new workspace can be found under the Configuration tab, and we'll go over it in more detail in the next blog. As a result, all of the specified workspaces will be presented here, which is highly useful for organizing and retrieving data fast. All you have to do now is click on the required workspace type, and all the workspaces that fall under this category will be presented in the window's center.

The window will show you a preview of the spreadsheet, as shown in the screenshot above. The document's name, tags configured, date, month, and year will all be displayed in each preview. Select document, schedule an activity, and toggle favorite are all options on the right side.

You can save a document as a favorite if it is essential to you. To do so, simply select the toggle favorite option. You can also schedule an activity by selecting the schedule action menu icon. As illustrated in the figure below, you will now create a dropdown window.

You can use the +SCHEDULE AN ACTIVITY button to do so. This action will open a new window where you can enter the information needed to create a new activity.

By selecting an activity type from the dropdown menu, you may customize your experience. Assign the Summary and Due Date as well. It's preferable if you filled out the Assigned to field. In the same way, make a note in the designated box. After you've filled out the form, click the SCHEDULE button.

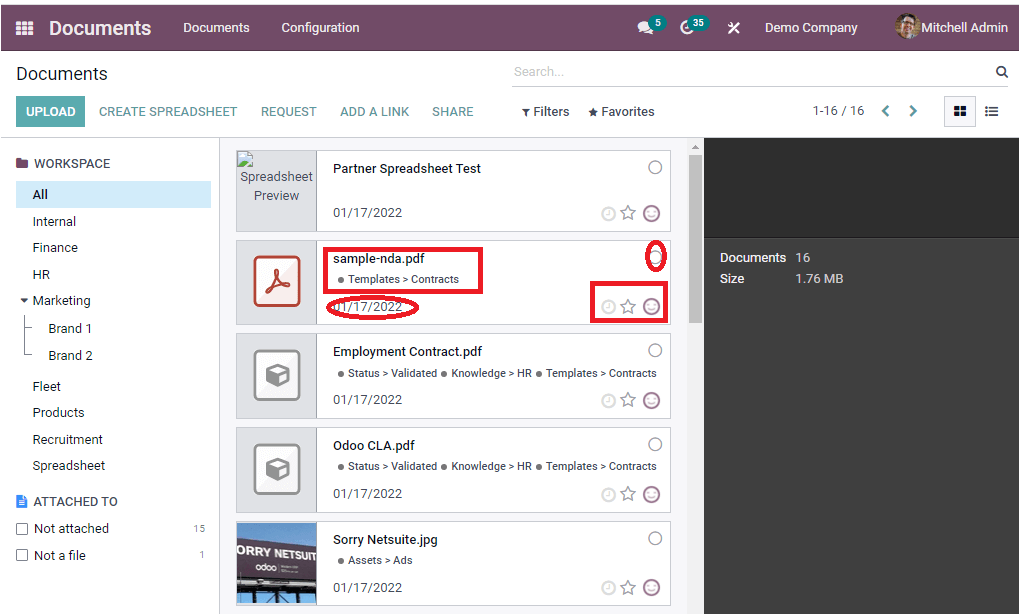
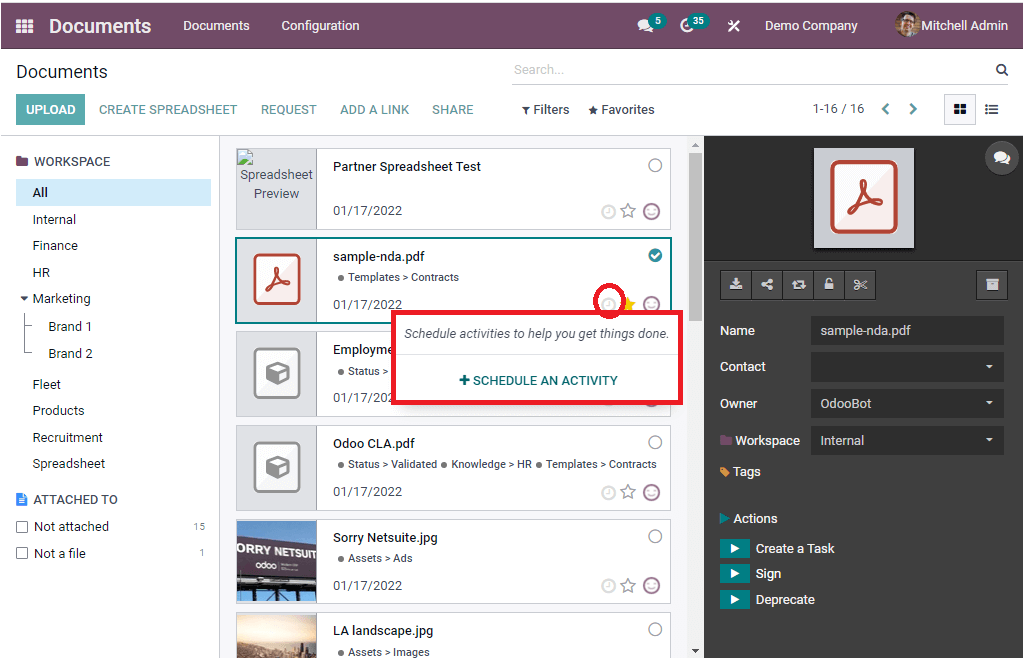
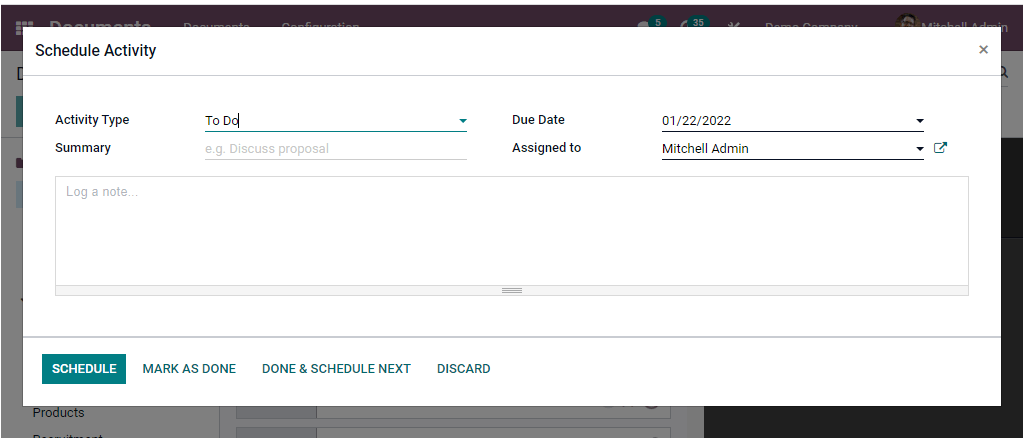
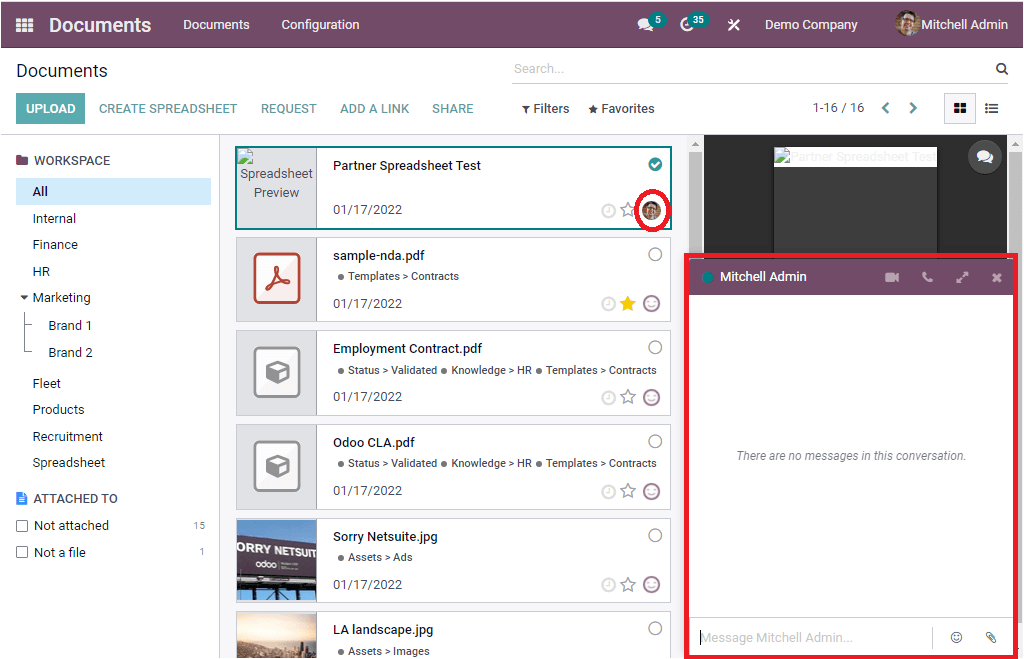
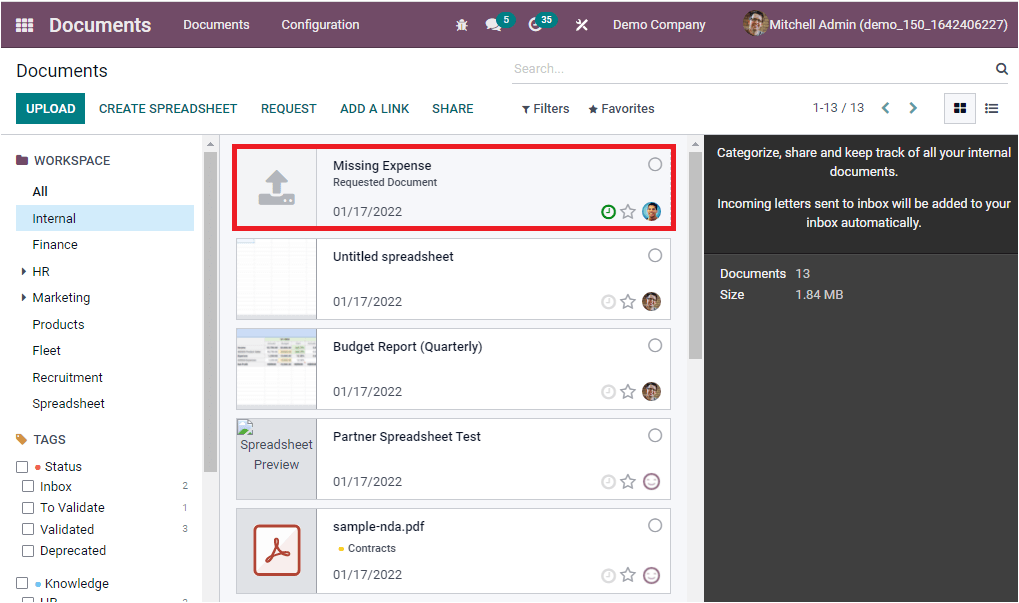
The module also gives the ability to have a direct discussion with the person in charge. To do so, click on the image of the person who is accountable, as seen in the image below.

When you click on the symbol, a pop-up chat window will appear, and you can use this window to communicate with the responsible party. Odoo allows you to put smileys and attach needed files in this section. Start a Video Call, Start a Call, Open in Discuss, and Close Chat Window are all options at the top of the chat window.

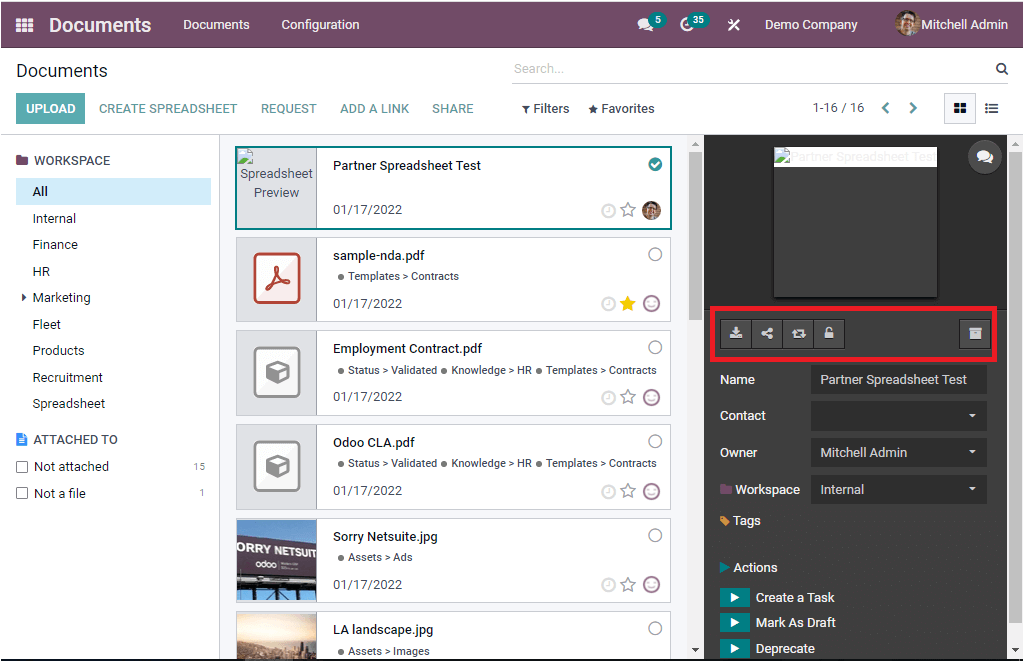
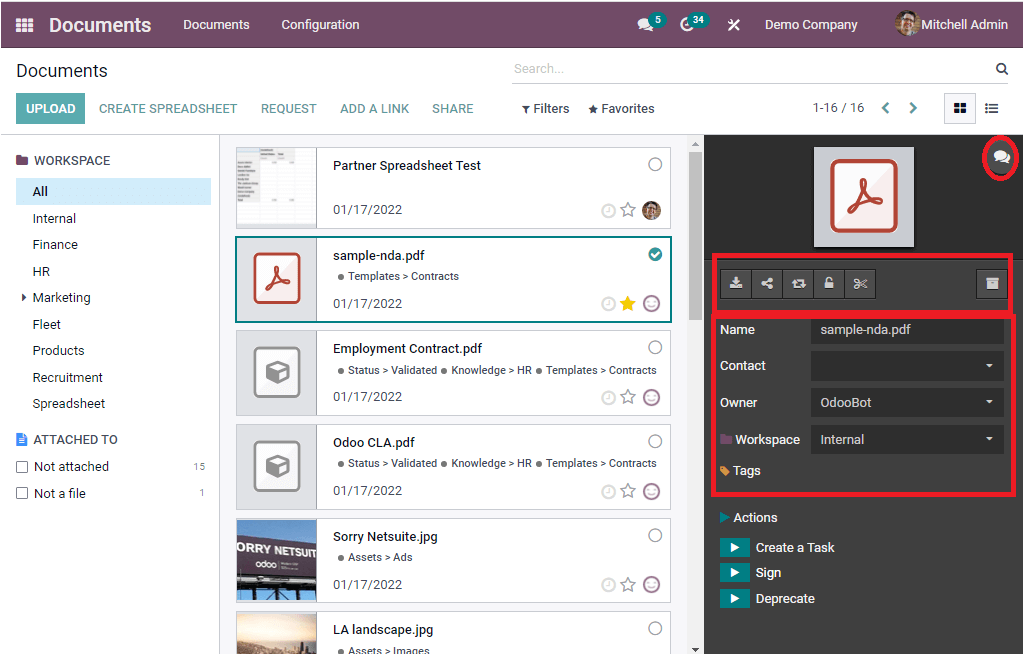
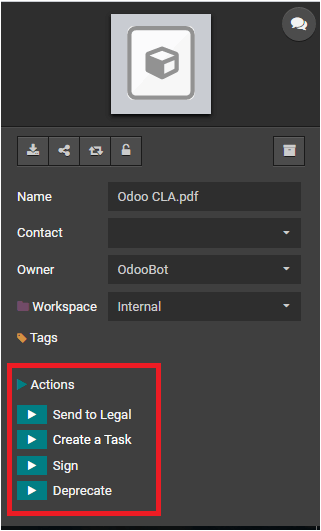
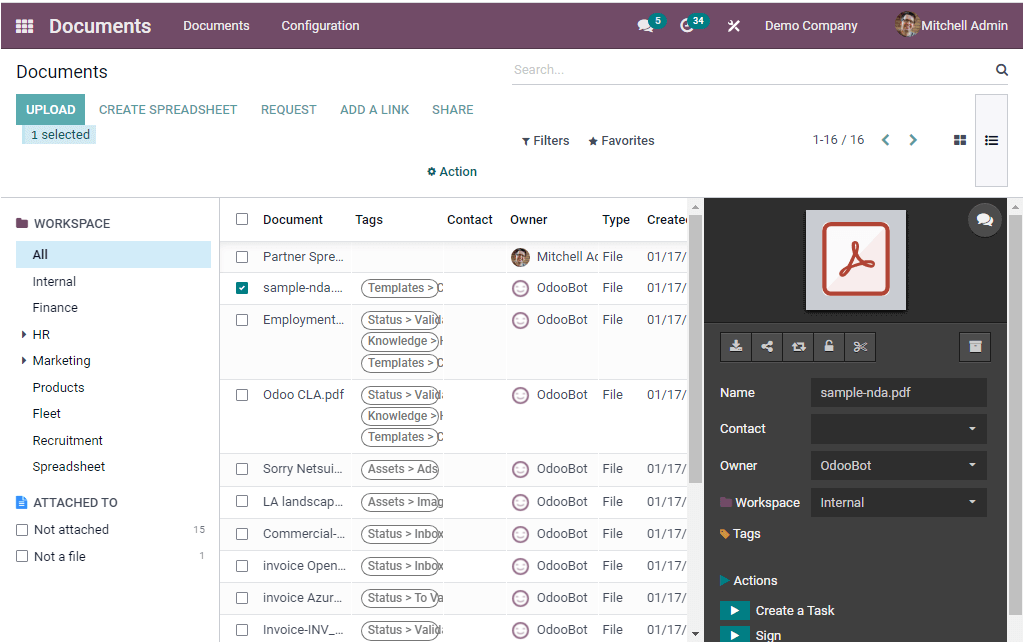
Furthermore, when you select a document, the right portion of the window displays information about that document, and you have a variety of alternatives for doing various tasks.

Let's take a look at each of the options in the right section. The Open chatter menu icon can be found in the top right corner of the section. You can send messages to the document's followers by clicking on them, and you can also make internal notes by clicking on the Log note option. You also have the option of scheduling an activity. You may also see the Add attachment option as well as the options to follow or unfollow. In the figure below, all of the described options are highlighted.

Similarly, as shown in the figure below, you have the options to Download, Share this selection, Replace, Lock, and Archive.

When you click the Download icon, the document will be downloaded to your computer. By clicking the Share button, you may share it with others. You can even distribute papers within or outside of the work span and even outside of the organization with the help of this option. Click the Replace menu icon to replace the current document with a new one. If the document is critical to you, you can use the Lock option to make it more secure. The document has now been locked. You can use the Archive button to separate the document from the rest.
In addition, the document's name will appear in the Name column. If you want to change something, simply click on it. The Contact, Owner, and Workspace will all be displayed in the same way. Adding new Tags to the document is a breeze. Simply select Tags from the drop-down menu.
Based on the document type, the platform allows you to do numerous automatic actions for a specific document. The choice can be found at the bottom right corner of the window, as shown in the figure below.

If you have installed the associated modules, you may use these choices to conduct a variety of operations right from this Document module. The Send to Legal option is provided in the above window. Make a task, sign it, and then deprecate it.

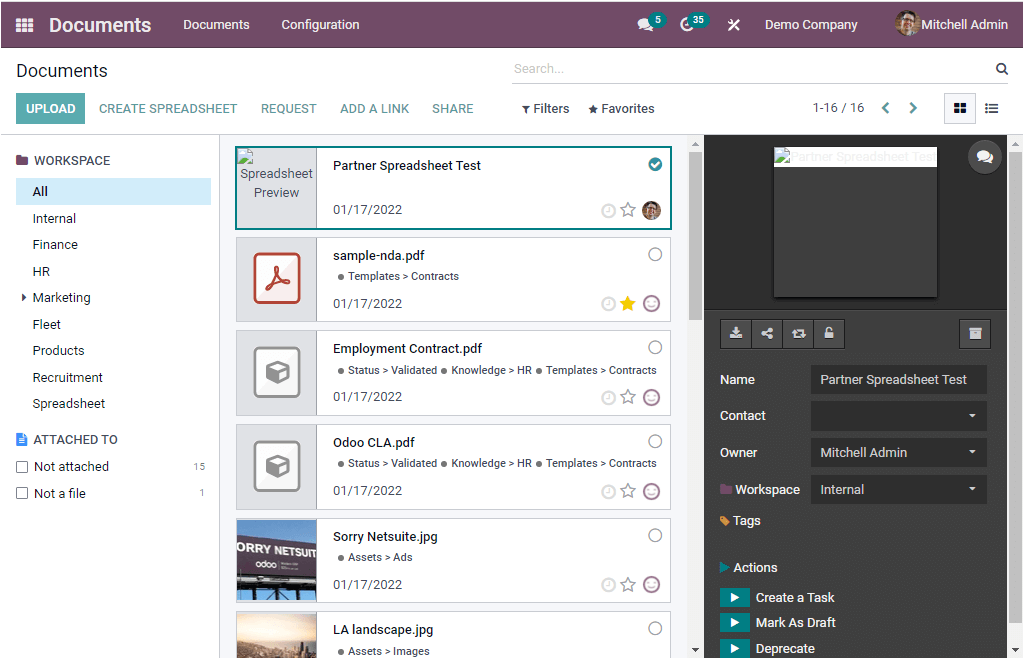
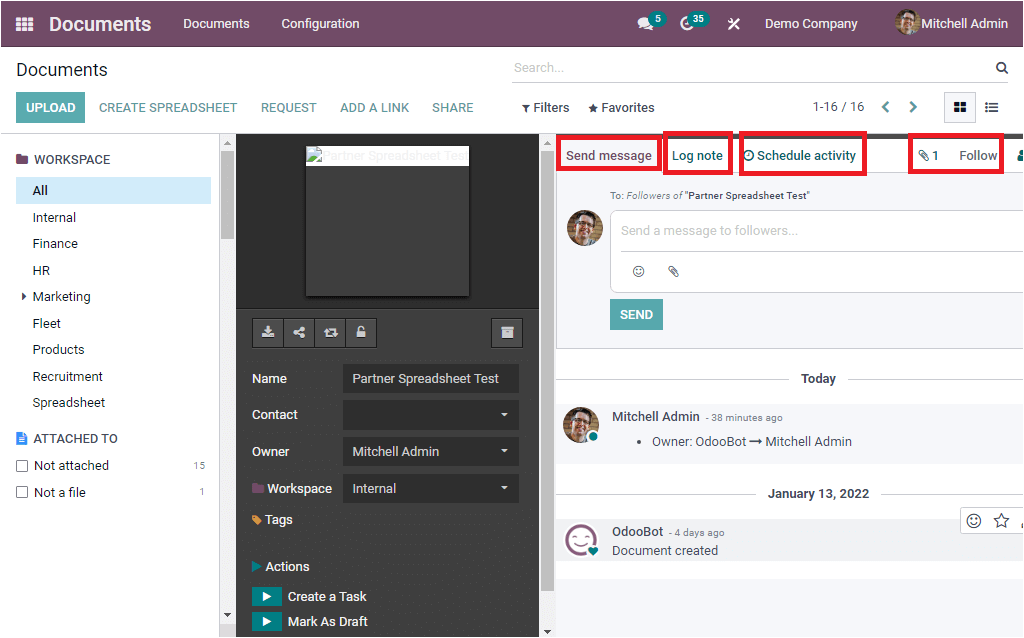
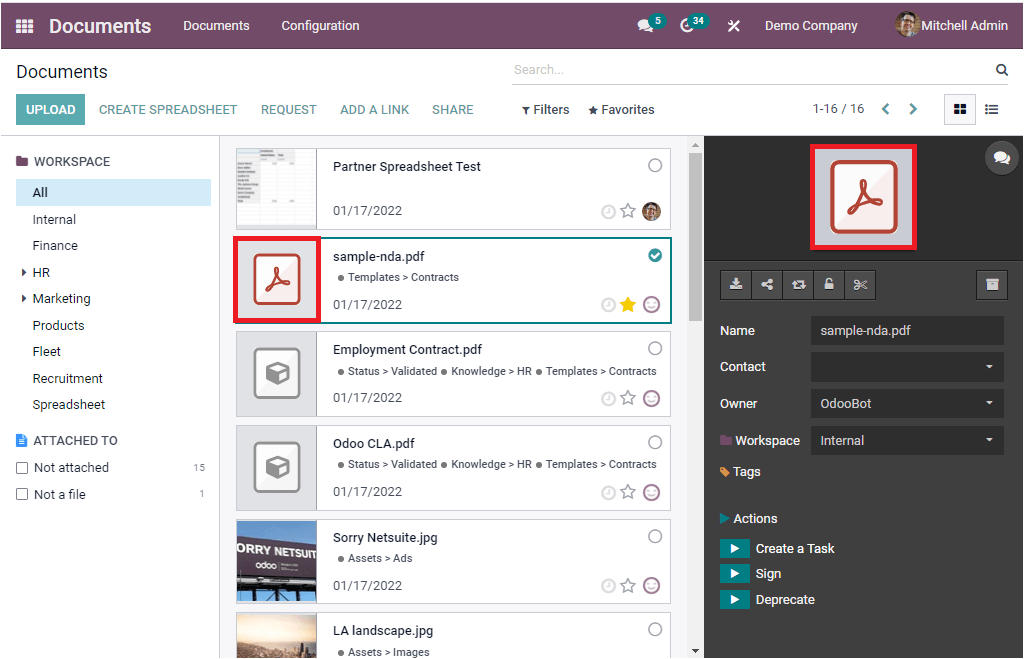
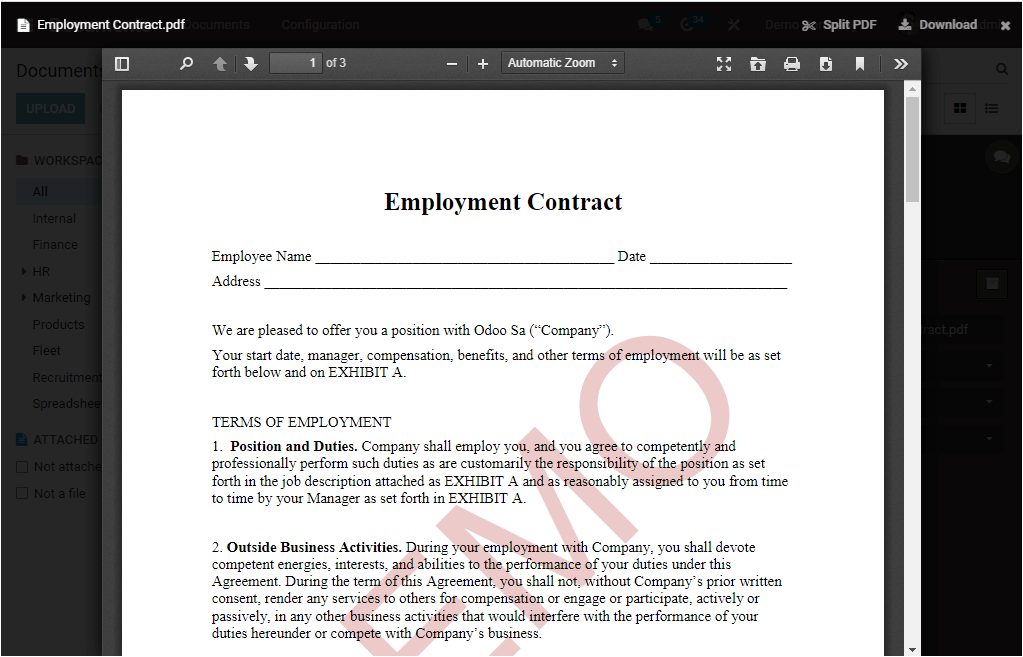
We talked about the many alternatives that were offered in the window. The to-do list had not been completed. If you wish to see a larger version of a document, click on the thumbnail for that document.

The document will now be opened and will appear as seen below.

You may view the document in List format by selecting the List menu icon.

The document window's List view is depicted in the above image, and the vital features of all the described Documents are listed in the preview. The Document name, Tags, Contact, Owner, Type, and Created date are all included in the information.

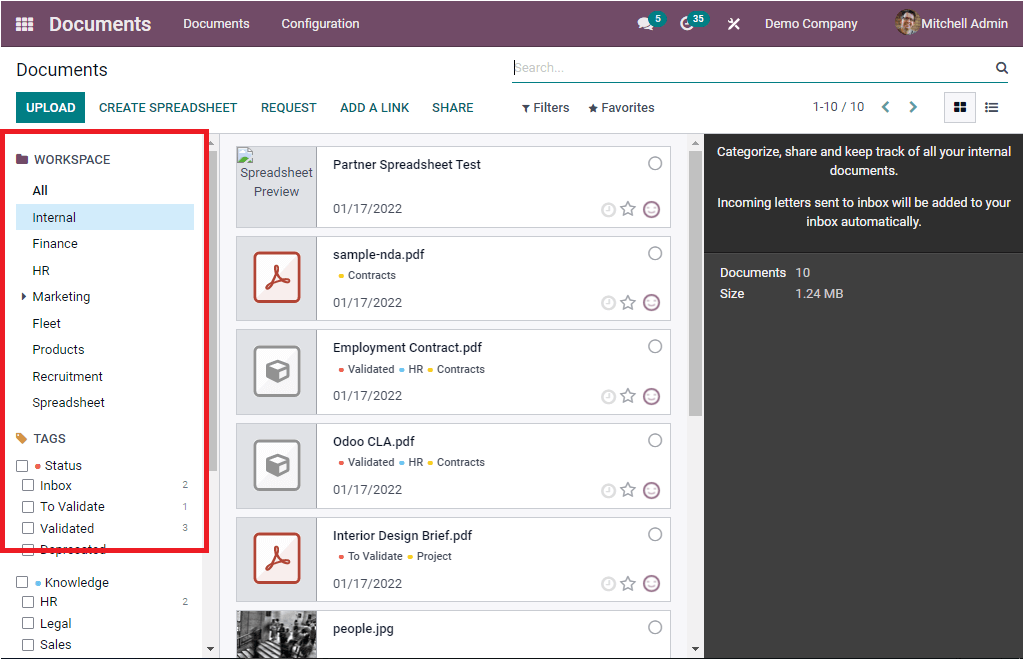
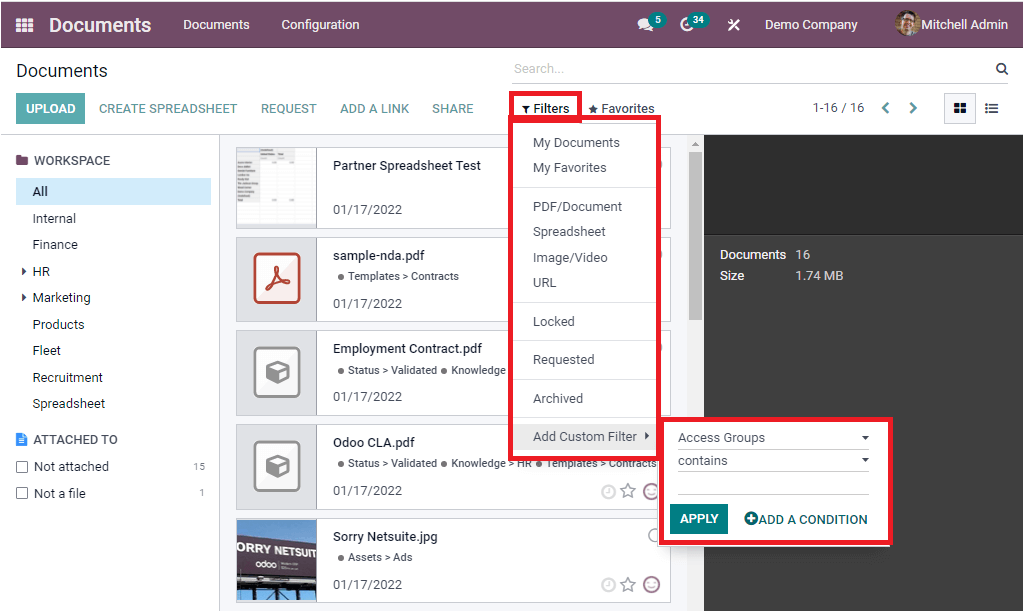
Filters, Search, and Favourites tabs, like all other windows in the Odoo system, allow you to examine and utilize different basic as well as customisable sorting functions. Multiple predefined filtering options are available on the Filters tab. My Documents, My Favorites, PDF/Document, Spreadsheet, Image/Video, URL, Locked, Requested, and Archived are the different types of files. All of these solutions can be used to swiftly obtain data.

The Save current search, Link menu in spreadsheet, and Add to my dashboard choices are also available on the Favourites tab.


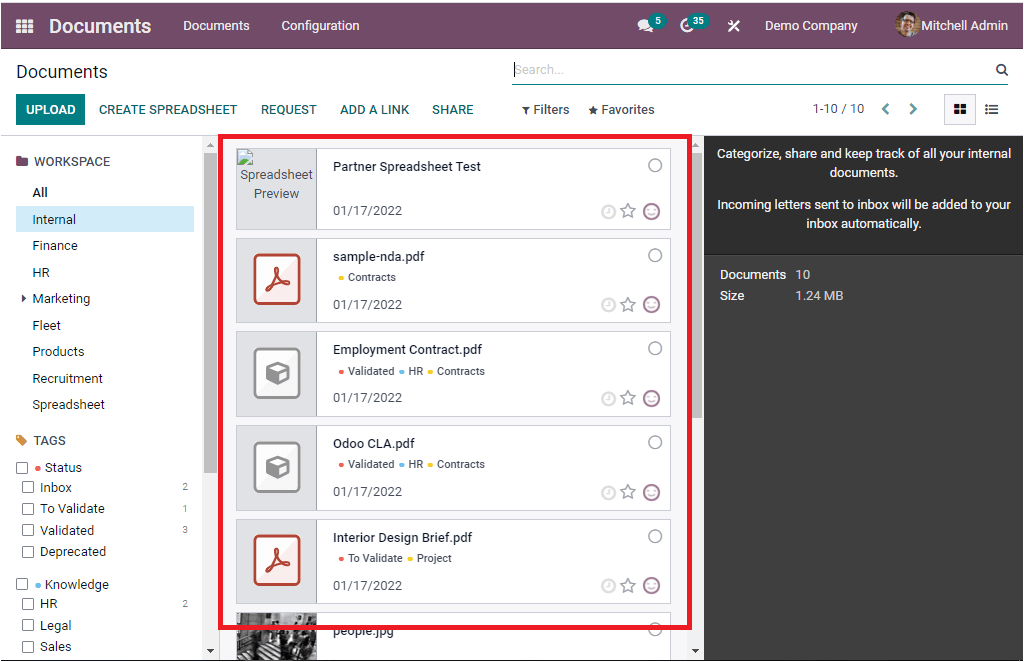
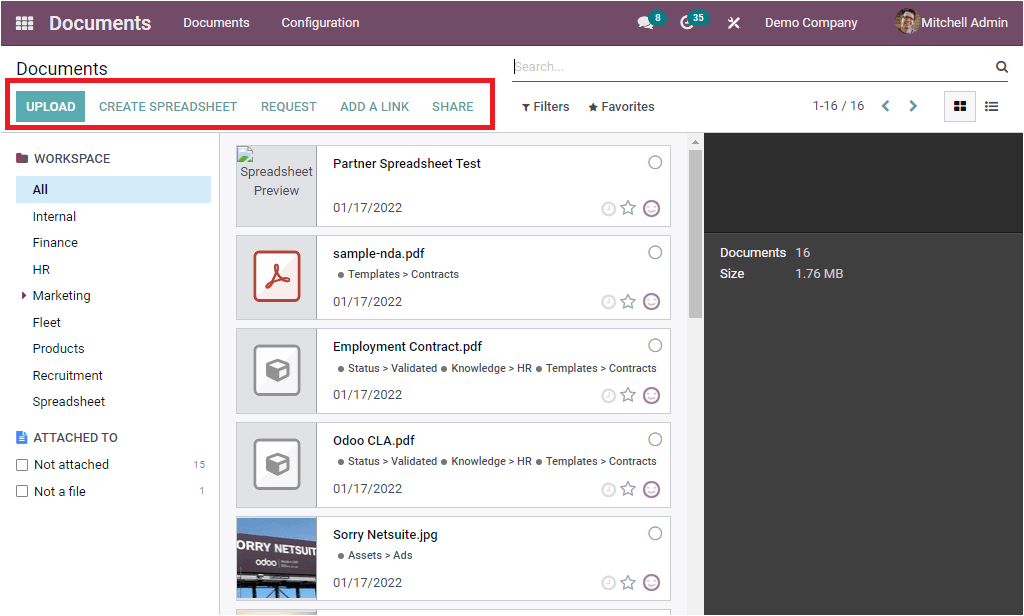
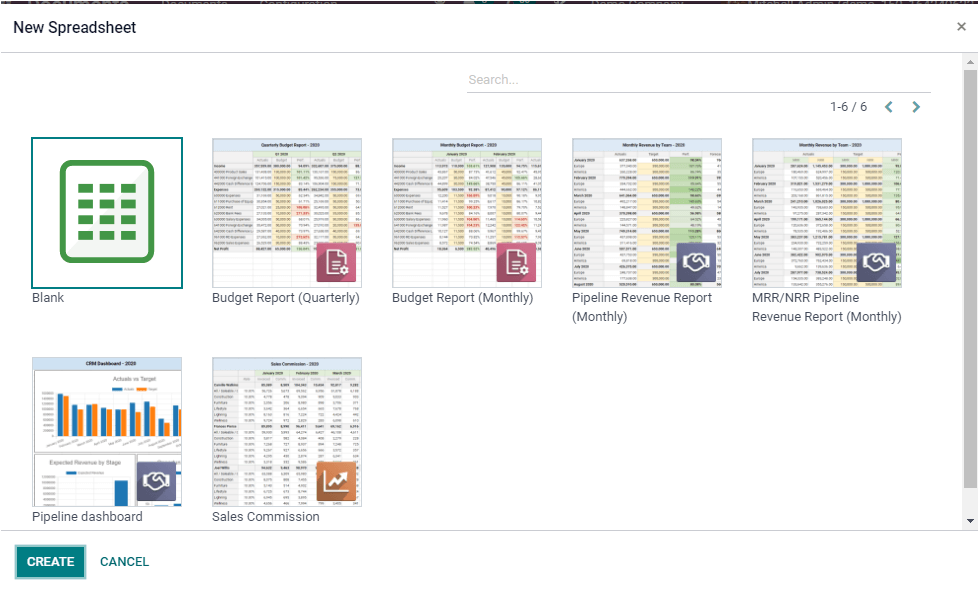
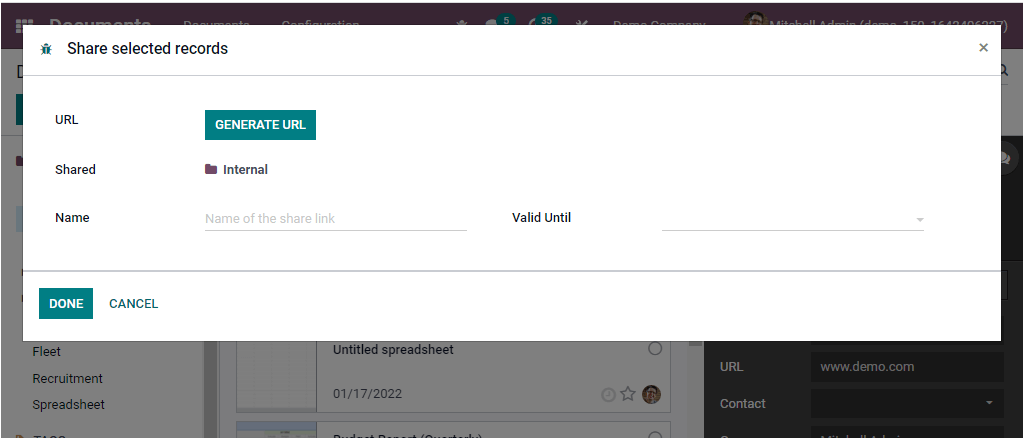
You may see several options for doing various actions on the upper right side of the window. As shown in the image below, the options are UPLOAD, CREATE SPREADSHEET, REQUEST, ADD A LINK, and SHARE.

The UPLOAD button can be used to upload new documents or files from your system to the Odoo system. You can make a spreadsheet with the CREATE SPREADSHEET option. When you click this button, a new window will appear, as shown below.

This option is ideal for combining, evaluating, and arranging similar data on a single page. You can see the blank spreadsheet and numerous alternative spreadsheet models in the window above. You can select a spreadsheet from the list that best suits your needs. Then, on the left bottom, click on the CREATE button.

Then you may add the necessary information, such as links or reports, to your spreadsheet.

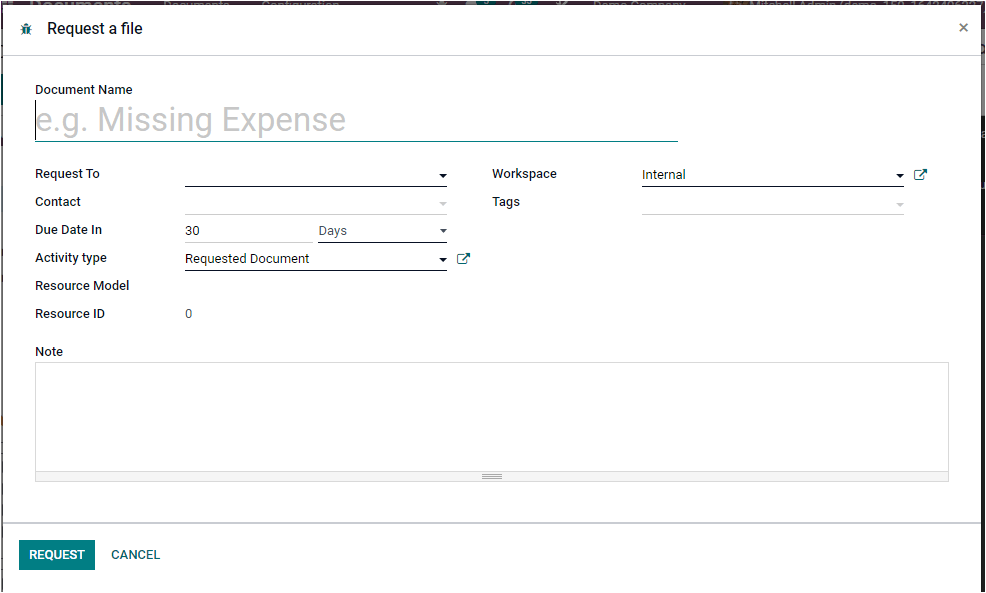
The next button on the document window's top row is the REQUEST button, which can be used to send document requests. When you click the button, a pop-up creation window will appear. This window can be used to request a file. The window is depicted in the screenshot below.

Odoo allows you to effortlessly request external documents from your team members, colleagues, and company personnel with this feature. You can do so by filling in the relevant information. You can fill out the Document Name field first, then the Request To field. You can enter the name of the person you're looking for here. The dropdown menu can also be used to fill out the Contact field. In the Due Date In area, you can provide the due date. Days, Weeks, and Months can all be used to define this. The Activity Type, Resource Model, and Resource ID fields can also be filled in.
The Workspace field will be filled in automatically based on the document type you select. Similarly, if necessary, you can define some tags. Finally, if you want to incorporate internal notes, you might include a brief message. After you've filled out all of the information, click the REQUEST button to send the request. As shown in the screenshot below, you can now view the sent request in the Documents window.

If the file has been received, simply click on the thumbnail to upload it to the system.

It's now time to talk about the ADD A LINK button at the top of the Document window. Odoo allows you to add external links to the module using the ADD A LINK button. That is, in addition to document forms, the Odoo system provides link forms. This option allows you to submit video and other links to your Odoo system. You can do this by clicking the ADD A LINK button. A pop-up window will appear, where you may enter a URL and a name. After you've entered it, click the ADD button.
You can share chosen records by using the SHARE button on the Document window. If you click on this button, a pop-up window will appear, as shown below.

You can generate a URL by clicking the GENERATE URL button and entering the share link's name and validity term. After you've filled out all of the information, click the DONE button.

Odoo 15 Document Management System

The Odoo 15 Document module has a high operational efficiency, and the Document system in the Odoo ERP is particularly useful for managing your valuable papers digitally. This is the right way to handle your company's files in a secure manner. In the next article, we'll look at the Configuration tab of the Odoo 15 Document module.

ERP Cloud LLC, an Odoo Certified Partner, offers a variety of Odoo ERP services, including Odoo Implementation, Odoo Customization, and Odoo Integration, based on individual business requirements.

If you're interested in learning more about Odoo and implementing it in your business, please contact us at sales@erpxcloud.com. Our specialized team of Odoo professionals is ready to create and implement the best solutions for your businesses to achieve maximum outcomes in terms of leads, sales, and money.  


Odoo, Moe Fawaz March 8, 2022
Share this post
Our blogs
Sign in to leave a comment
Odoo 15 Accounting Module Invoice Management
  /