Odoo 15 Purchase Module Vendors

Odoo 15 Purchase Module Vendors

With good vendor or supplier management, the organization can take steps to eliminate vendor risks, regulate costs, ensure correct service, and derive long-term value from suppliers. The enterprise can benefit from strong vendor management by having a better selection of vendors, better contract administration, better performance management, better vendor relationships, and better value. The Purchase module in Odoo 15 allows you to manage vendors, maintain track of their data, and keep track of sales history. 
The Purchase module in Odoo 15 allows you to manage vendors, maintain track of their data, and keep track of sales history. The Purchase module makes managing vendors a breeze. The Purchase module helps you manage vendors, as well as generate RFQs, send them to vendors, manage purchase orders, and configure vendor price lists. The Odoo Purchase module is more effective and efficient because of centralized data storage and connection with other modules. 
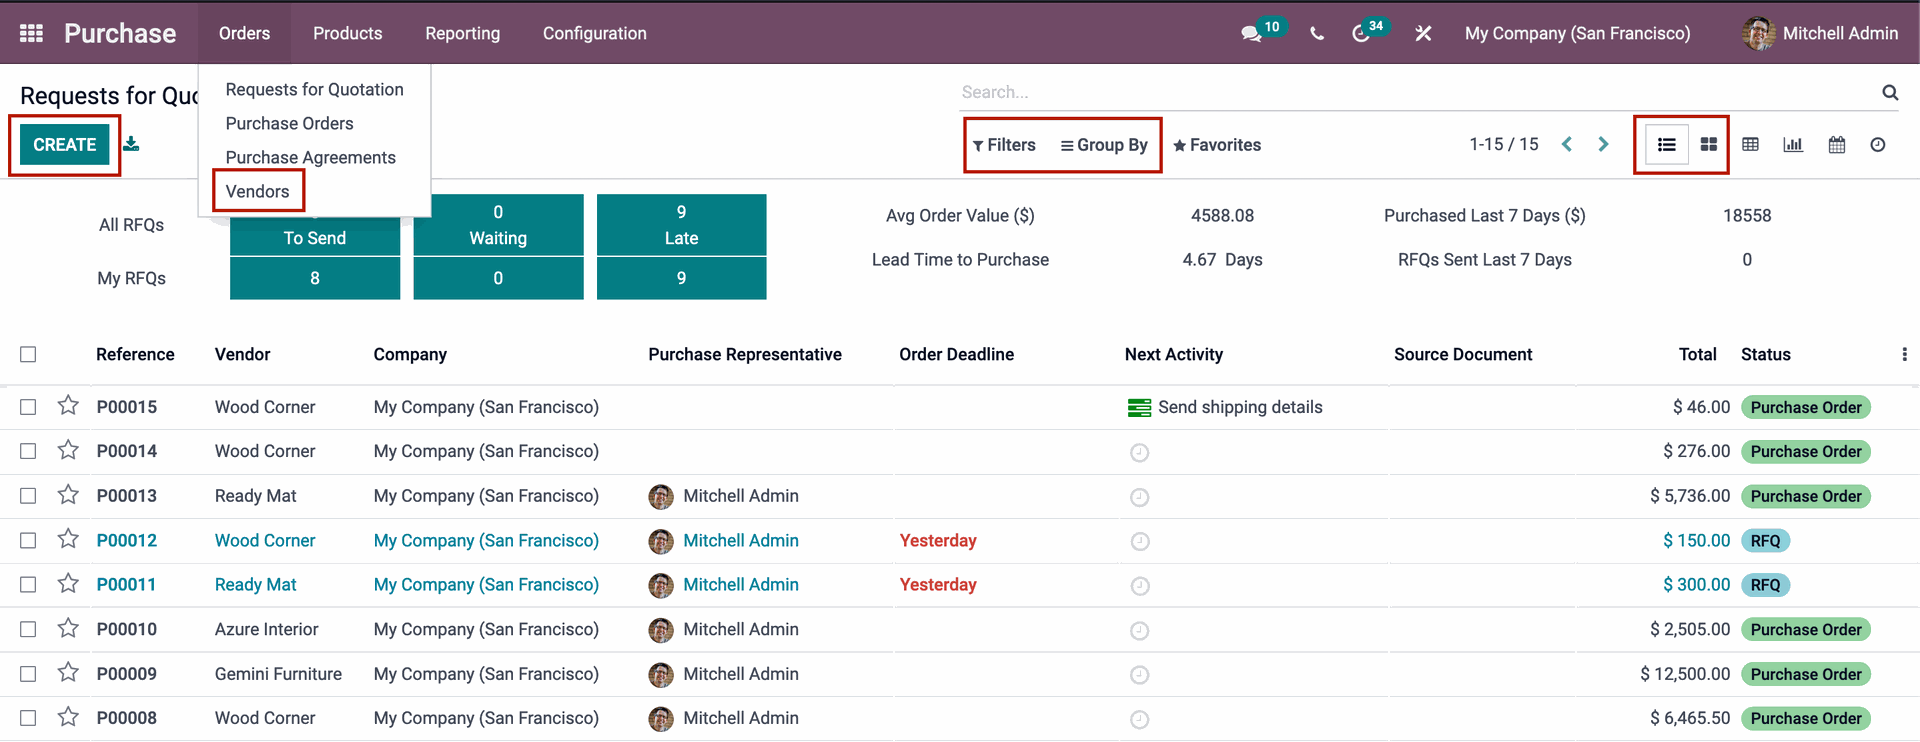
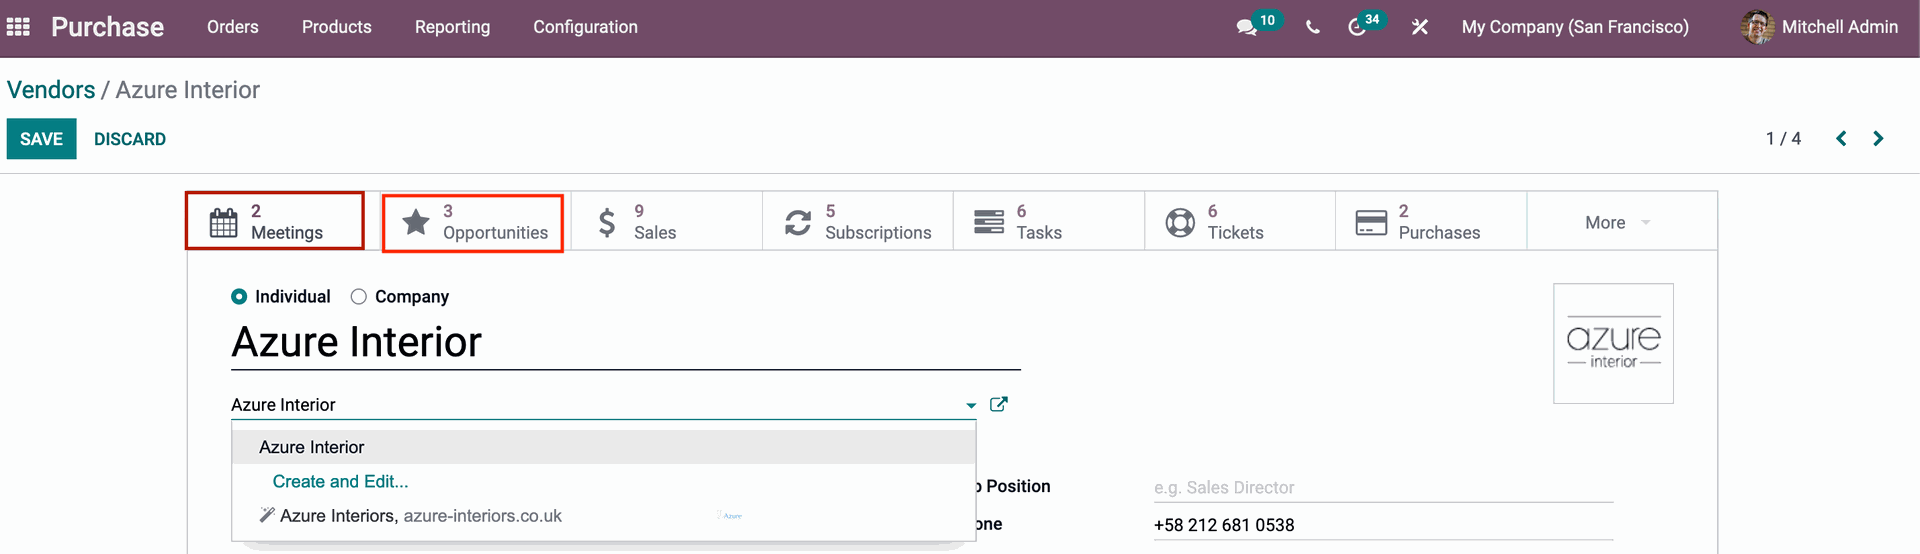
The Purchase module is available for download in Odoo Applications. At the dashboard, you can see the details of the RFQ mentioned, as well as the total number of RFQs To Send, Waiting, and Late, by opening the application. 

Odoo 15 Purchase Module

Select the Vendors option from the Orders tab to see the vendor details. Vendor information is displayed in a Kanban view on the dashboard. Vendors that have already been set up in the system are listed here. Individuals, Companies, CustomerInvoices, Vendor Bills, Subcontractors, and Archived are some of the categories where filters can be used to display certain vendors. Vendors can also be classified by Salesperson, Company, or Country. 

In Kanban and List views, you may see the vendor details. Click on the CREATE button to add new vendor entries to the database. Click on an existing vendor to see more information about them. 

You can view the details of a vendor by selecting it from the list, including whether the profile belongs to an individual or a company, the vendor's name, the company's name, contact information, VAT tax information number, CitizenIdentification code, the vendor's job position at the company, phone number, mobile number, email, website, preferred language, and tags. 
The meetings that have been scheduled are listed at the top. The specifics of the scheduled meetings can be viewed by selecting the Meetings tab. The calendar view of the scheduled meetings is shown. You can schedule new meetings with the vendor by selecting the day and time. By clicking the SHARE AVAILABILITIES option, you may also choose to share your availability. 
The Opportunities section shows how many opportunities the company has with the vendor. You will be forwarded to the opportunities page with the vendor indicated at the stage of opportunity if you select the opportunities option. Aside from the category name, you can see the estimated revenue. 
The Sales option displays the number of sales and quotations conducted with the vendor. You can view a list of sales and quote orders, as well as the invoice status, by selecting the option.

At PoS Orders, the number of Points of Sale associated with the vendor is recorded. You can examine order details, receipt number, and order status by selecting the PoS Orders option.

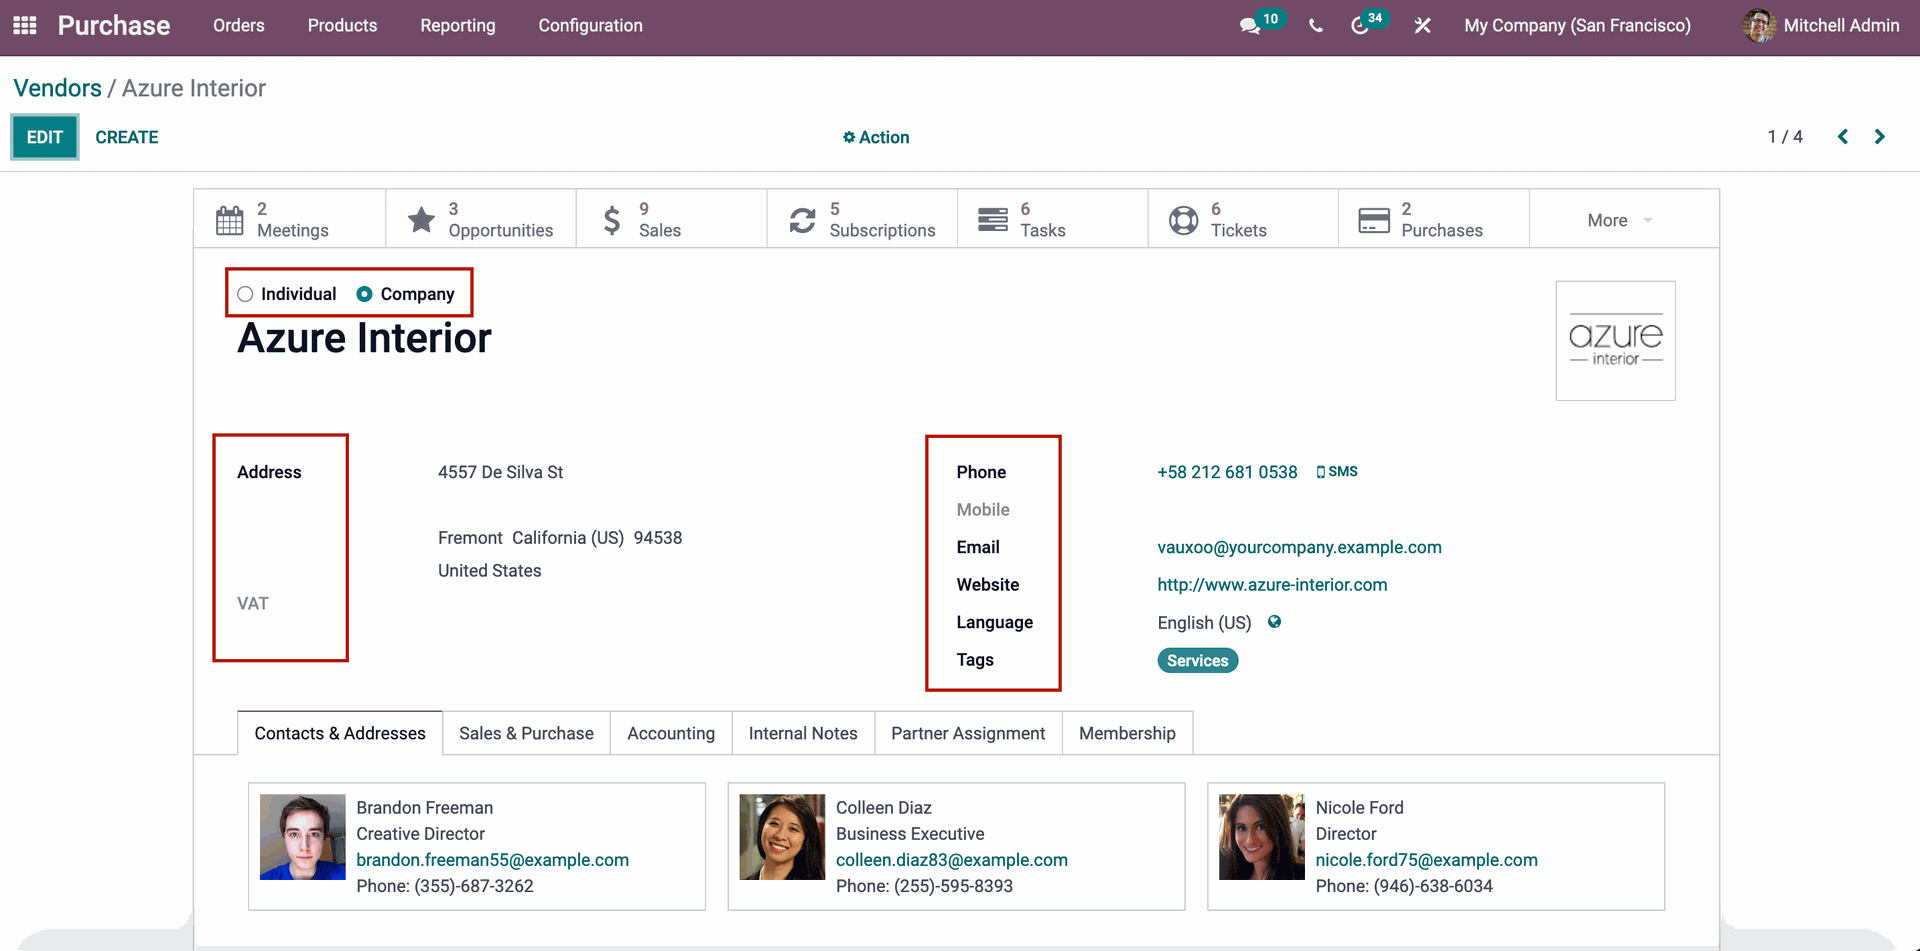
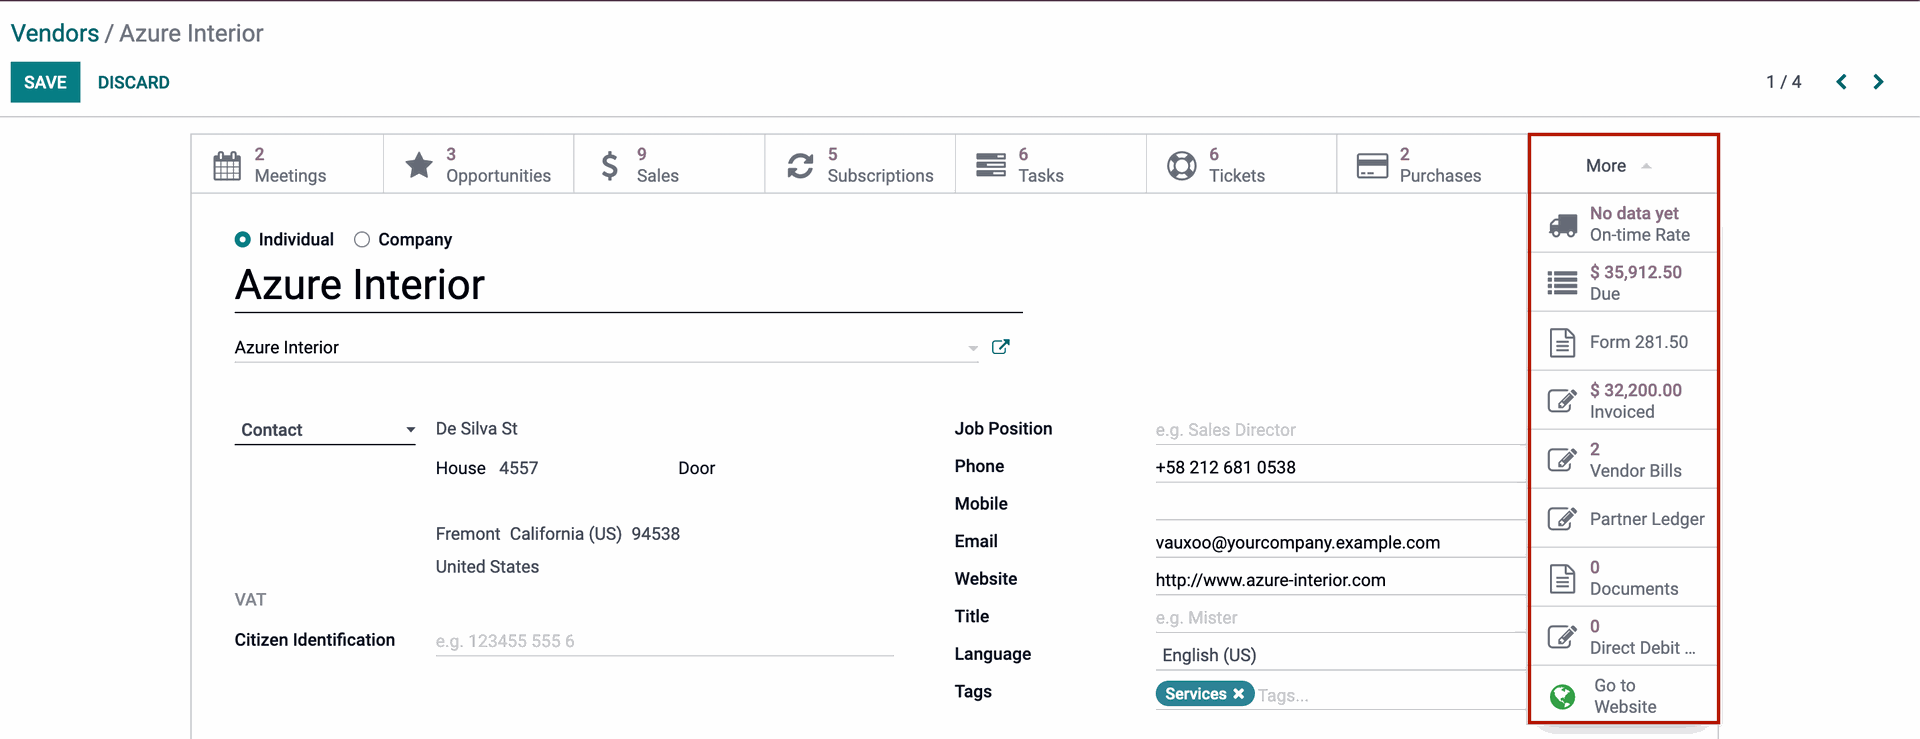
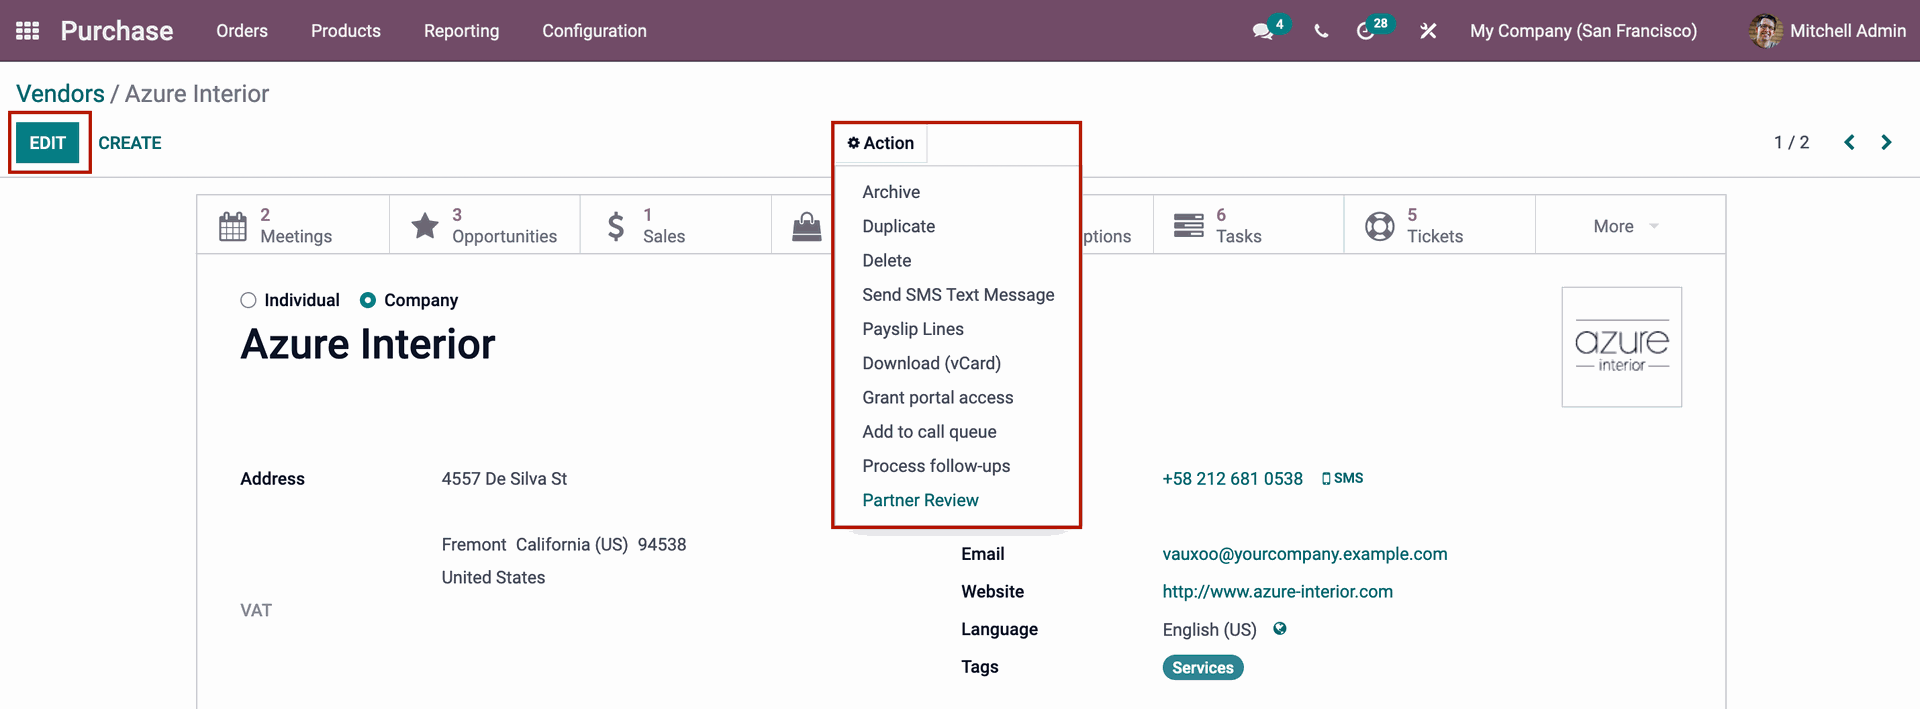
Click on the Subscriptions option to see the specifics of the vendor's subscriptions.

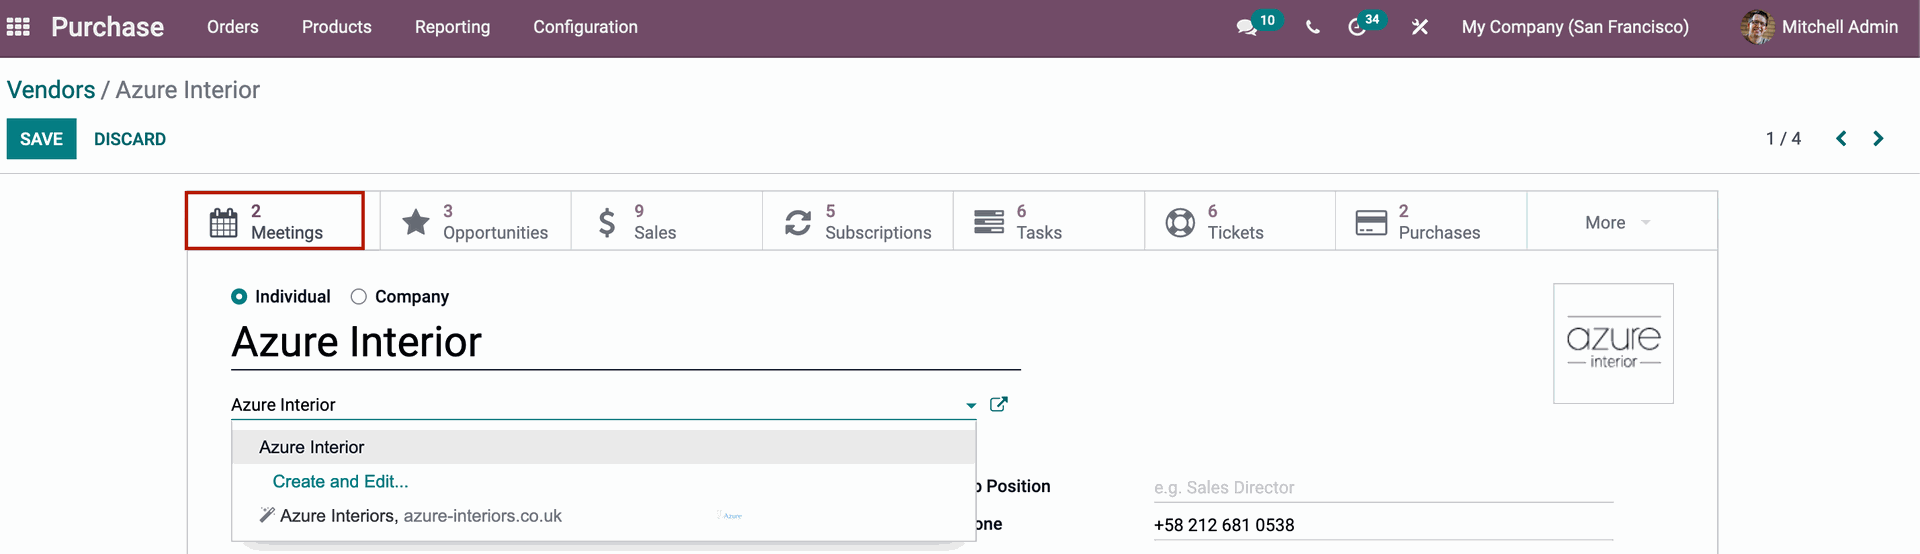
The Tasks option displays the number of tasks assigned and planned to the vendor. To see their information, select the choice. 

The Contacts and Addresses option allows you to establish and browse contacts as well as their information relating to the vendor. Individual and company contact information, as well as their addresses, can be found here. 
The Sales and Purchase menu contains information on the vendor's sales and purchases with the company. Payment Terms, Pricelist, Delivery Method, Barcode, Loyalty Points, 1099 Box containing the vendor's summed-up journal, preferred Payment Method, whether automatic confirmation email to be sent regarding the receipt date at Receipt Reminder, Supplier Currency, Fiscal Position to determine the tax, Reference, Company, Website, Website Tags, and SLA Policies are among the information provided. The Pricelist can be customized to meet the needs of the company, and it will take the place of the default pricing list. 
You may check the vendor's accounting details, such as the name of the bank, account number, Account Receivables, and Account Payables, under the accounting menu. You may also see the payment choices, as well as whether the vendor bills use OCR numbers and the Default Vendor Payment Ref. By clicking the View Account Details button, you may see more information about the account. 
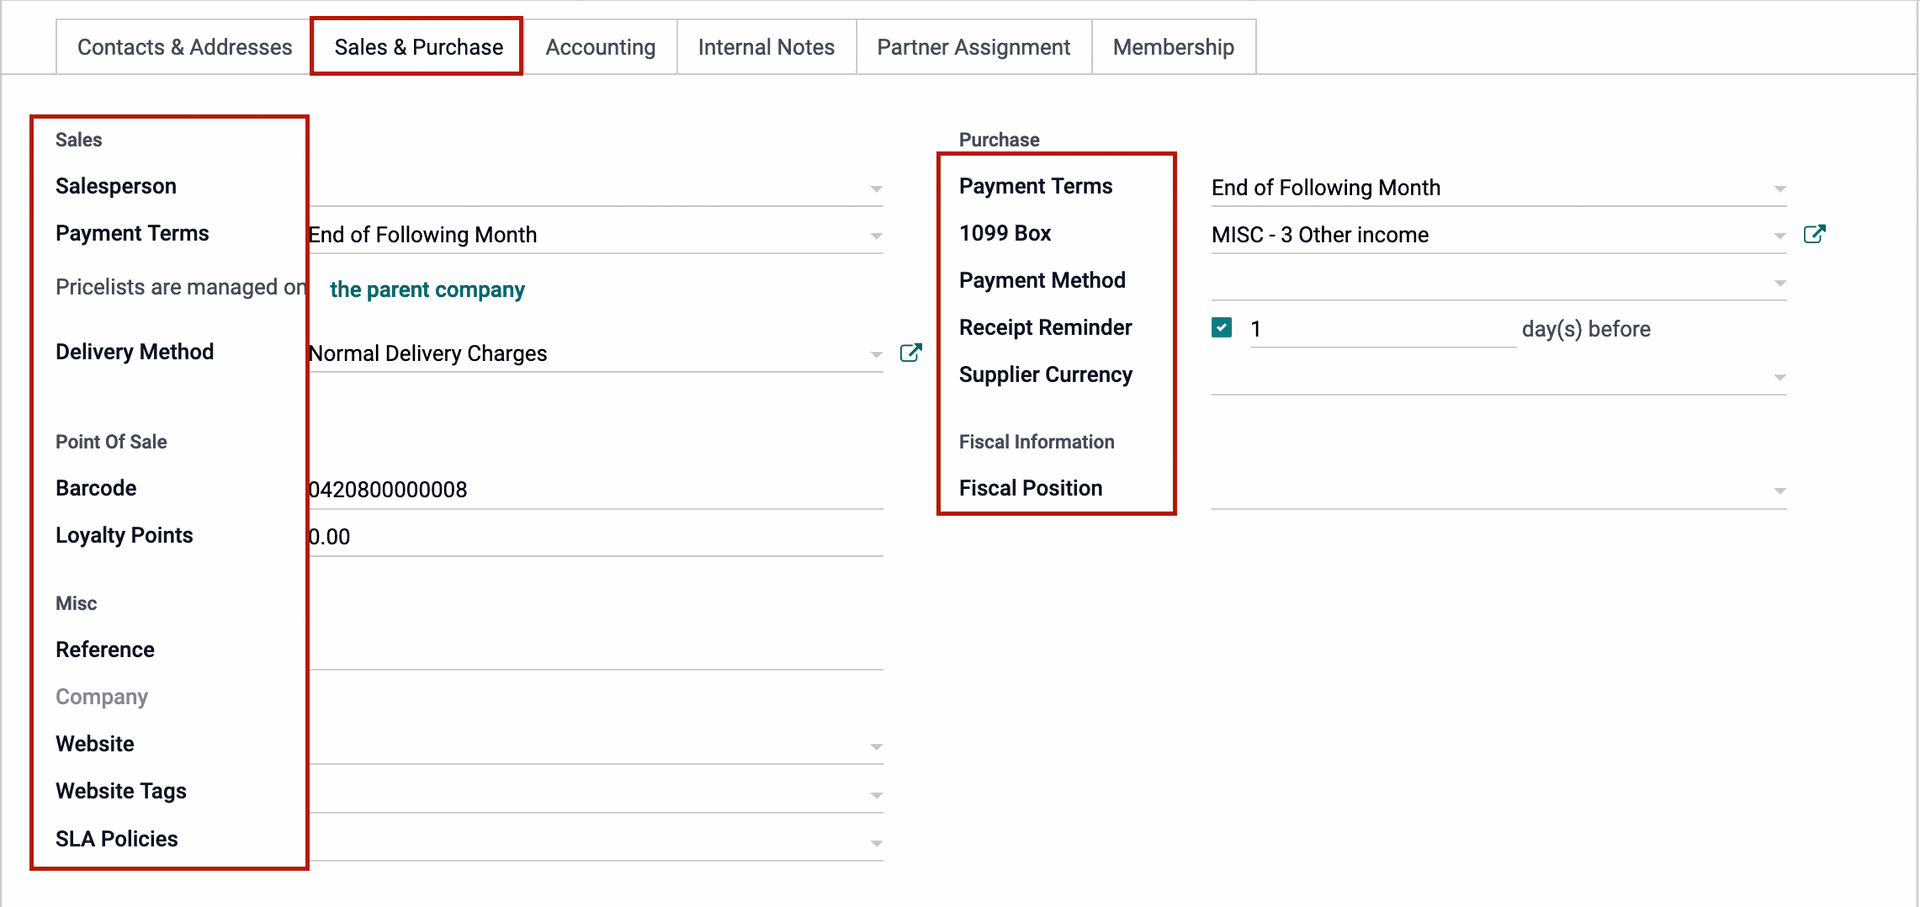
Any notes related to the vendor can be recorded and viewed at the Internal Notes menu. You can record additional notes which couldn't be recorded at any other fields.
You may view the Geolocation, Partner Activationdetails, and Partner Review under the Partner Assignment menu. You may see the Partner Level, Commission Plan Activation, and Level Weight, which determines how competitive the offer is for the partner to take. You may see the most recent partner review, the next partner review, and the partnership date under Partner Review. 
 
The vendor's membership information can be found in the Membership menu. These details include whether the vendor is eligible for a free membership, as well as the vendor's current membership status and AssociateMember. The membership information is listed, including the Join Date, Membership, Membership Fee, Invoice, and Membership Status. 

The vendor can be a Non-Member under Current Membership if he or she has not applied for any membership. If the vendor has canceled the membership, it is referred to as a Cancelled Member. If your membership has expired, you will be considered an old member. If the vendor has applied for membership and has submitted an invoice, a Waiting Member will be established. Invoiced Member if an invoice has been generated, or Paying Partner if the membership price has been paid. You purchase a membership for the vendor by using the BUY MEMBERSHIP button. 
With the Change button, you can edit and amend the Vendor profile's details. Additional actions include archiving the information, duplicating the vendor profile, sending an SMS text message, generating a Payslip Line, downloading a vCard, GrantPortal Access, adding to the call queue, processing follow-ups, and reviewing the partner. 
You can keep track of your vendors and keep accurate records with the Odoo 15 Purchase module. Managing vendors is simple when you have a complete record of them in one place, and Odoo makes this possible. 
 
 
Odoo 15 Purchase Module Vendors
Ismail Harake October 27, 2021
Share this post
Our blogs
Sign in to leave a comment
Odoo 15 Inventory Module Managing Products
  /