Odoo 15 Purchase Order

Odoo 15 Purchase Order

Purchasing is an important aspect of any organization because it involves obtaining goods, services, and raw materials from vendors. This is a typical and recurrent action that takes place in the firm. As a result, proper administration for the purpose of purchasing should be provided. Typically, the company's purchasing department keeps the data in systems and accesses it when needed. You may create quotation requests, transmit them to suppliers, confirm purchase orders, and produce bills with the Odoo 15 Purchase module. Aside from vendor administration, product management, stock updating, and agreement type setup can all be done from within the module.  With its reporting feature, the Odoo 15 Purchase module allows you to generate and analyze purchase procedures. In terms of purchasing activities, the module represents a complete management solution.
Odoo 15 Purchase Module
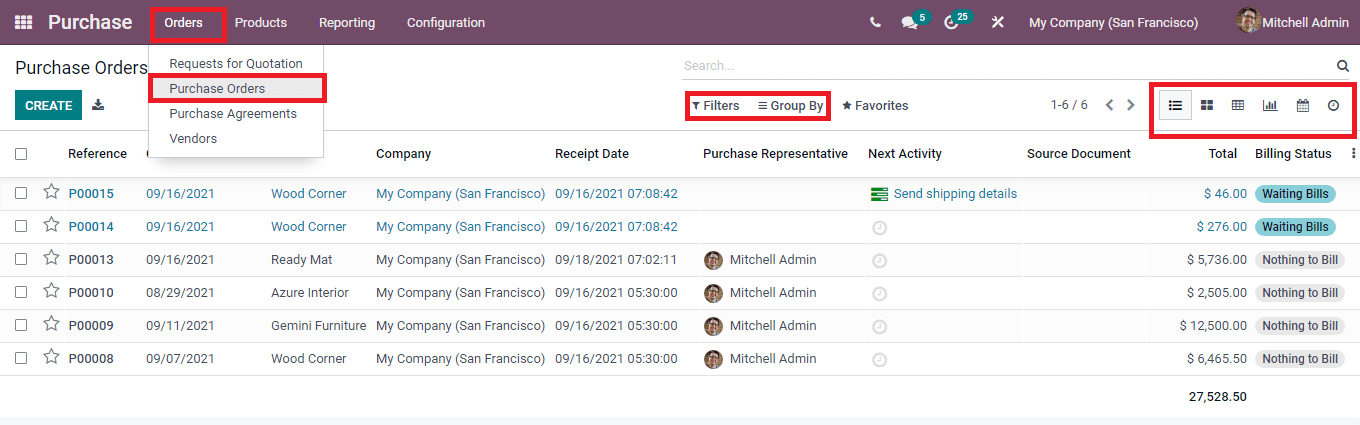
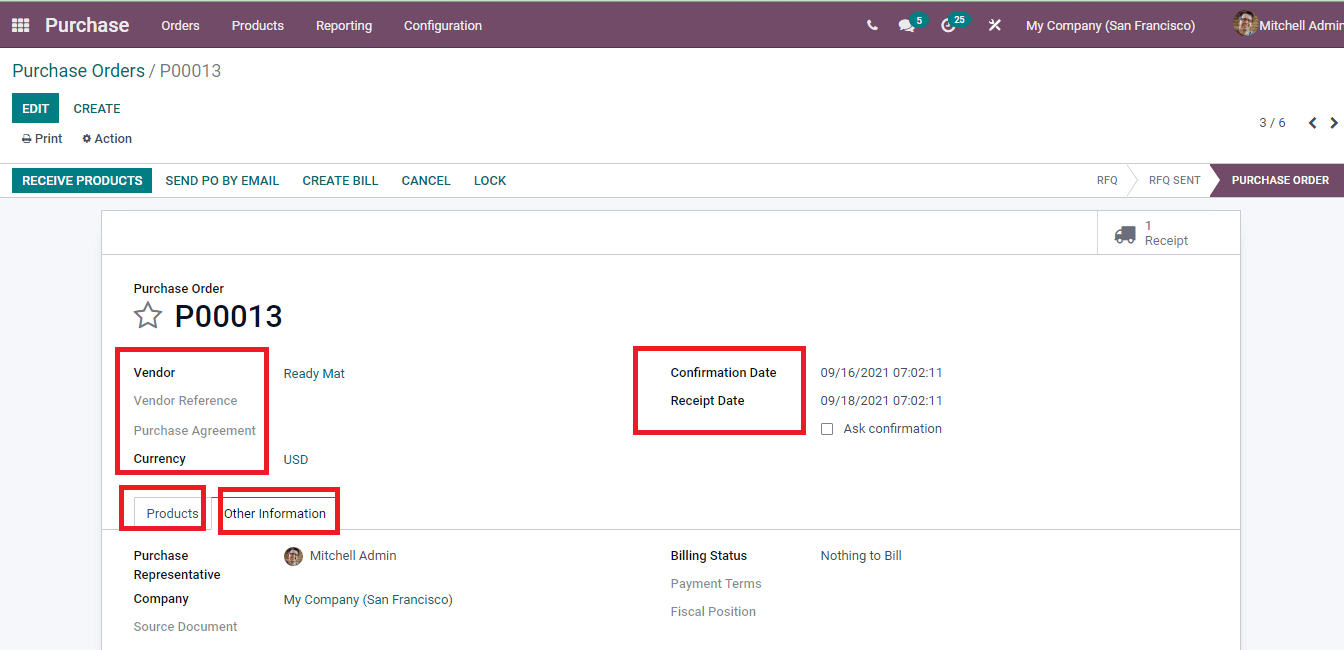
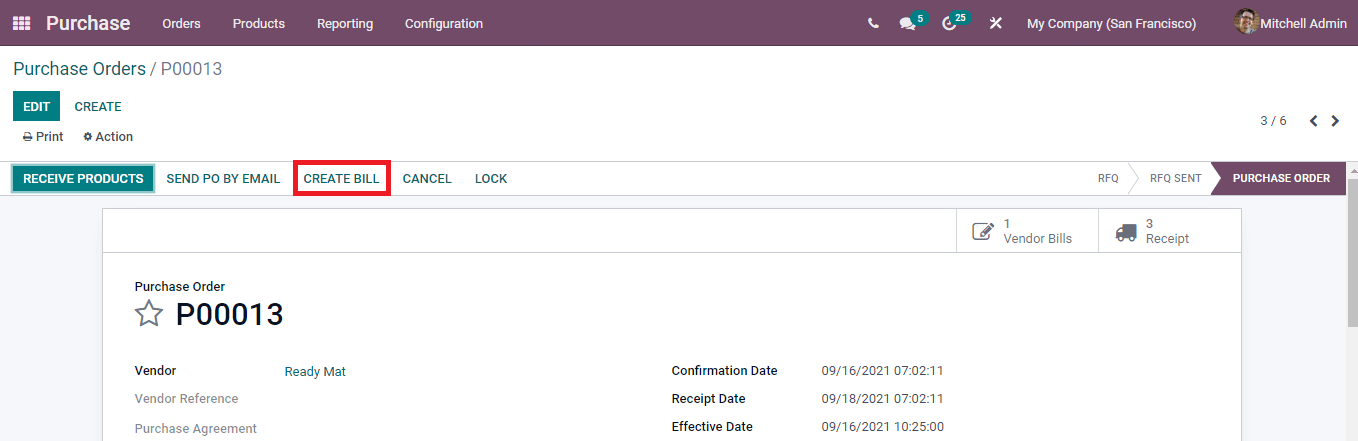
When the RFQ you issued to the vendors receives a good response, purchase orders are created. If the vendor responds positively to the RFQ you sent, you can place an order right from the RFQ profile. You can also create a buy order without sending RFQs to vendors by using the purchase order option in the Odoo Purchase module. When dealing with routine purchasing activities, making purchase orders without sending an RFQ is the most common method. 

To see the buy orders, go to the Purchase Orders option on the Odoo Purchase module's Orders tab. Each purchase order's Reference Number, Confirmation Date, Vendor's Name, Company, Receipt Date, Purchase Representative's Name, Next Activity Reminder, Source Document, Total Amount, and Billing Status are displayed on the screen. You can utilize the Filters option to examine buy orders based on their individual details. For example, you can gather orders based on Bill Status, Order Date, Starred, My Orders, and Warnings. Additionally, orders can be categorized by Vendor, Purchase Representative, and Order Date. Orders can be viewed as a List, Kanban, Pivot, Graph, or Calendar. 
 
Select a specific purchase order from the list to see additional information about it. The purchase order information will be presented, including the Reference Number, Vendor information, Confirmation Date, and Receipt Date. Under the Products menu, you'll also find information on the products. You can see the Product's Name, Description, Quantity, Received quantity, Billed amount, Unit of Measurement, per Unit Price, Taxes, and Subtotal information. The Purchase Representative, Company, Billing Status, Source Document, Payment Terms, and Fiscal Position are also presented under the Other Information menu. 
 Receive Products 
After receiving the products, click the RECEIVE PRODUCTS button to enter the information. You may see the name of the vendor who delivered the goods, the first shipment's Scheduled Date, the Deadline, and the Source Document. Under the Operations menu, you can see the product name, Demand quantity, Done quantity, and Unit of Measurement. Under the Additional Info option, shipping information such as the Tracking Reference, Carrier, Weight, Weight for Shipping, and the name of the Responsible and Company is noted. 
 
You can confirm that the order has been received by pressing the VALIDATE button. If you anticipate processing the remaining products later and your processed product is less than the initial demand, you can create a backorder. You can continue without generating a backorder if you are not going to process the remaining products. The Print option allows you to print the Picking Operations, Delivery Slip, and Picking Label. Click the PRINT LABEL button to print and customize the labels. Label designs can be chosen and printed. 
 
Click the RETURN button if you don't want the goods and need to return the items you've purchased. On the screen, a Reverse Transfer window will display. Include the product's specifications as well as the amount to be returned. Press the RETURN key once you've finished inputting the information. 
 
The purchase order will be unlocked by clicking the UNLOCK button. You can change the starting demand or completed amounts if the picking is unlocked. You can enable Lock Confirmed Orders in the Settings to prevent confirmed orders from being edited. 
 
By selecting the CREATE BILL option from the purchase order profile, you can generate bills. 
 
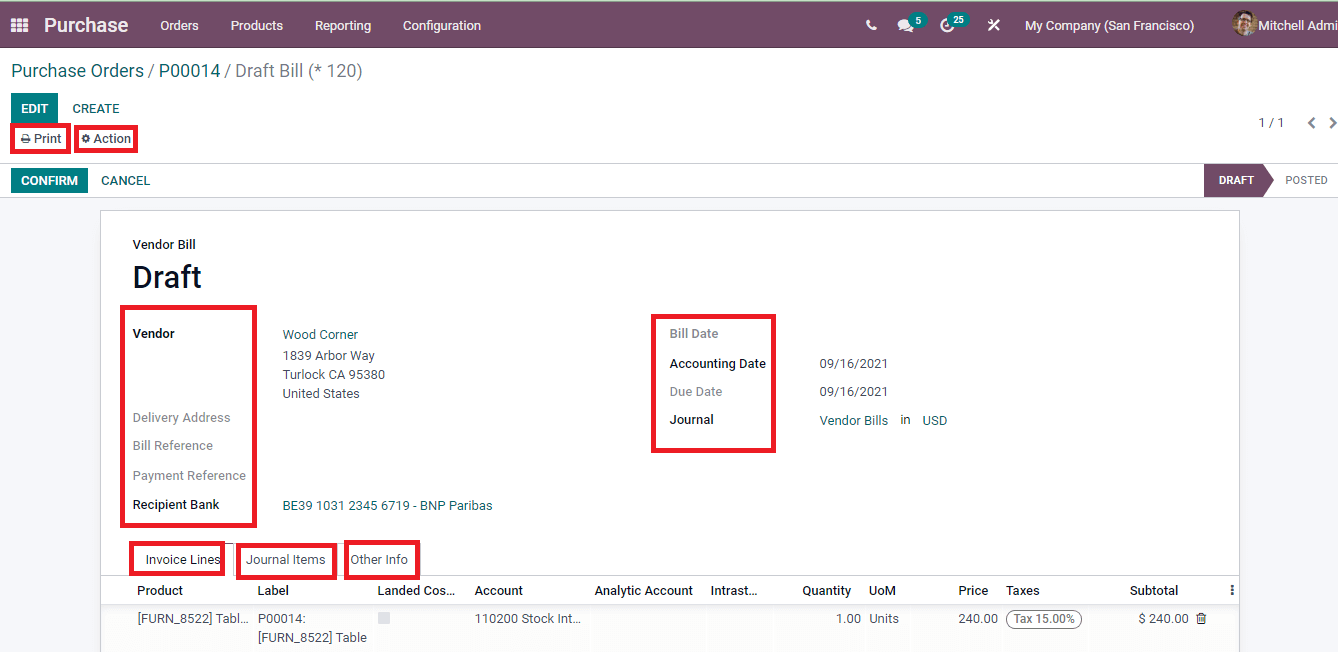
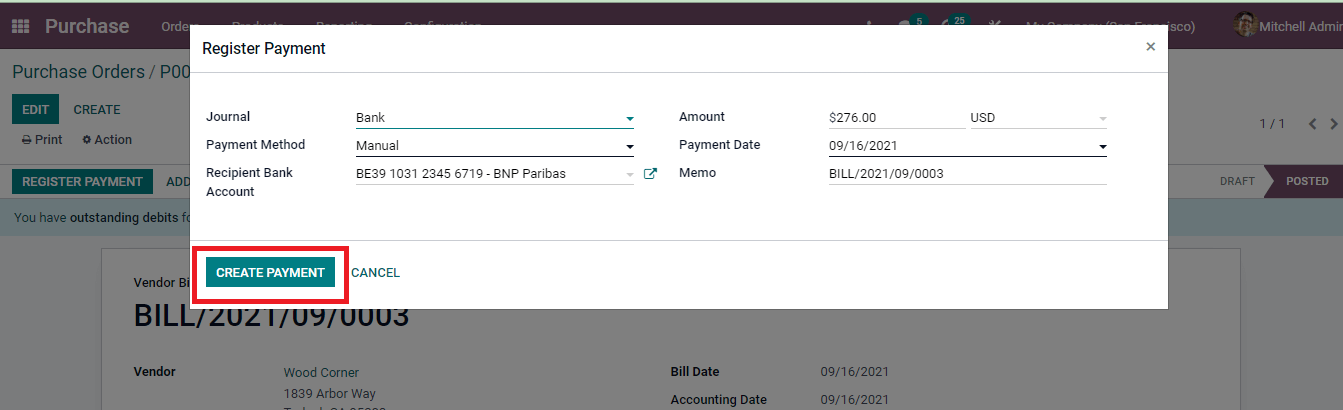
Details such as the Vendor's information, Delivery Address, Bill Reference, Payment Reference, Receipt Bank, Bill Date, Accounting Date, Due Date, and Journal will display on the draft bill. The product invoice details such as the Product Name, Label, Landed Costs, Account, Analytical Account, Intrastat, Quantity, Unit of Measurement, Price, Taxes included, and Subtotal amount is displayed under the Invoice Lines menu. At the end of the draft, the untaxed, taxed, and total amounts are displayed. 
Under the Journal Items menu, you can record the Account, Label, Debit, Credit, and Tax Grids. Below the Further Info menu are other facts about the accounting, company, fiscal position, Incoterm, and Intrastat Country. By clicking the Amend button, you can change and edit the details. You can print Invoices and Invoices without Payment by selecting the Print option. Select Generate a Payment Link from the Action menu to create a payment link. From the Action menu, you can also switch to a refund or credit note. 
 
After reviewing and revising the draft bill, click the CONFIRM button to continue with the billing process. By selecting the ADD CREDIT NOTE and ADD DEBIT NOTE buttons, you can add a credit note or a debit note to the bill. 
 
A popup with details such as Journal, Payment Method, Receipt Bank Account, Amount, Currency, Payment date, and Memo will show when you click the REGISTER PAYMENT button. After you've evaluated and made any necessary adjustments, click the CREATE PAYMENT option. 
 
By choosing the Submit PO BY EMAIL button on the Purchase order profile, you can send the PO by email to the seller and get a receipt. You can send the mail by selecting the SEND button, which will open a mail window with automated mail and the purchase order attached. 
 
You can quickly manage purchase orders and keep track of them using the Odoo 15 Purchase module. 
 
 
Odoo 15 Purchase Order
Ismail Harake October 22, 2021
Share this post
Our blogs
Sign in to leave a comment
Odoo 15 POS (Product Management)
  /