
Odoo Inventory Module (Scrap Management)
Inventory control is the most important aspect of any firm. In order to run a successful firm, you'll need proper inventory management support. The inventory management solution we use can determine our company's fate.
Odoo is one of the greatest inventory management platforms available, and it can be used without any investment in implementation, customization, or integration, ensuring corporate success. Odoo inventory module has been designed to work with all types of businesses and sectors. Regardless of the size of their company, business organizations can use this technology. Odoo Inventory can be a foundation of strength for a business because it is a flexible module that plays a vital role in handling all inventory-related operations.
One of the features available in Odoo Inventory Module is Scrap management.
Scrap is anything that is no longer usable or has been ruined. A product can also be called a scrap if it has passed its expiration date. We frequently discover product damage or expiration dates while maintaining or reviewing inventory. When such damage or expiration of a product is discovered, it is our responsibility to remove it from stock because we cannot sell damaged products. To avoid the selling of obsolete products, we usually move them to a scrap yard.
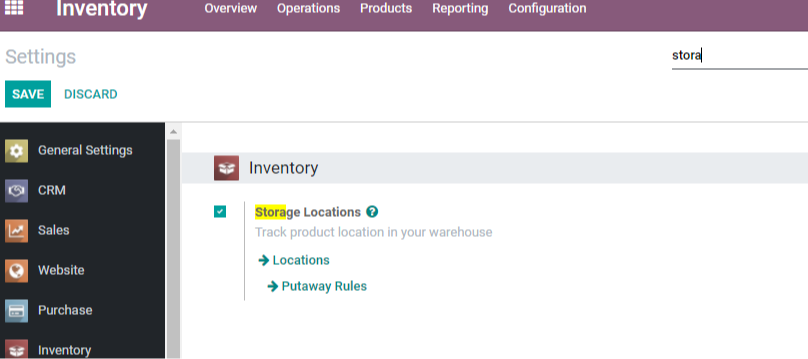
These storage areas allow us to keep track of where our products are in the warehouse. We can find locations under Configuration if we activate Storage Locations.
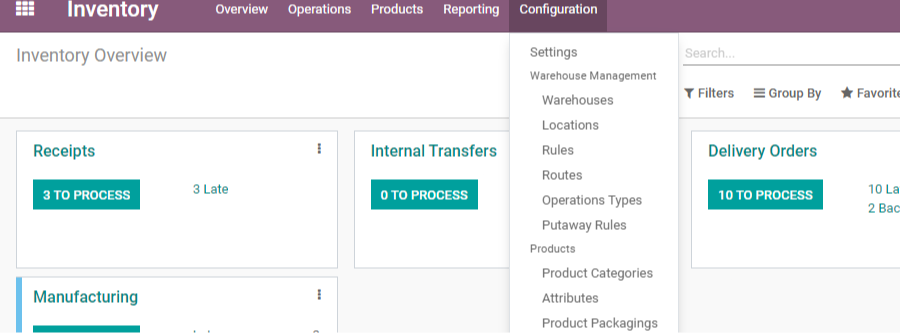
We'll be led to a page where we can find pre-configured locations if we click on Locations. It's possible to make new sites in this area.
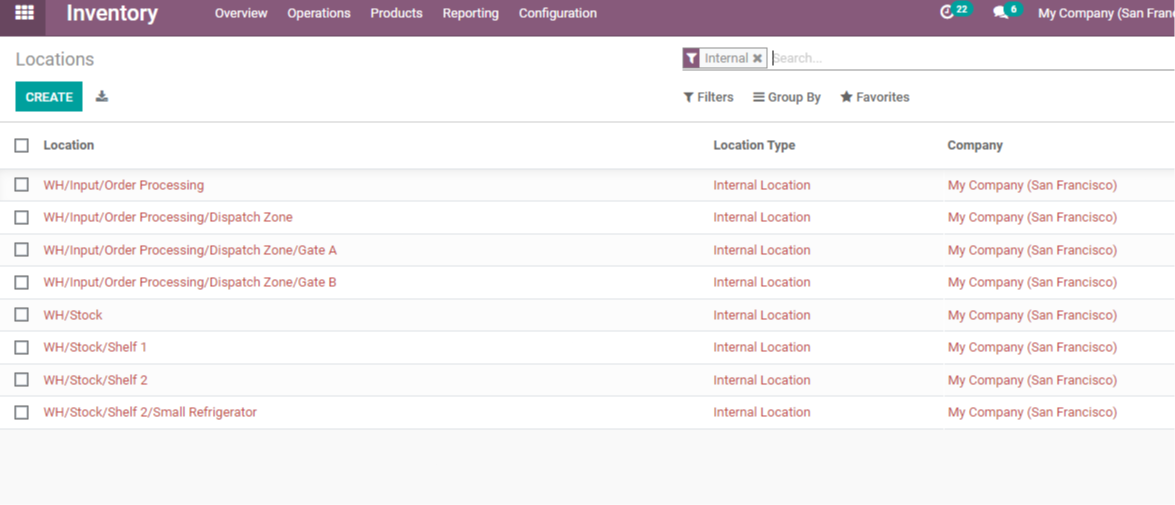
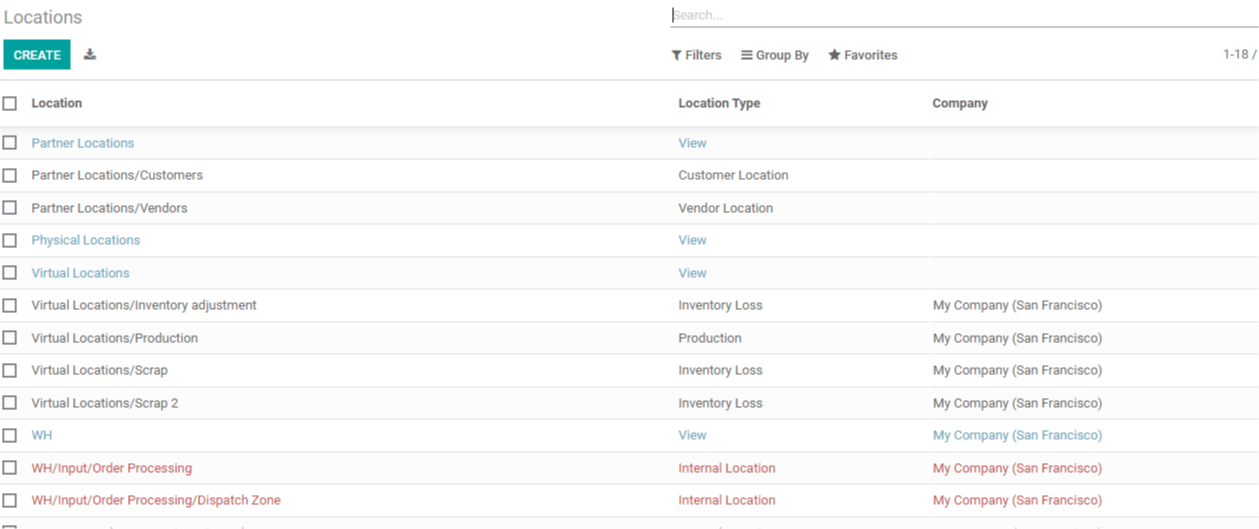
We can see that we've solely filtered internal locations. By eliminating the filter, we can now see all of the existing locations.
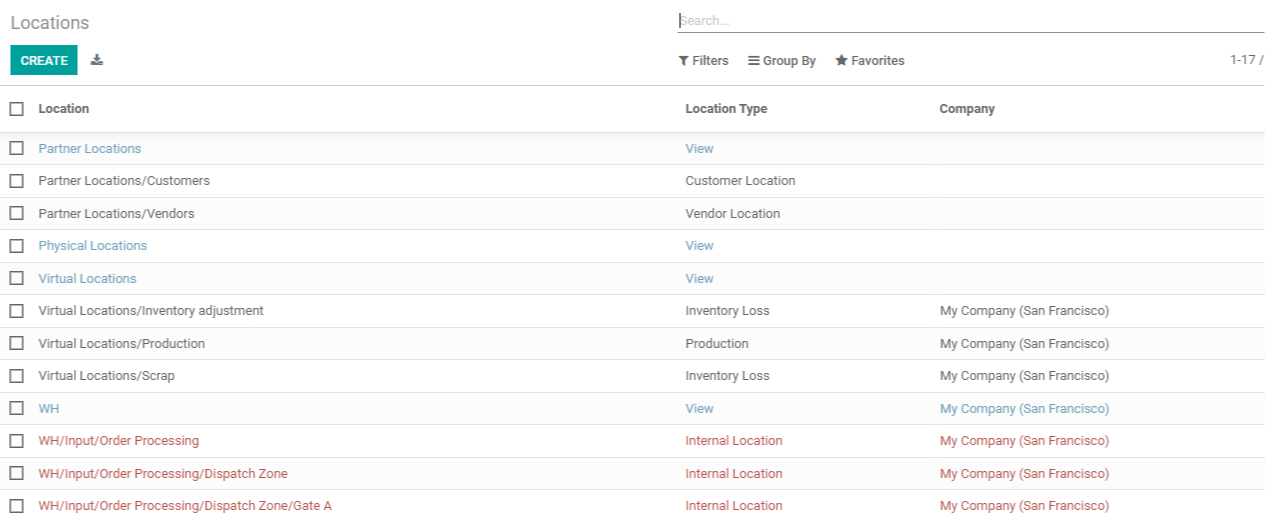
We may find several types of locations on this website, such as Partner locations, virtual locations, and so on. A VirtualLocation/Scrap can also be found, which is used to indicate inventory loss. Using the CREATE tab, we can now create a new scrap place.
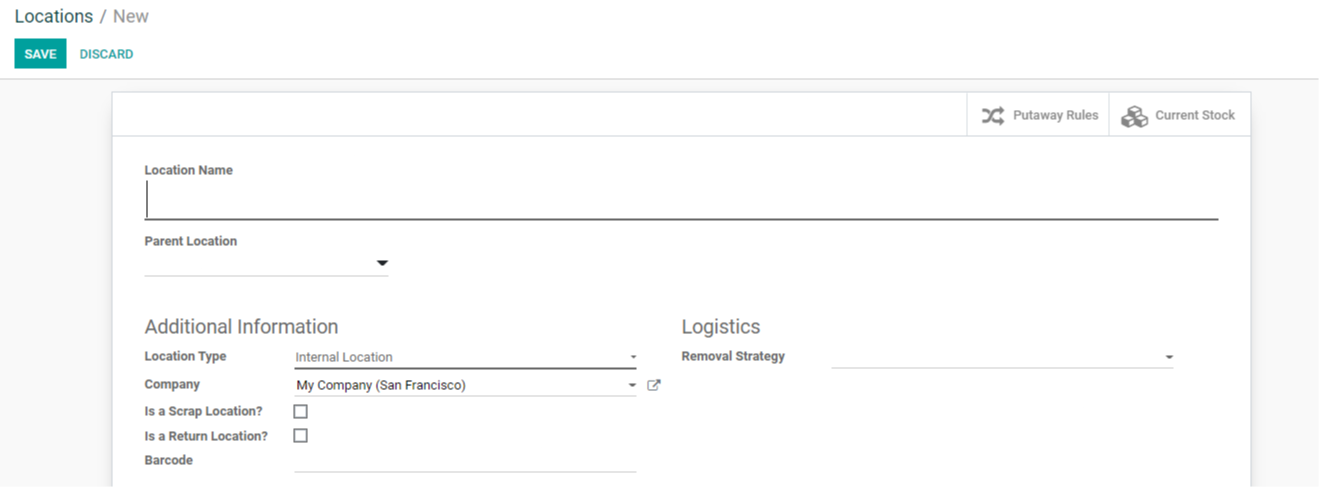
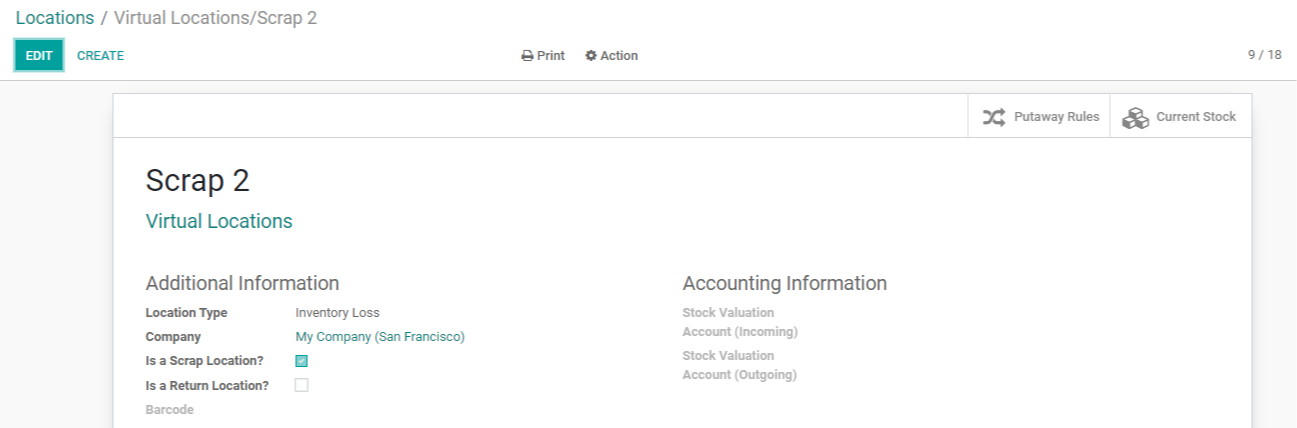
Because Scrap locations already exist, we can add the Location Name as Scrap 2. After that, we may choose the parent location. Scrap locations are usually controlled as the virtual location's child location.
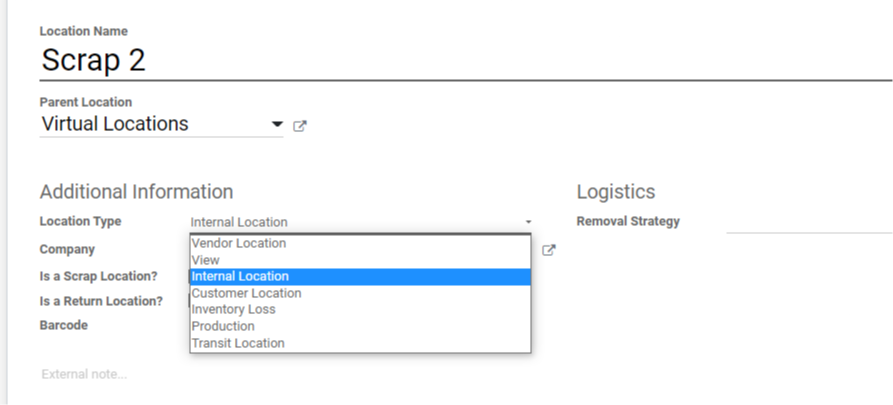
Location Type is listed underneath Additional Information. We can choose Inventory Loss from the list of location kinds because that is the genuine reason for creating a scrap location.
When we select inventory loss as a location type, new fields appear beneath the accounting information. Details for Stock Valuation Account (Incoming) and Stock Valuation Account (Outgoing) must be entered. The firm name must also be entered before the box next to Is a Scrap Location? may be checked. We enable it because we're going to make a scrap location here.
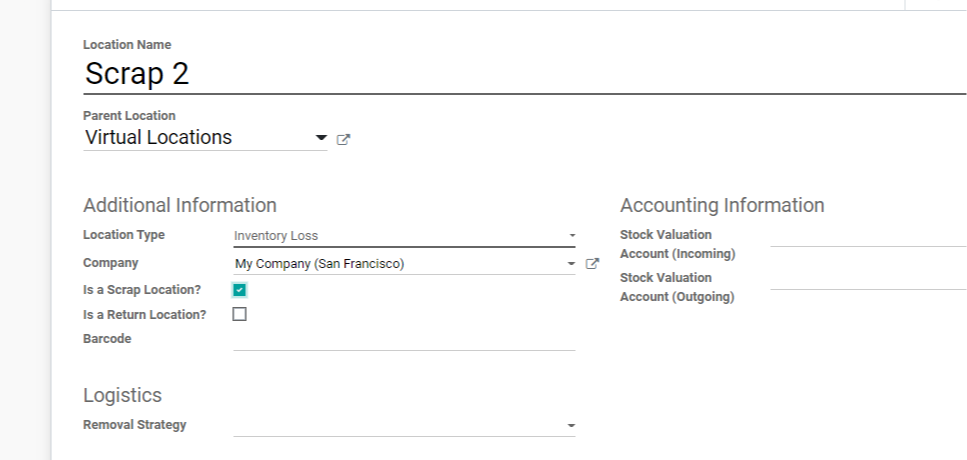
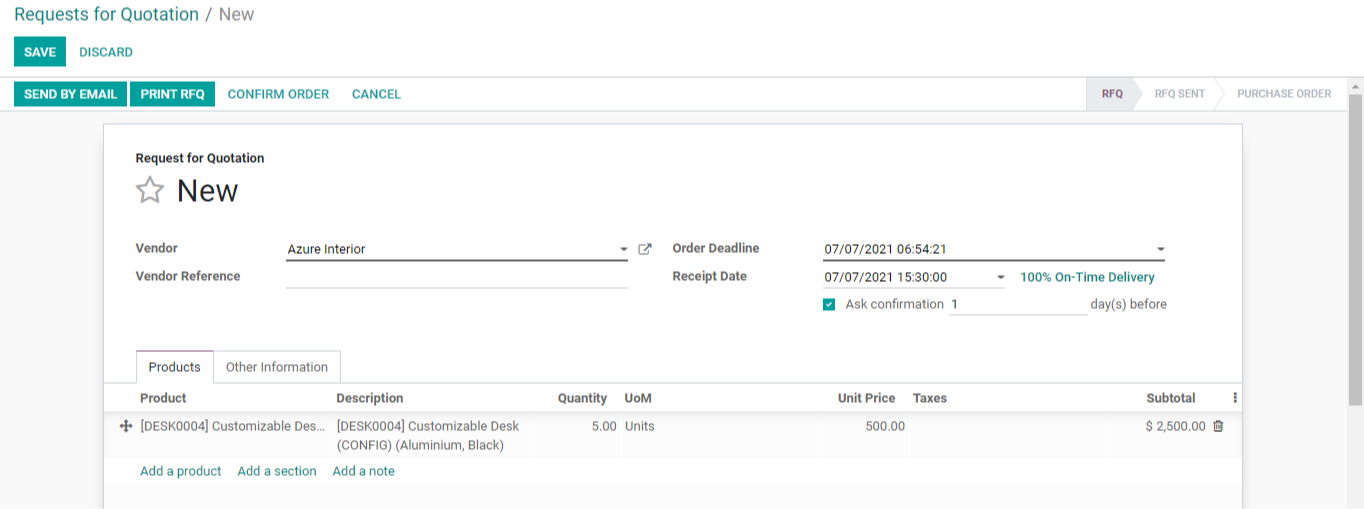
The following field is a Return Location, which does not need to be enabled. We have a removal strategy below Logistics. We can now save this location and generate a buy order in the purchasing module.
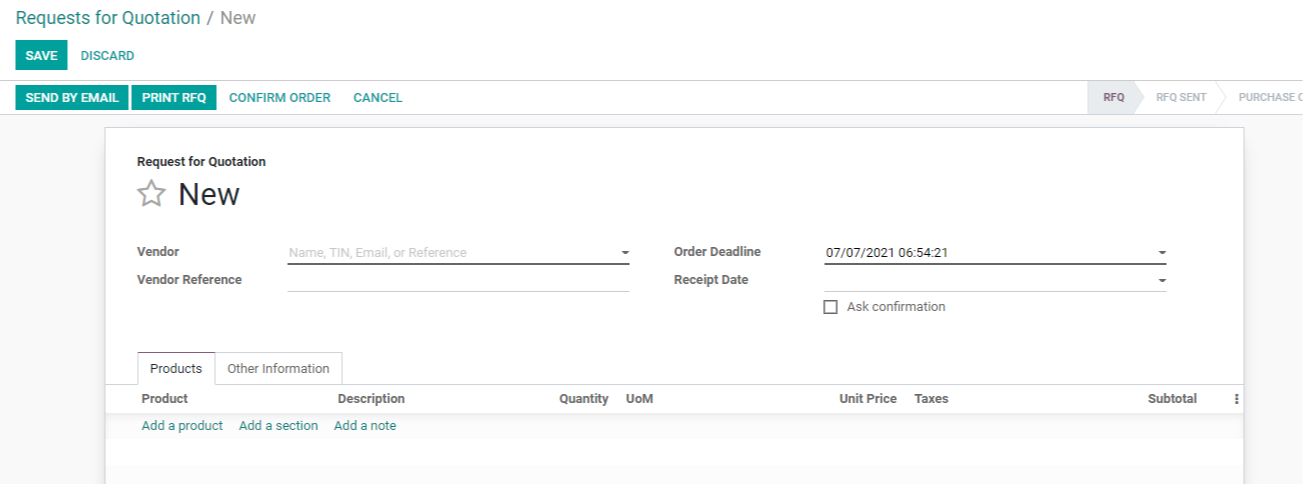
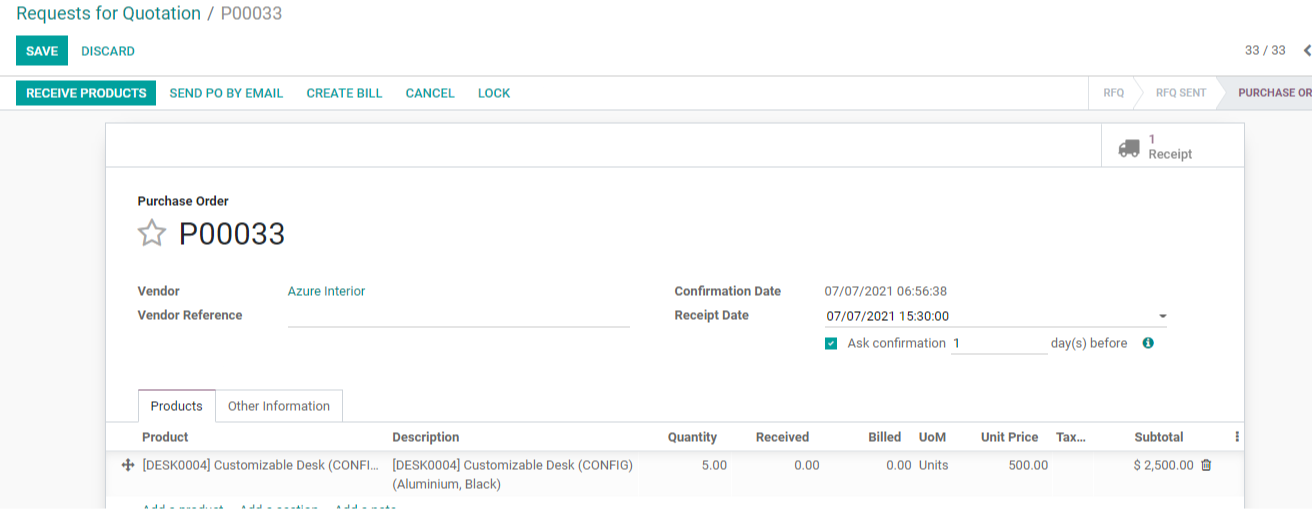
We may confirm the order and obtain a screen like this, where all we have to do now is wait for the things to arrive.
We can return to the Inventory module and examine the receipts instead of receiving the things from here.

We can find all of the Receipts by clicking on Receipts.
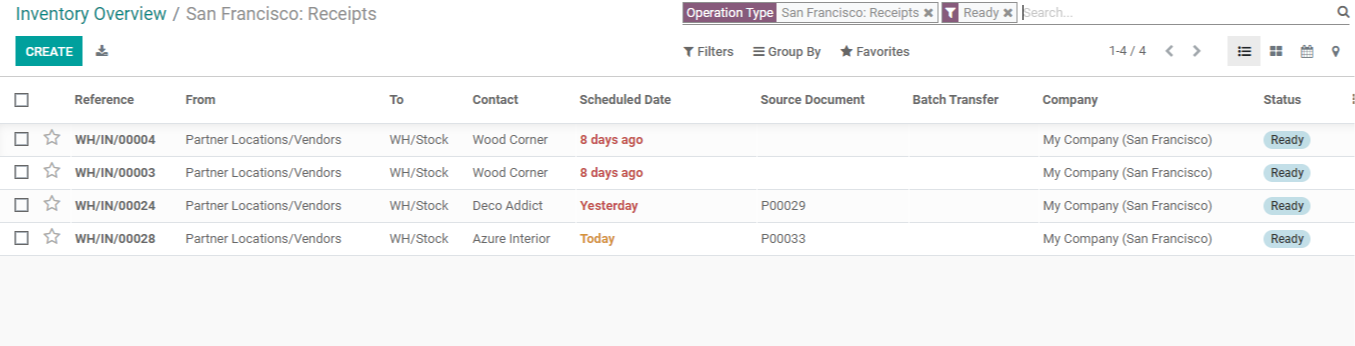
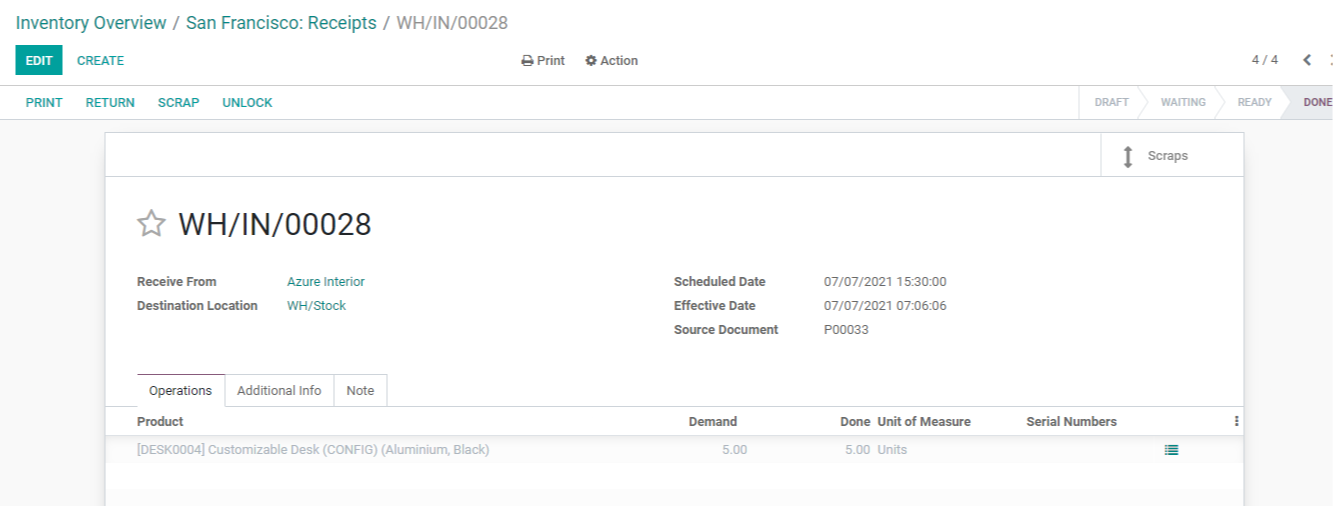
Our newly created receipt with the scheduled date of Today can be found here. We get all the details when we click on the receipt.
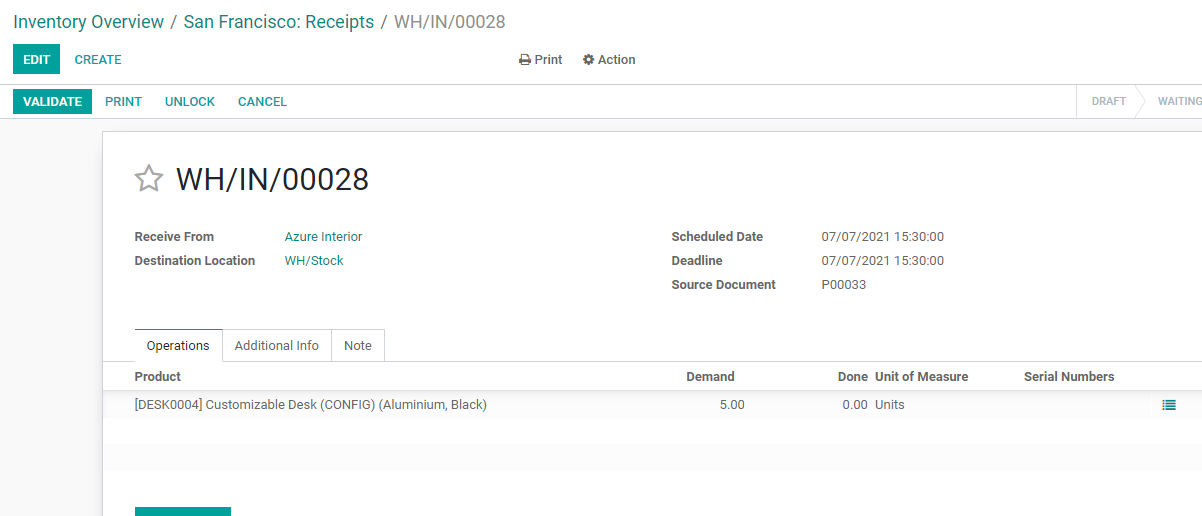
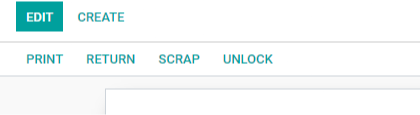
Here, we have options like Validate, Print, Unlock, and Cancel. To proceed with the receipt we have to click the VALIDATE button.
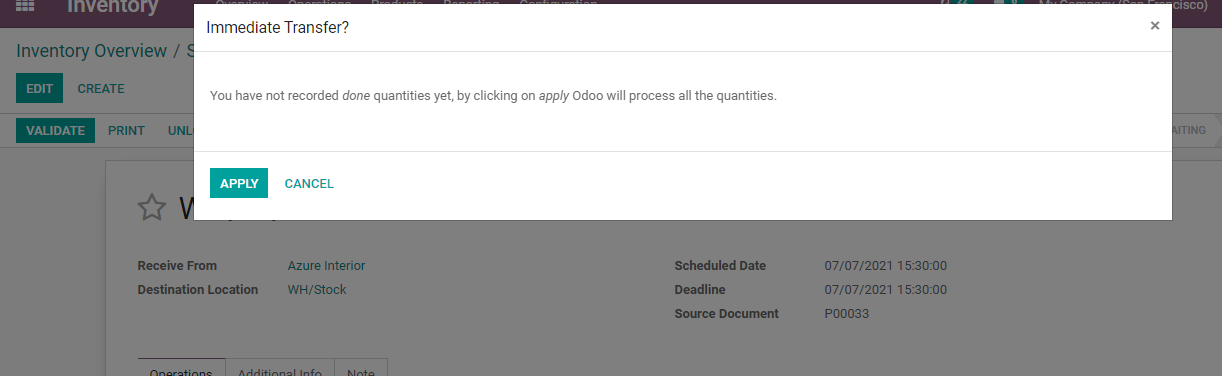
Because I did not mark the done quantities, I received this pop-up window. This is a simple task for us. To begin, cancel the transfer.
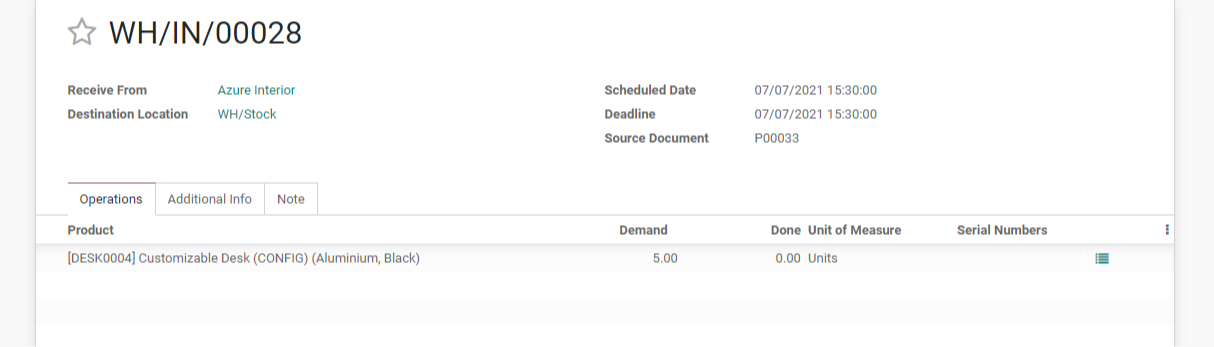
We can discover an icon beside the serial number on this page. By selecting it, we will be taken to a new page where we can indicate the quantities that have been completed.
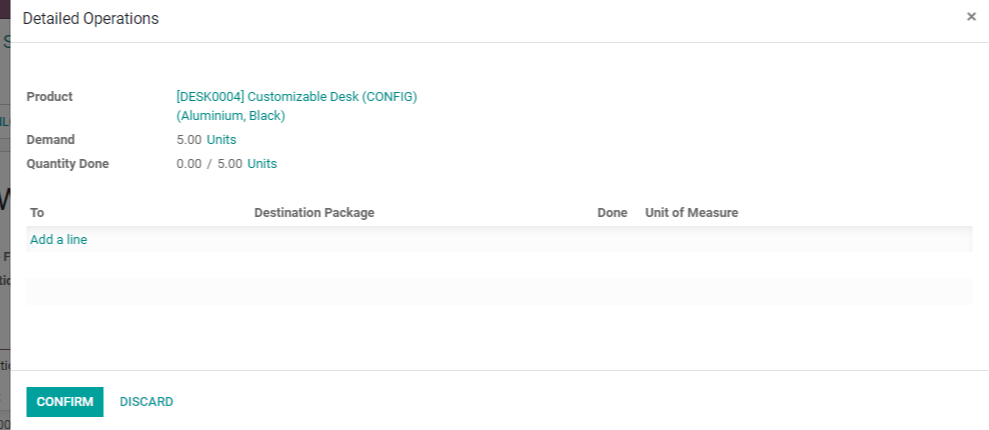

We can now confirm the process because I have indicated the done quantity as five. We can now verify the receipt.
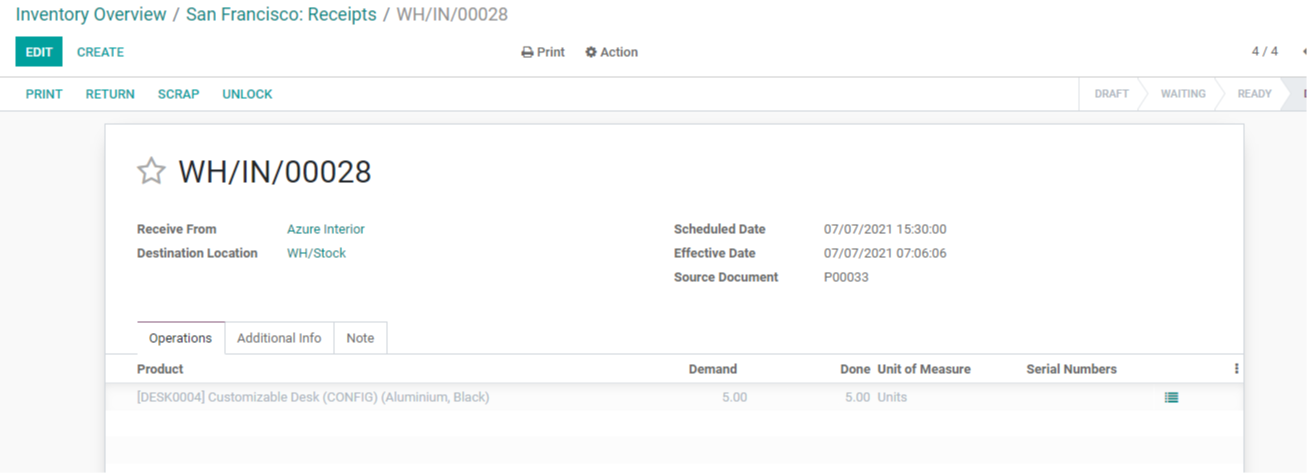
When we validate, we get a page that looks like this:Imagine that when we receive the product, we see that some of the products are broken.
To begin, we must remove the product to be scrapped. On the top, we have a SCRAP button for this.
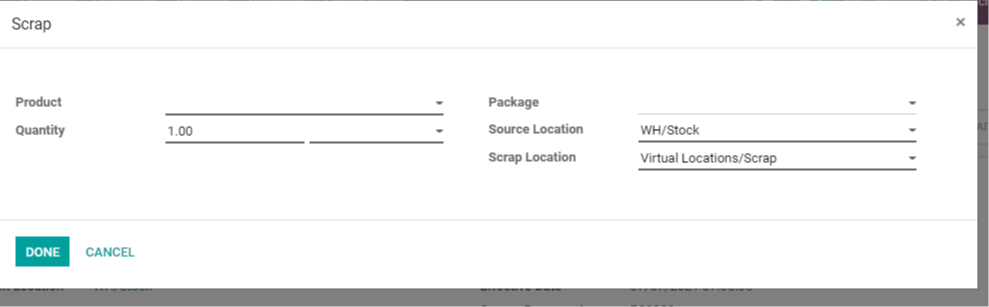
We are given a window in which to discard the merchandise. Here, we must provide product information as well as the quantity to be discarded. Assume that only one of the five quantities received has been damaged. The quantity can then be added as one.
We must also provide the source location from where we obtained the merchandise, as well as any accompanying packages, and the destination location. We already constructed a scrap place, Virtual Locations/Scrap 2, which we may now select.
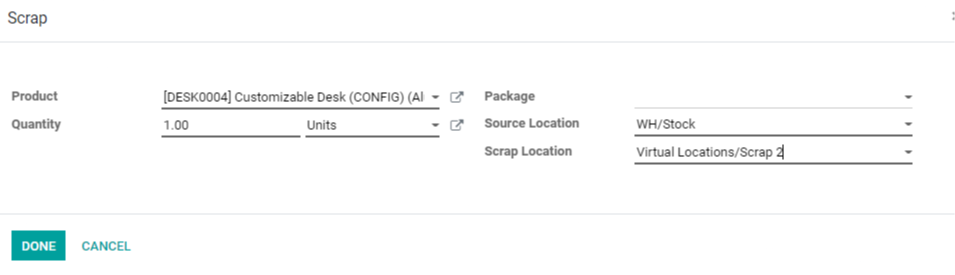
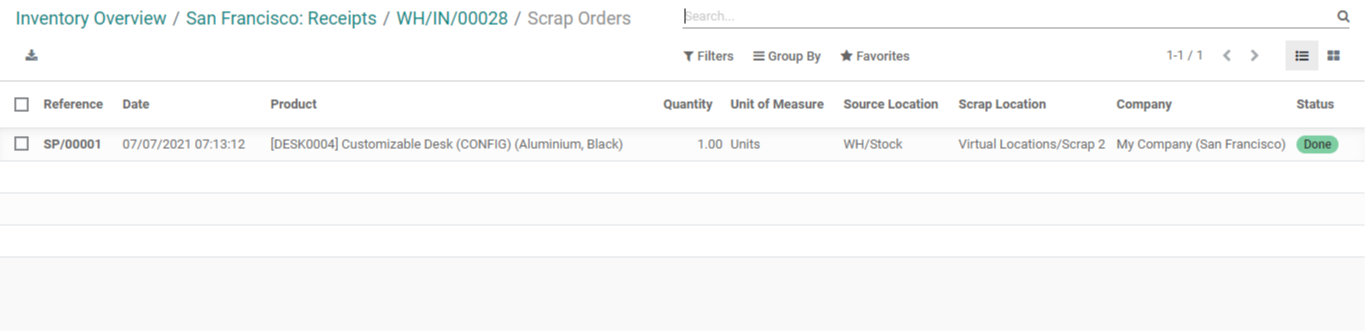
All of the information on the product can be found on this page.
The product adjustable desk one unit was damaged, as shown in the above screenshot, and it was relocated from WH/Stock to Virtual Location Scrap 2. The junk has reached the end of its life cycle.
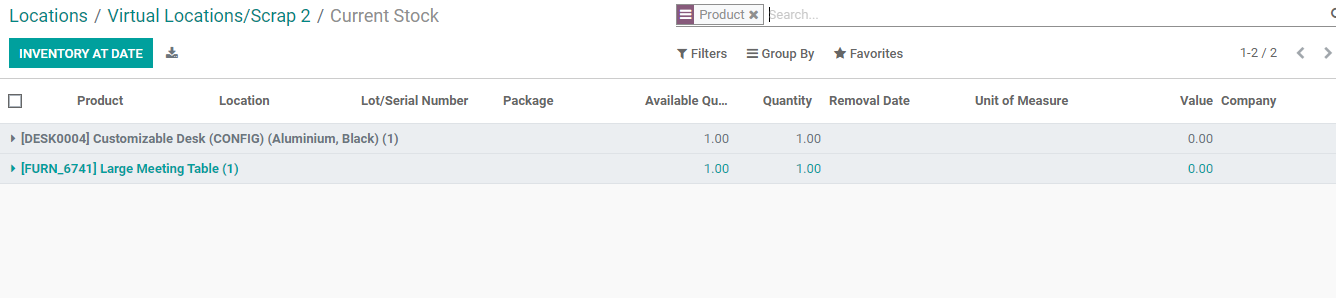
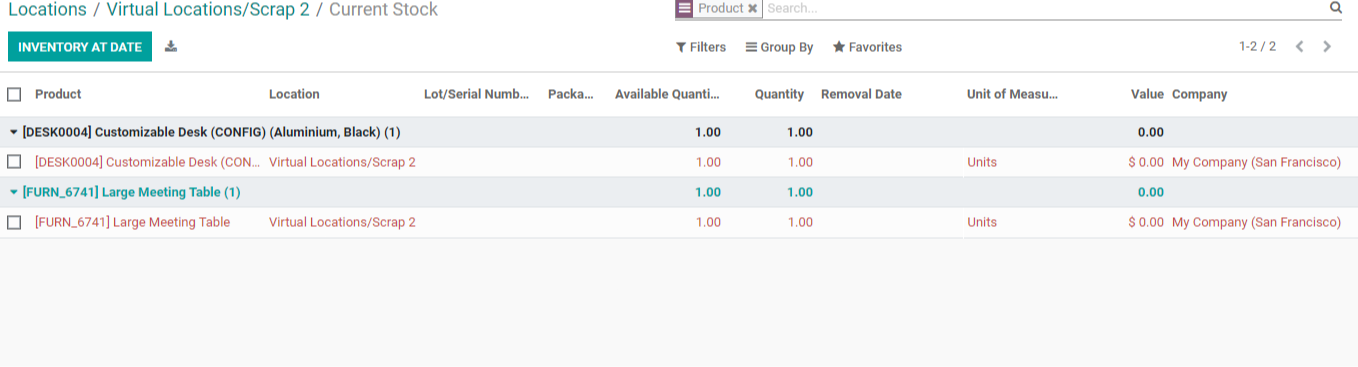
Let's go back to our original places to check out our freshly constructed Scrap 2 location.

When I clicked Current Stock, I was taken to the screen shown above, where we can see all of our inventory in the Scrap 2 location.
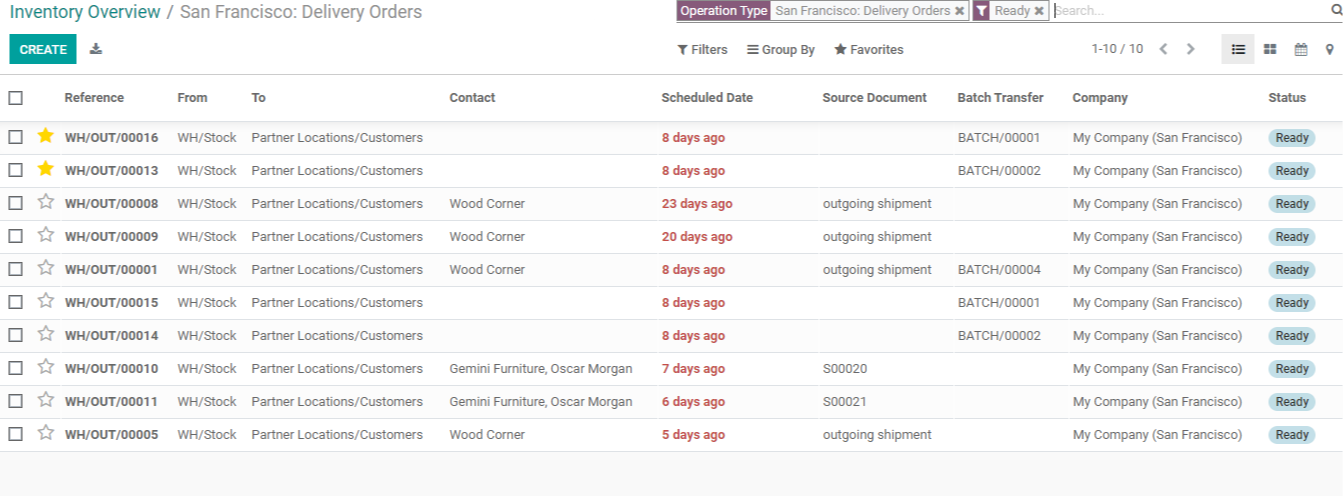
We've now made a scrap while receiving payment. When managing internal transfer and delivery of products, we are likely to identify damage to the product at this stage, so we can issue scrap orders. We may manage this by returning to the overview page and selecting the operation type.
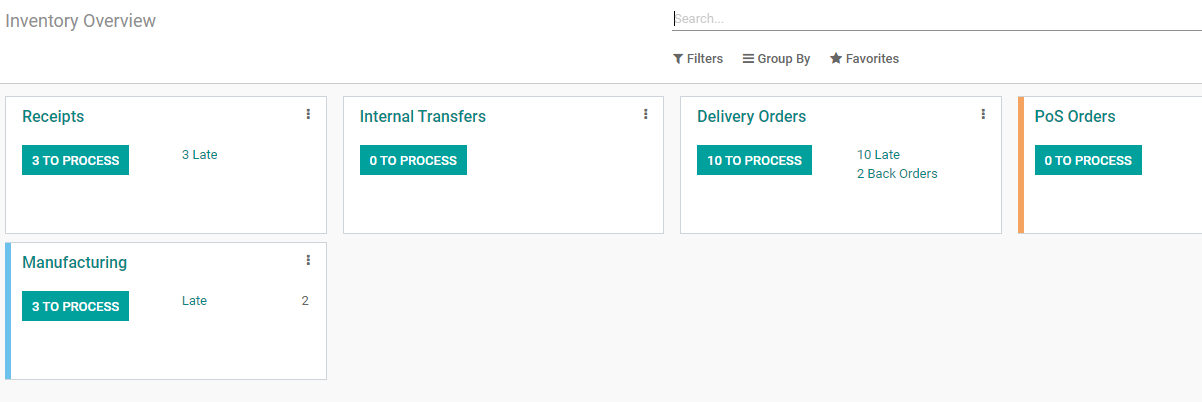
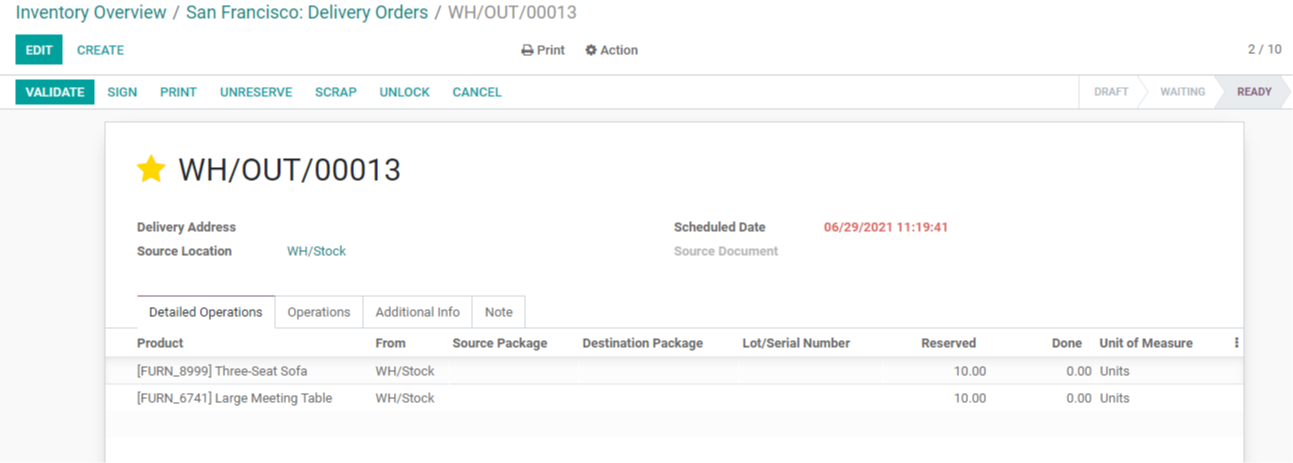
We can't do anything about internal transfer here. There isn't any transfer to complete. Let's have a look at the Delivery Order now.

We can also manage scrap orders at the production, point-of-sale, and other locations.
Odoo Inventory Module (Scrap Management)