US Payroll Management With Odoo 15 Payroll Module

US Payroll Management With Odoo 15 Payroll Module

Paying and employing staff is one of the challenging procedures for business operations in various nations. Benefits include bonuses, salary, promotions, and other deductions for employees. Earnings, deductions, gross pay, taxable gross, and an employee's net pay are some important factors in payroll calculations in the US. The majority of businesses struggle with managing employee payroll, and this problem differs from region to country. To finish a payroll process in a certain county, several stages are required. Users may simply handle the payroll process rapidly with an Odoo ERP. With the help of the Odoo 15 Payroll module, you can accurately perform payroll management for the nation of your choice.


With the aid of Odoo 15, this article offers an overview of US payroll management.


Users can use the Odoo 15 Payroll module to handle employee contracts and salary attachments. The Payroll module's compensation structure functionality makes it easy to enter an employee's salary information fast. You can examine each employee's payroll structure in a company separately using the Reporting tool. Let's look at how to handle US employee payroll now.


Basic Payroll Components in the US

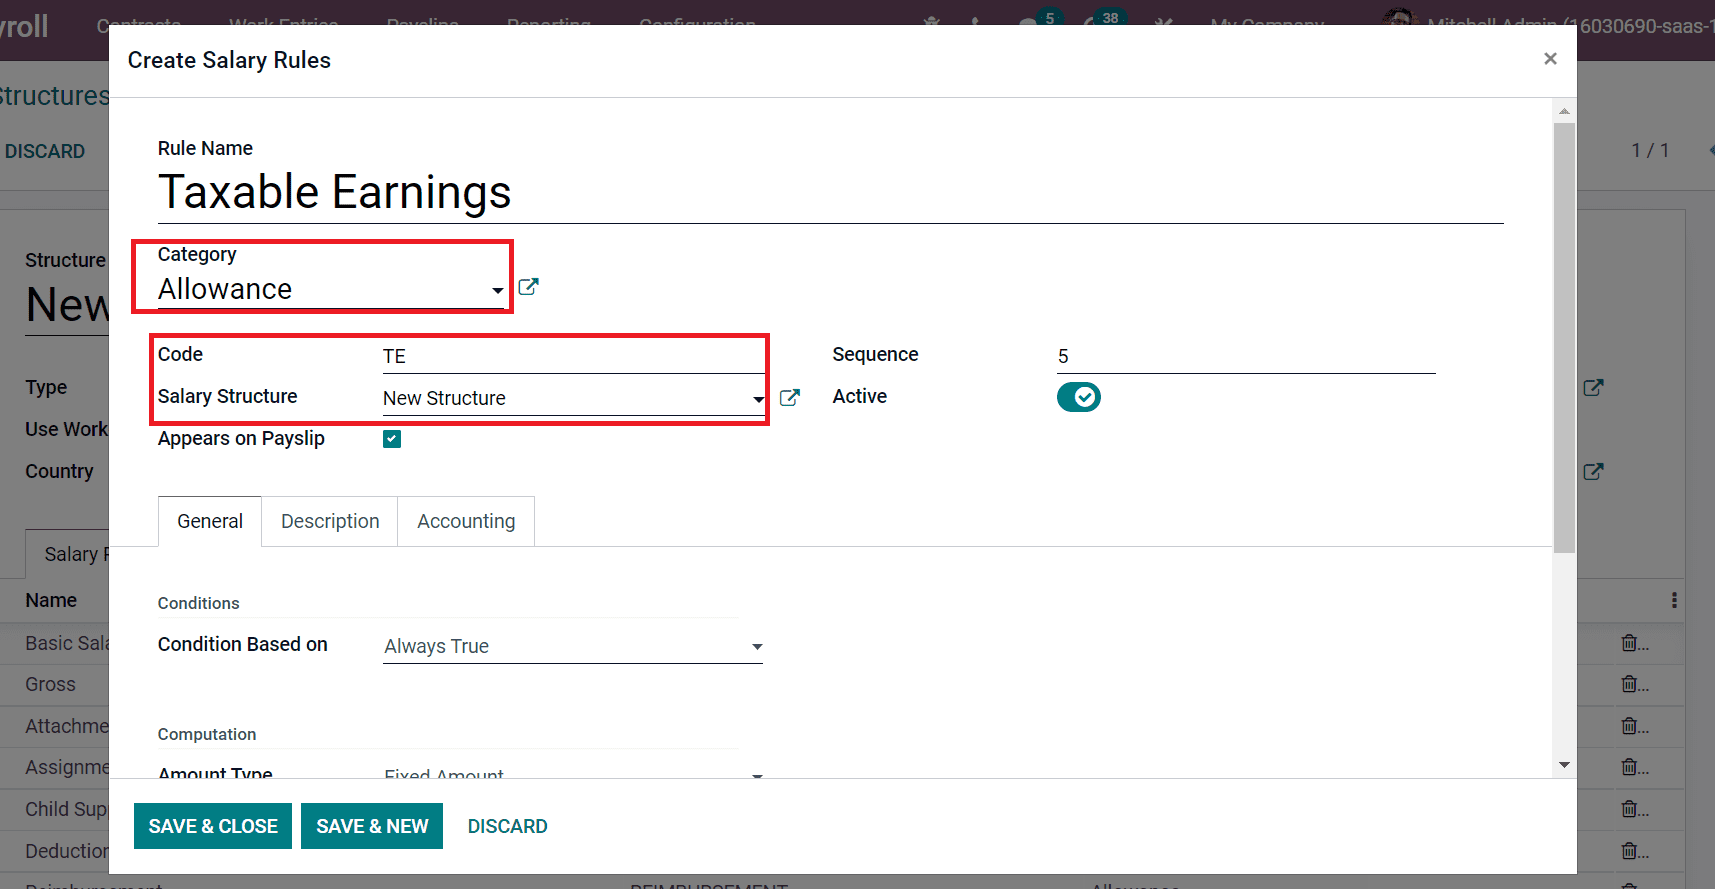
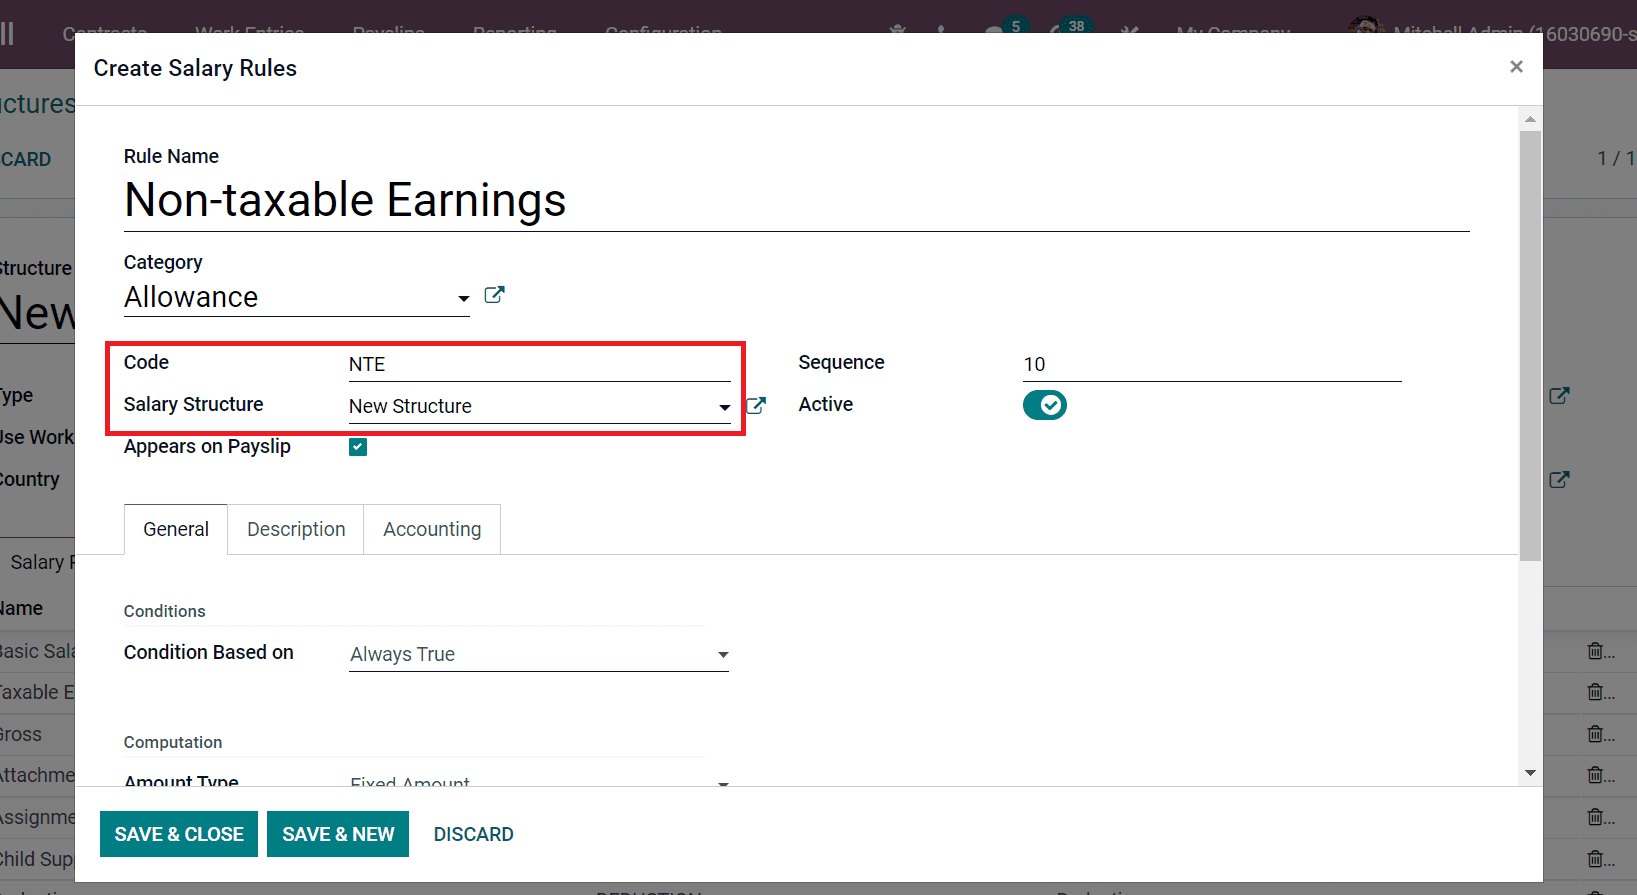
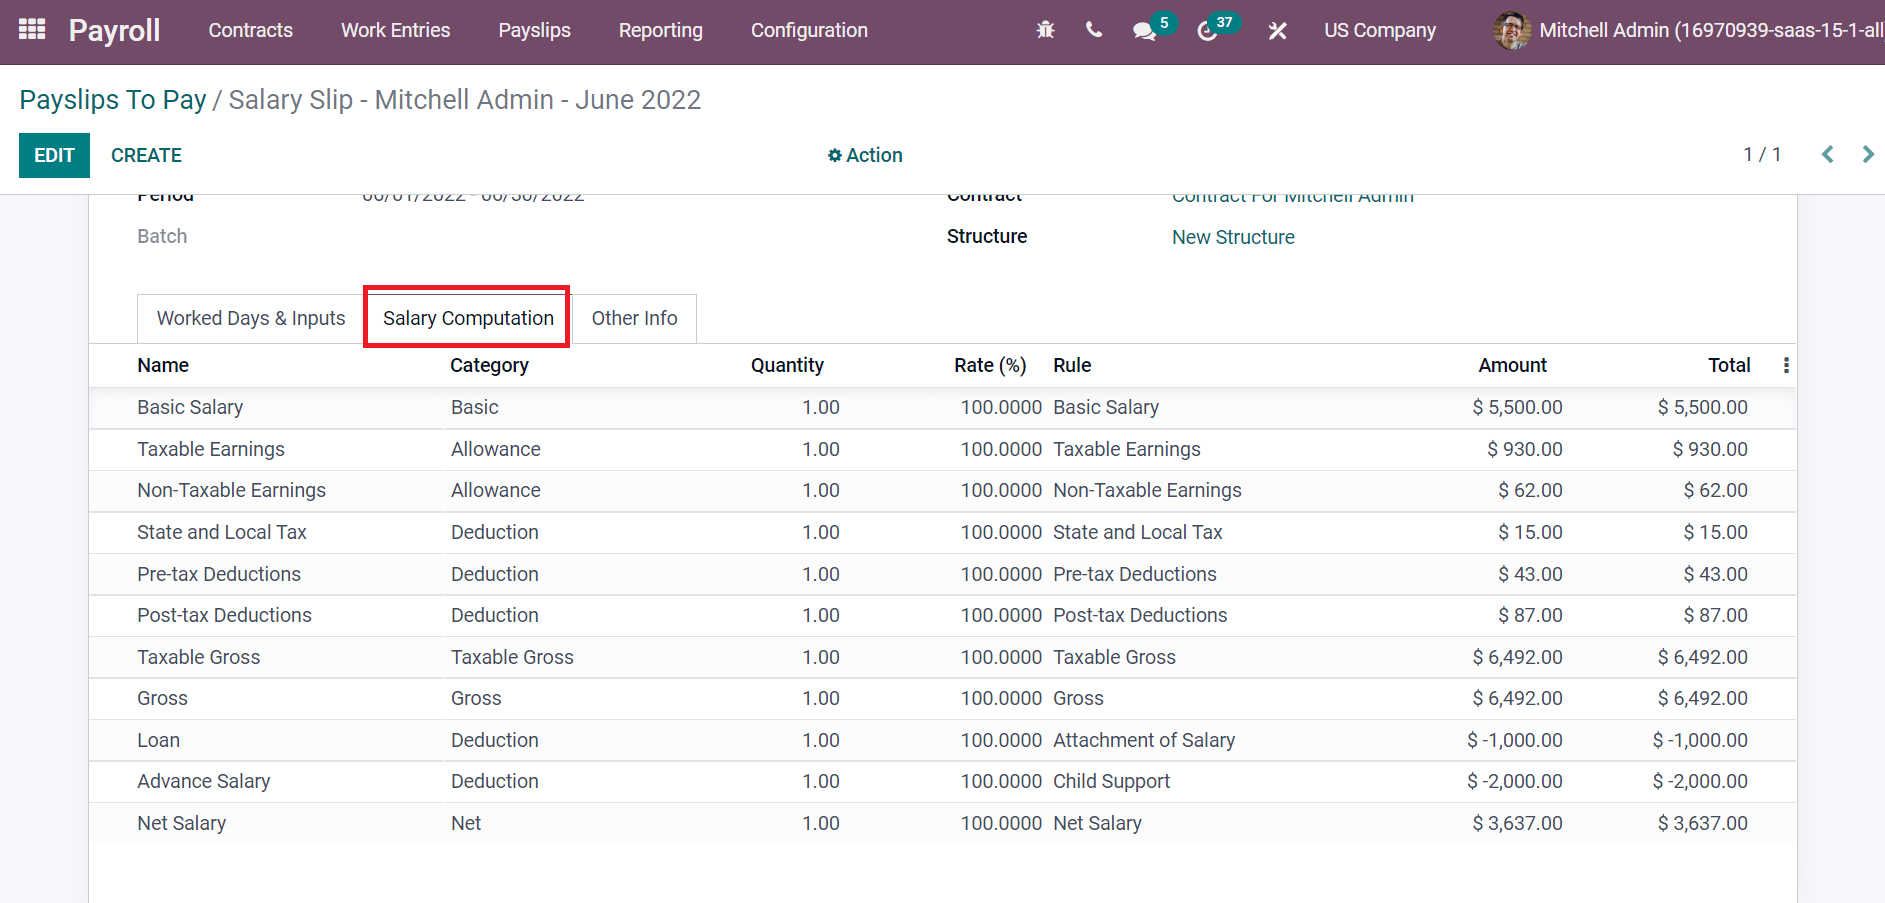
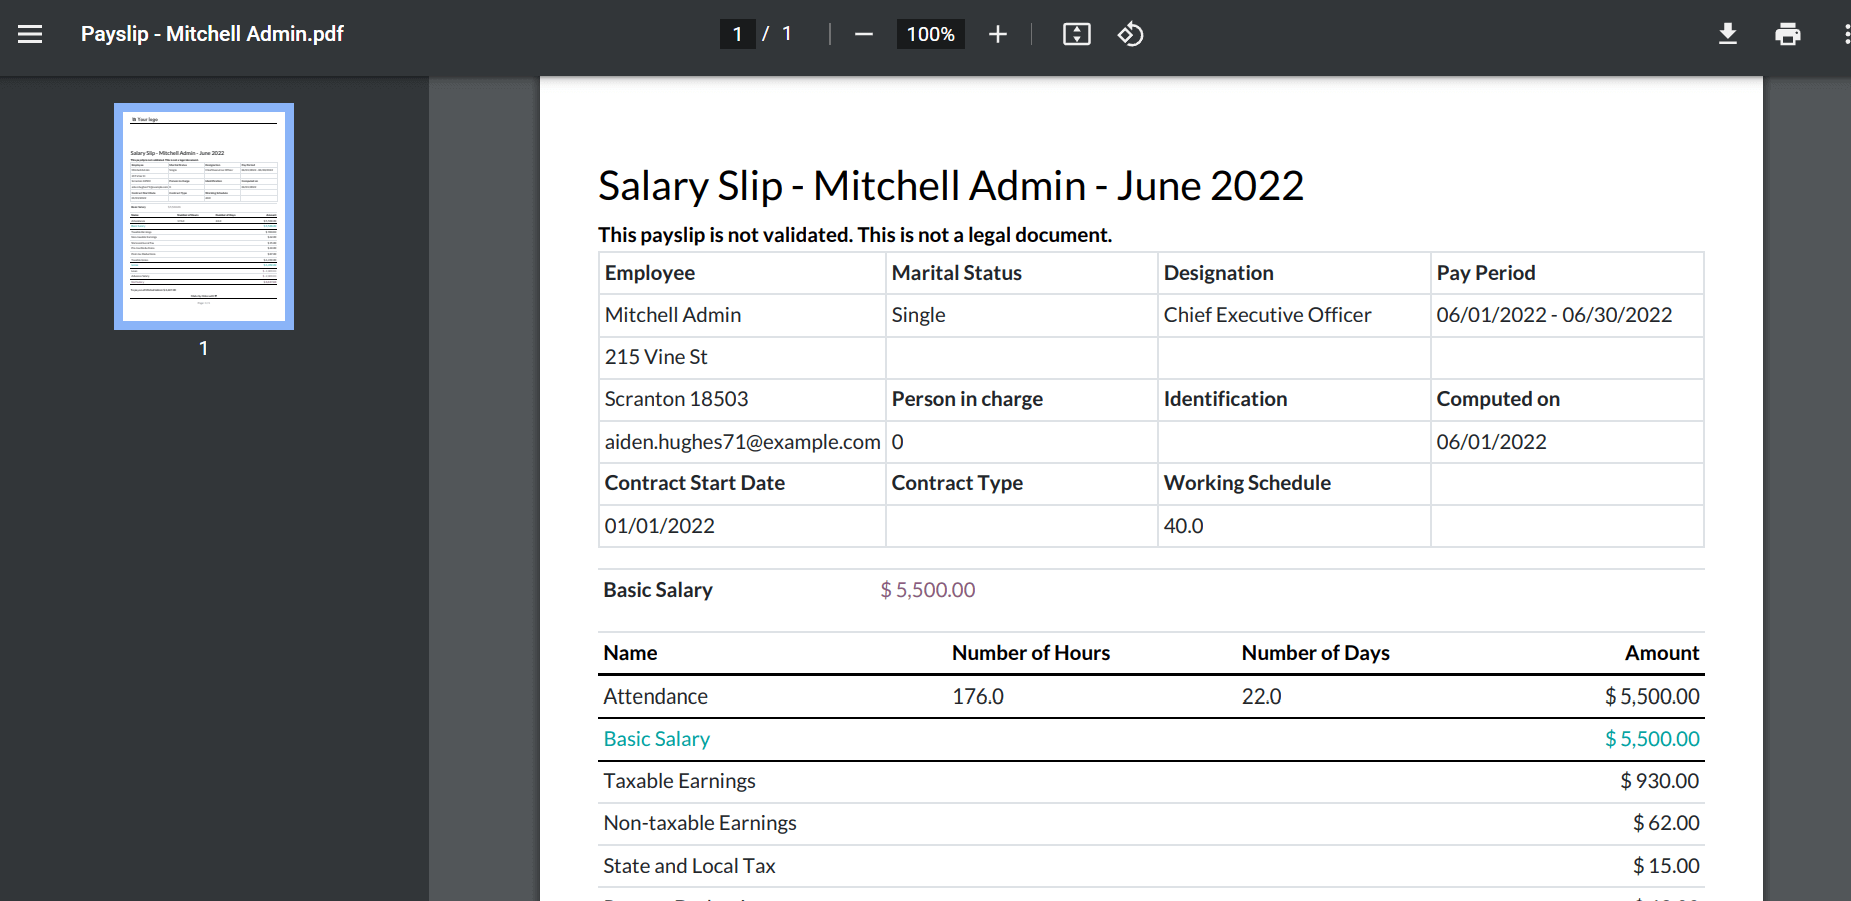
A US corporation will deliver a payslip to an employee that includes information about the company, the worker, payroll information, earnings, and deductions. The company details section contains information about the names, addresses, and identification numbers of the companies. In the workers' data, you may see the full name, profession, and DNI number. Earnings are a worker's base salary and are divided into two categories: taxable earnings and non-taxable earnings, which are regarded as allowances.


Payroll deductions in the US come in various forms:

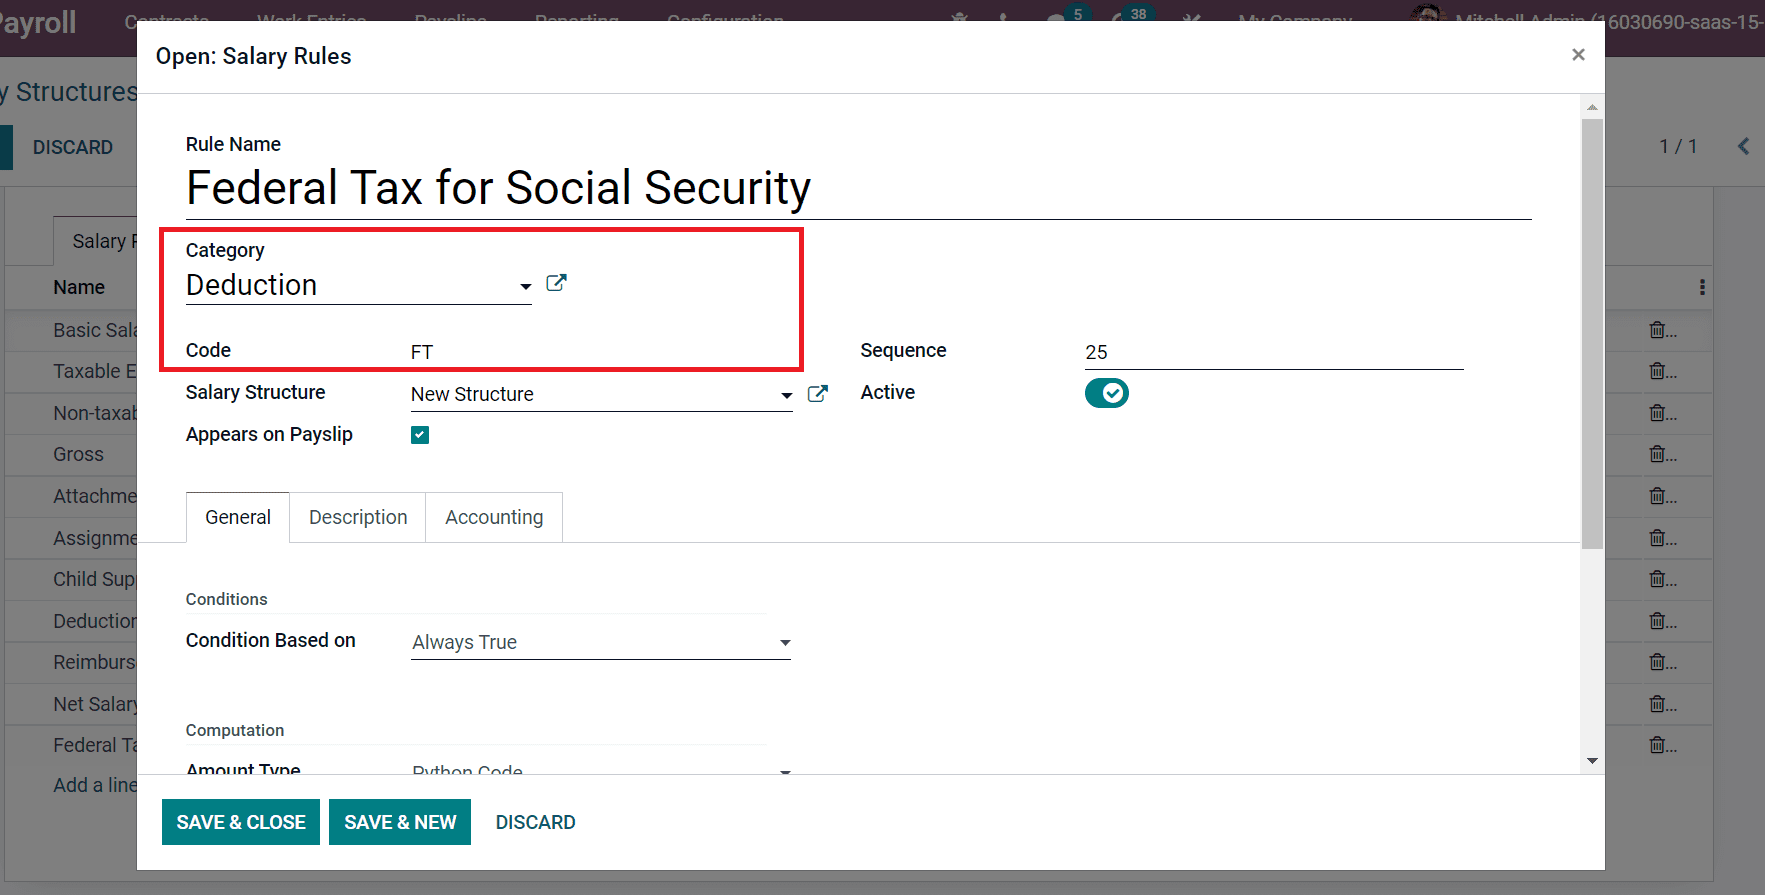
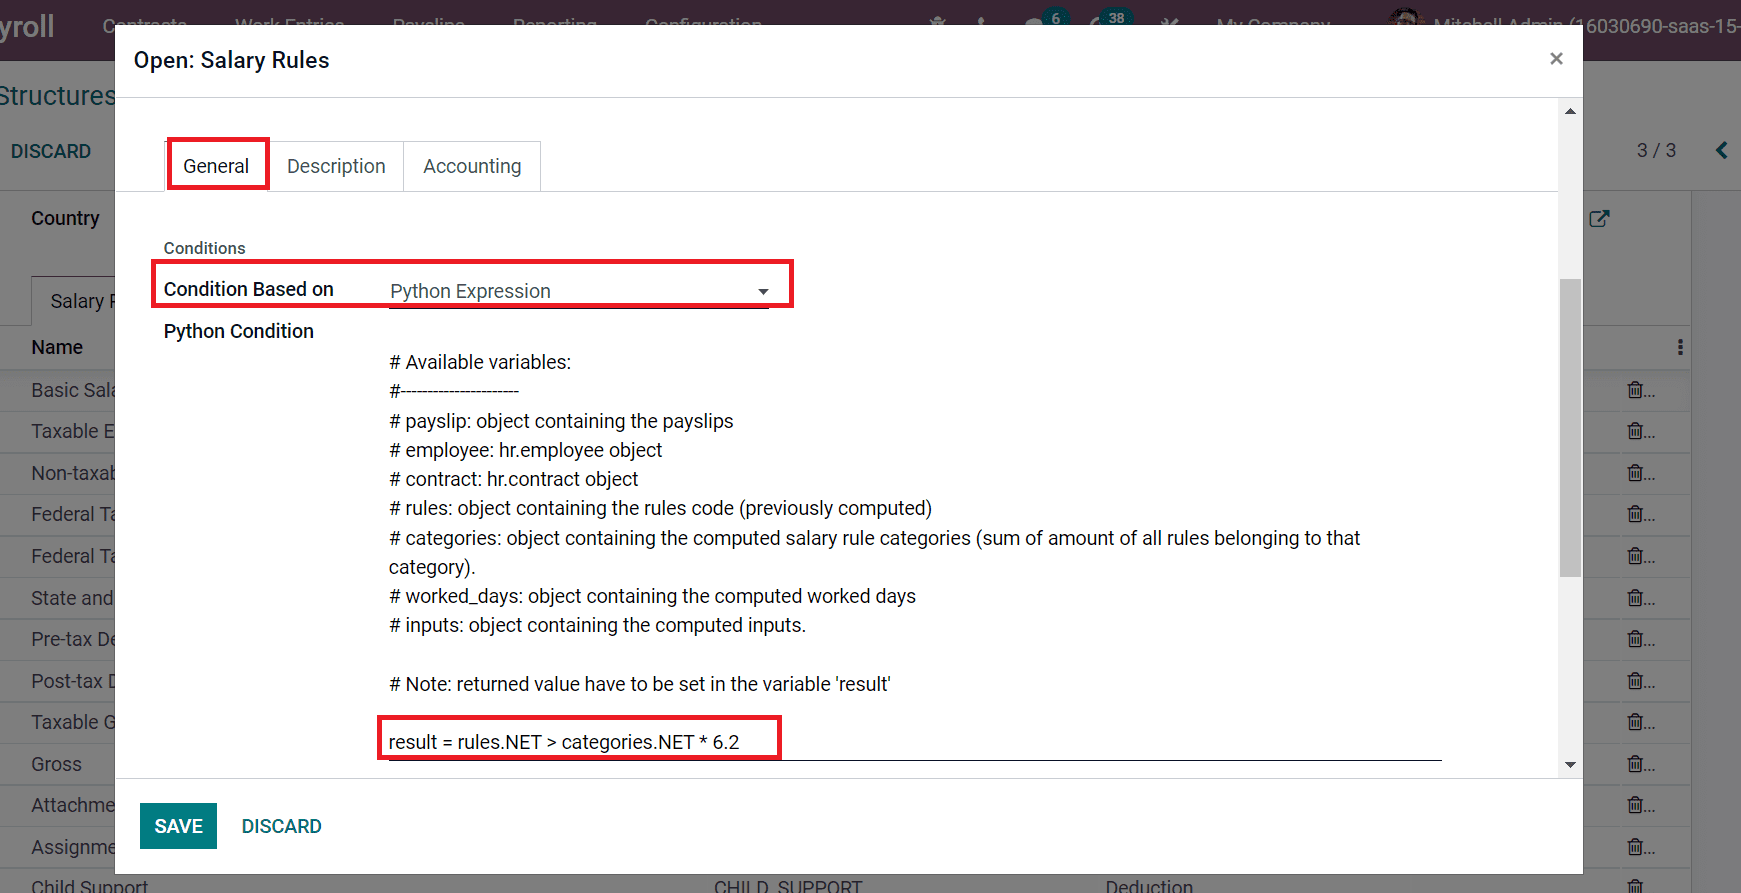
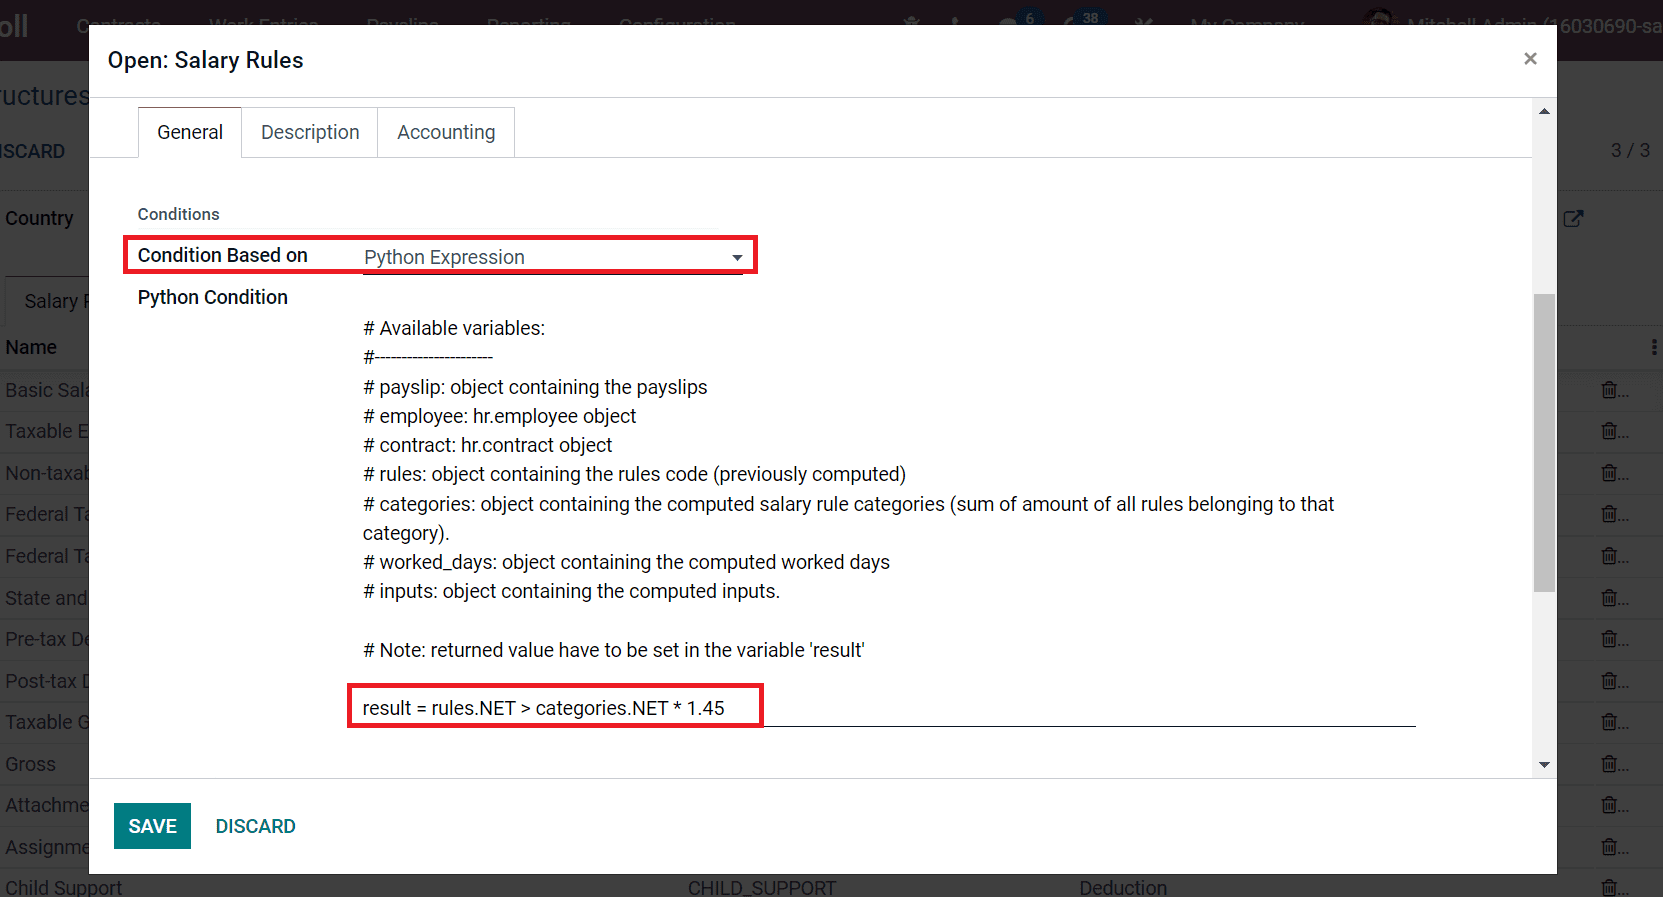
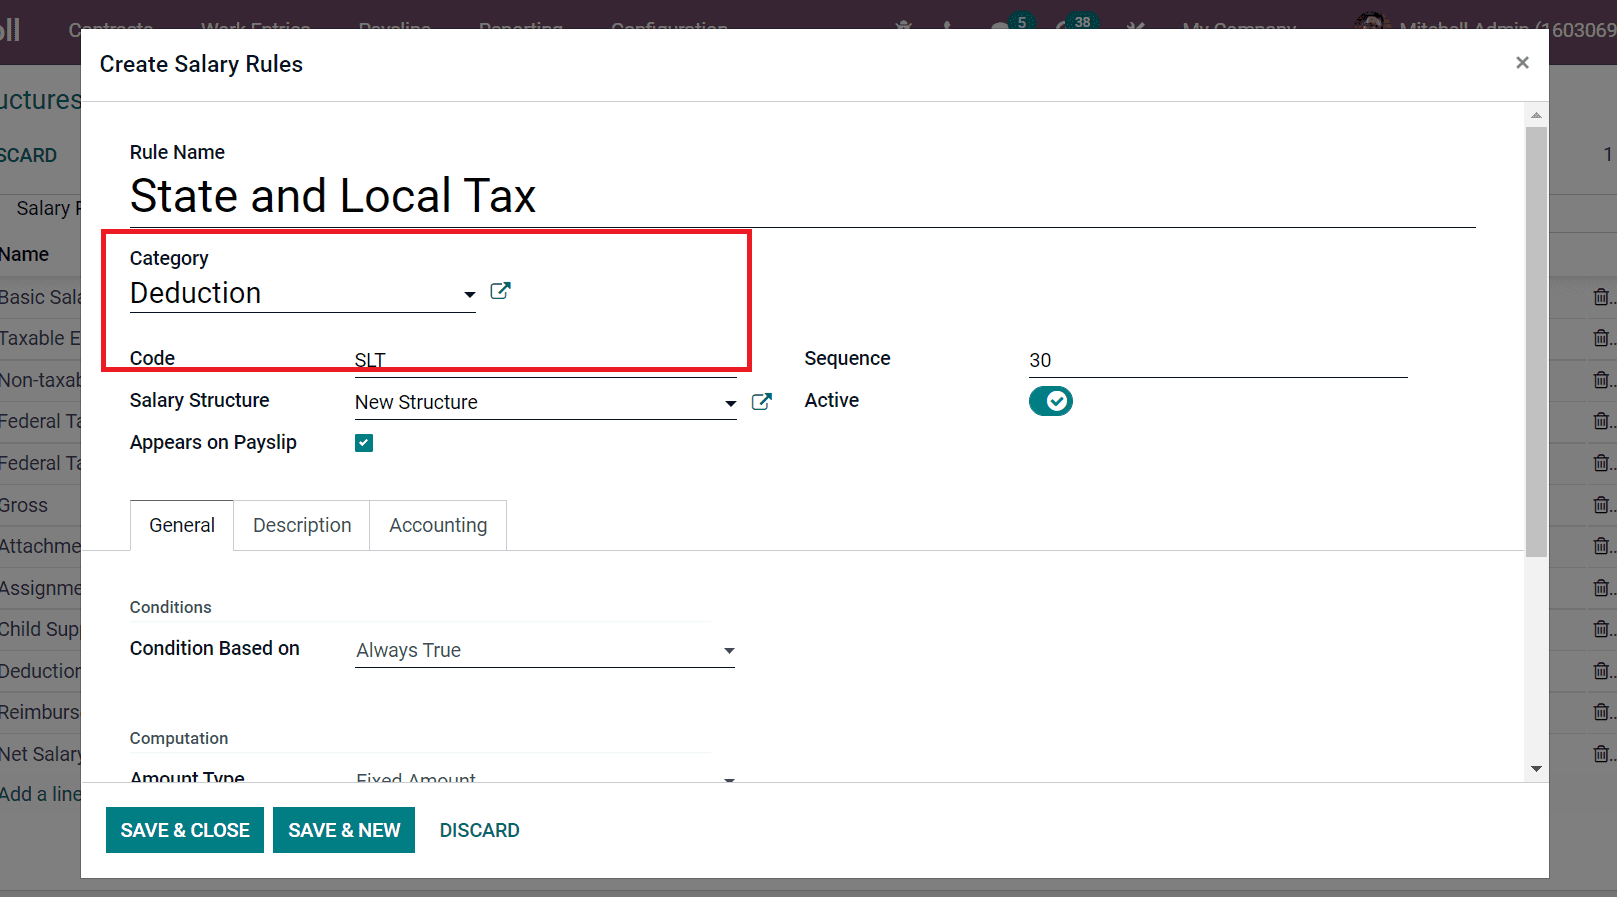
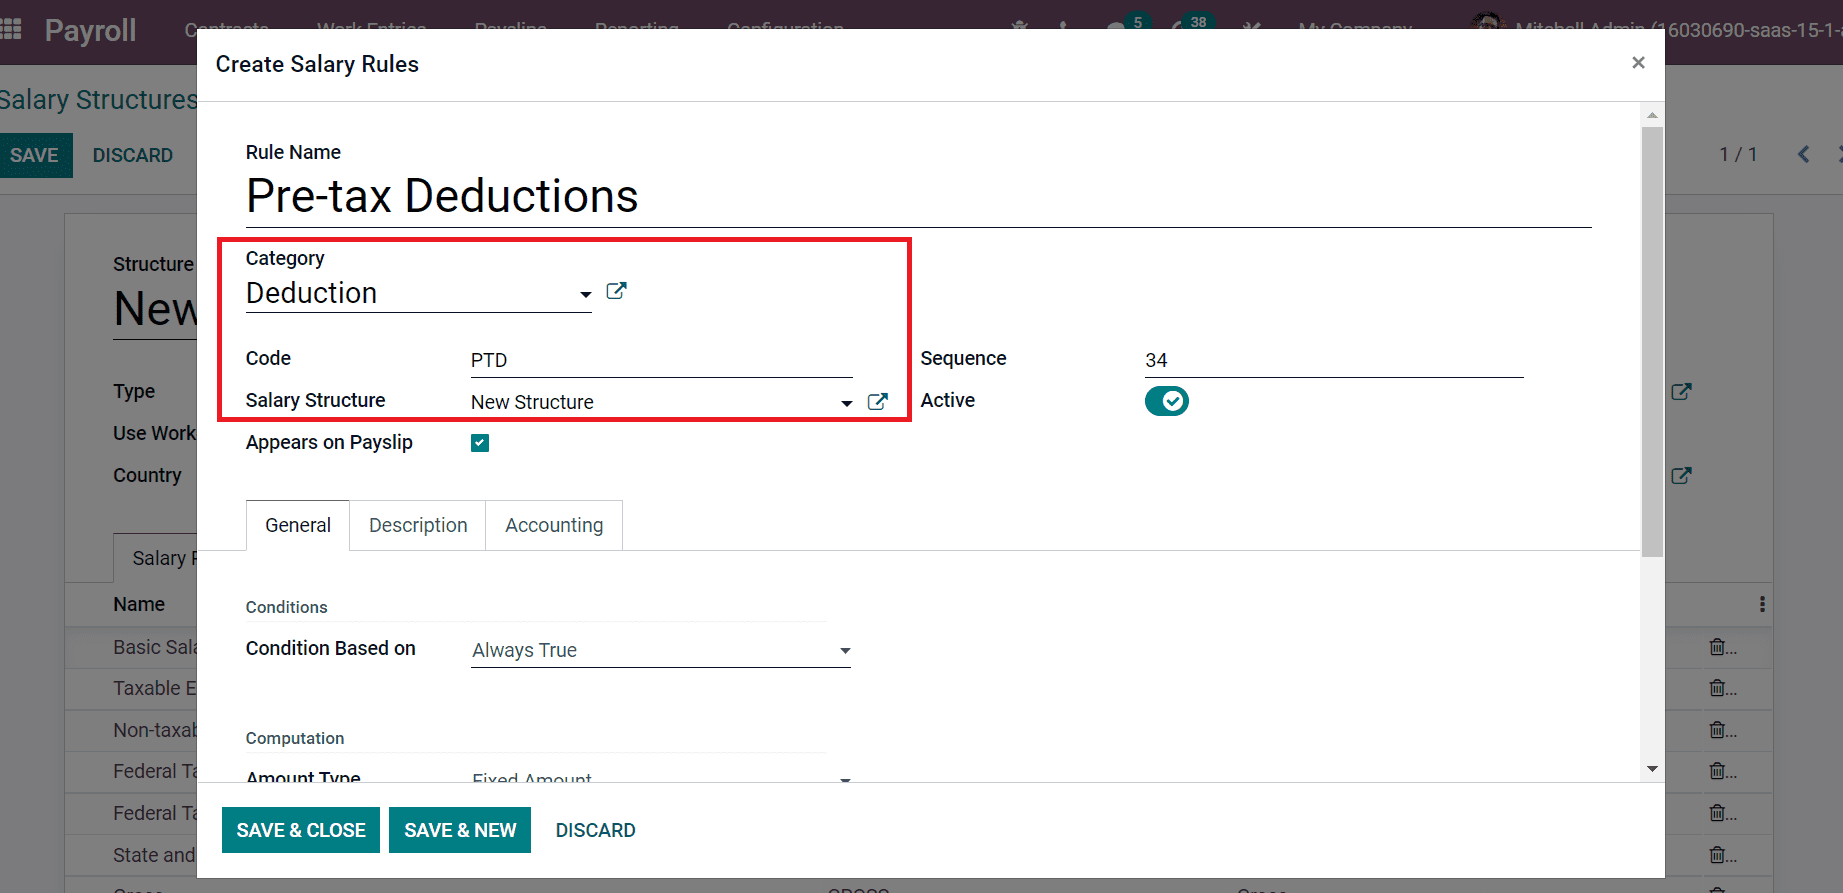
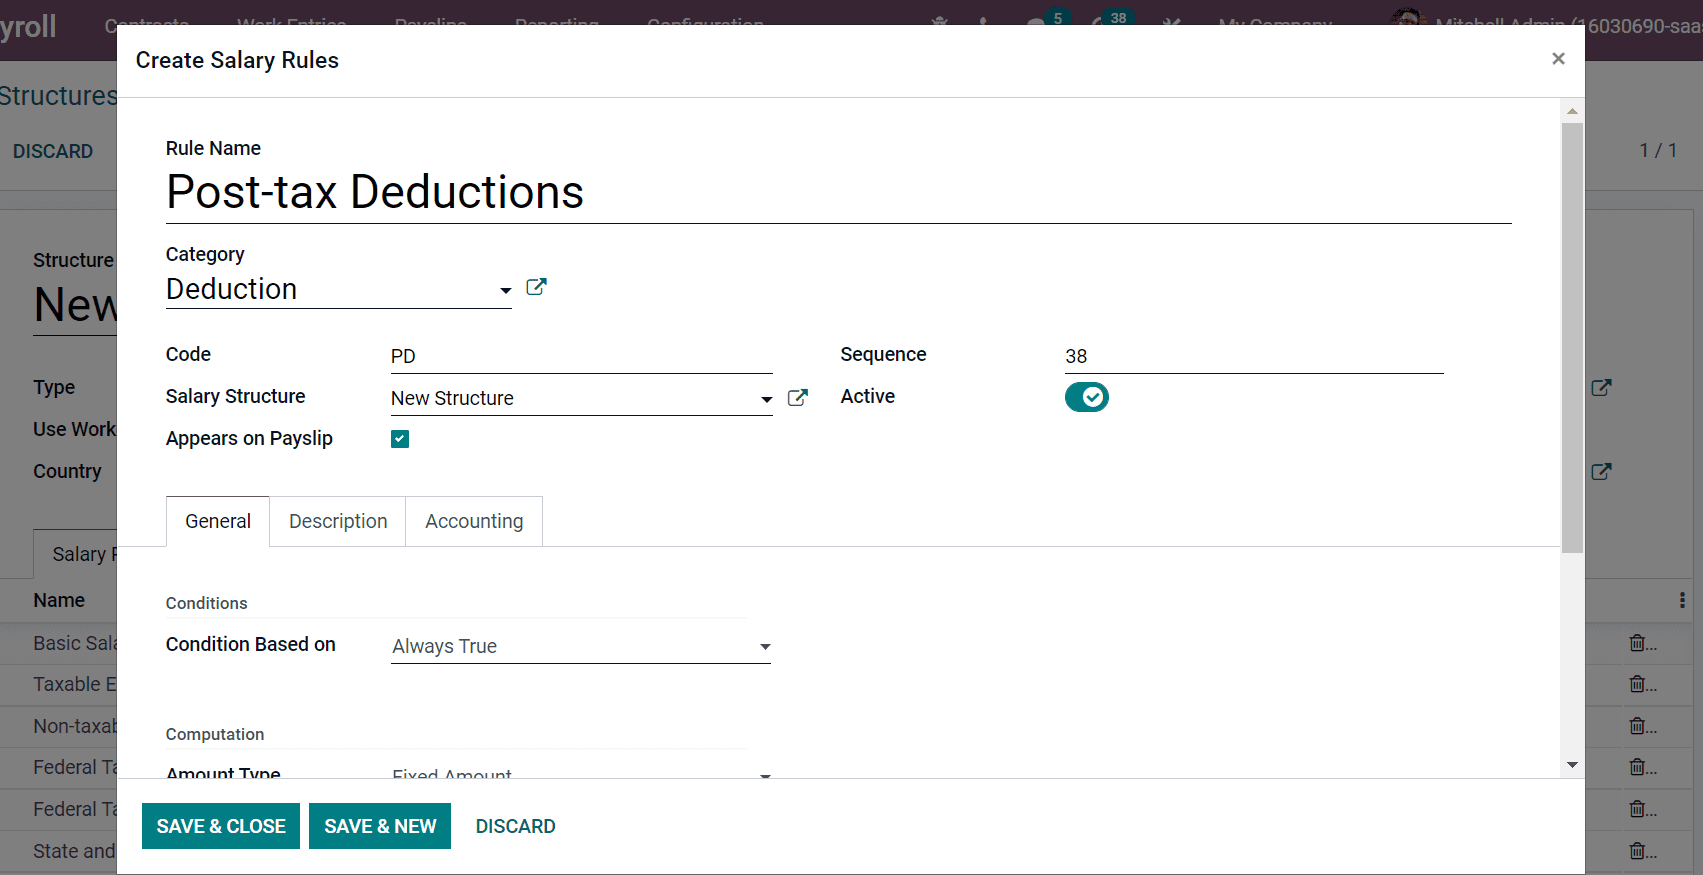
Taxes are paid at the federal level, as well as state and local taxes. Social Security and medical care taxes are included in the Federal Insurance Contributions Act taxes. Multiplying the tax rate on social security or medical expenses with the gross domestic product yields the federal tax rate. State and local taxes differ depending on the employee's location. Other advantages that a company provides to an employee are included in post-tax deductions. Let's create a new payroll structure inside the Odoo 15 Payroll module based on these specifications.


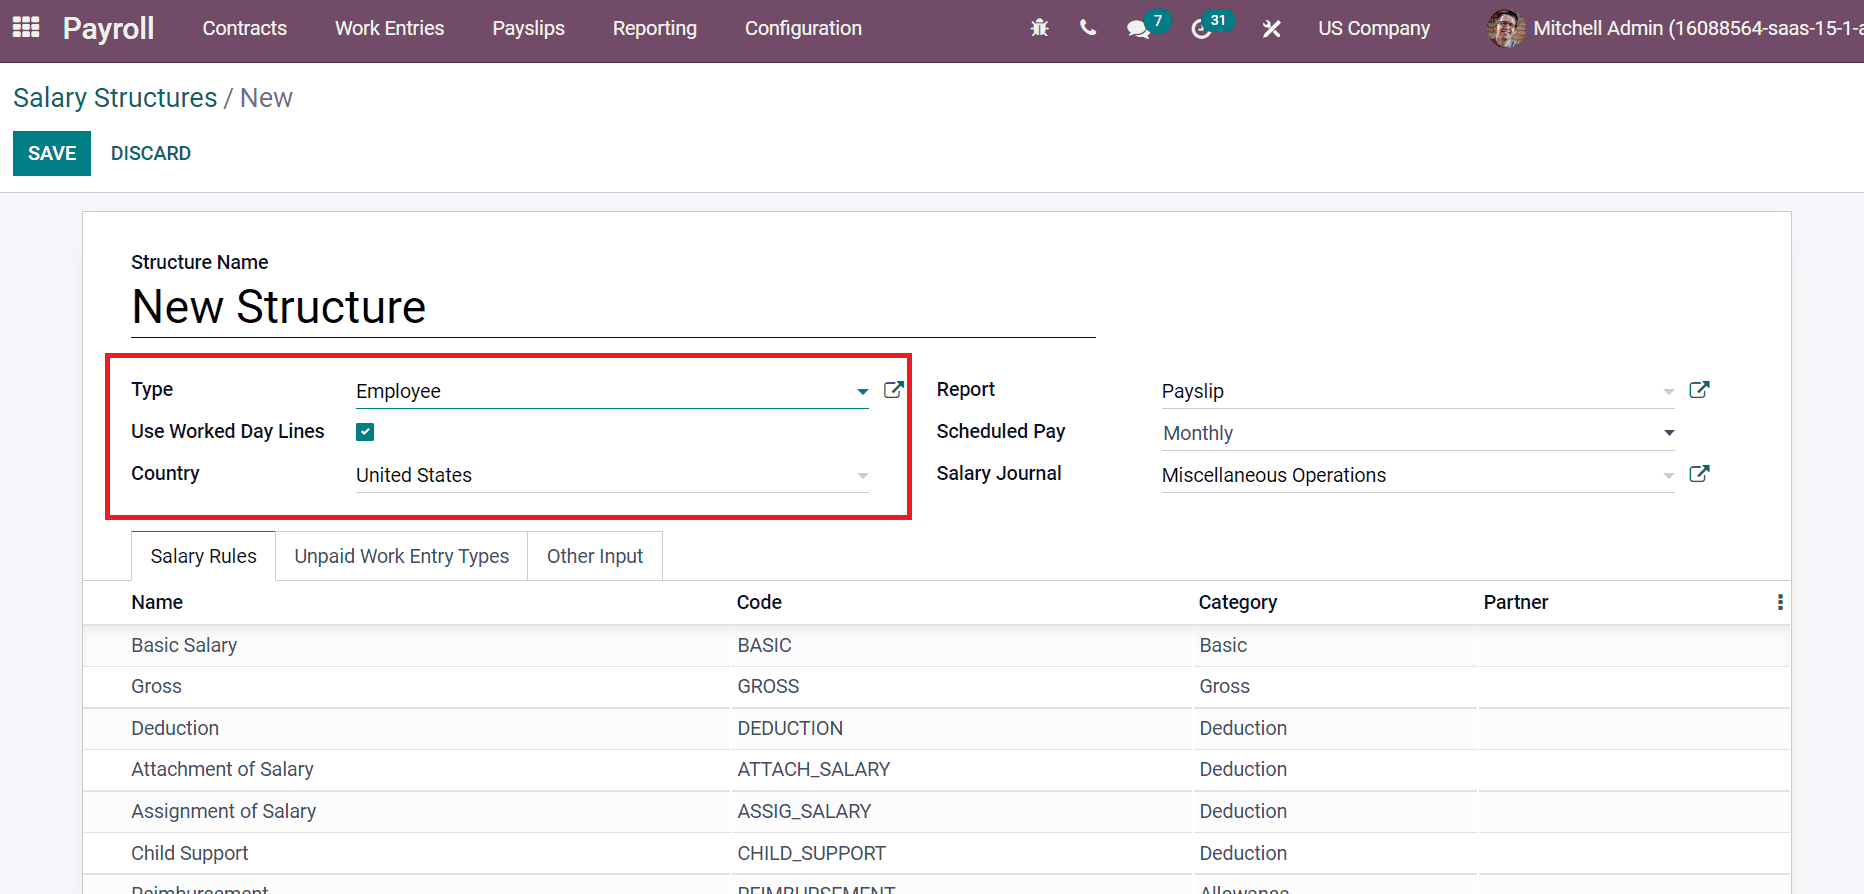
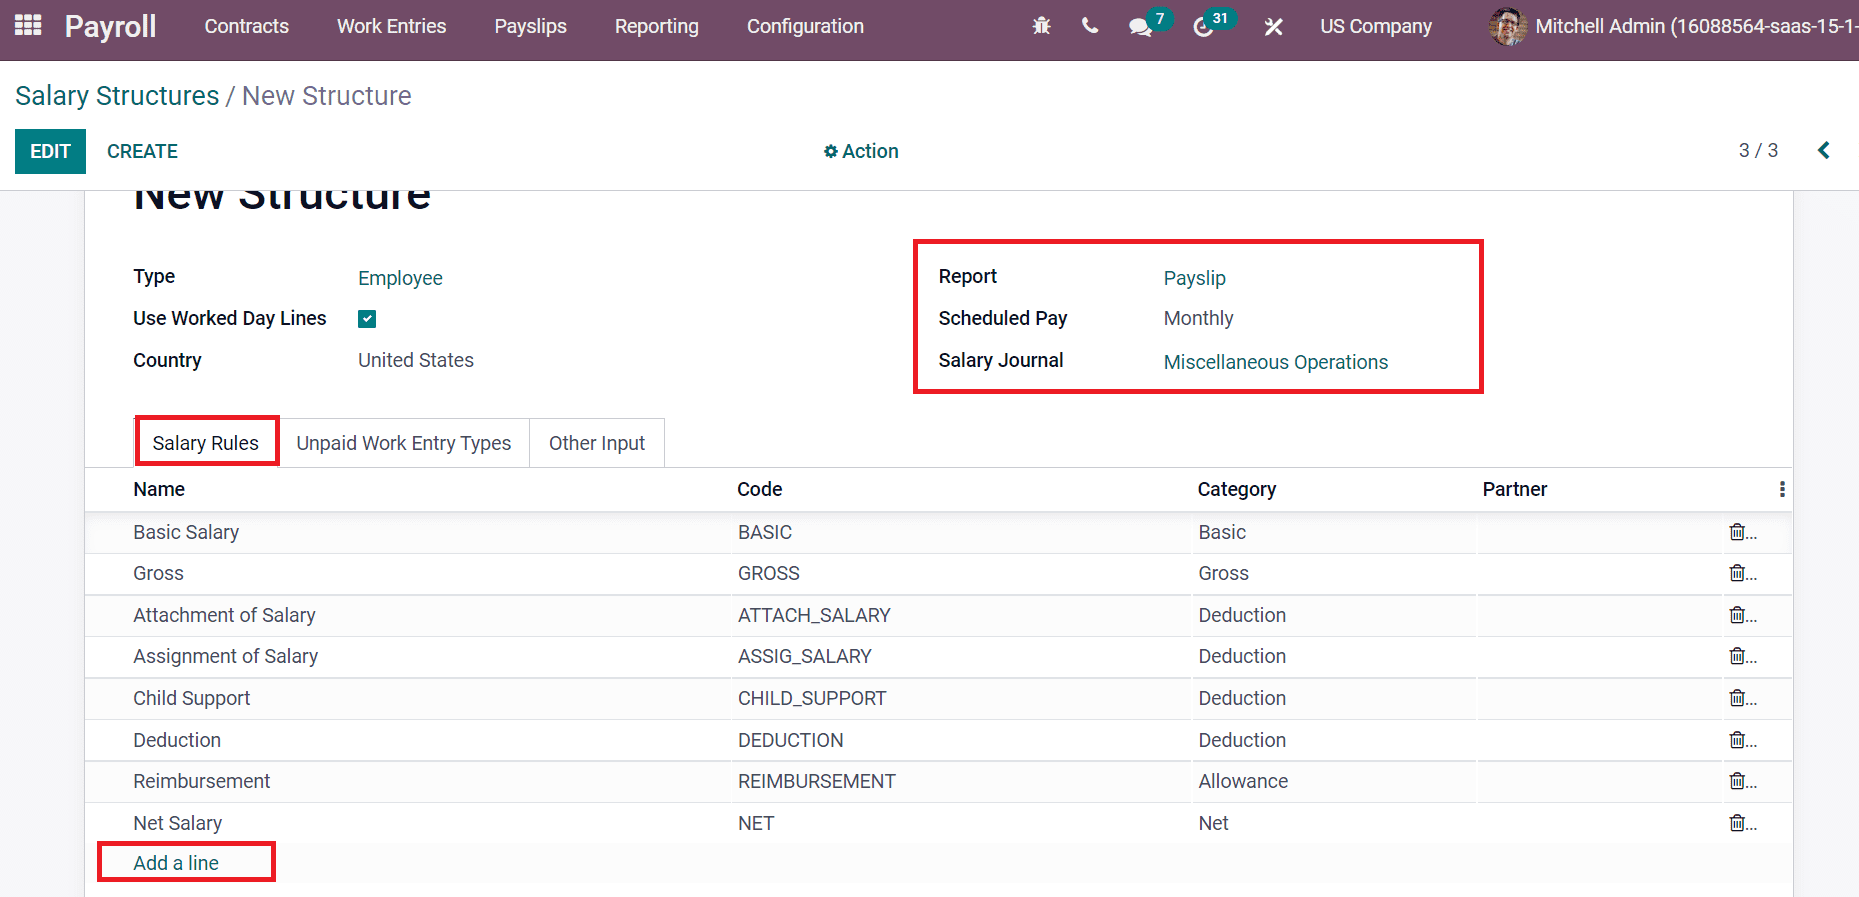
Using Odoo 15, create a payroll structure

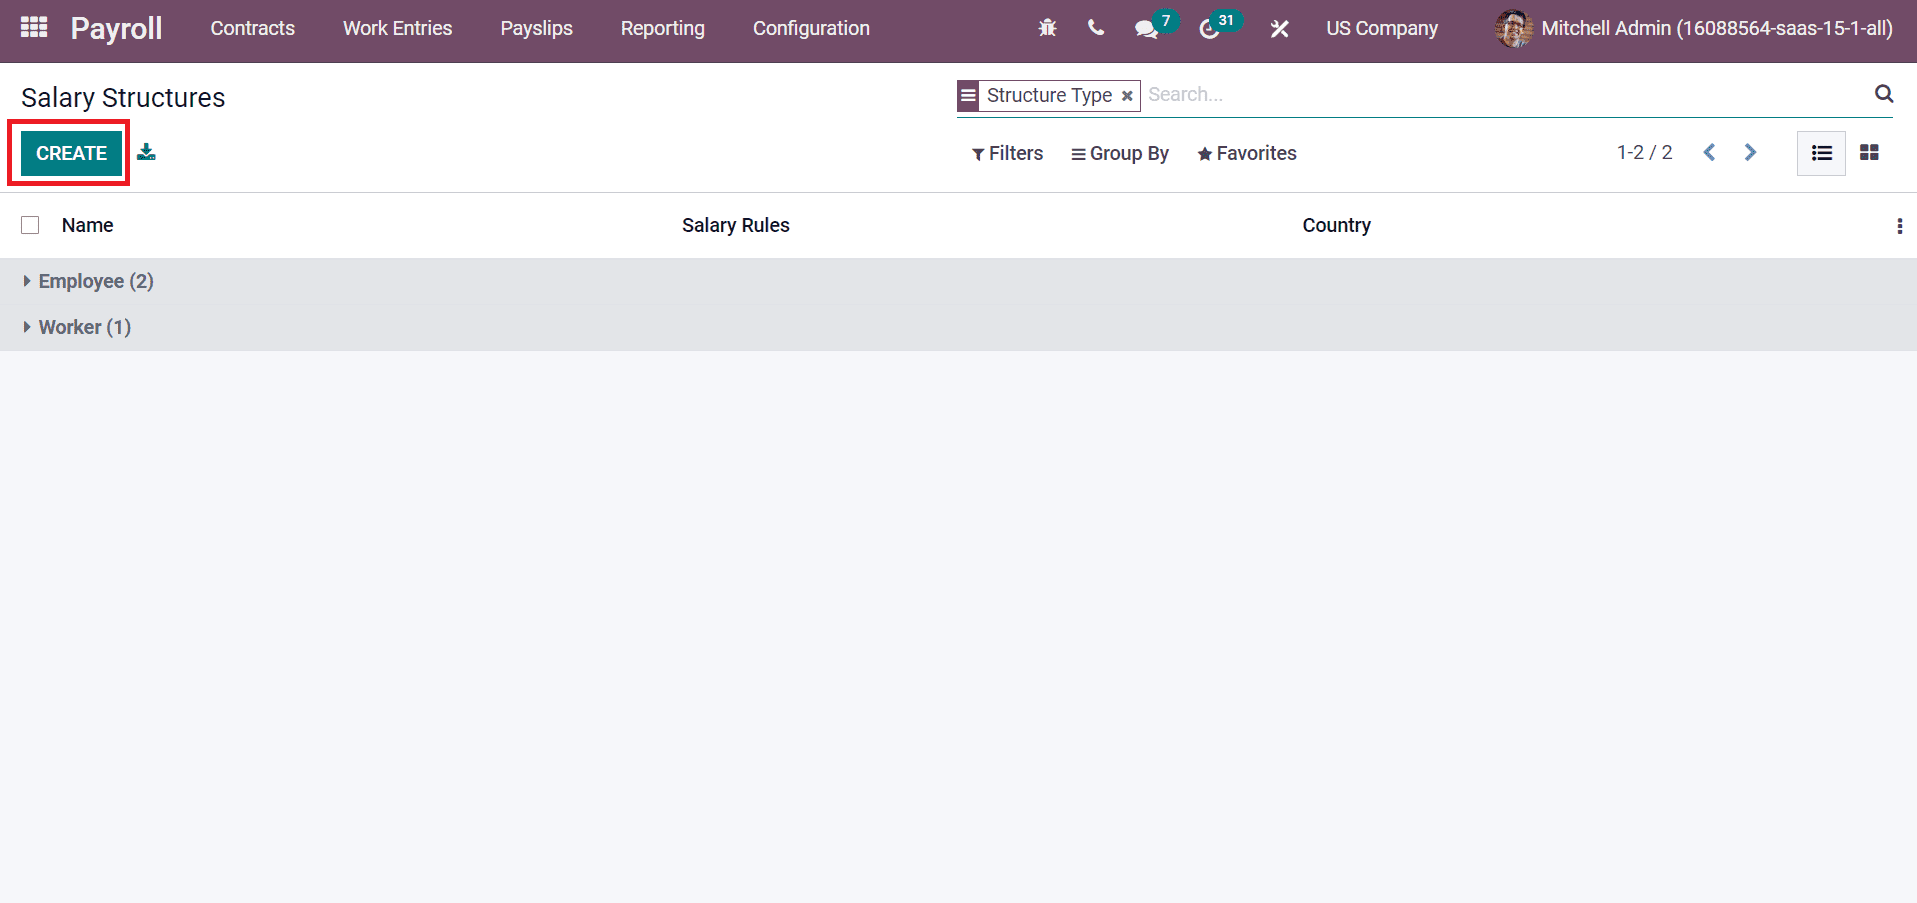
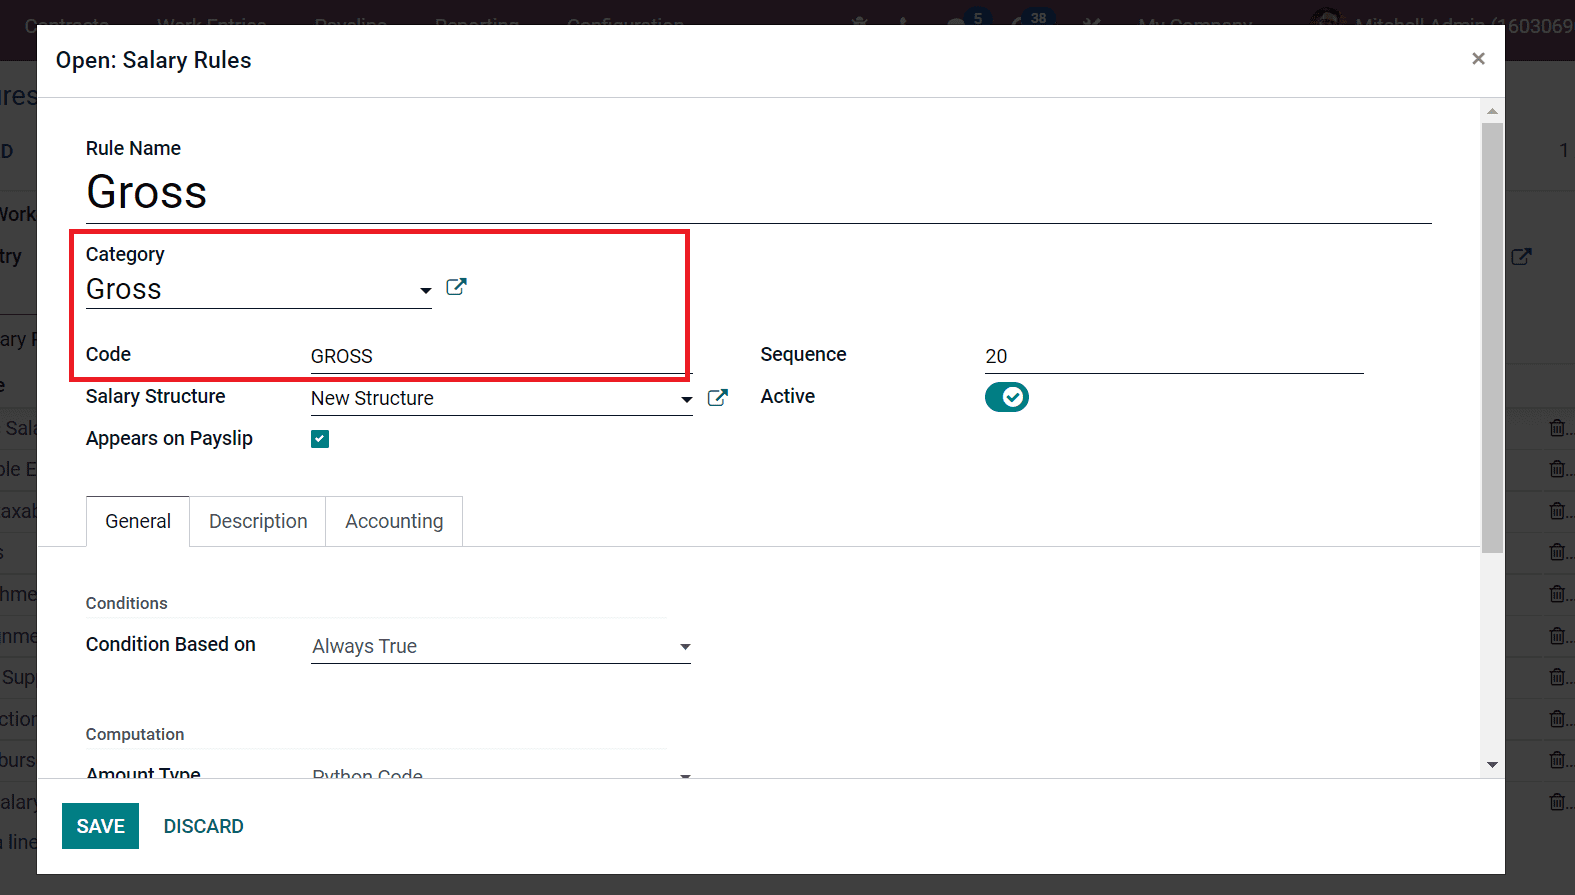
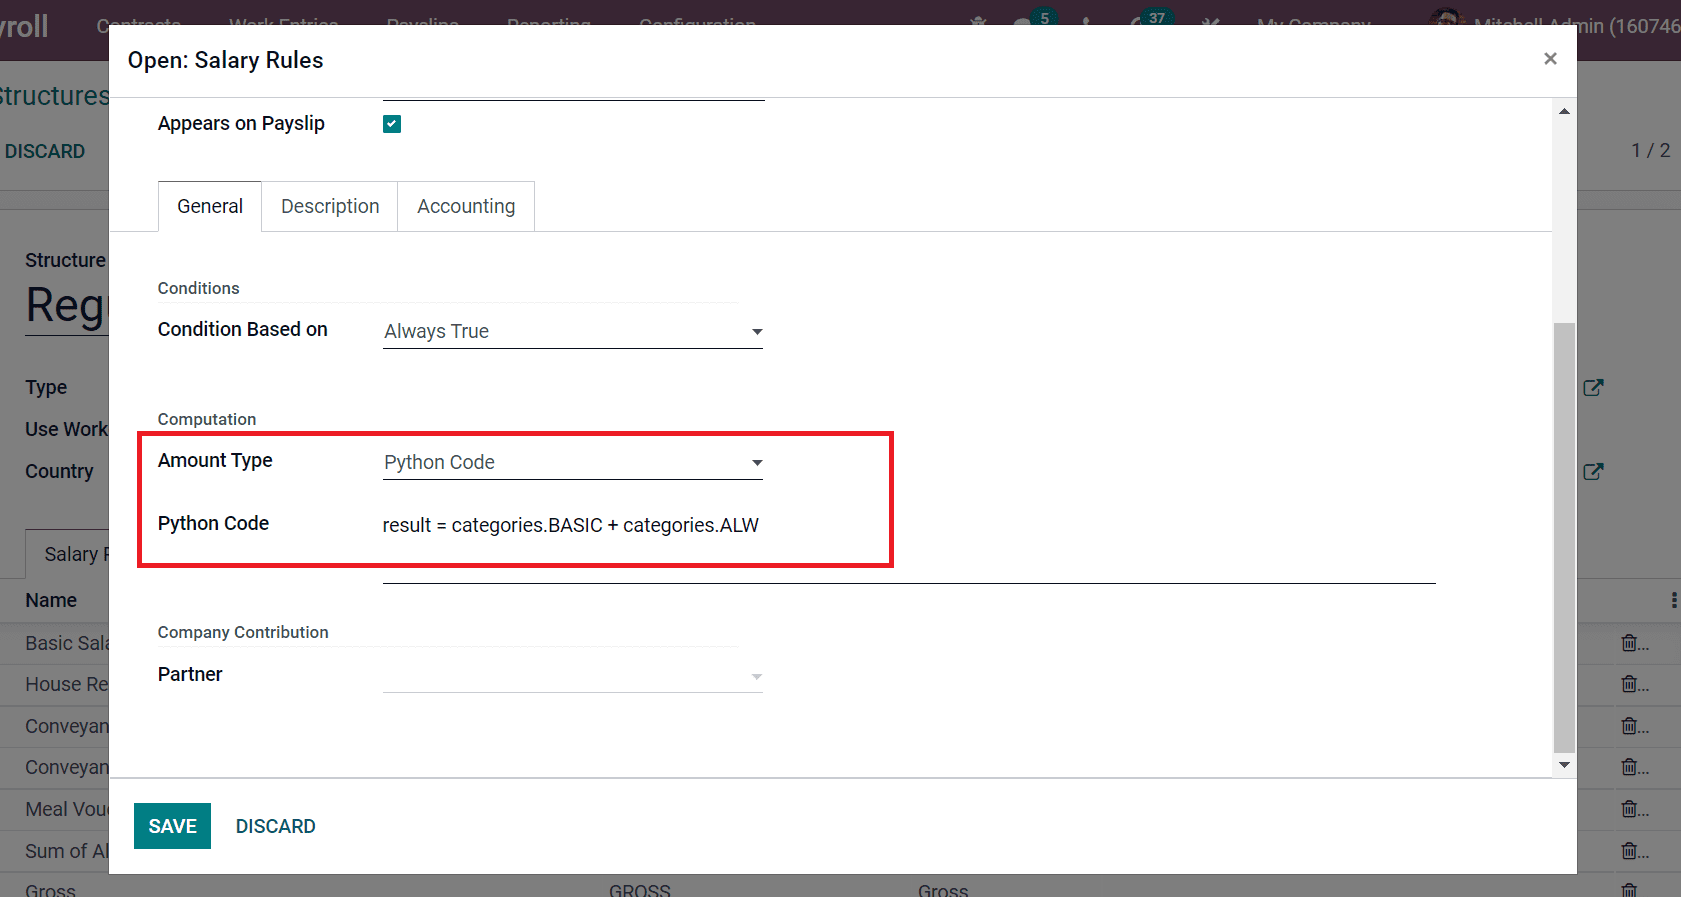
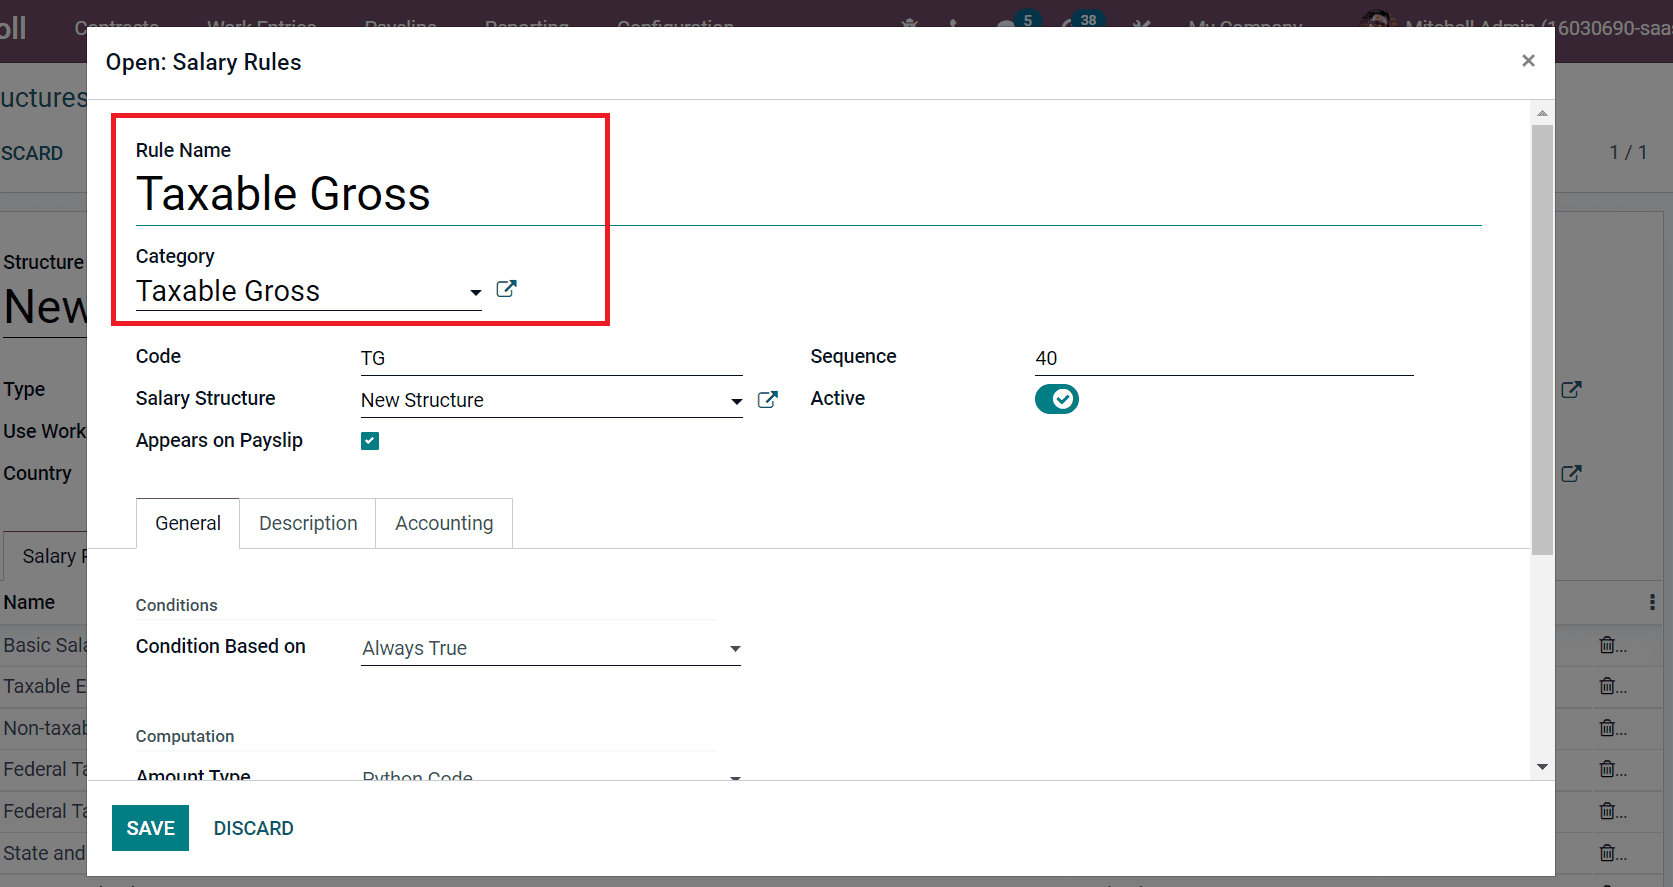
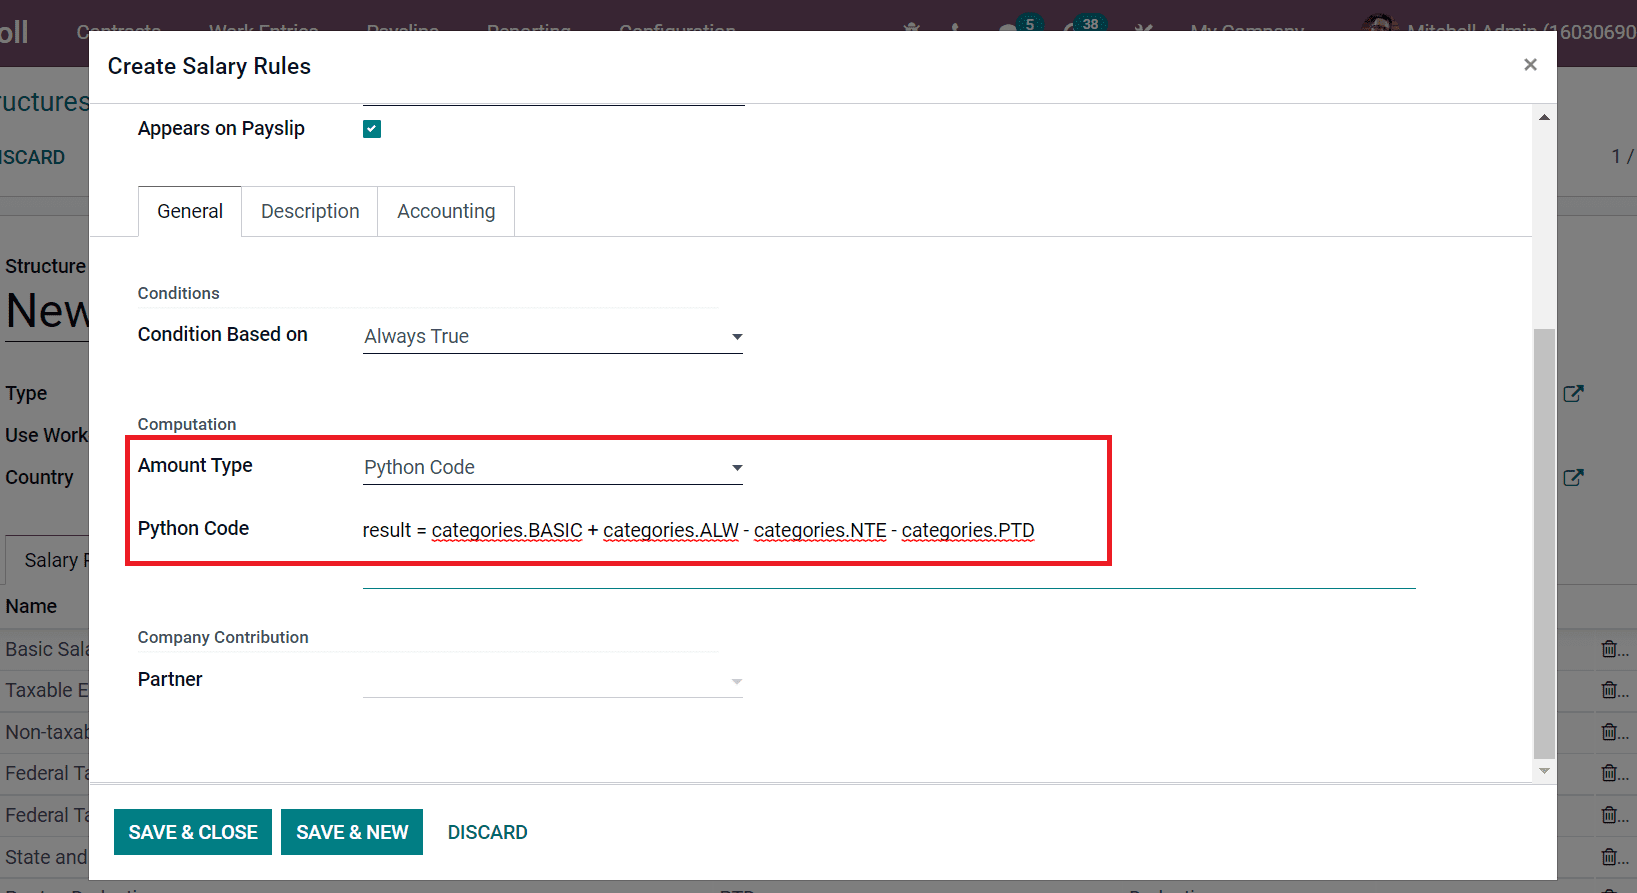
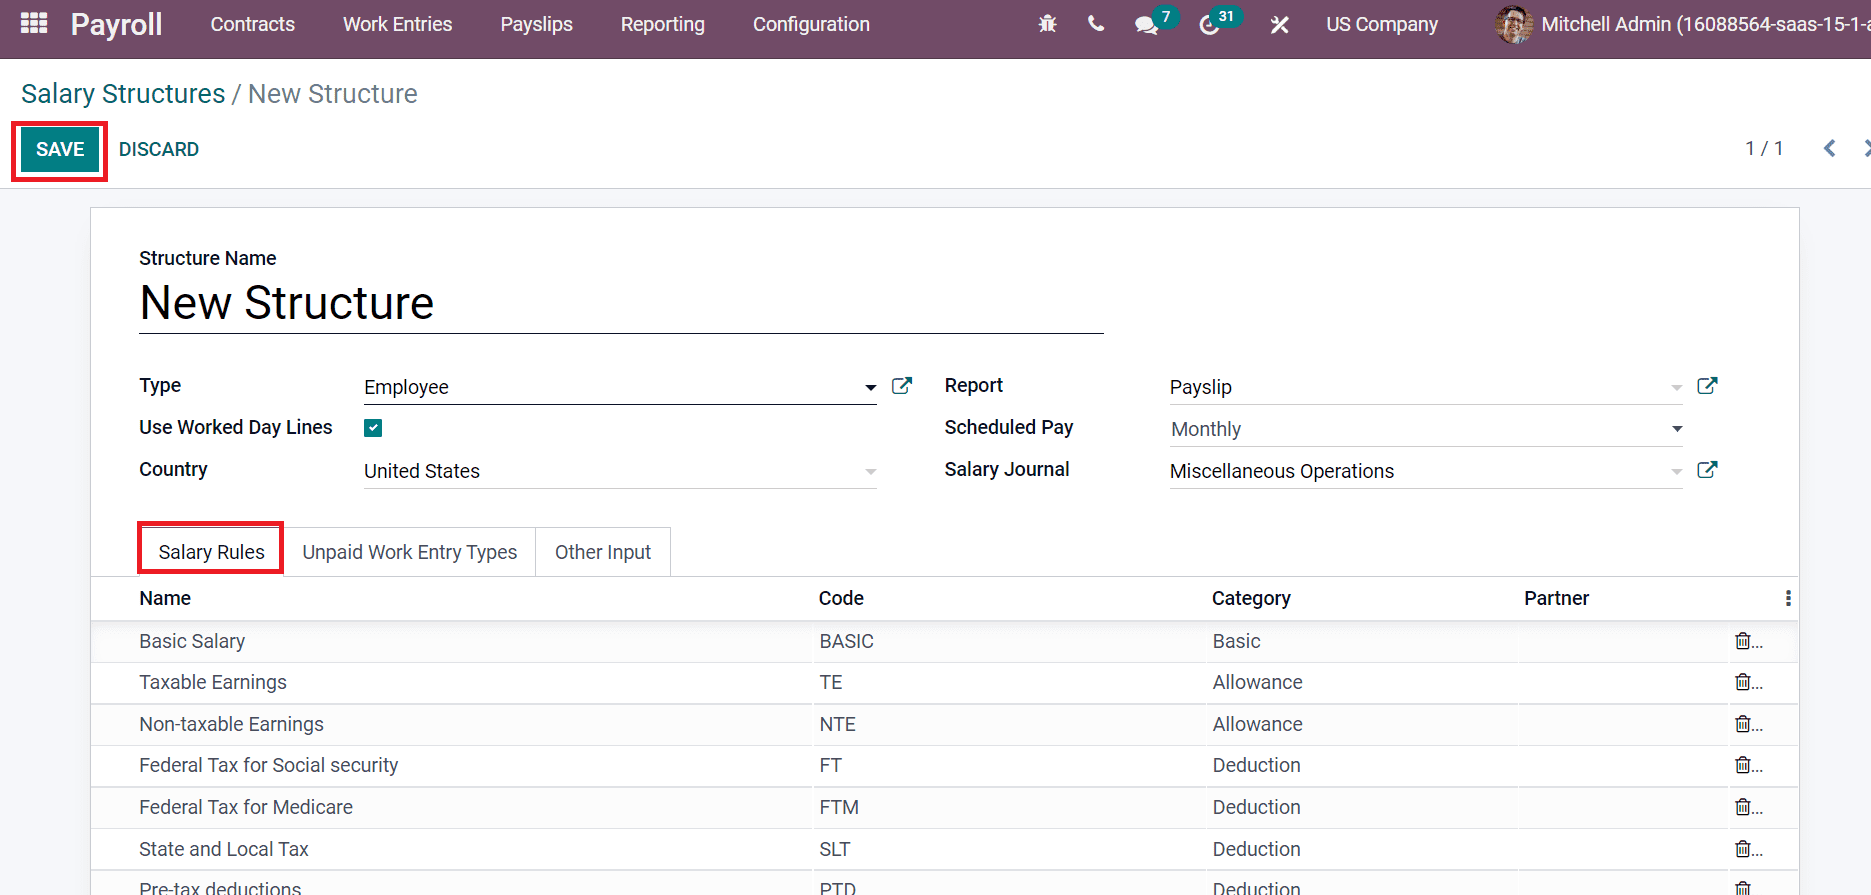
A user must choose the Structures menu from the Configuration tab to view all previously generated payroll structures before creating a new one. As shown in the screenshot below, select the CREATE icon to create a new structure.

In the following window, let's create a structure called "New Structure" for a US employee. We use an employee's payslip information provided by a US corporation to create a wage structure. Applying each head to the new wage structure window is the next step. In the Structure Name area, enter "New Structure," As seen in the screenshot below, type "employee" and select the United States as the country.


Set the frequency of your wage payments in the Scheduled Pay area and the Salary Journal field to record payroll data for your account. Select Miscellaneous Operations in the Salary Journal, enter Monthly in the Scheduled Pay area, and select Payslip as a Report option. By selecting Add a line from the menu that appears beneath the Salary Rules tab as shown in the screenshot below, you can later add a variety of rules to your New Structure.


The Basic Salary rule can be added first for the New Structure. Type a Code after adding the rule name "Basic Salary" and the category "Basic". To arrange the calculation sequence as seen in the screenshot below, simply add a Sequence number.


The Basic Salary rule can now have a computation method selected by the user. Python Code is an option for the amount type. We treat the base pay as a wage covered by an employment agreement. Thus, the result=contract.wage Python code will be used, as shown in the screenshot below.


To create a Basic Salary rule, select the SAVE symbol. Let's now incorporate Earnings into the New Structure's other salary standards. Earnings are known to be split into taxable and non-taxable categories. In the Salary Structure window, we may first input the taxable earnings of employees as a general guideline. Put "Taxable Earnings" as the Rule Name, "Allowance" as the Category, "TE" as the Code, and "New Structure" as the Salary Structure option in the new window, as shown in the screenshot below.


The Amount Type can then be changed to Fixed Amount in the Computation section. Then, as shown in the screenshot below, enter 930 in the Fixed Amount field and click the SAVE & CLOSE icon.


We can now develop a salary rule for non-taxable income. Enter "Non-taxable Earnings" as the rule name in the salary rule field and "Allowance" as the category. As seen in the screenshot below, you can alternatively put the Code as "NTE" and "New Structure" in the Salary Structure area.


As seen in the screenshot below, you can select Fixed Amount as the amount type and enter 62 in the Fixed Amount area.


We can add another rule for Gross pay after storing the data. Apply Gross as the Rule Name, choose Gross as the Category, and type "GROSS" into the new window as shown in the screenshot below.


Basic salary and allowances are added to determine gross compensation. Taxable and non-taxable earnings are the allowances in the US. So, using the Gross calculation as a basis, we can add Python code. Enter a Python Code as a result = categories after choosing the Python Code as Amount Type. Basic plus classes ALW, as shown in the following screenshot.


'Categories' here. The phrase "ALW" refers to the total of taxable and non-taxable income. The allowances category we established in the salary rule has a shortcode called ALW. Federal Tax, State and Local Tax, Pre-tax Deductions, and Post-Tax Deductions are additional salary regulations in the US. These were all included in the category of deductions. Social Security and Medicare taxes are the foundation of federal taxes. Let's examine each one separately now. As shown in the example below, add Federal Tax for Social Security to the Rule Name field in the Salary Rule window and set the Category to Deduction.


Inside the General section, you can set conditions based on python expression, as denoted in the screenshot below.


The social security tax in the US is 6.2 percent and is added inside Python Condition as shown in the screenshot above. We can create a salary guideline for federal tax on medical care after saving the specifics. Use the Code as FTM and apply the Category as Deduction as shown in the screenshot below.


Apply the rule in the Python Condition field and put the Python Expression in the Condition Based on the field as shown in the screenshot below.


The federal Medicare tax, which is offered to employees in the US, is 1.45%. It must be mentioned within the Python code. As shown in the screenshot below, we can now apply State and Local Taxes inside Rule Name and Category as Deductions.


The city in which an employee lives affects the State and Local Tax. In this case, we select Fixed Amount from the Amount Type drop-down menu and type a value as shown in the screenshot below.


Below the Computation section, you can choose the Amount Type as Fixed. Later, add the quantity and fixed amount as seen in the screenshot below.


You can create a salary rule for post-tax deductions in the same way. For that, as seen in the screenshot below, type Post-tax Deductions inside Rule Name, code as PD, choose New Structure in Salary Structure box, and Sequence.


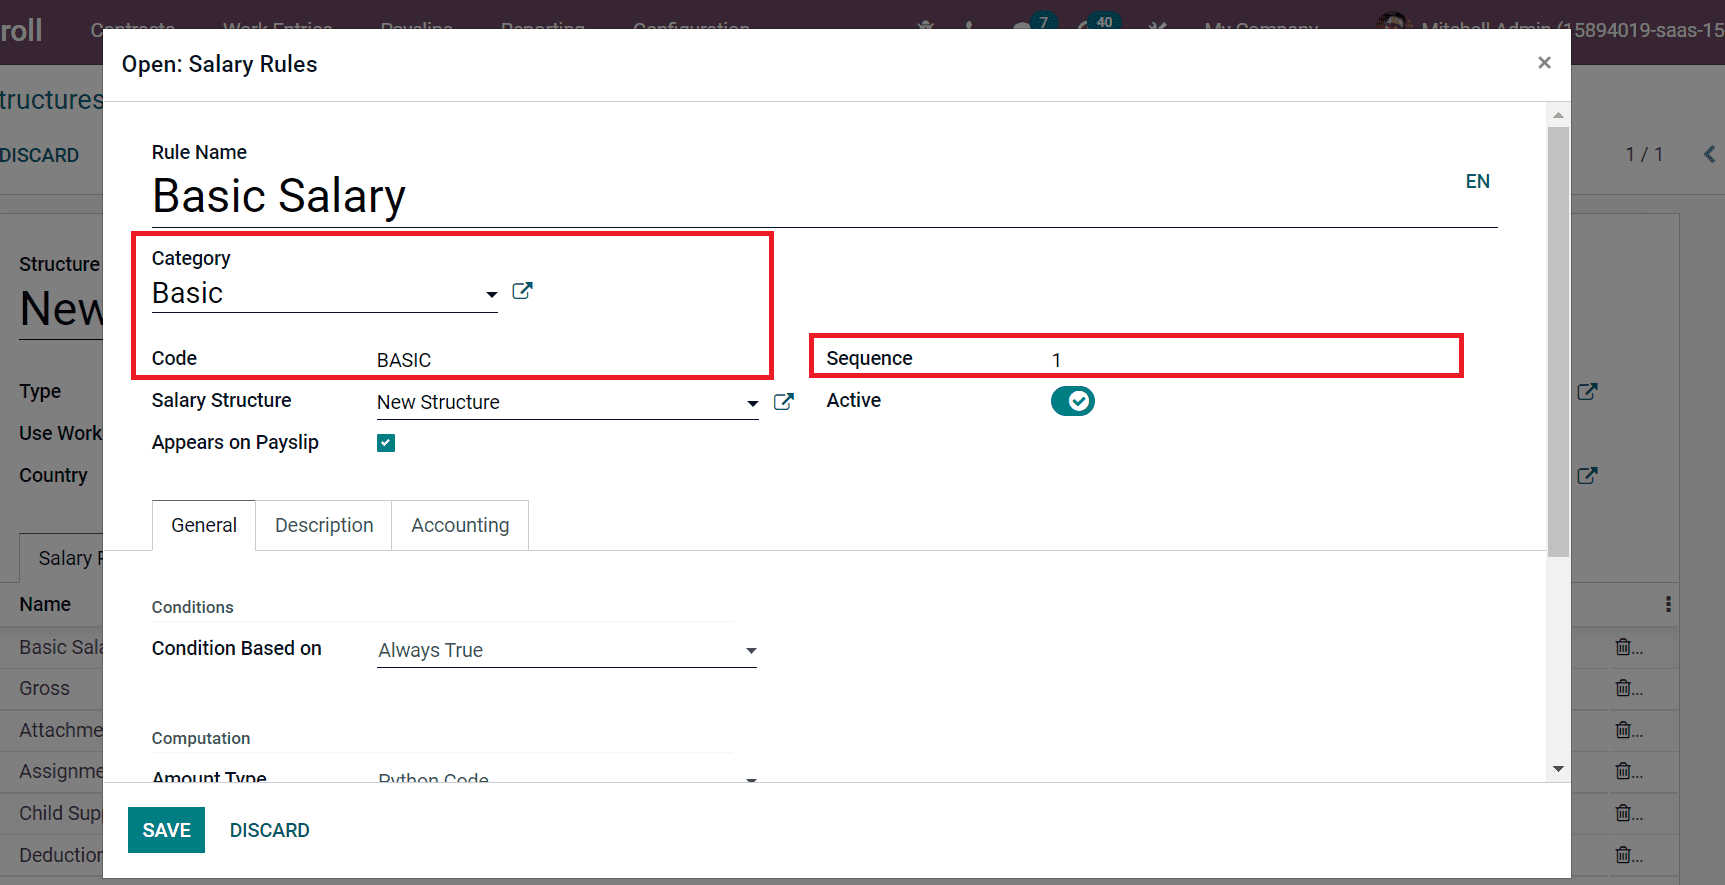
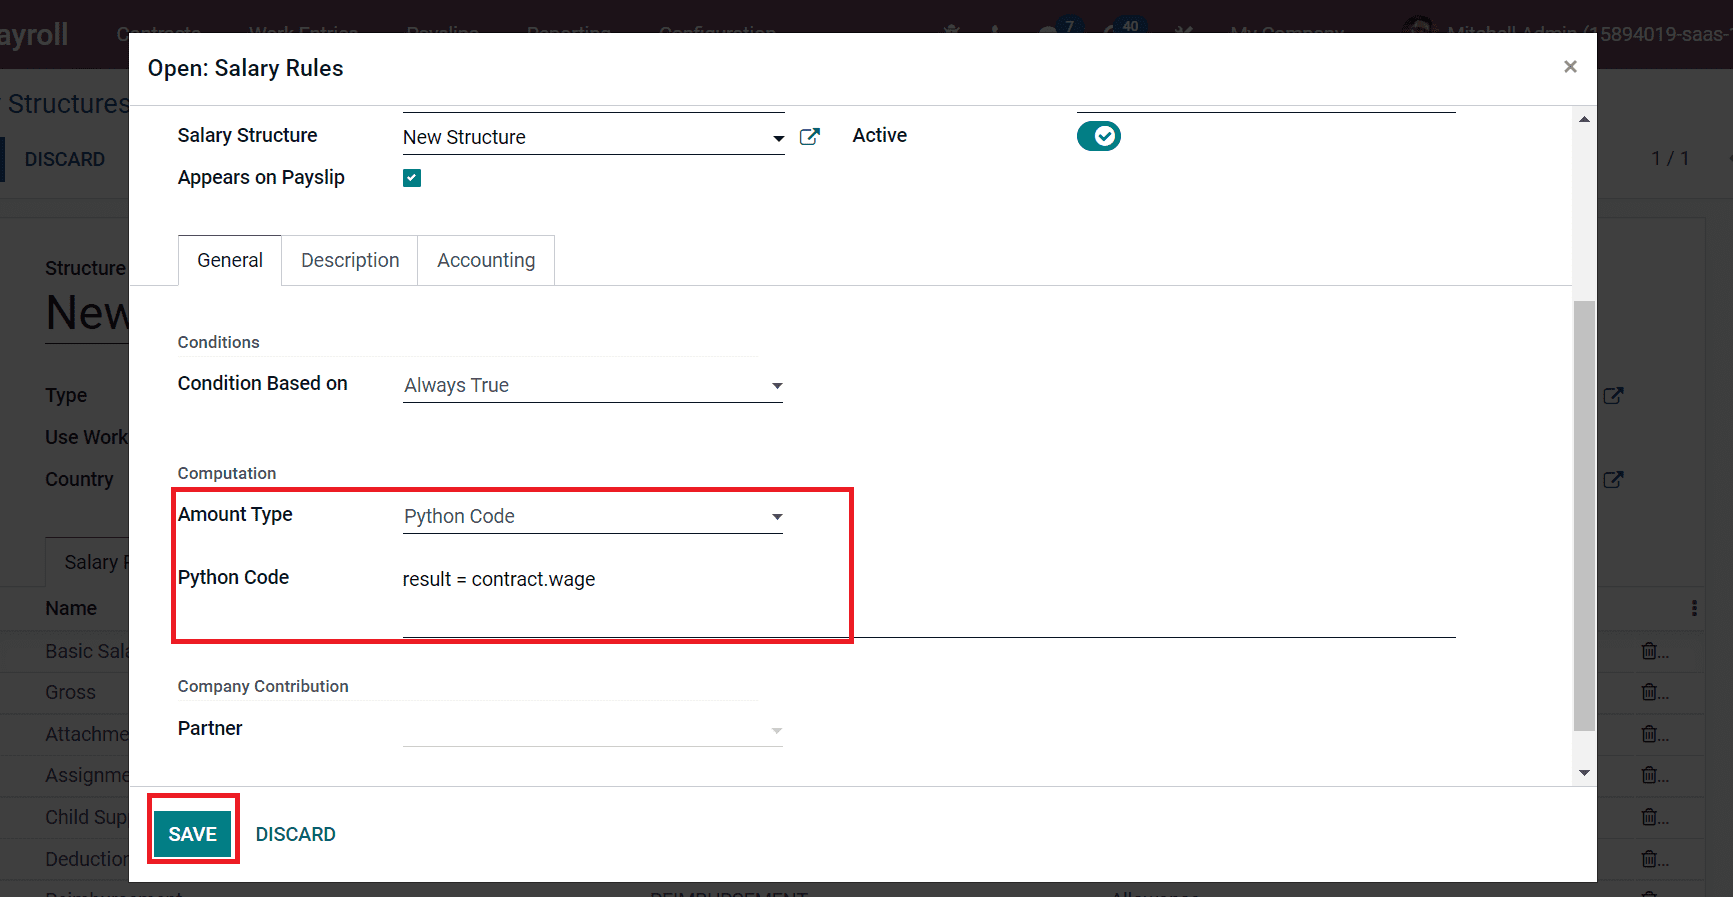
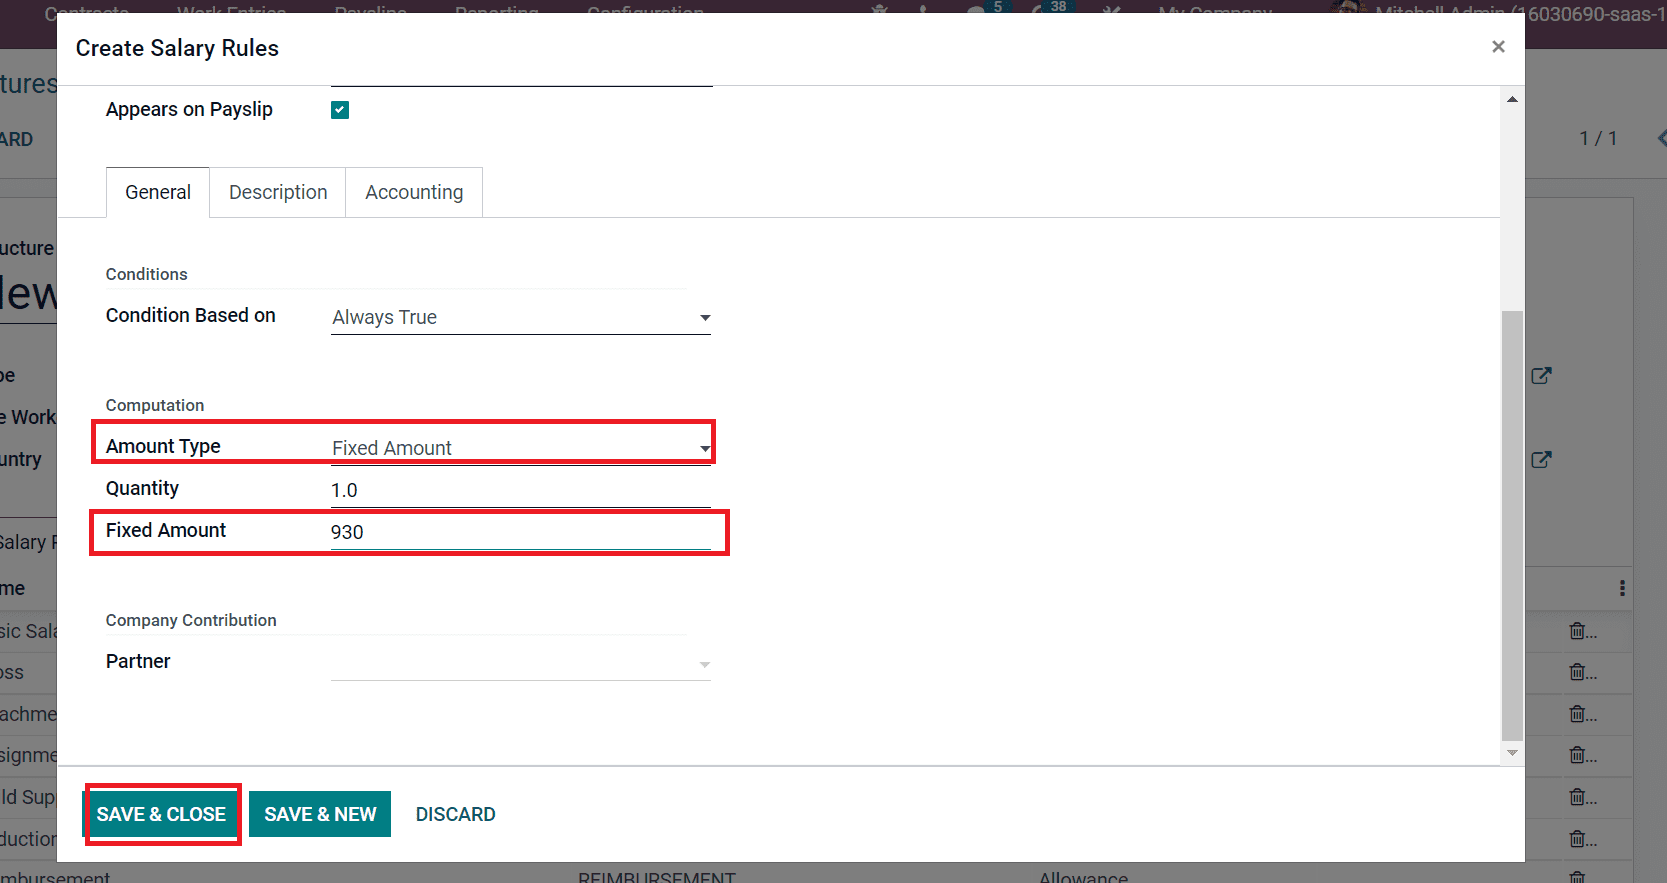
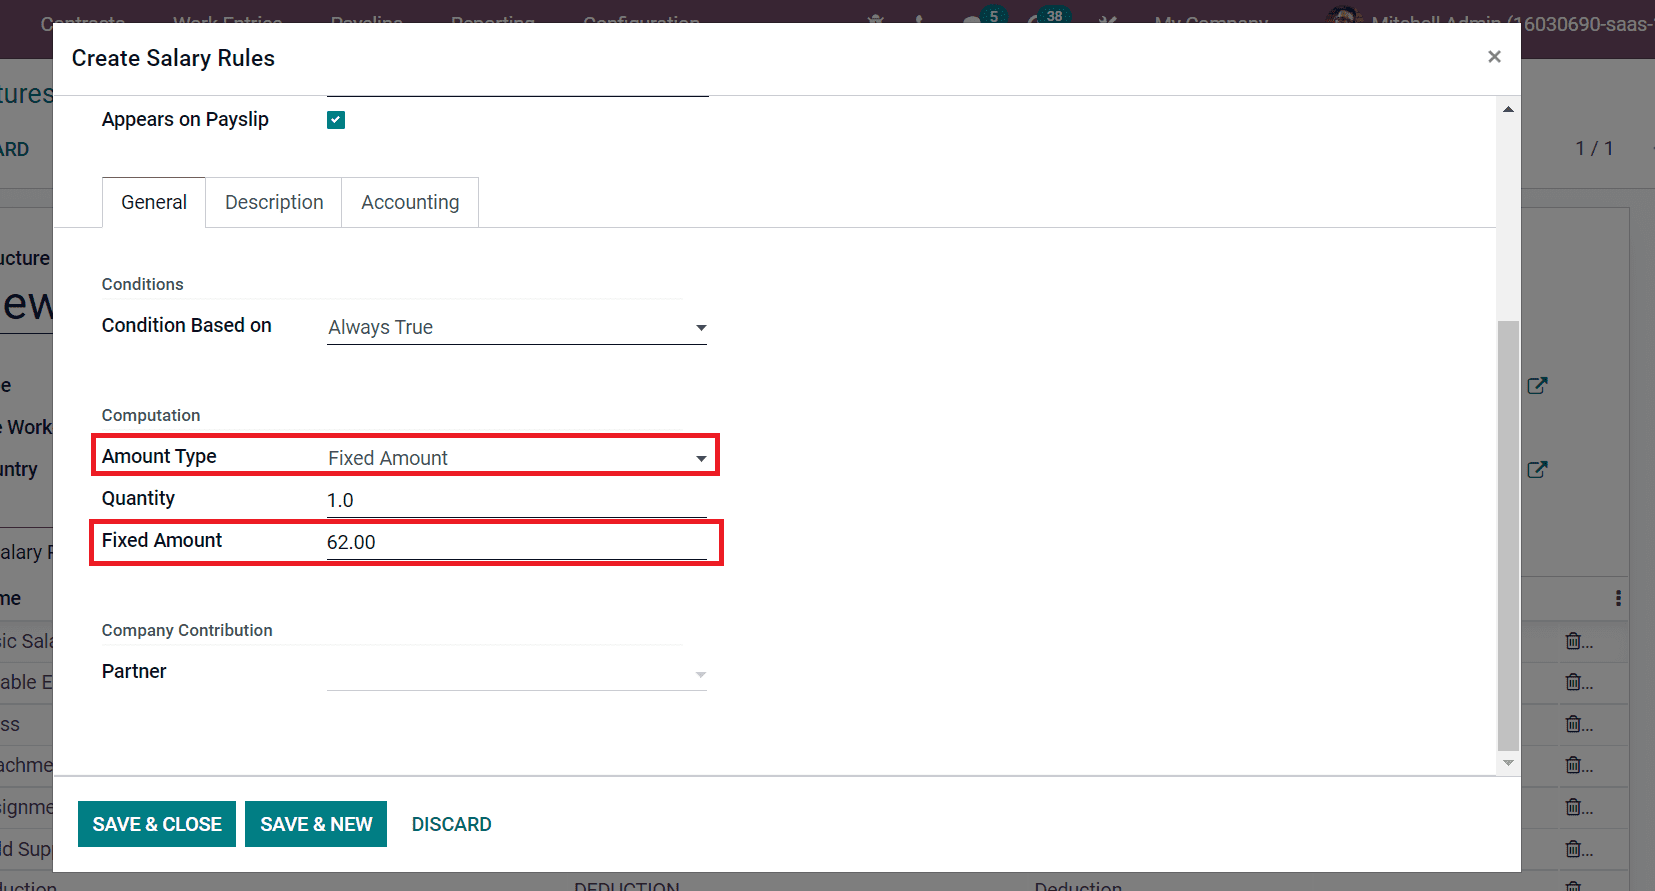
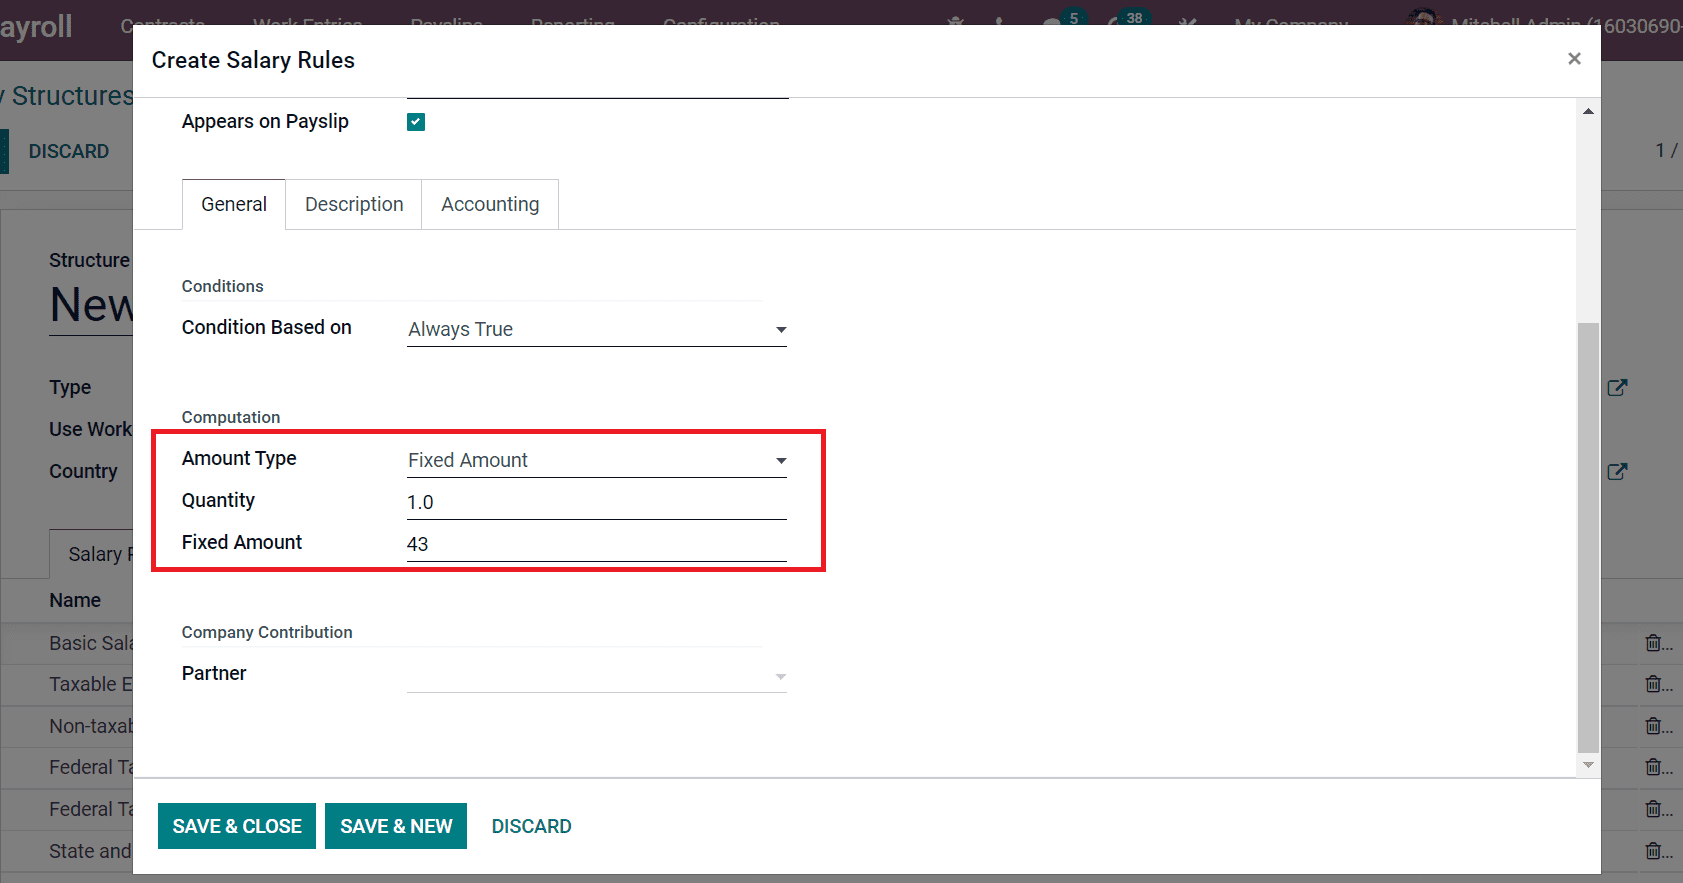
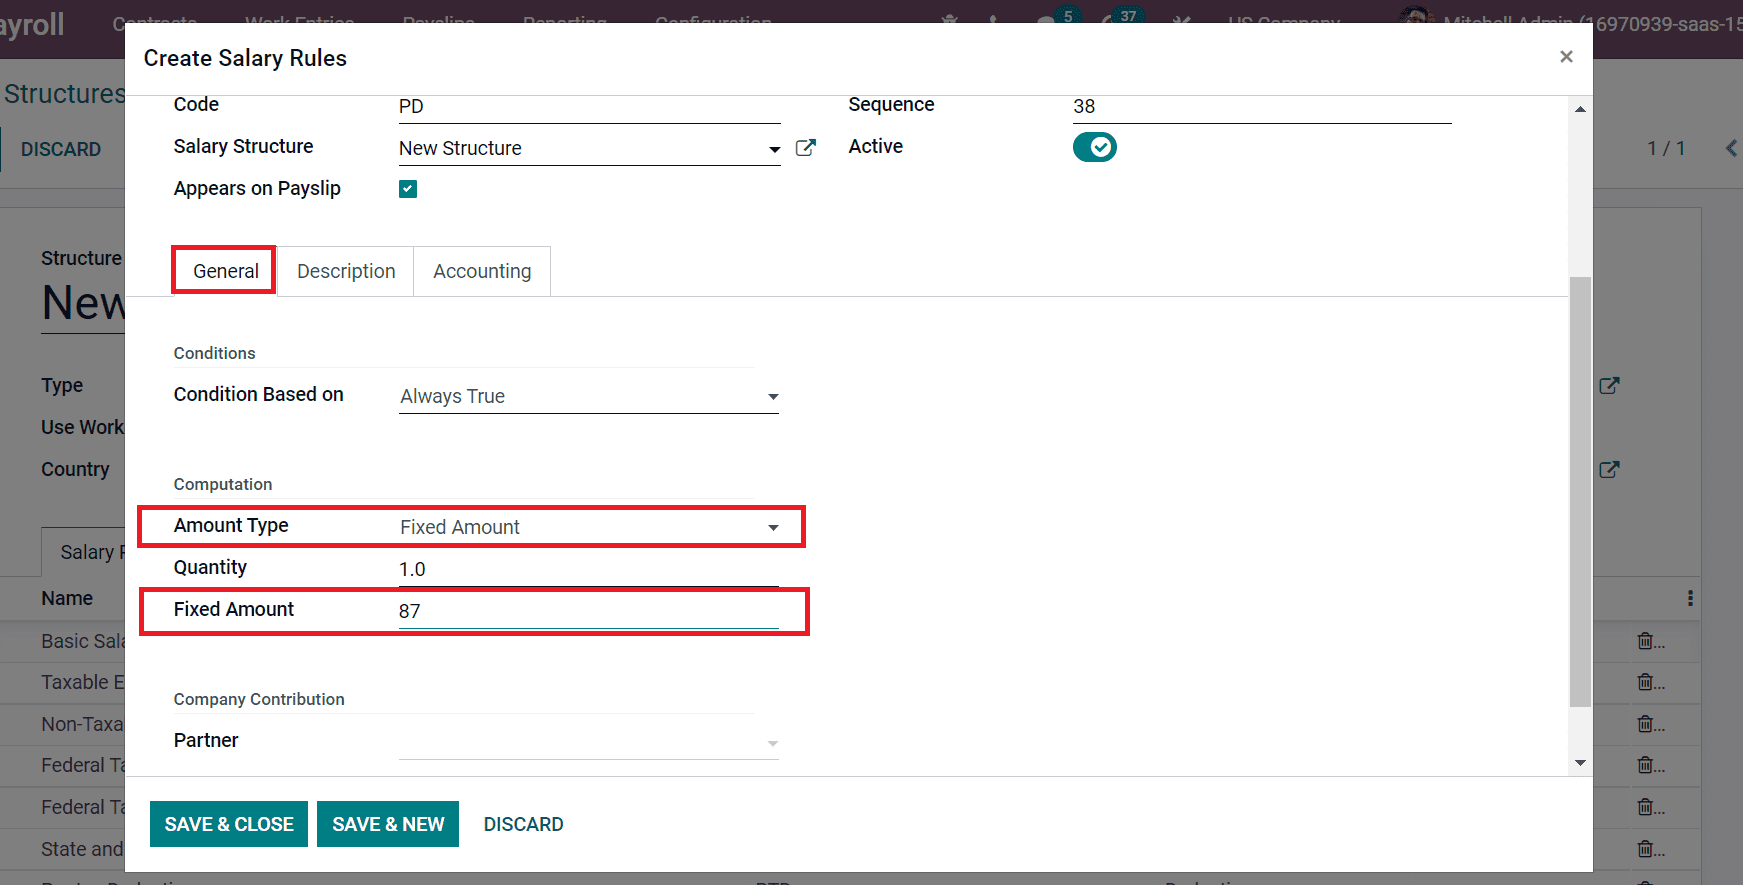
Below the General tab, select Fixed Amount in the Amount Type field and add the amount $87 in the Fixed Amount field as represented in the screenshot below. 


Let's now open a new window and write a salary rule for Taxable Gross. As seen in the screenshot below, apply Category and Rule Name as Taxable Gross.


The taxable gross is determined by deducting pre-tax deductions and non-taxable income from the gross amount. As shown in the screenshot below, we can apply a Python function inside the Computation section based on these data.


The Salary Rules tab in the New Structure box, as seen in the screenshot below, is where you can view all of these newly formed salary rules for an employee in the US.


Once you have used all salary rules, select the SAVE icon.

Now How to apply an Employee Apply Salary Attachments?

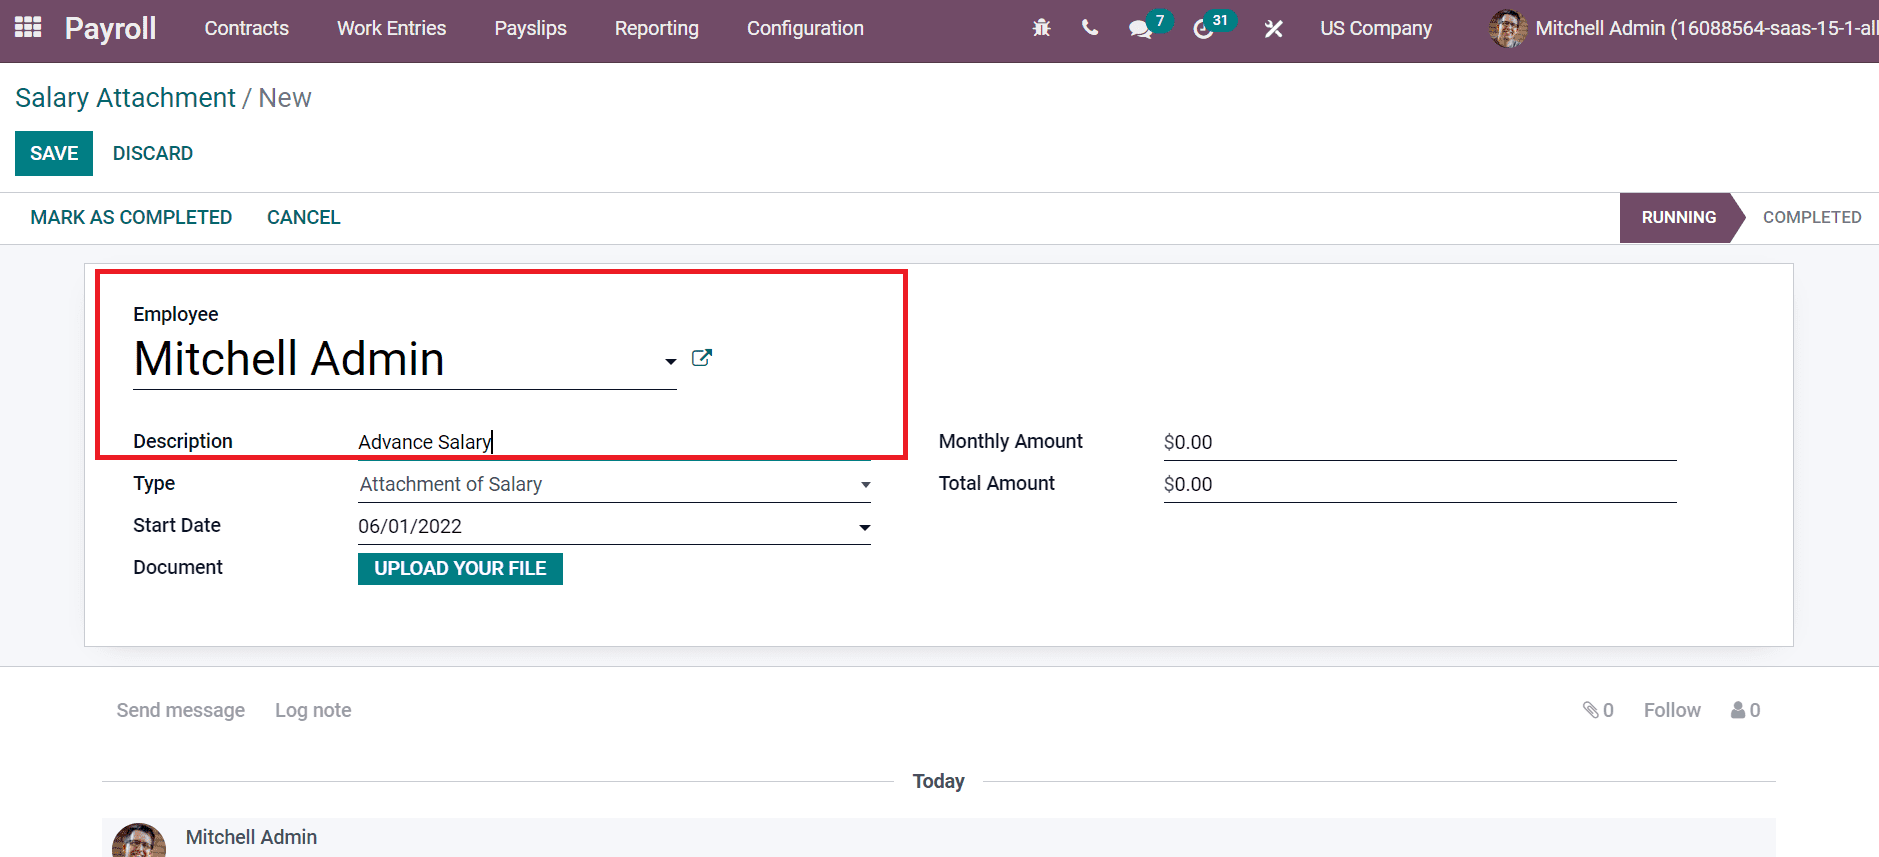
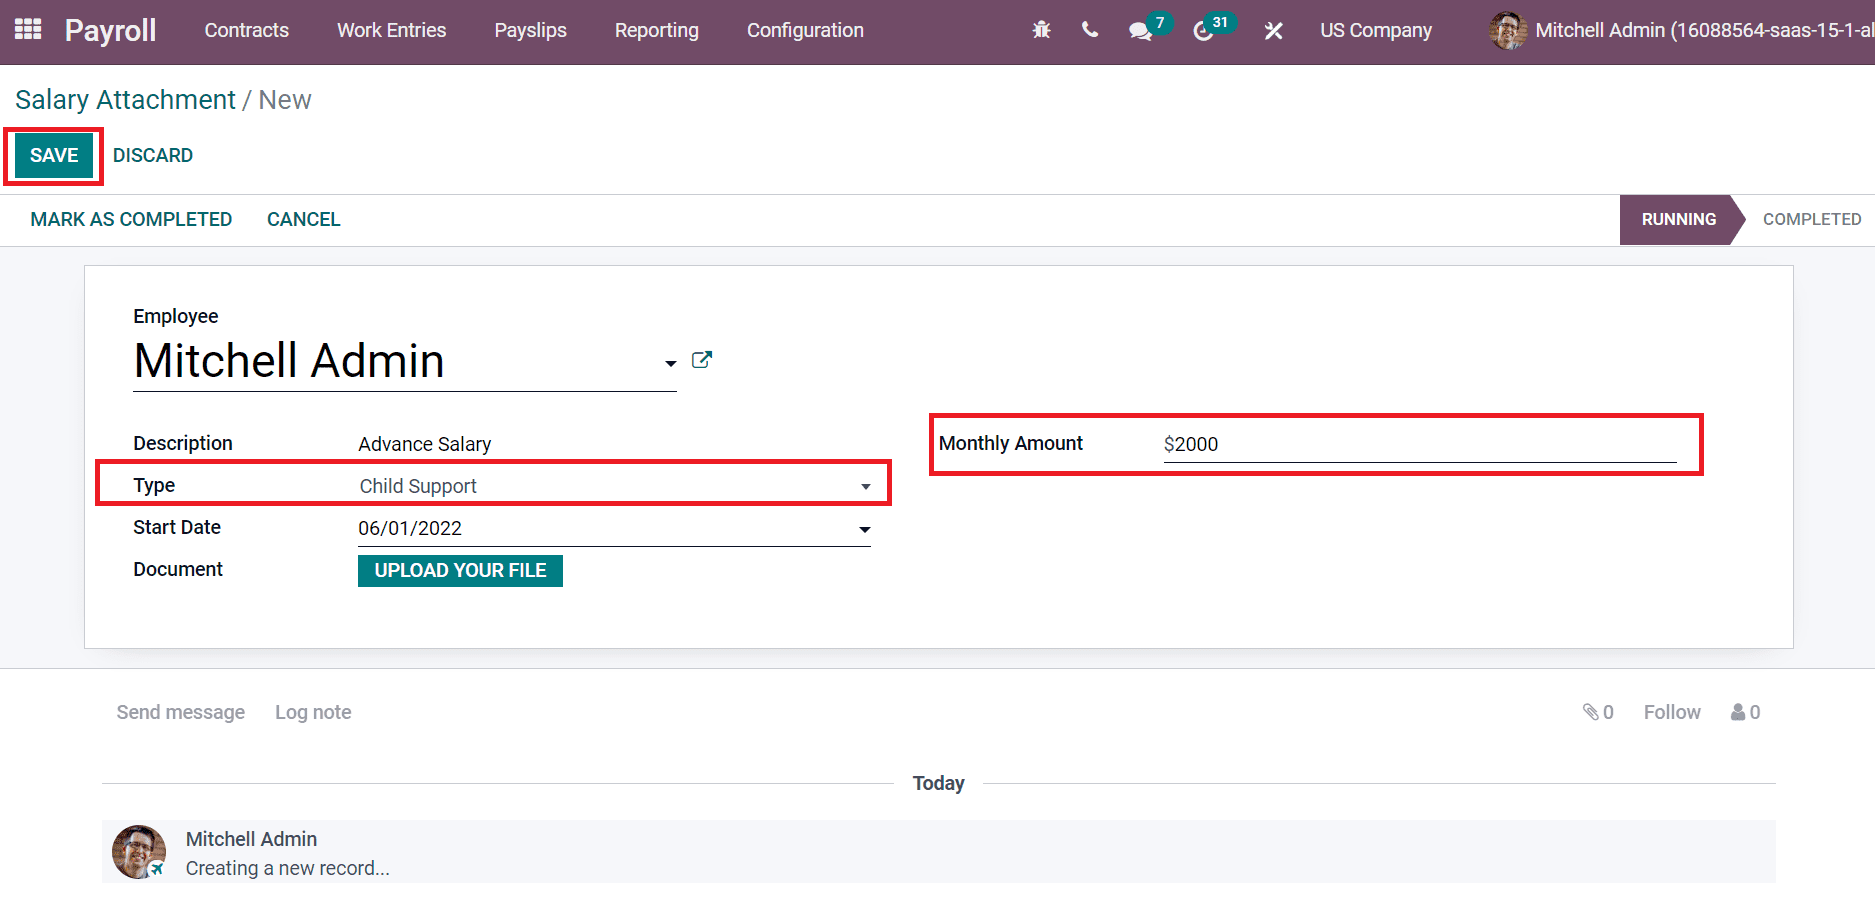
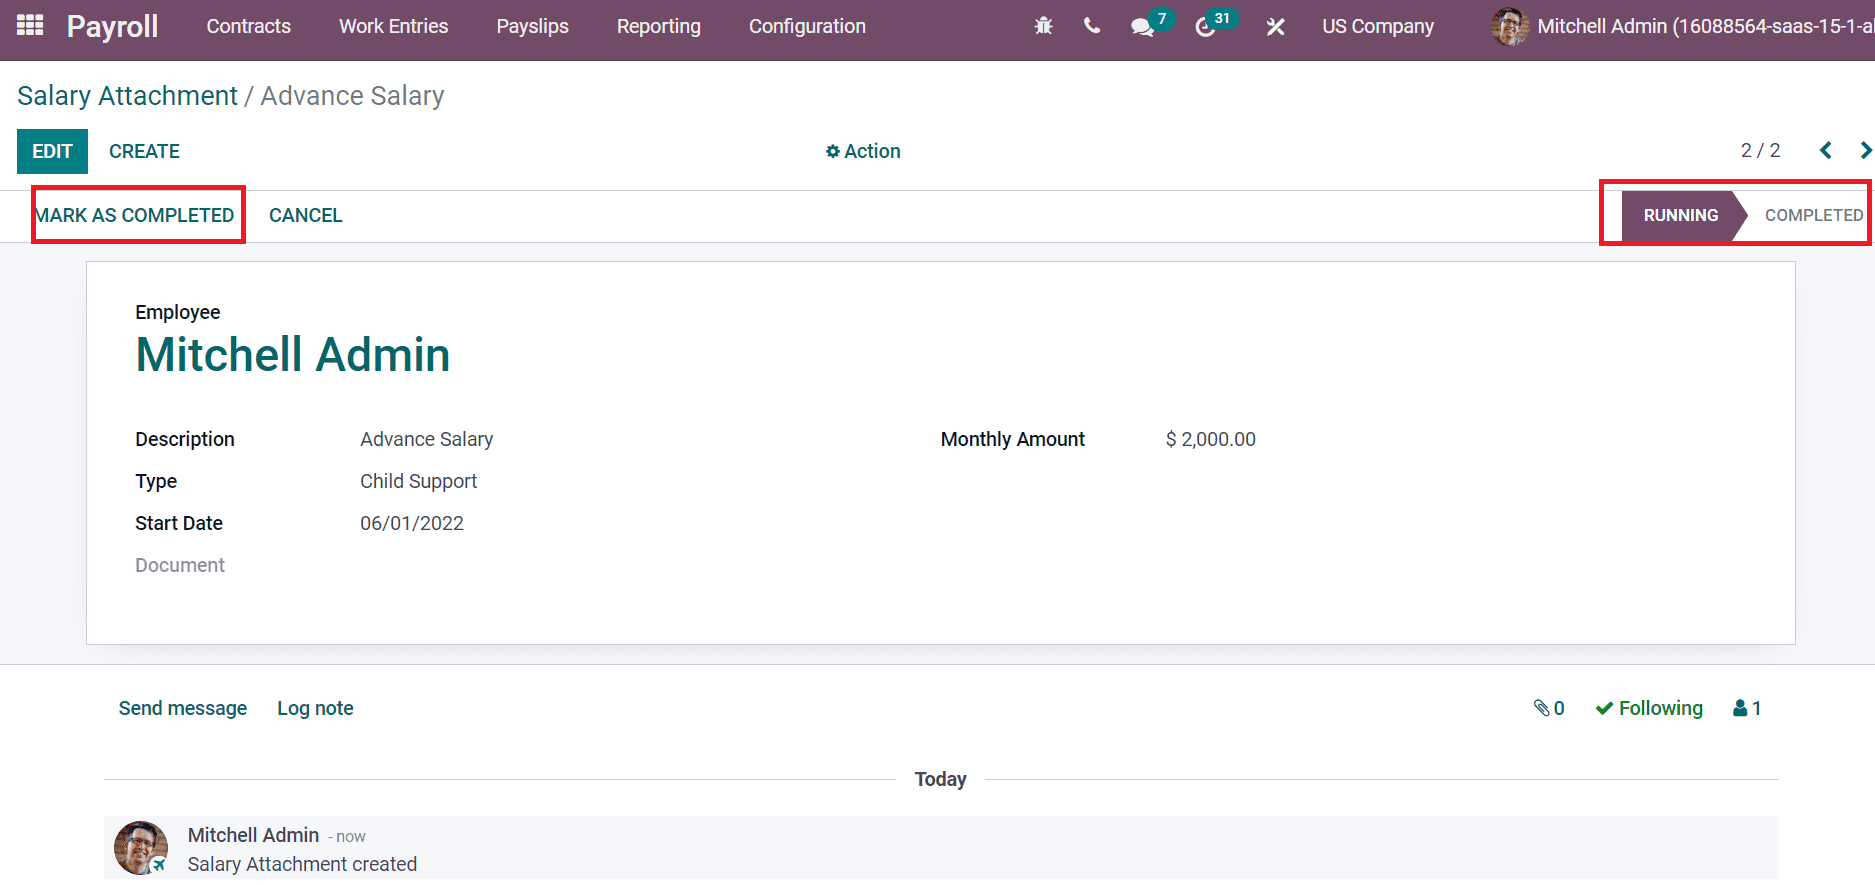
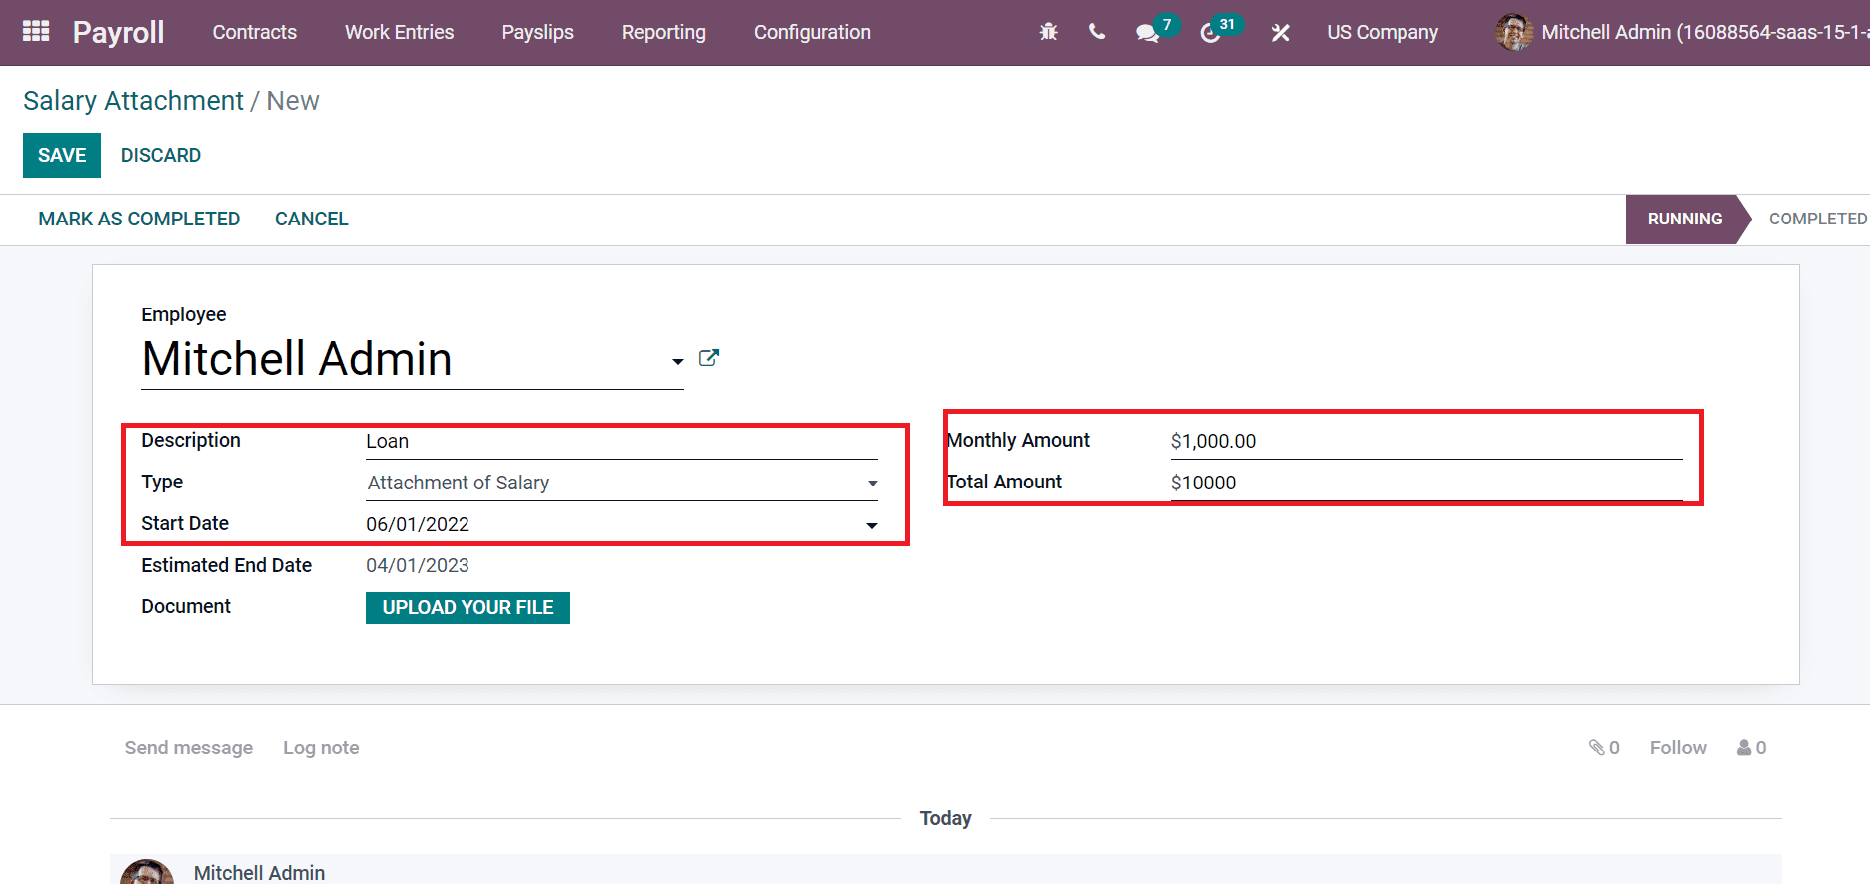
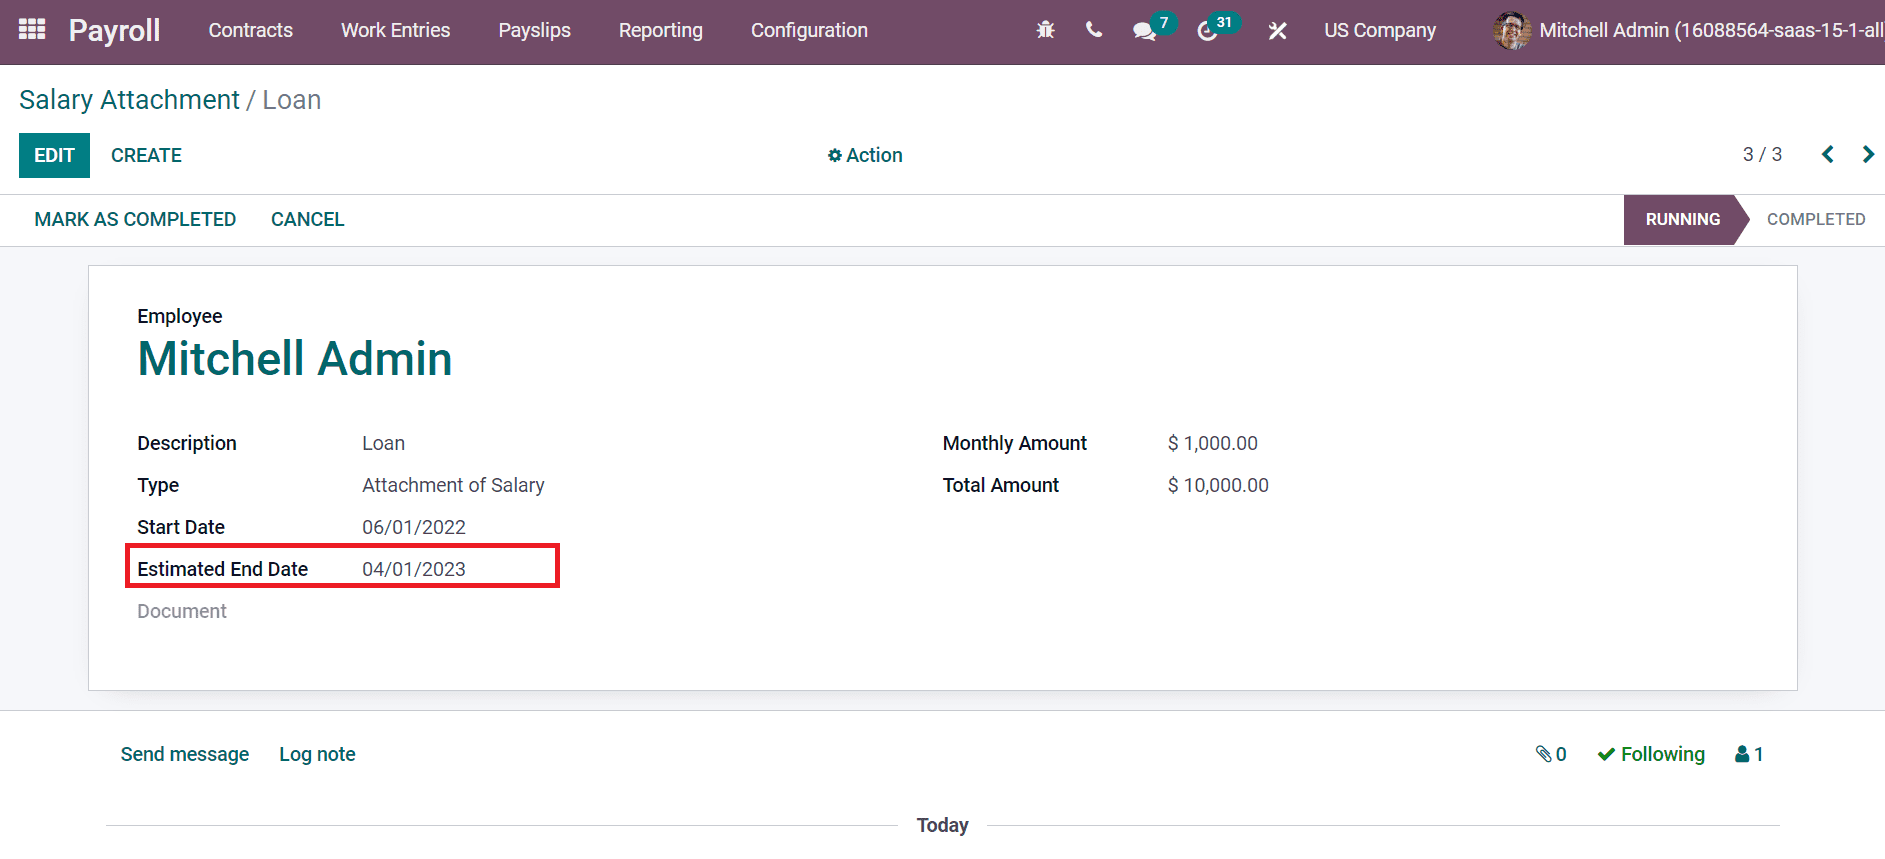
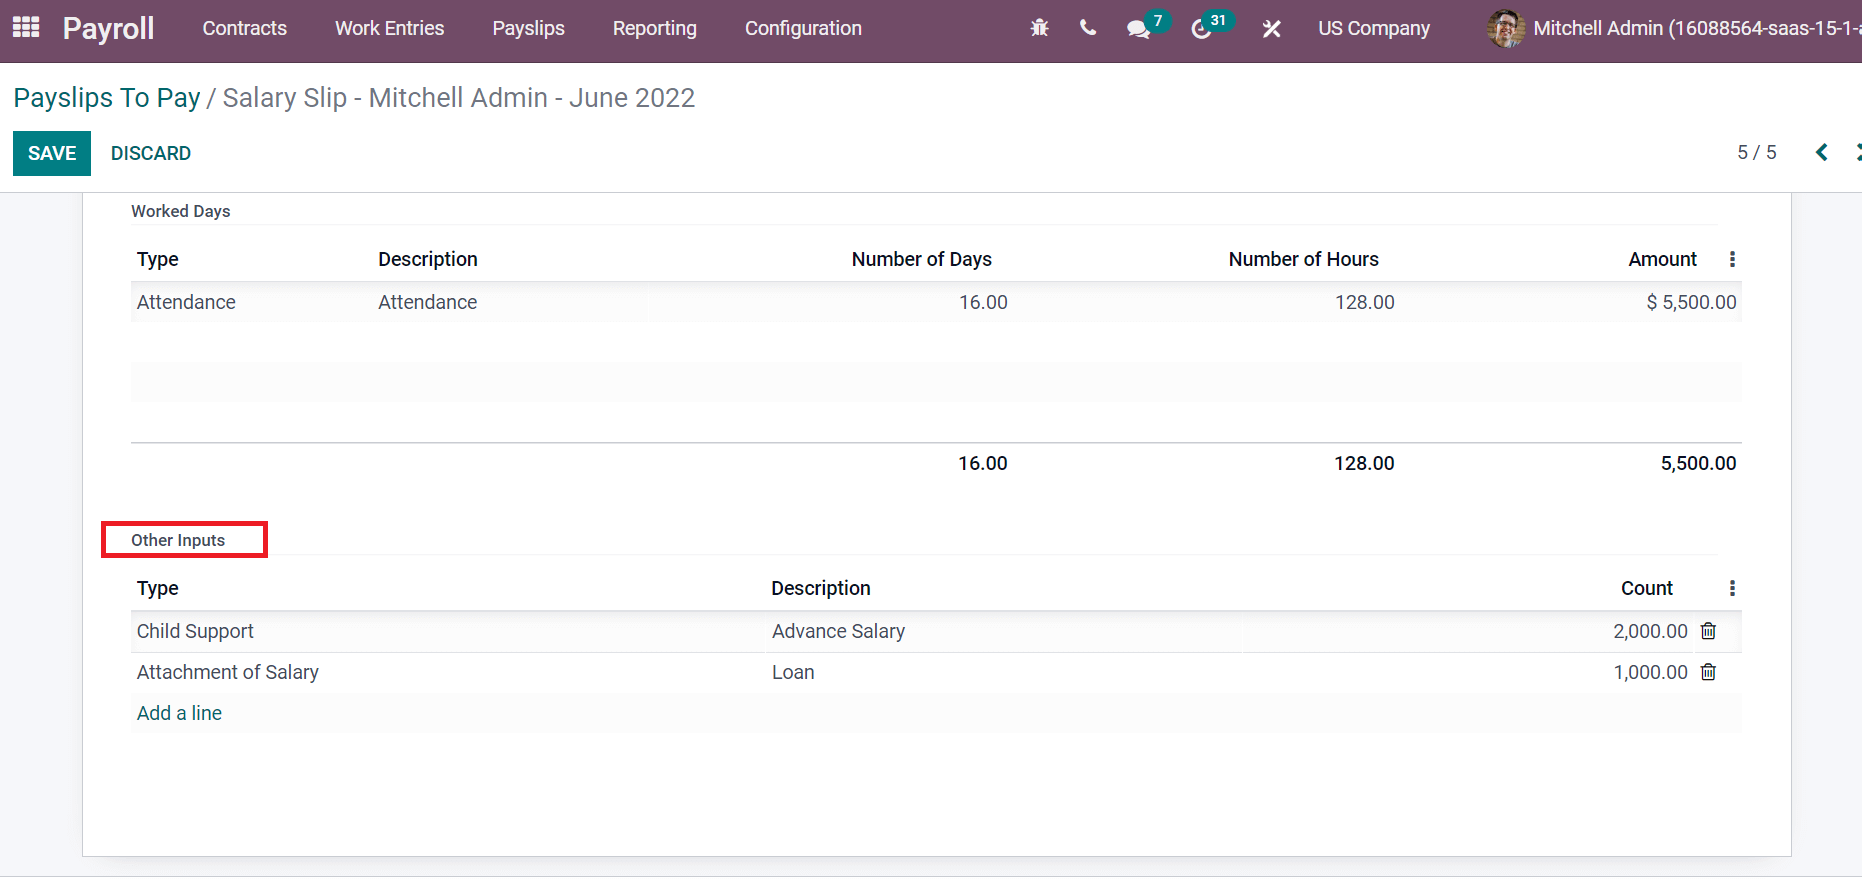
By choosing the Salary Attachments menu in the Contracts tab of the Odoo Payroll module, we can create salary attachments for employees. Add Employee as Mitchell Admin and Advance salary in the Description area of the Salary Attachment window as seen in the screenshot below.


There are three different sorts of salary attachments: child support, salary assignment, and salary attachment. You are presented with a Monthly Account form after selecting the Child Support as Type. As seen in the screenshot below, enter your amount in the Monthly Account form and click the SAVE icon.


We can see that process is active for Mitchell admin's employee. You can also finish the process after a while by selecting the MARK AS COMPLETED symbol, as shown in the screenshot below.


You can select Attachment of Salary or Assignment of Salary as the Type when applying for a loan for an employee. Add "Loan" to the Description field, then in the Type field, select "Attachment of Salary." You can enter the sum in the Monthly Amount and Total Amount fields after choosing the Attachment of Salary, as seen in the screenshot below.


You can view the Estimated End Date for a loan to the employee based on the entire amount, as shown in the screenshot below.


Making Payslips for Employees Using Odoo 15

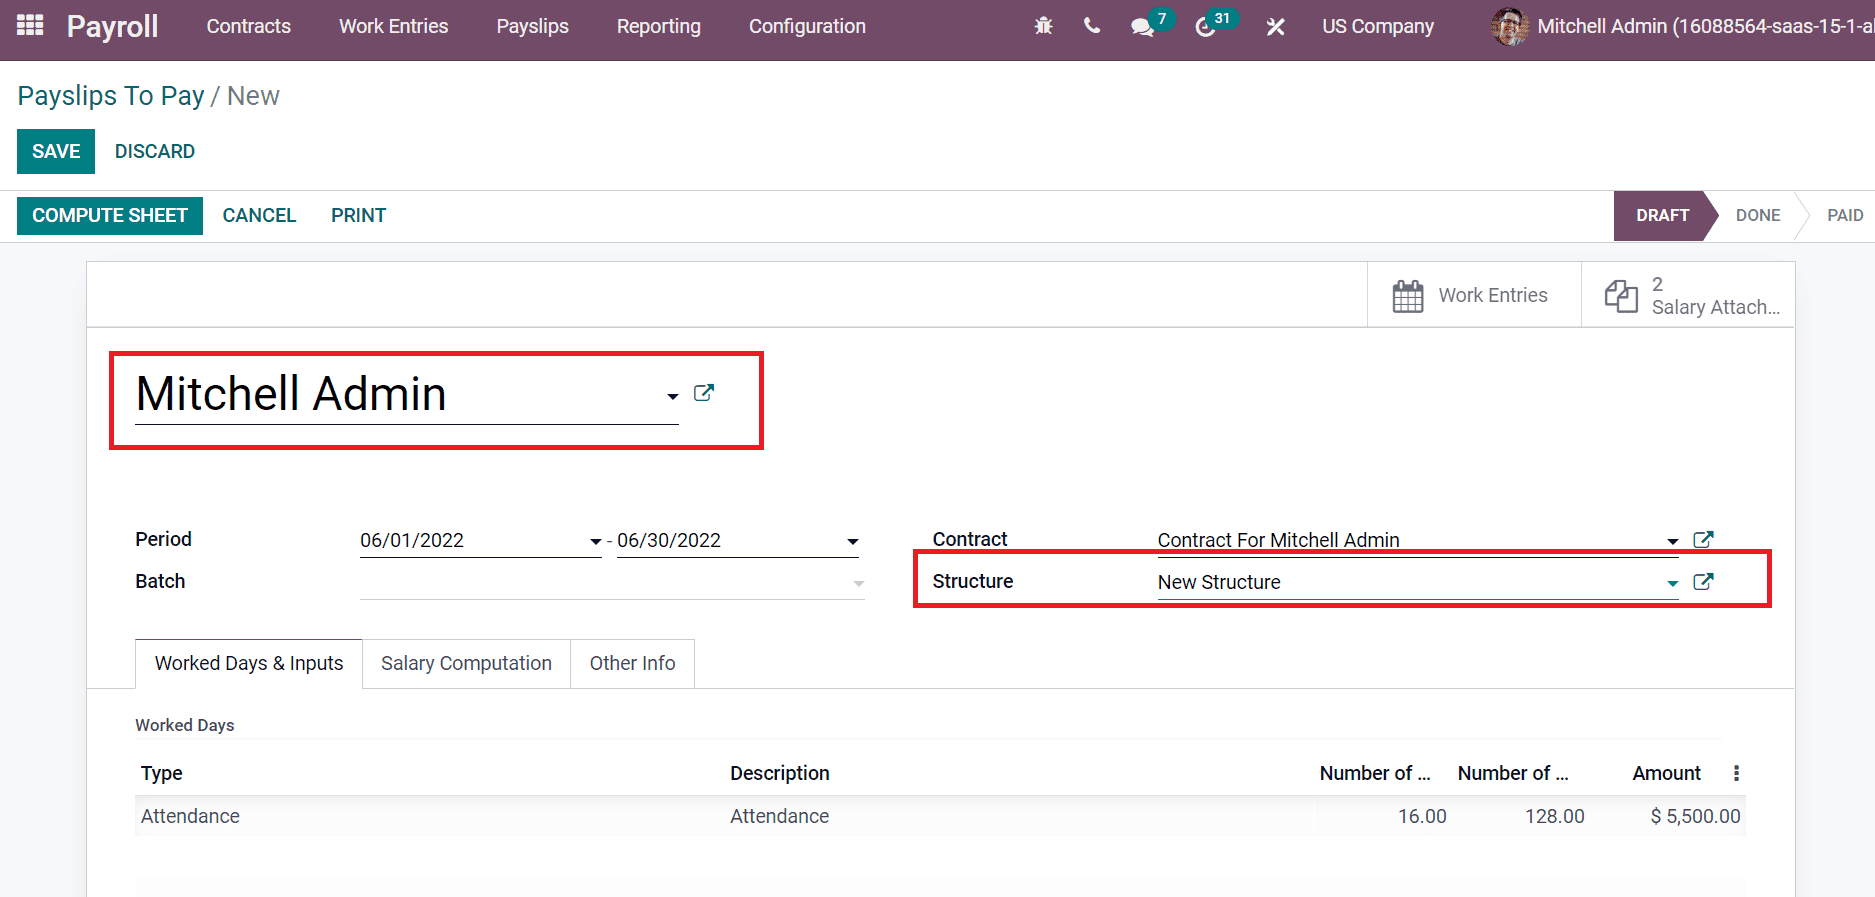
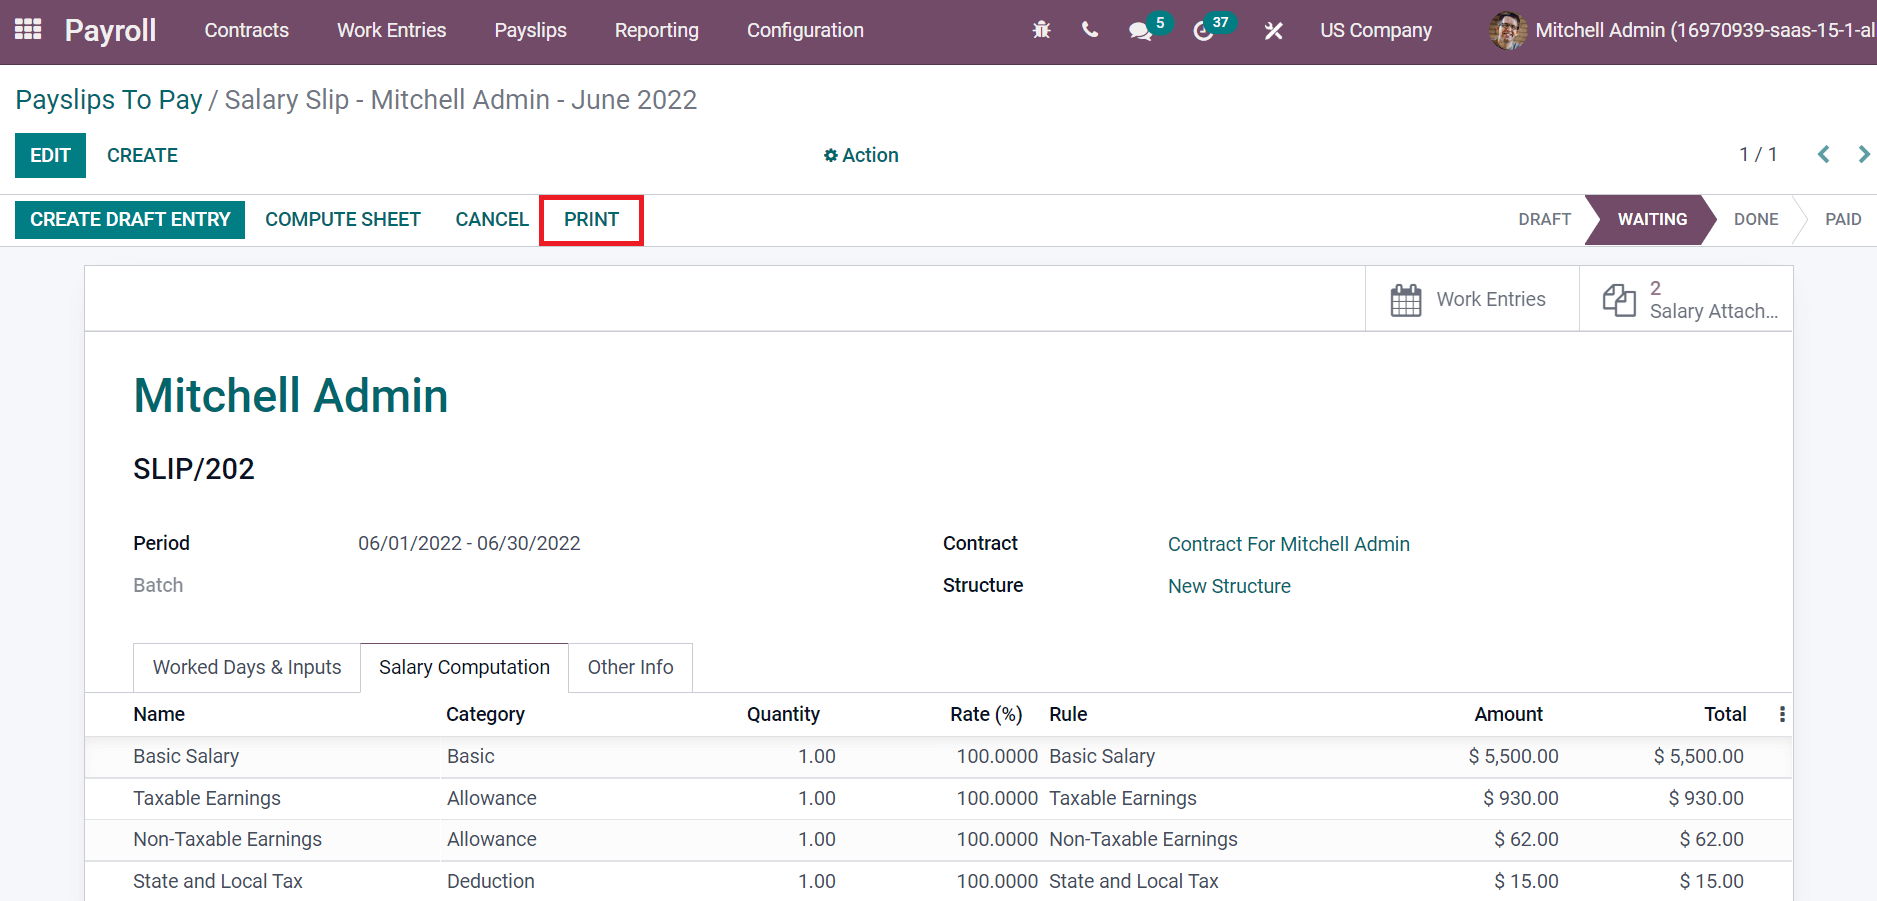
By choosing the To Pay menu from the Payslips tab, we can create a payslip for Mitchell Admin. Add "Mitchell Admin" as the employee name in the new Payslip box, then click New Structure in the Structure field as shown in the screenshot below.


As seen in the screenshot below, by choosing the New Structure option, you can observe newly constructed salary attachment kinds and descriptions under the Other Inputs sections.

As seen in the screenshot below, computation is dependent on each value in the Salary Computation tab after computing is chosen.


To view Mitchell Admin's payslip, click the PRINT icon in the Payslips to Pay page.


As a result, Mitchell Admin receives a payslip. The screenshot below displays Mitchell Admin's pay stub.


Conclusion: US Payroll Management With Odoo 15 Payroll Module

Users of the Odoo 15 Payroll module can create payslips for employees in a number of different countries. With the help of the Odoo 15 Payroll module's extensive features, we can rapidly create a variety of salary rules and attachments for an individual.

ERP Cloud LLC, an Odoo Certified Partner, offers a variety of Odoo ERP services, including Odoo Implementation, Odoo Customization, and Odoo Integration, based on individual business requirements.

If you're interested in learning more about Odoo and implementing it in your business, please contact us at sales@erpxcloud.com. Our specialized team of Odoo professionals is ready to create and implement the best solutions for your businesses to achieve maximum outcomes in terms of leads, sales, and money.

Odoo, Moe Fawaz July 4, 2022
Share this post
Our blogs
Sign in to leave a comment
Odoo 15 Maintenance Management Advanced Features
  /