
Using Odoo 15 Accounting to Manage Your Budget
Budgeting is necessary for effective business administration. Budgeting will enable firms to properly manage and arrange their expenses, as well as prioritize their activities.
Budgeting is one of the most effective strategies to assess actual performance. Budgets typically allow you to take actions for the company's future well-being, allowing you adequate room to plan for financial security. It's simple to manage the budgets in the firm with Odoo's extensive budget management tools.
With the Odoo 15 Accounting module, you can effortlessly handle complex financial operations. The first step in configuring Budget management in Odoo is to enable it in the Accounting module's setup settings, as shown below.
Odoo 15 Accounting Module (budget)
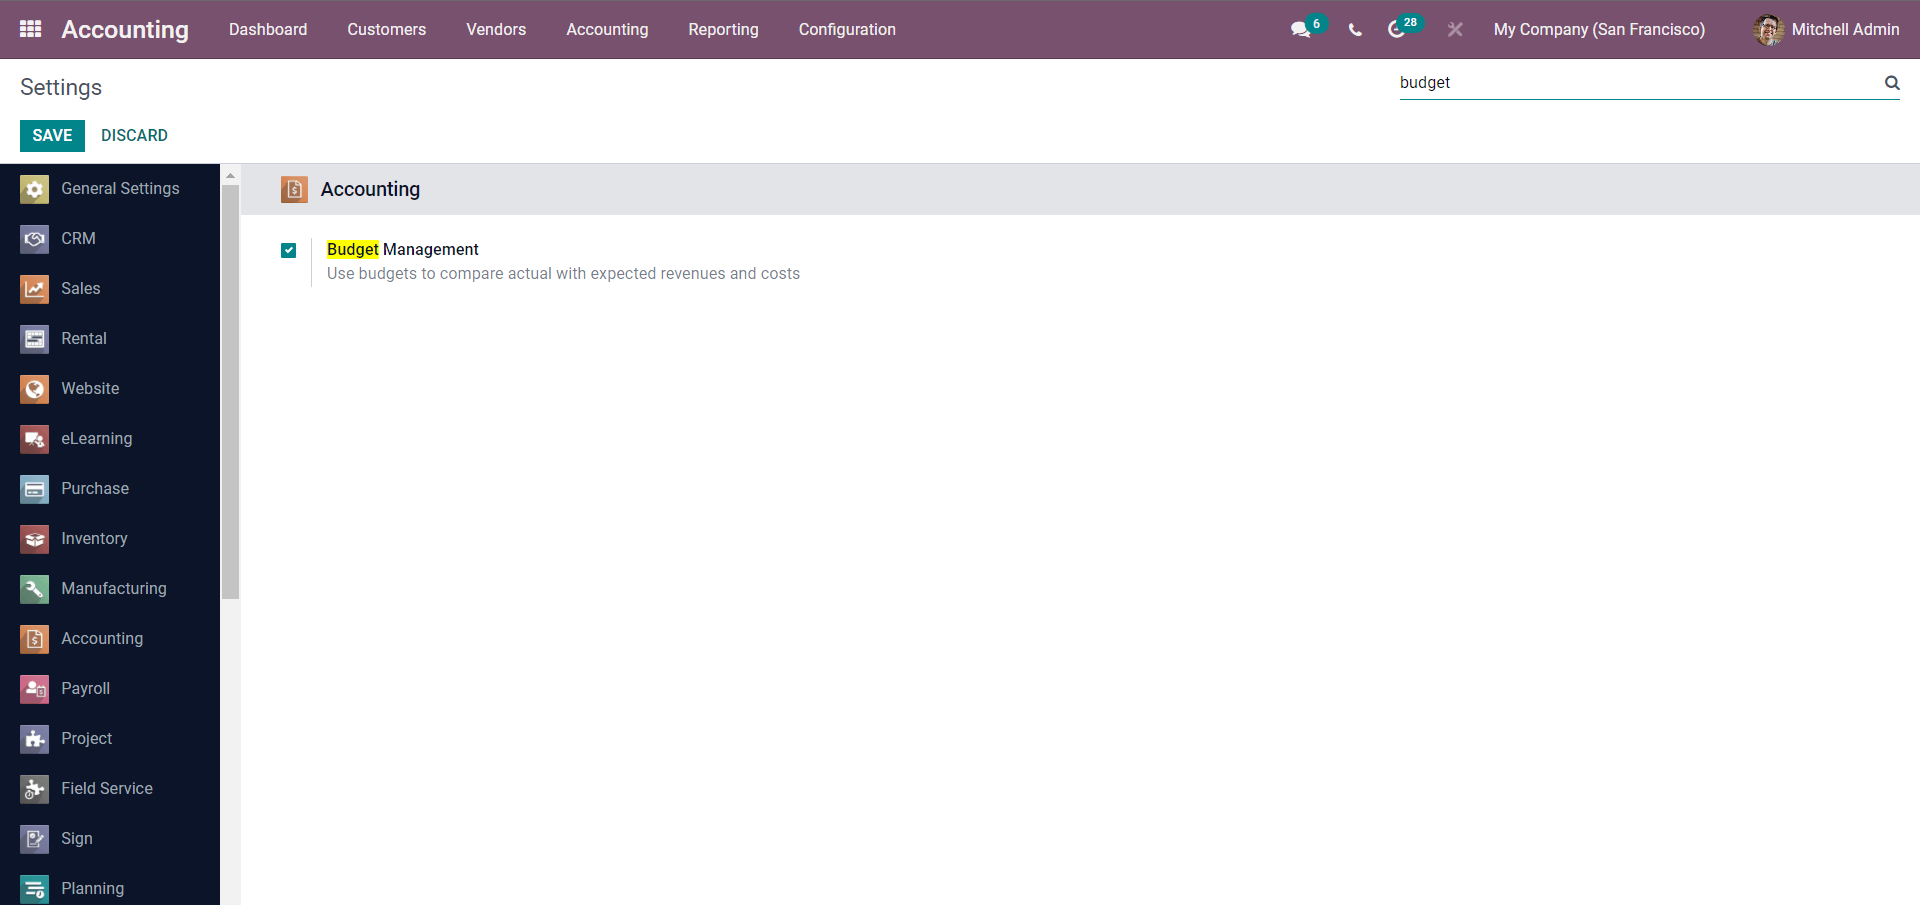
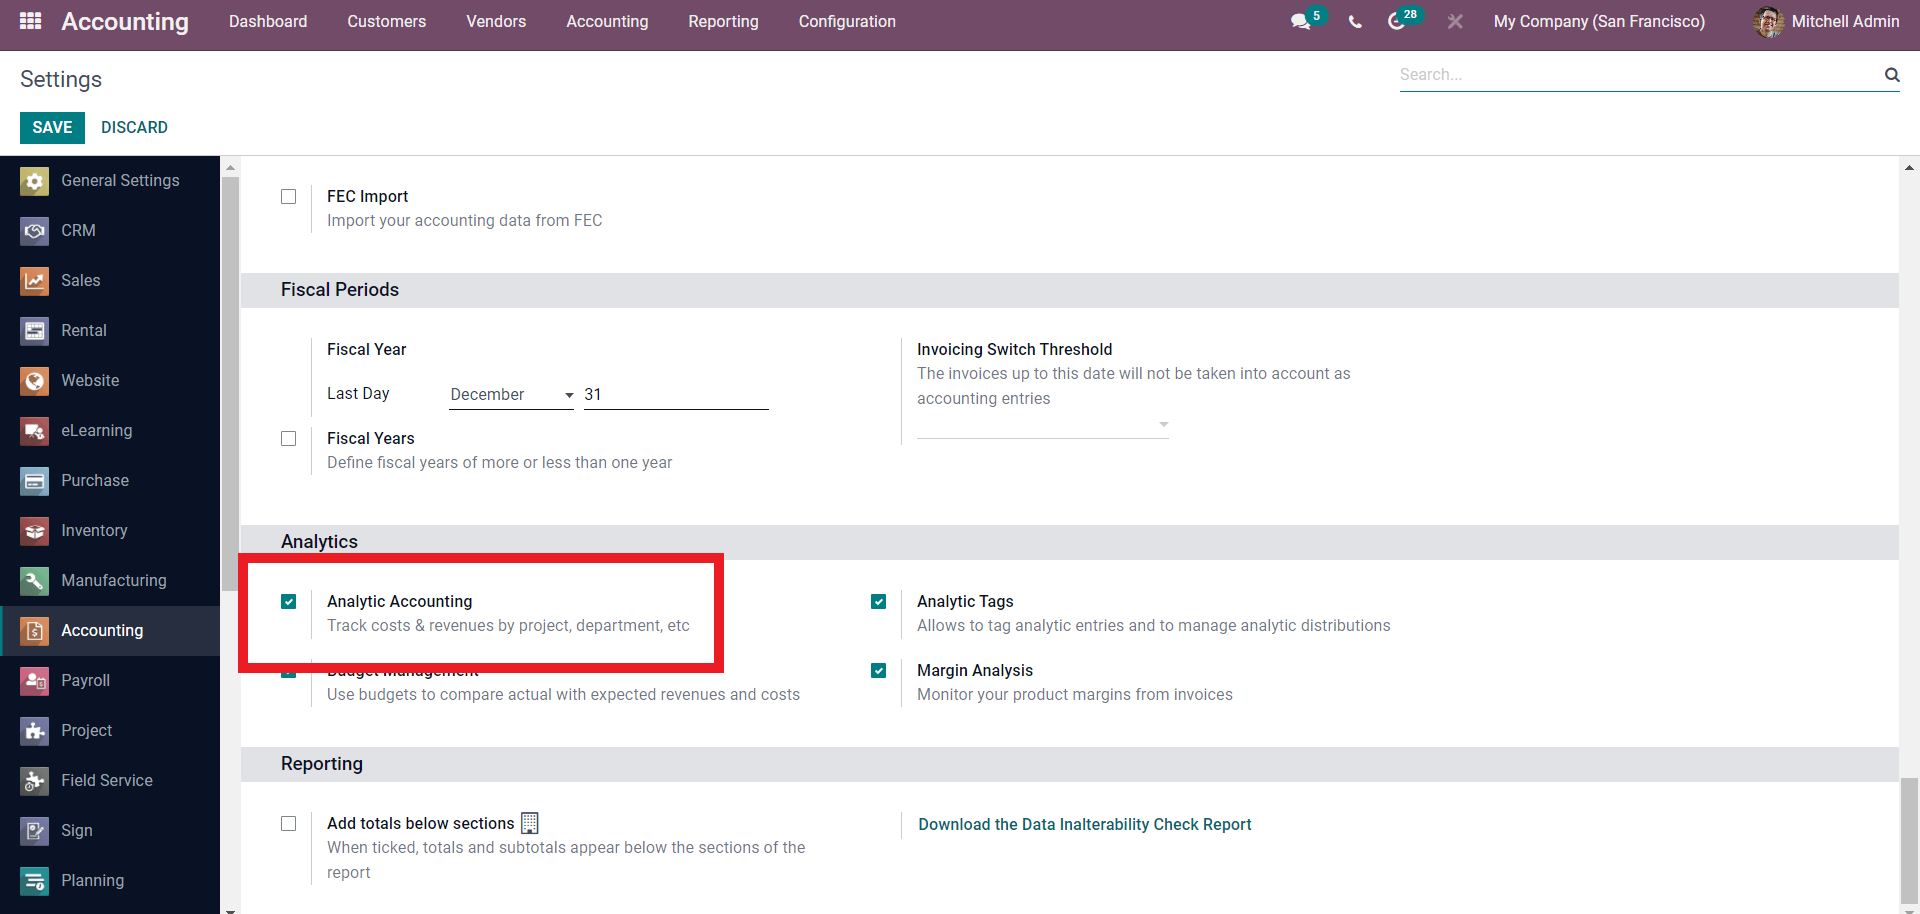
From the Settings page, type budget management into the Search field. To activate Budget management, check the box next to it. Along with budget management, Odoo employs Analytic Accounting. The Analytic configurations settings of the Accounting module can be activated as indicated below.
Once you've completed the Activation, go to the Accounting tab on the Accounting module's Dashboard and select Budgets from the drop-down menu. As illustrated below, a page on Budgets will appear.
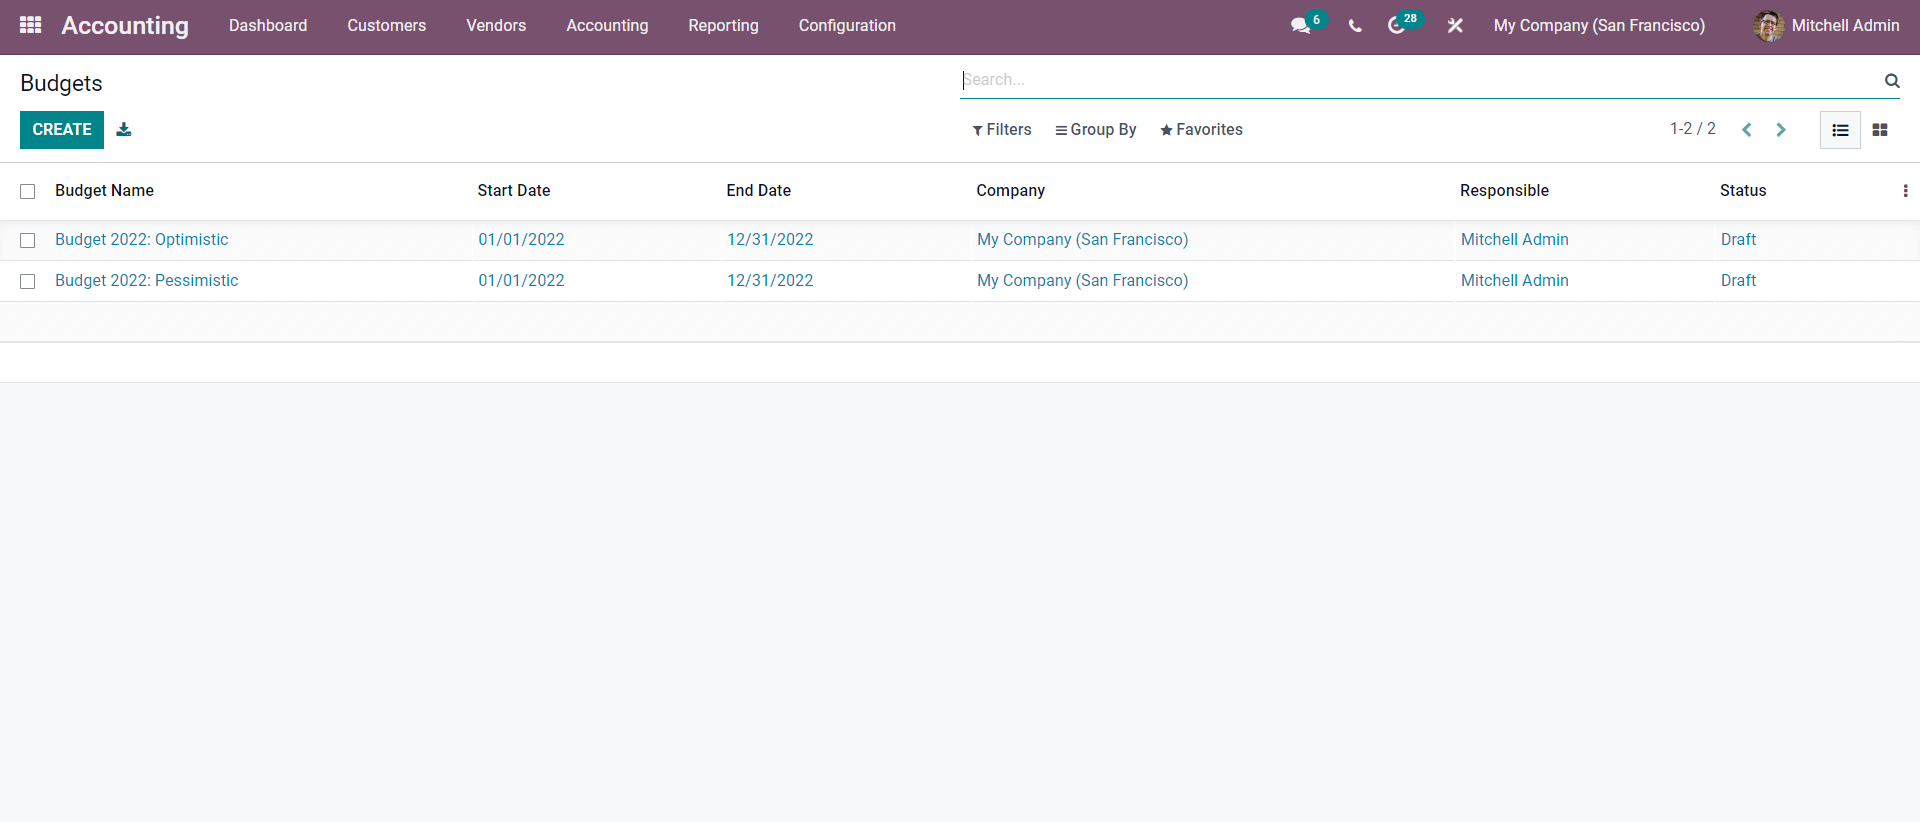
Create new Budgets by pressing the CREATE button. To configure the new Budget, a confirmation screen will appear, as seen below.

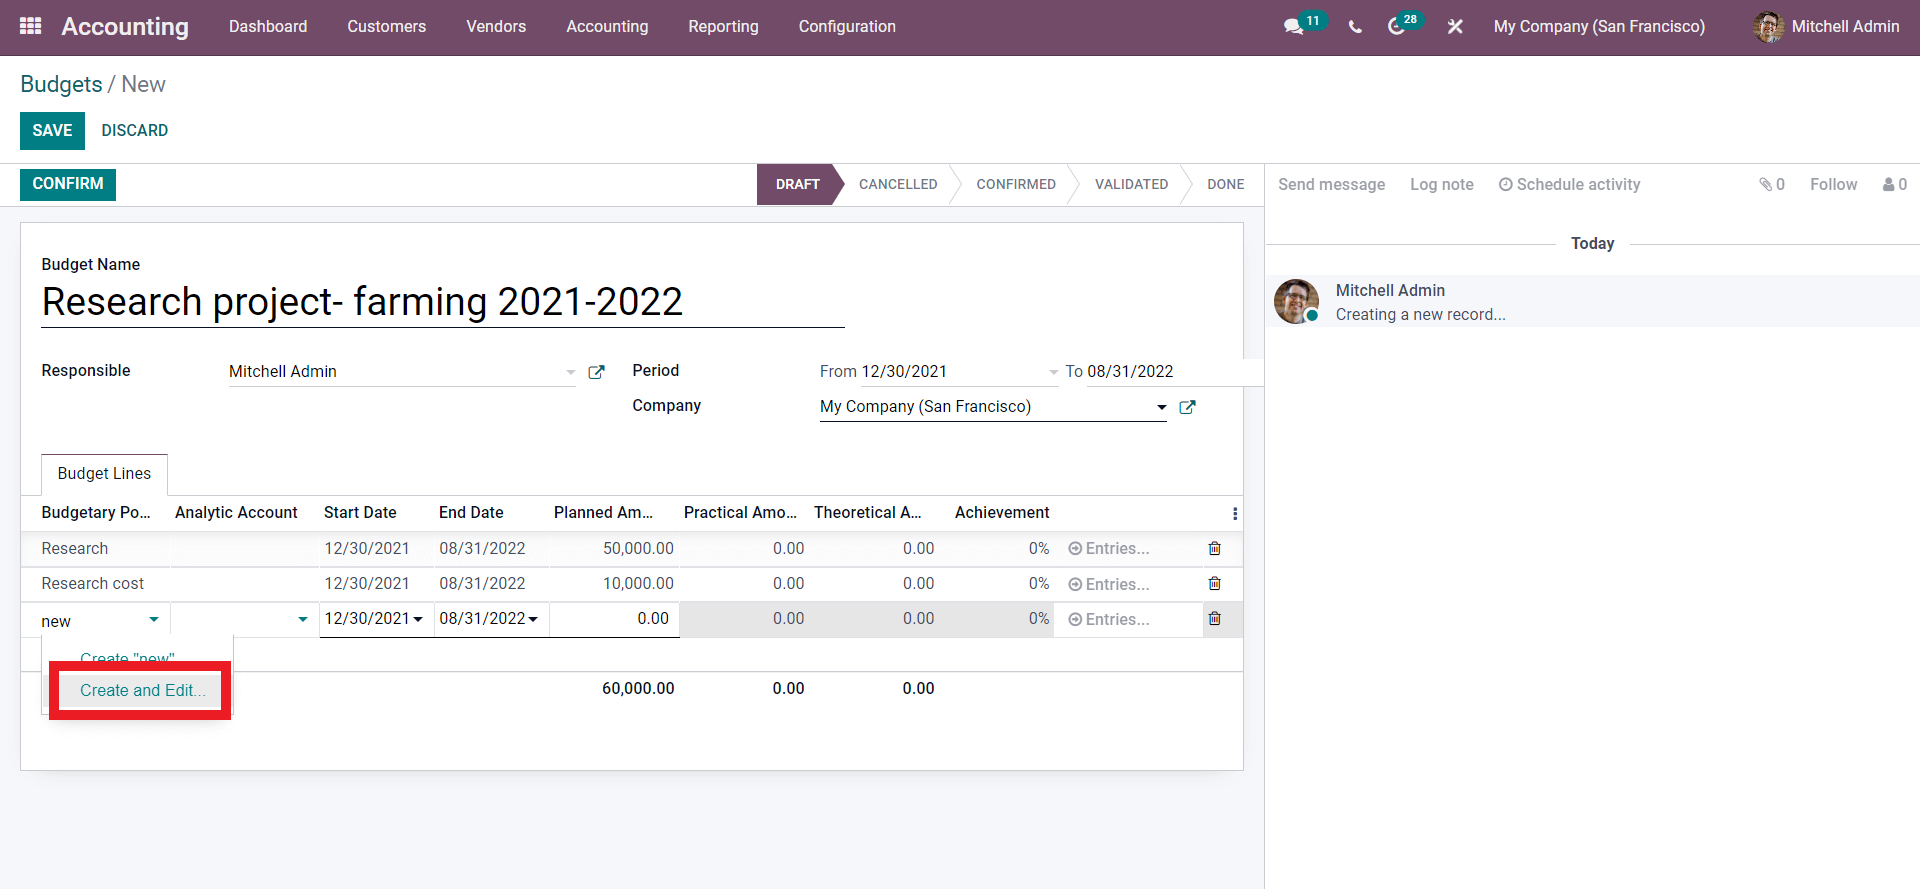
You can add Budget lines under the Budget Lines section. Under the Budgetary positions section, click the Add a line button and enter in the name of the Budgetary Position. If it's the first time you've used it, a Create and Edit Window will appear, as seen below.
When you click the Create and Edit button, a configuration page will appear, as shown below, where you can adjust the Budgetary position.
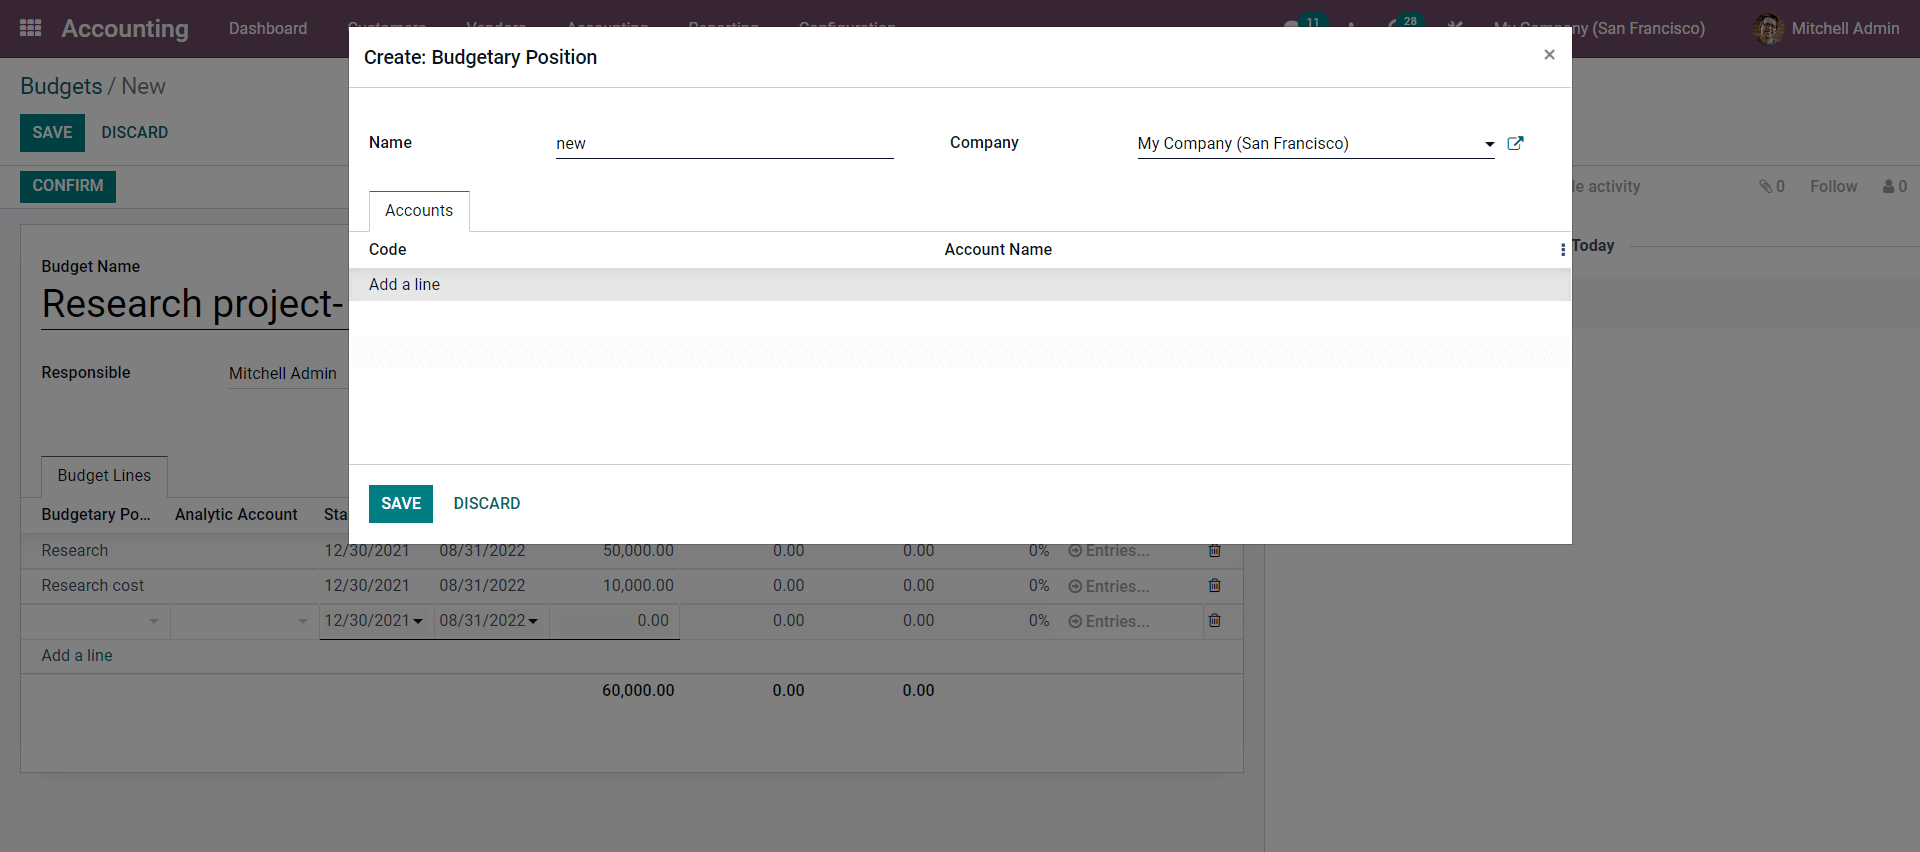
By clicking on the Add a line button and entering the name of the Budgetary position and adding the Accounts under the Accounts section, a tab with a list of accounts will pop up, as shown below.
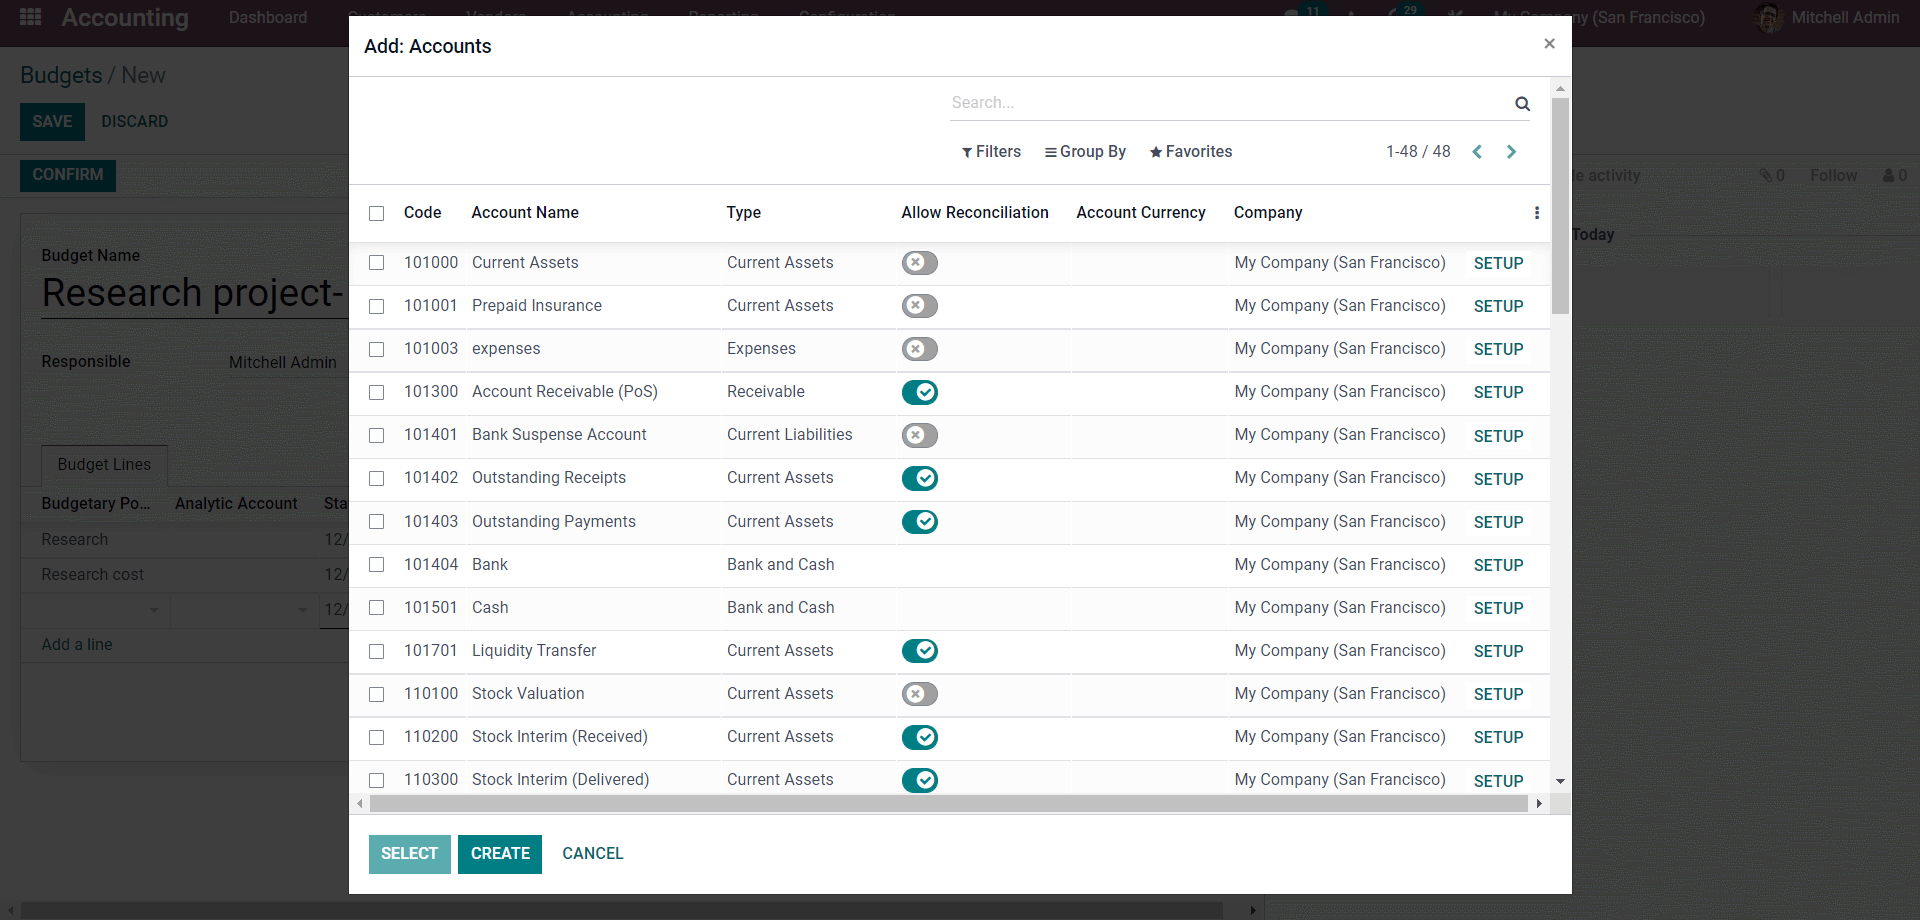
Select he Accounts to handle the nature of the budgetary position you're putting up. Choose an Income Account if your budgetary position is mostly focused on income, and an Expense Account if your budgetary situation is primarily focused on expenses. Similarly, based on the nature of your business, you might choose an account. If you want to establish a new account, click the CREATE button and fill out the form on the preceding configuration page. After you've finished configuring the account, pick it by checking the empty checkboxes next to it and then clicking the SELECT button to apply the accounts you've chosen.
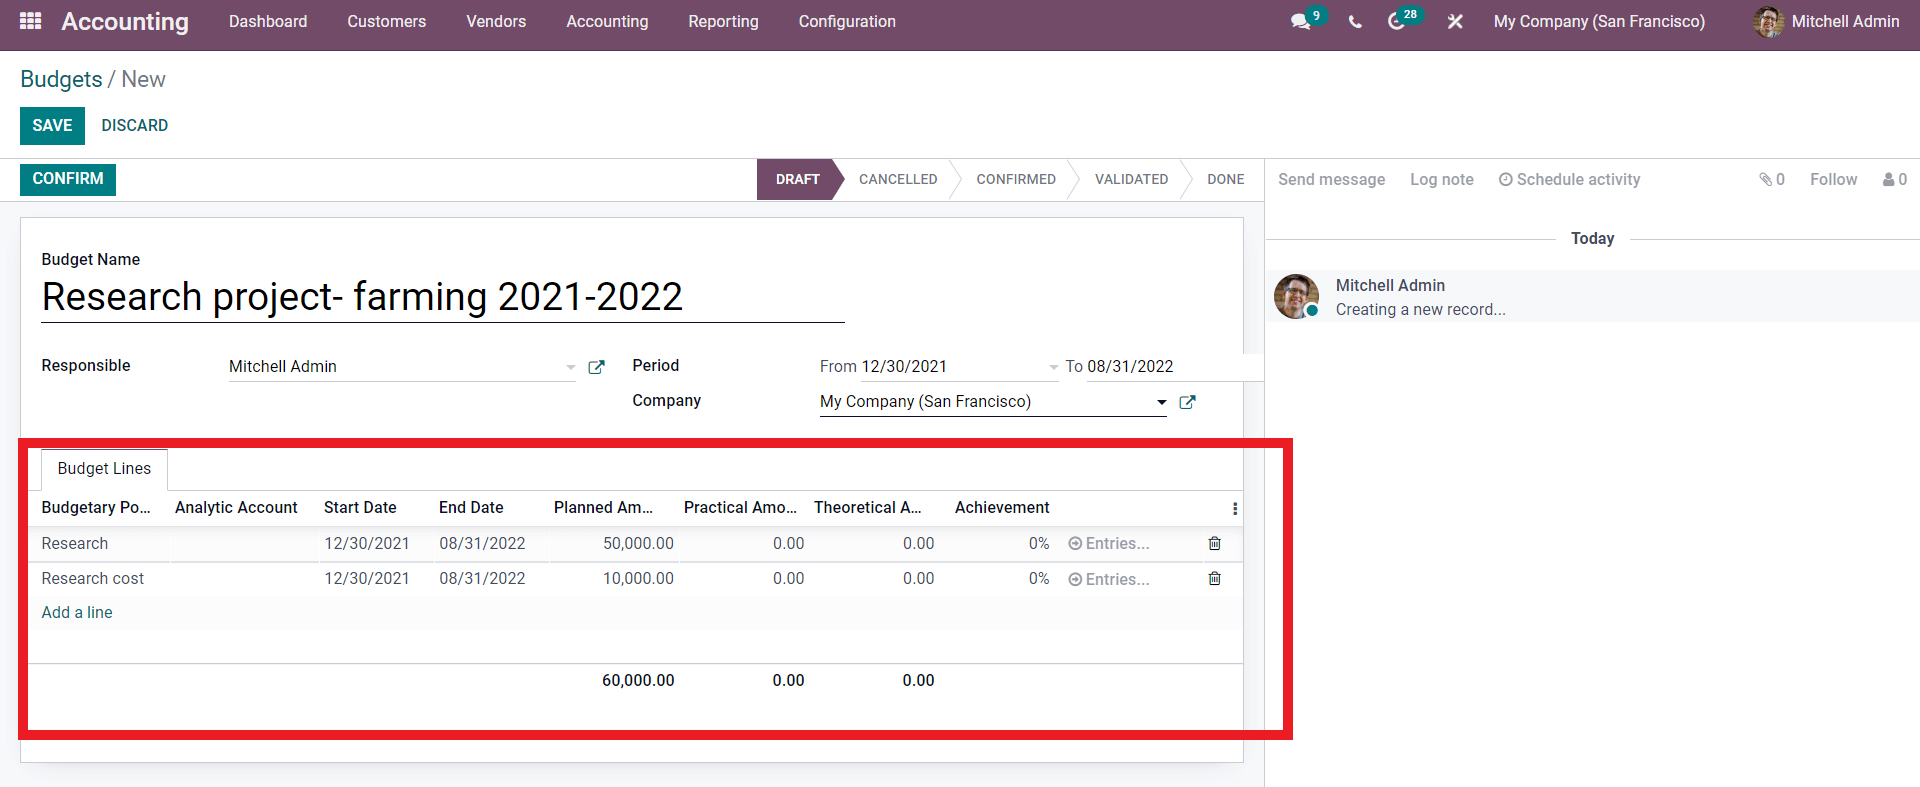
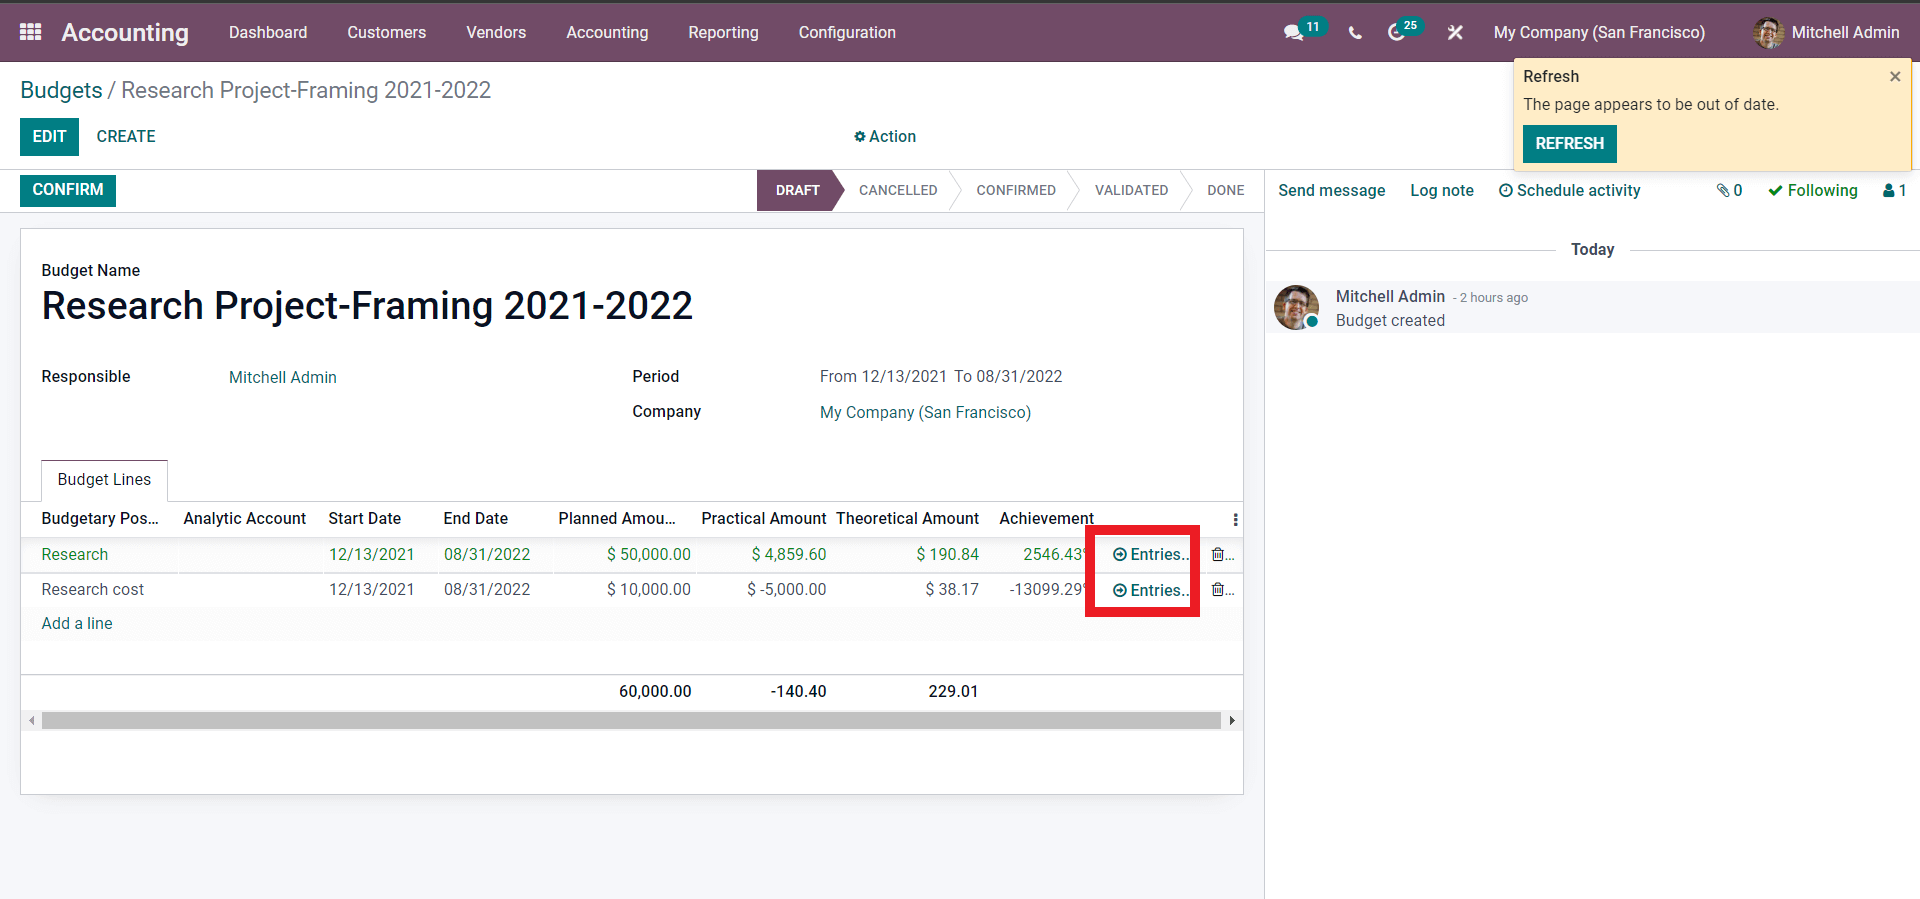
Research and Research Cost are the budgetary positions here. The budget lines' date and planned amount can both be changed. To add an analytic account, go to the Analytic account field and type in the account's name. From here, you may set the time frame, the person in charge, and the company. After you've finished configuring the Budget, click the SAVE button to save it.
To demonstrate, we can change the above-mentioned configurations on the Budget to see how they effect the procedures. Let's change the Start date to the present date or the date the project or process's budget is being prepared, as shown below.
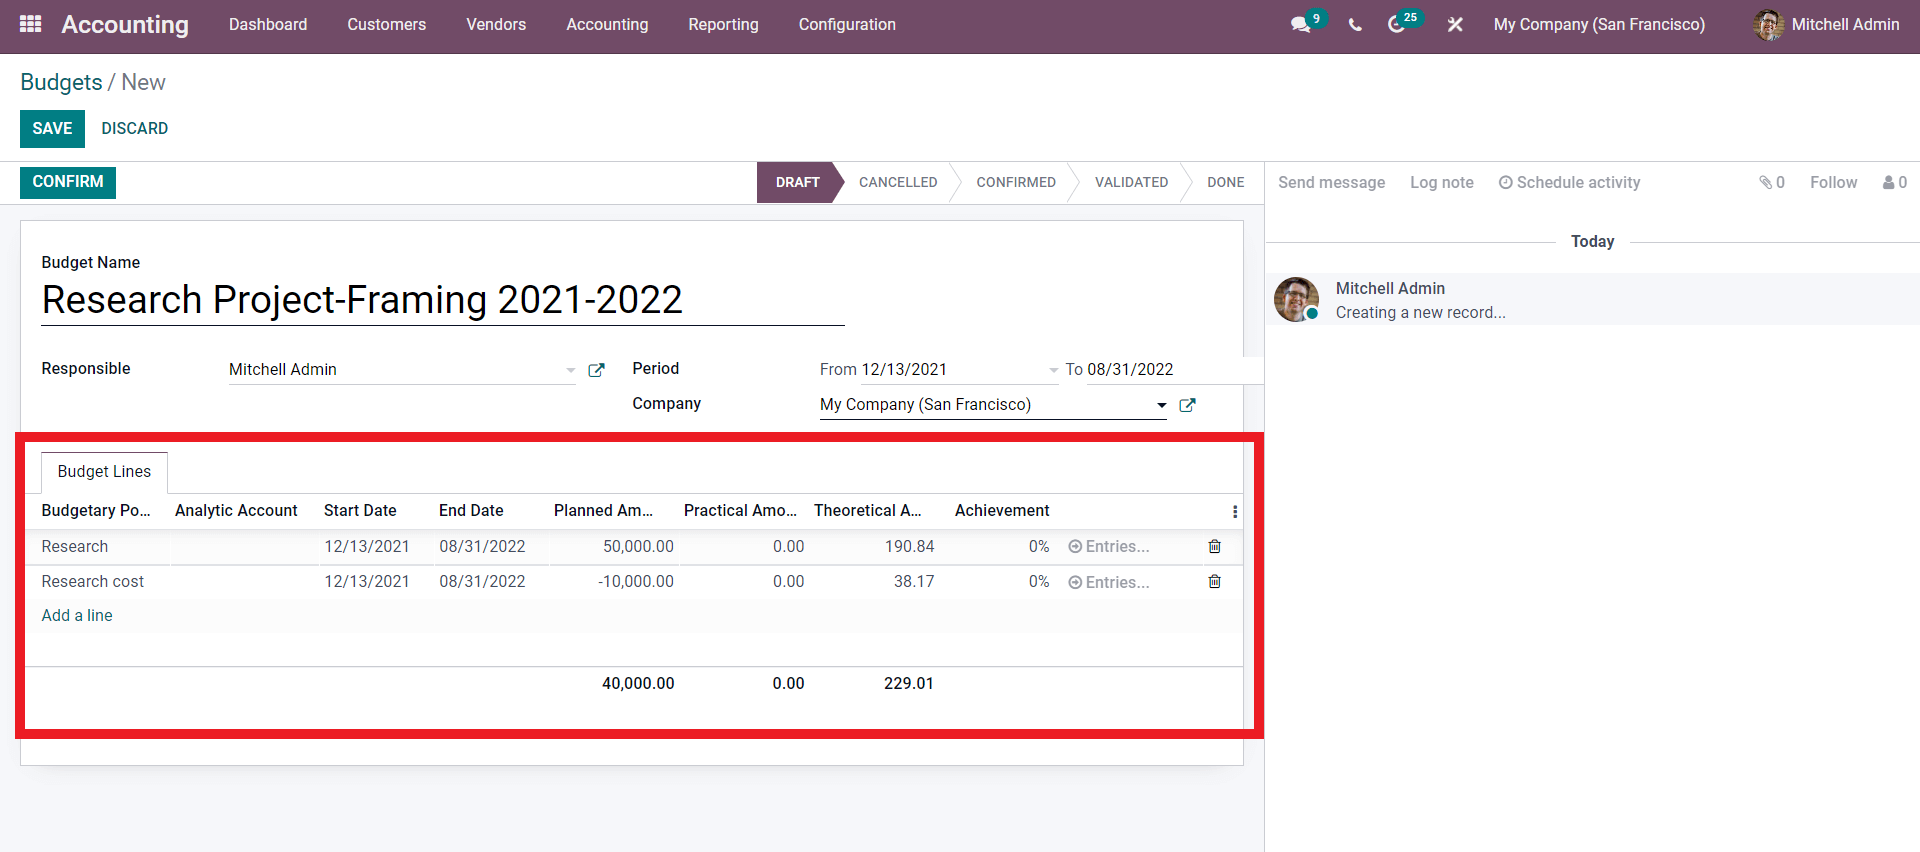
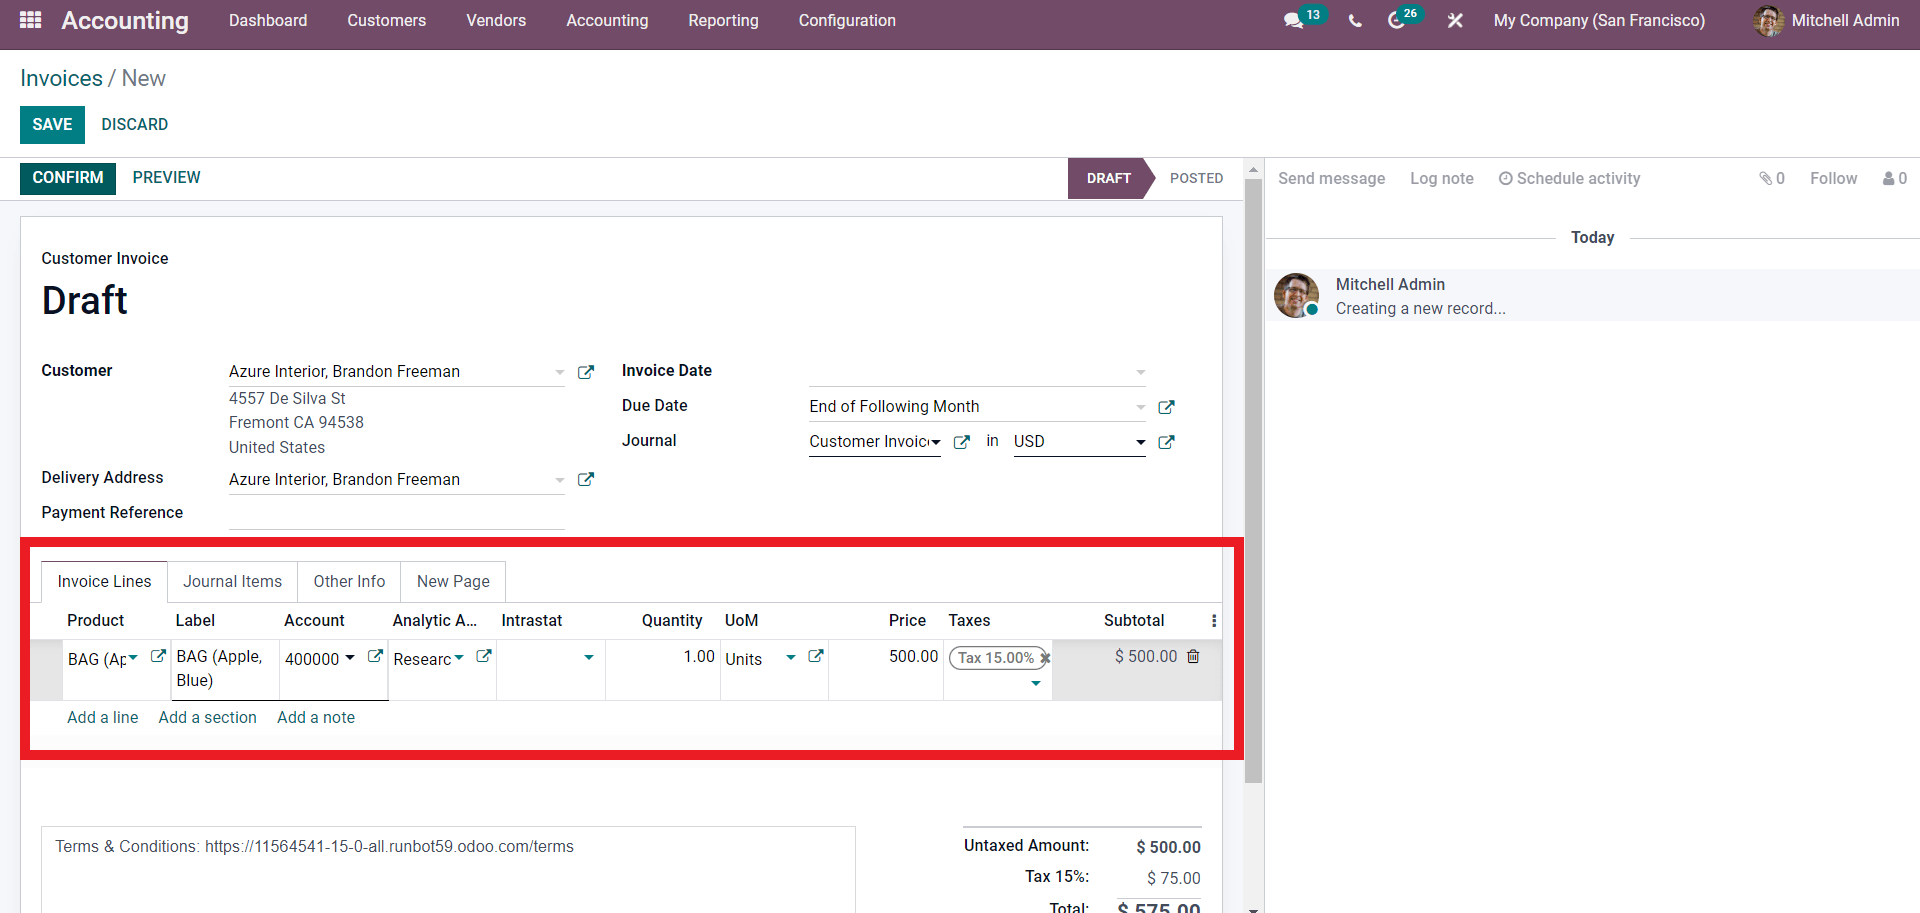
It's worth noting that the Theoretical amount is calculated and shown automatically in relation to the Planned amount. If the mount is negative, it will be saved with a negative sign, and if it isn't, it will be displayed as is when the configurations on the SAVE button are saved. Now let's make a customer invoice to see how the budget configuration affects it. To create an invoice in the Accounting module, navigate to the Customer tab on the Accounting module's dashboard and select Invoices from the Dropdown menu. To customize the invoice, go to the setup page shown below.
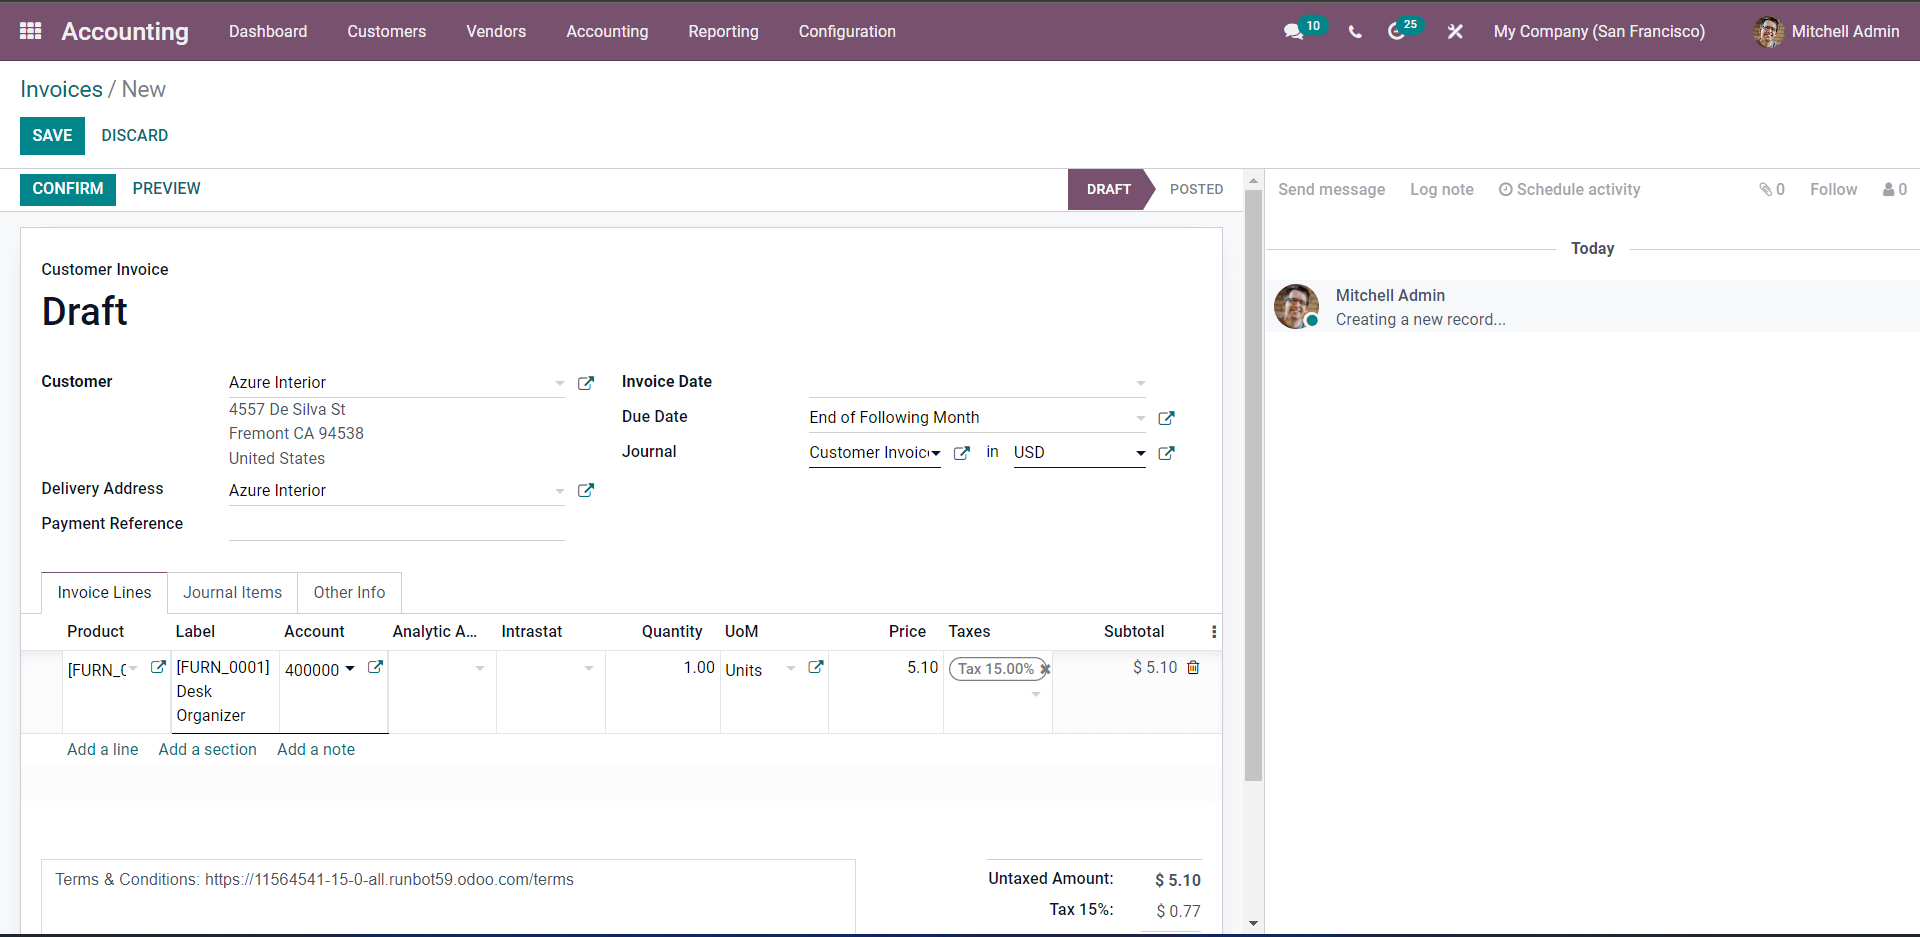
Add the customer and product, as well as the procedure, and then click CONFIRM. After you've confirmed, go to the Account tab's Budget and choose the newly established budget from the list; you'll notice that the budget has been reconfigured in relation to the invoice. To access the journal entries, go to the budget section and click the Entries button next to the shown below.
As illustrated below, a page containing all of the Journal entry items listed down will appear.
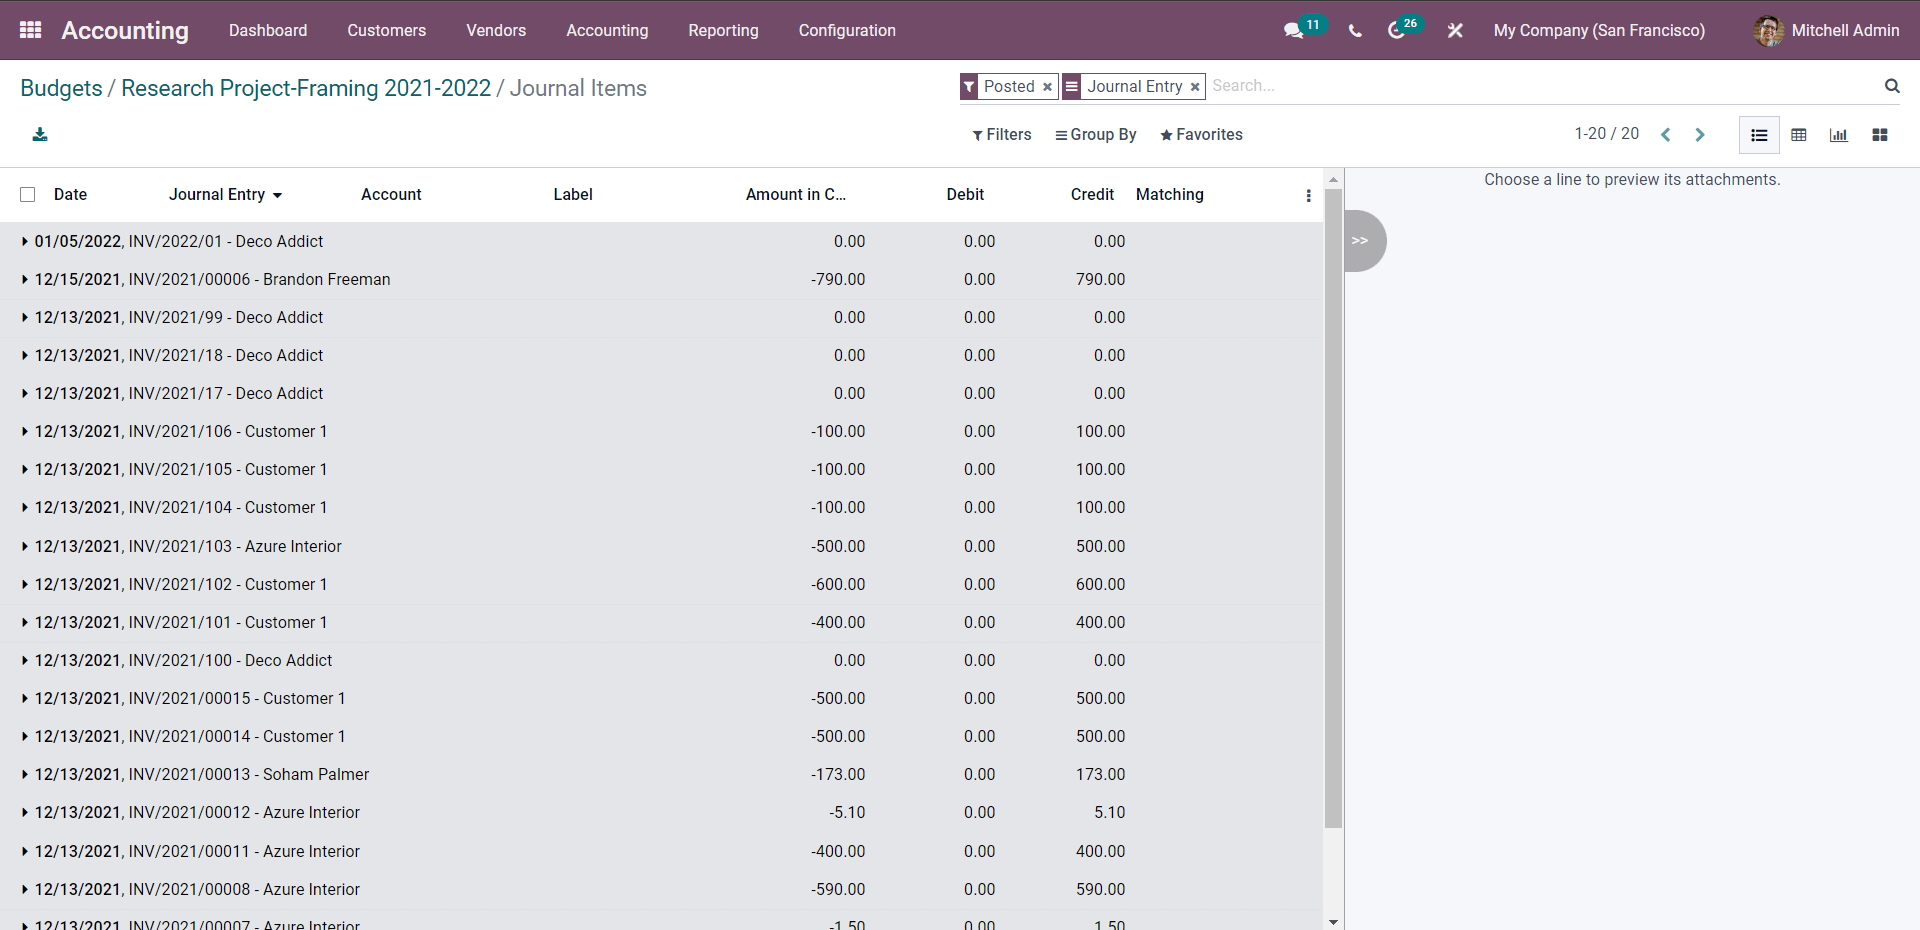
From here, you can manage your submissions. To see a more thorough view of any entry, click on it. This can assist you in more effectively managing your budgets. If you bought something, go to the Vendors tab and select Bills from the drop-down option. A page containing a list of bills will appear. To create a new vendor Bill, click the CREATE button, which will reveal a configuration screen as seen below.
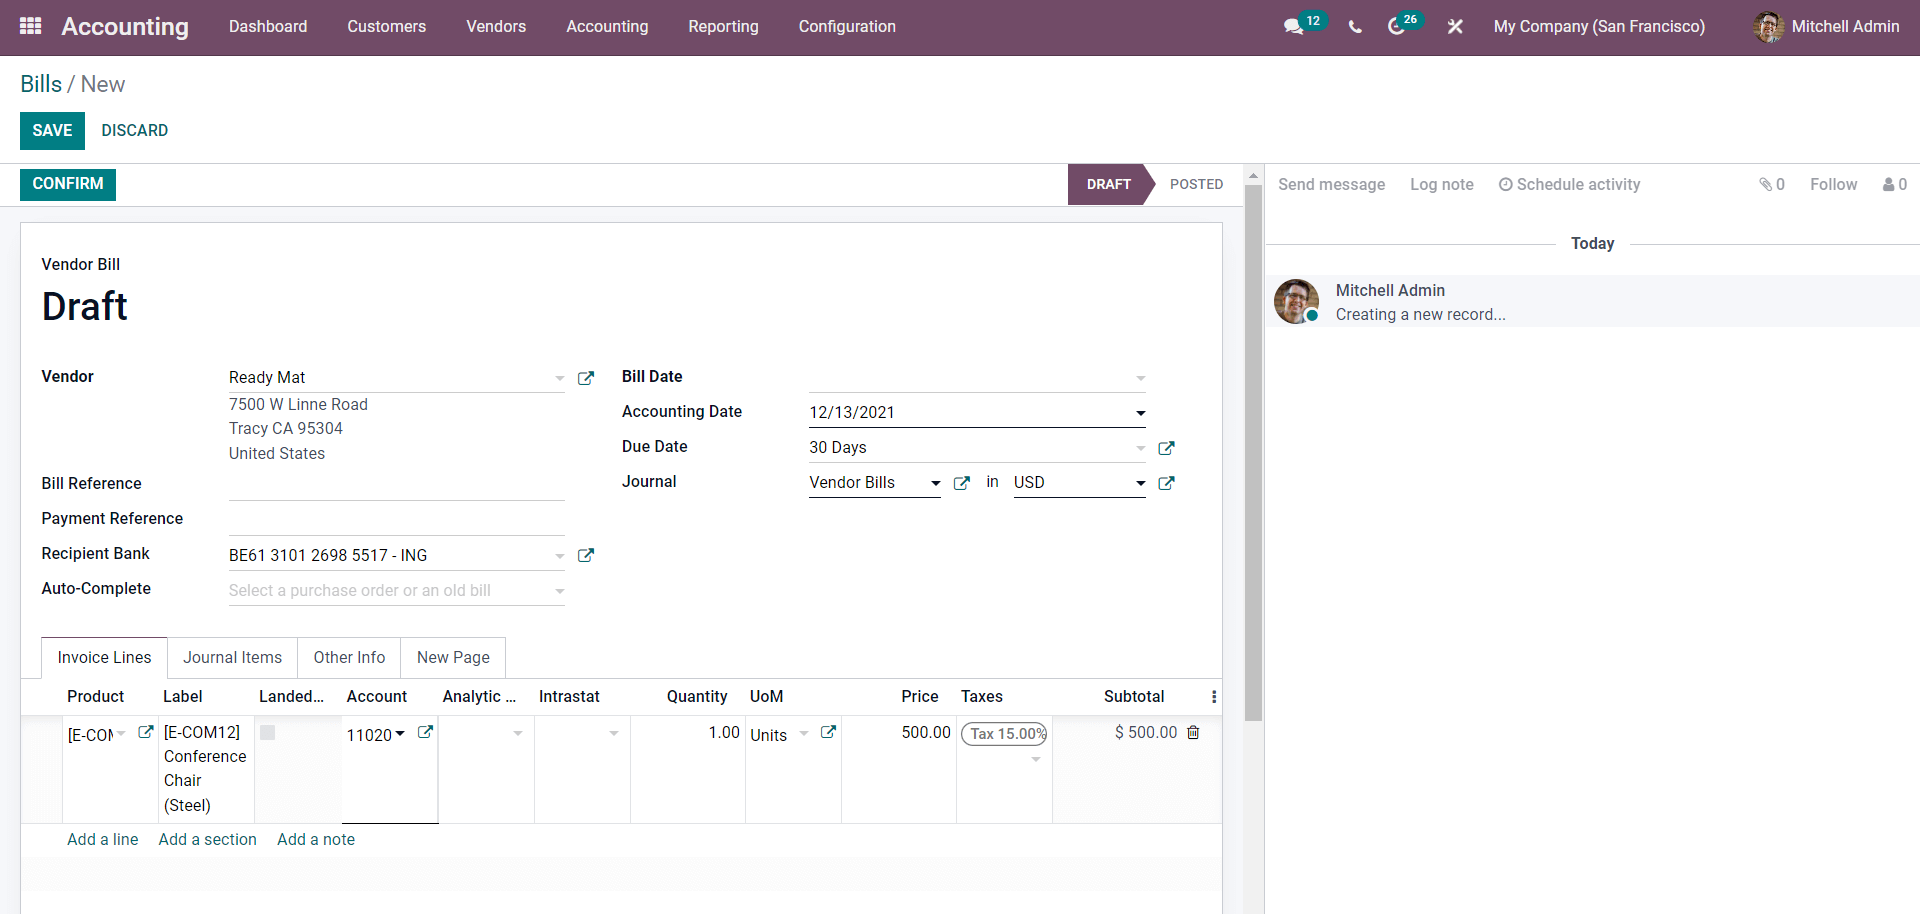
In the Invoice line area, insert the Vendor and the product, as well as the Bill date, Accounting date, and other billing date options. After you've finished with the designs, click the CONFIRM button. This will lead you to the payment part of the Register. Then go to the Budget area, where you'll see that we've over the limit and will be displayed as such. This also means that you should take care of your expenses right now. You can link an analytical account to the Budget, as illustrated below, as previously discussed.
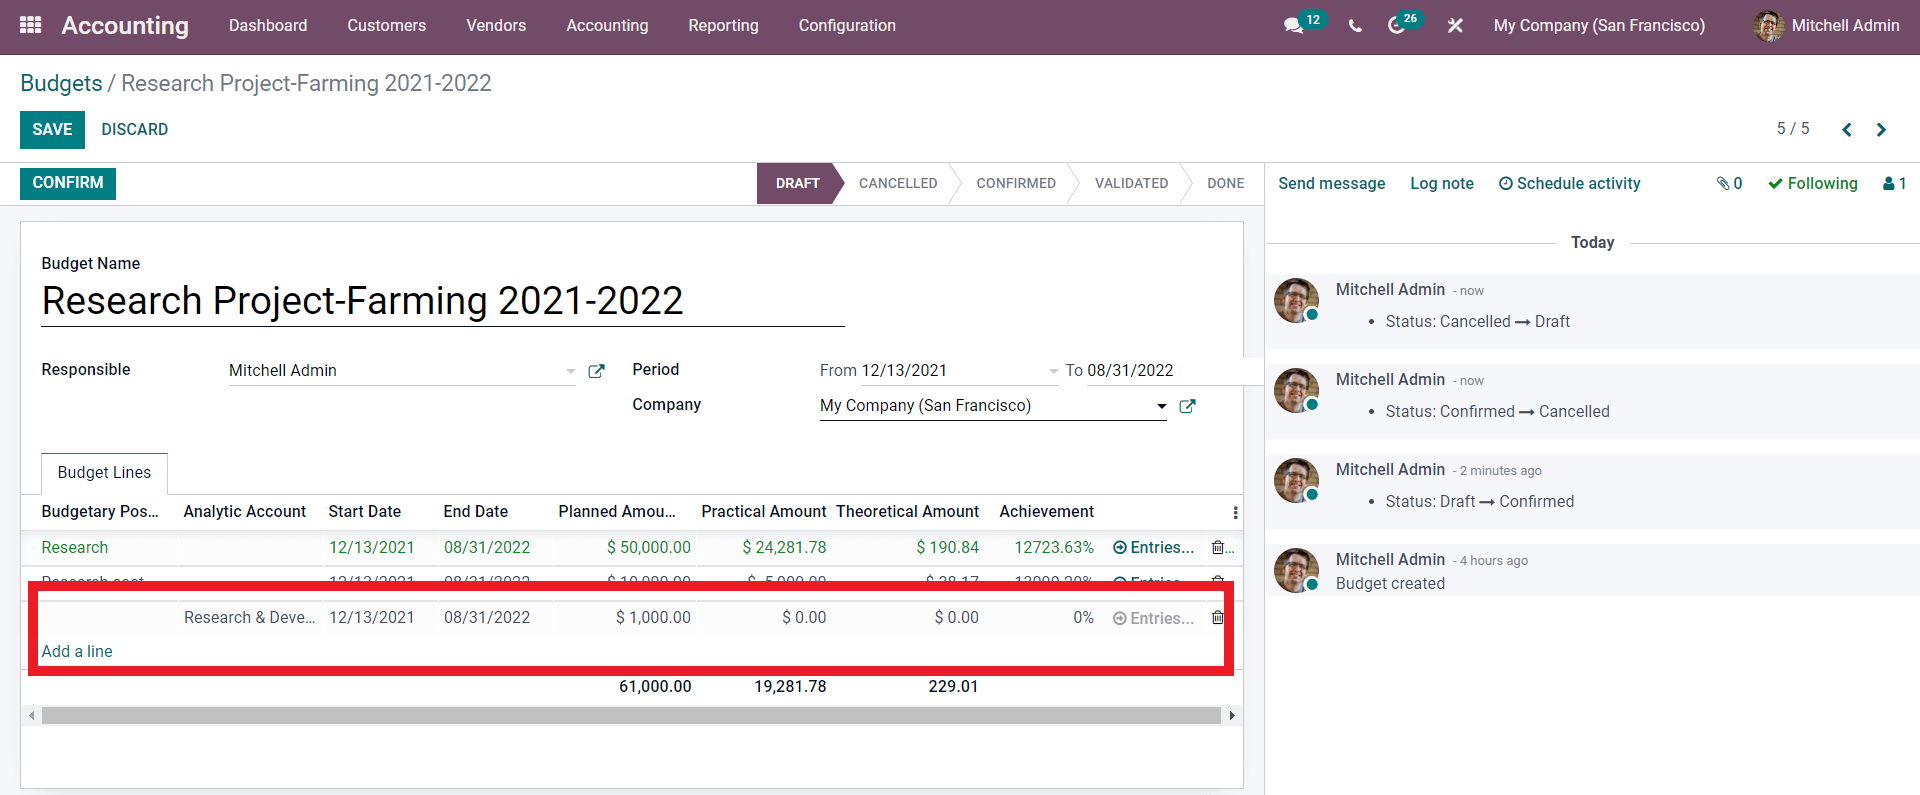
Add the client and the product, and be sure to use the same account in the Analytic account area as you did in the Budget section. After you've finished configuring, click the CONFIRM button and return to the Budget area, where you'll discover the entry as shown below.
To see the entry, click the Entries button. As seen below, the entry will appear in the Analytic items area rather than the common journal's part.
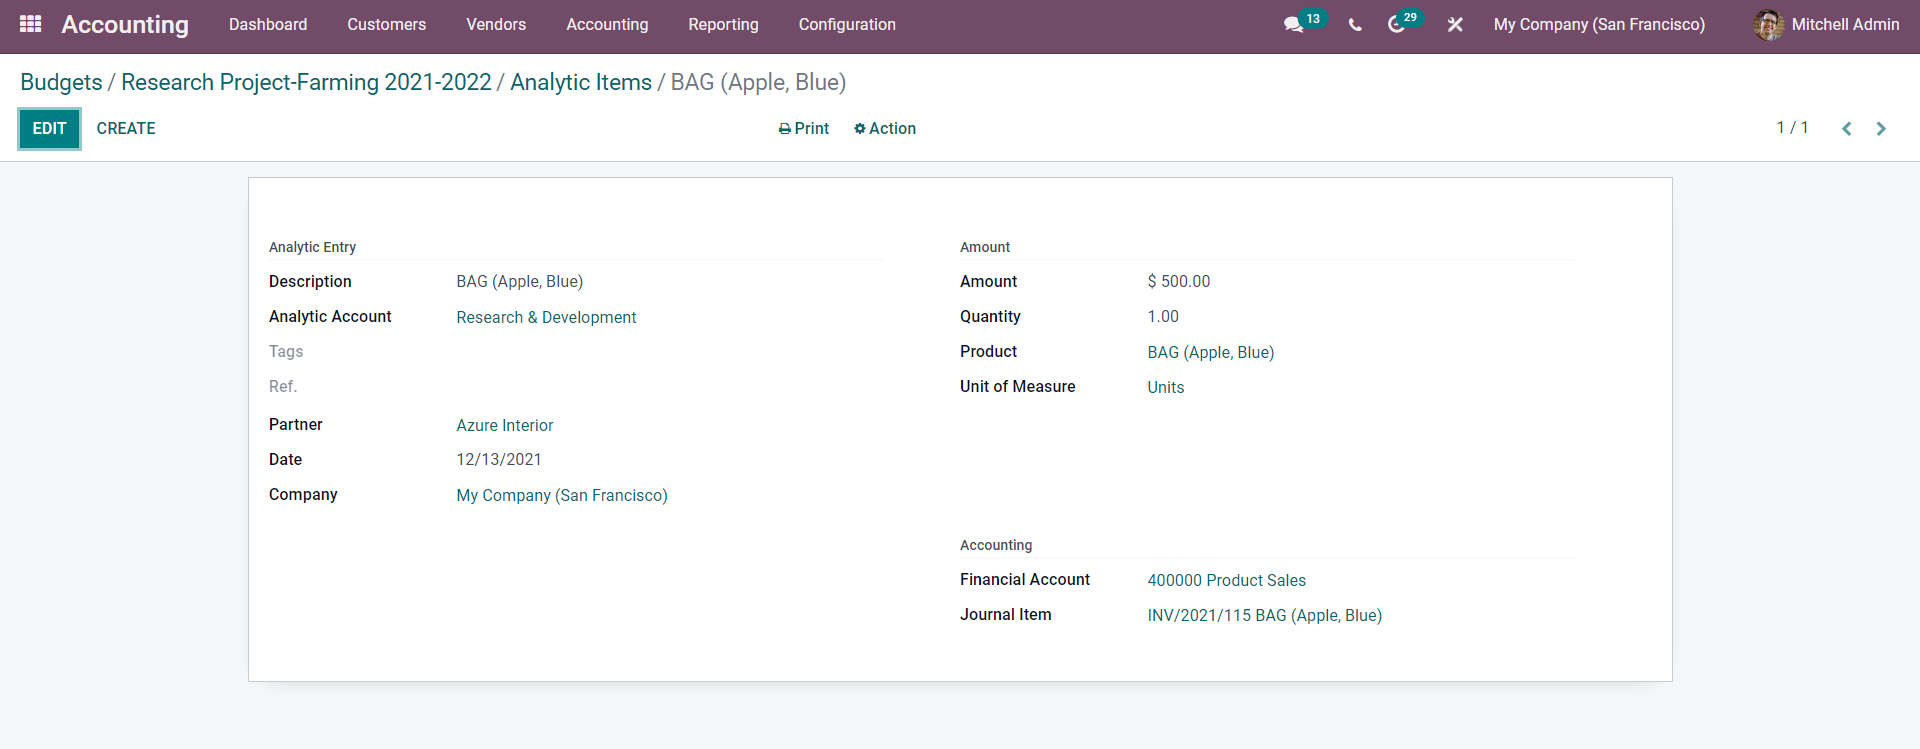
The information on the entry form can be found here.
With the Budget Analyst report, you can easily assess the Budget. To get the budget analysis report, go to the Accounting module's dashboard, click the Reporting tab, and then select Budget analysis from the Drop-down menu. A page with the report will appear, as shown below.
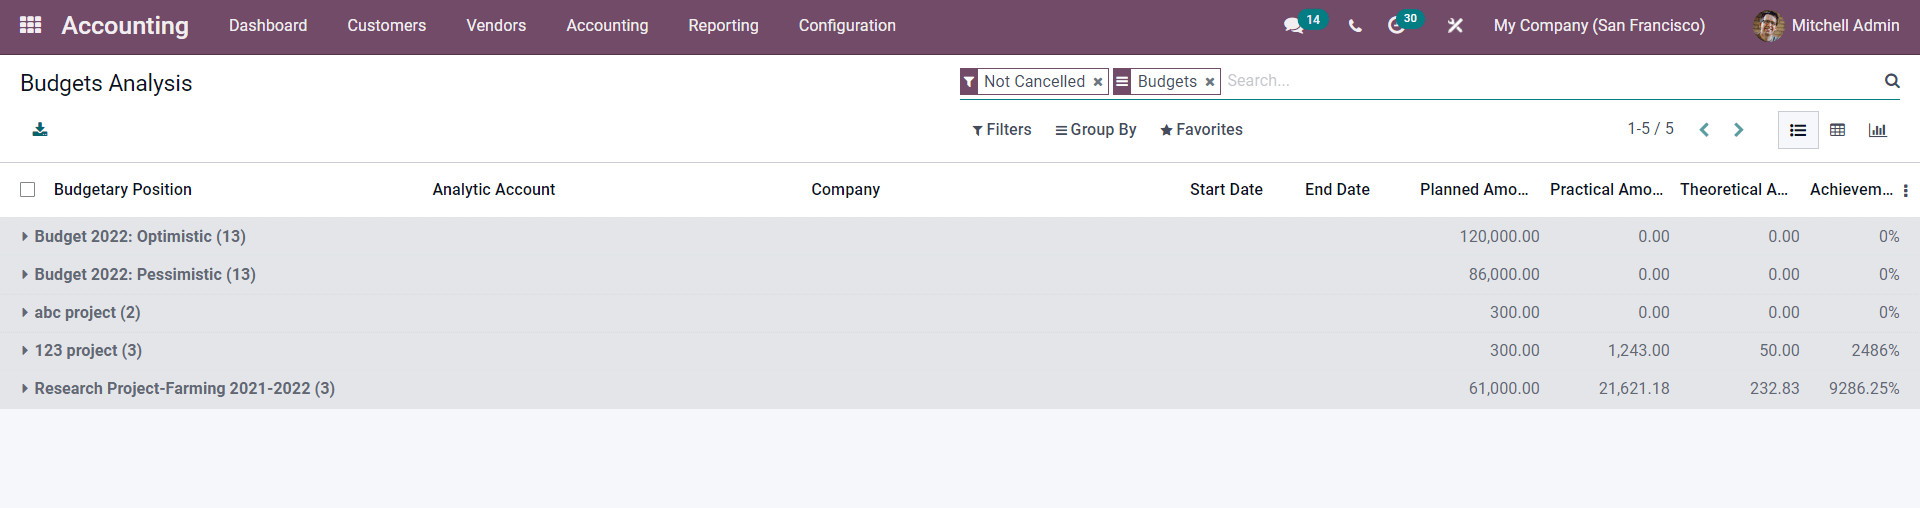
Select the Budget for which you want a thorough report. On the page, there are many filtering and grouping options that you can use to rapidly find the data you need and minimize budget data clutter or any other clutter that might cause a huddle in business management.
Start writing here...
Using Odoo 15 Accounting to Manage Your Budget